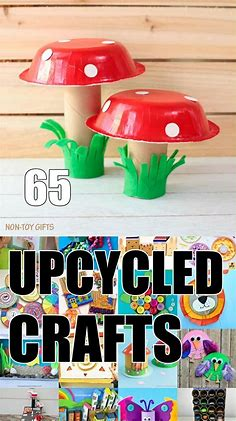
Sure! Here’s a list of DIY upcycle and repurpose ideas to sew, perfect for giving old fabrics and clothing a new life. These projects are great for beginners and seasoned sewists alike.
🧵 DIY Upcycle and Repurpose Sewing Ideas
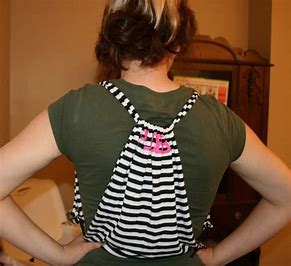
1. T-Shirt to Tote Bag
- Materials: Old t-shirt, scissors, sewing machine or needle/thread.
- How-To: Cut off the sleeves and neckline, then sew the bottom shut. Instant tote!
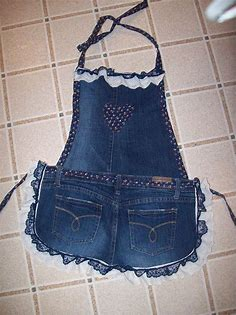
2. Denim Jeans to Apron
- Materials: Old jeans, scissors, sewing tools.
- How-To: Cut along the seams to open up a leg, shape into an apron, and add ties from leftover denim or ribbon.
3. Button-Up Shirt to Pillow Cover
- Materials: Old button-up shirt.
- How-To: Cut a square out of the shirt and use the button front as the pillow closure.
4. Sweater to Mittens
- Materials: Old wool sweater, fleece (optional).
- How-To: Felt the sweater by washing/drying it hot, then trace a mitten pattern and sew.
5. Fabric Scraps to Quilted Coasters
- Materials: Fabric scraps, batting or felt.
- How-To: Sew fabric pieces into small squares, quilt with batting, and finish edges.
6. Men’s Tie to Zipper Pouch
- Materials: Silk tie, zipper.
- How-To: Open up the tie, add a zipper, and sew it into a unique pouch shape.
7. Shirt Sleeves to Wine Bottle Bags
- Materials: Shirt sleeves.
- How-To: Cut sleeve, sew the bottom closed, and add a drawstring or ribbon at the top.
8. Old Sheets to Pajama Shorts
- Materials: Cotton sheets, elastic.
- How-To: Use a shorts pattern or trace an old pair to cut and sew.
9. Baby Clothes Quilt
- Materials: Outgrown baby clothes.
- How-To: Cut squares from different garments and stitch into a memory quilt.
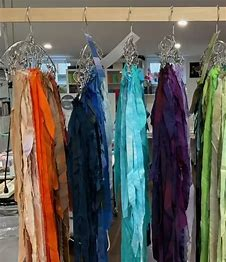
10. Scarf to Kimono Jacket
- Materials: Large lightweight scarf.
- How-To: Fold, cut an opening for arms, and sew the side seams for a breezy kimono-style jacket.
Would you like a printable pattern or step-by-step tutorial for any of these ideas?
- Adorable Gnomes from Old Socks
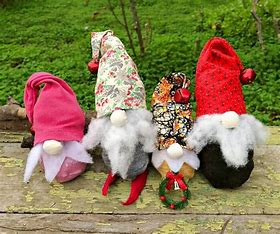
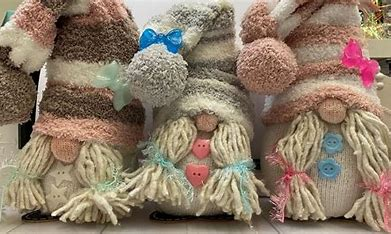
I am aware that the bottoms of the Christmas socks you received last year may be worn. Make some sock gnomes out of the cute, cuddly fabric. Gnomes are very adorable!
2. Non-Slip Fabric Hangers from Scraps
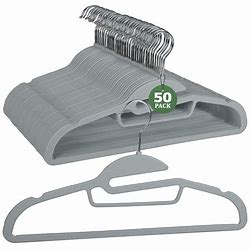
Sure! Here’s a simple DIY project to make Non-Slip Fabric Hangers from Scraps — a great way to upcycle leftover fabric and improve your closet.
🧵 DIY Non-Slip Fabric Hangers from Scraps
✂️ What You’ll Need:
- Fabric scraps (cotton, flannel, or jersey work best)
- Wire or plastic hangers (old ones are fine!)
- Scissors or rotary cutter
- Hot glue gun or needle and thread
- Optional: batting or foam for padded hangers
🧶 Instructions:
1. Cut Your Fabric
- Cut your fabric scraps into strips about 1.5–2 inches wide and around 18–24 inches long.
- If you’re using stretchy fabric like jersey, no need to hem—edges won’t fray.
2. (Optional) Add Padding
- If you want padded hangers, wrap a layer of batting or foam around the hanger first and secure it with glue or a few stitches.
3. Wrap the Hanger
- Starting at the hook, wrap the fabric strip tightly around the hanger, overlapping slightly as you go.
- Add a small dab of hot glue (or stitch) every few inches to keep it secure.
- When one strip runs out, overlap the next strip slightly and keep wrapping.
4. Secure the Ends
- Tuck in or fold the last bit of fabric and glue or sew it in place.
5. Add a Bow (Optional)
- Use a fabric strip to tie a bow at the neck of the hanger for a cute touch.
✅ Why It Works:
- The fabric adds grip, preventing clothes from slipping.
- It protects delicate fabrics from getting snagged.
- It’s a zero-waste project using materials you already have.
Would you like a printable version or a visual tutorial for this project?
3. Felted Wool Hat

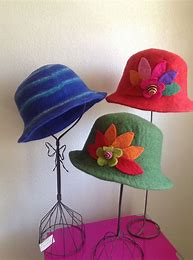
Absolutely! Here’s a DIY guide for making a Felted Wool Hat — a cozy, stylish project that’s perfect for upcycling old wool sweaters or using wool fabric.
🎩 DIY Felted Wool Hat
🧵 What You’ll Need:
- 100% wool sweater (shrunk/felted in hot water) or wool fabric
- Sewing machine or needle/thread
- Scissors
- Measuring tape
- Pins or clips
- Hat pattern (optional – you can trace a beanie-style hat)
🧶 How to Felt Wool (if using a sweater):
- Use a 100% wool sweater (not blended with synthetics).
- Wash in hot water with detergent, then dry on high heat.
- Wool will shrink and become dense – this is felted wool!
✂️ Step-by-Step Instructions:
1. Make or Use a Hat Pattern
- Use a paper pattern or trace around a hat that fits you.
- For a simple beanie: trace a dome shape about 11″ wide by 8.5″ tall (for average adult).
2. Cut Your Pieces
- Cut 2 identical hat pieces from the felted wool.
- If your sweater has a ribbed waistband, use it as the bottom edge for a nice finished look.
3. Sew the Hat
- Place right sides together (if the fabric has a side you prefer).
- Sew along the curved edge using a ¼ inch seam allowance.
- If using a 4-panel pattern, sew the front and back, then add the sides.
4. Trim and Turn
- Trim seam allowances if needed and turn the hat right side out.
- You can topstitch around the edge for a more finished look (optional).
5. Add Embellishments (Optional)
- Add buttons, appliqué, or a felted flower.
- You can also add a brim or fold up the edge for a cuffed style.
✅ Tips:
- Felted wool doesn’t fray, so you don’t need to hem.
- This hat is warm, wind-resistant, and naturally water-repellent.
- Great for kids and adults — just adjust the pattern size!
Would you like a printable pattern template or visual diagram for this project?
4. Helpful Aprons from Old Jeans
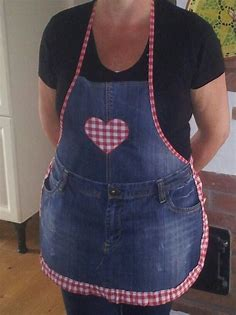
This year, are you a room mom? Perhaps you’re teaching a class at church or preparing to throw a party. Think about giving the art teacher at your school a set! In any case, this Happy Hooligans lesson on how to make the best crafts aprons is a great resource if you need to outfit a group of talented kids—or even just one.
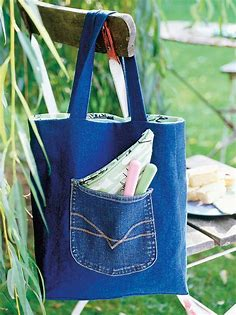
5. Adorable Purse from Old Clothes
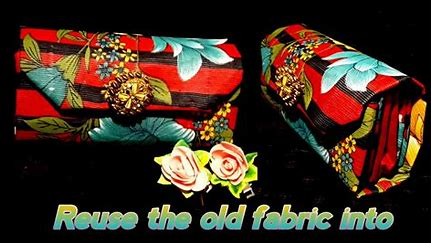
Absolutely! Here’s a fun and creative DIY project: making an adorable purse from old clothes. This is perfect for upcycling items like jeans, skirts, dresses, or shirts into something totally new and useful.
👜 DIY Adorable Purse from Old Clothes
🧵 Materials You’ll Need:
- Old clothes (denim jeans, skirts, or shirts work best)
- Scissors
- Sewing machine or hand needle & thread
- Lining fabric (optional – use fabric scraps or an old pillowcase)
- Button, snap, or zipper for closure
- Straps (can be made from fabric, belts, or bag handles from an old purse)
- Pins, chalk or fabric marker
✂️ Step-by-Step Instructions:
1. Choose Your Fabric
- Denim jeans: Great for structure
- Skirts/dresses: Good for cute prints
- Shirts: Use button-ups to make easy pocket details!
2. Cut the Purse Shape
- Cut two rectangles or desired shapes for the front and back (e.g., 10” x 8” for a small purse).
- Cut the same shape in lining fabric if using.
3. Add Pockets (Optional)
- Cut and reuse pockets from jeans or shirts and sew them onto the front or inside.
4. Sew the Outer Shell
- Place fabric pieces right sides together and sew around the sides and bottom.
- Turn right side out.
5. Add Lining (Optional)
- Sew the lining pieces together the same way.
- Place lining inside the outer shell wrong sides together and tuck in raw edges at the top.
6. Attach Straps
- Use fabric strips, braided t-shirt yarn, or old belt pieces.
- Pin straps inside the bag and topstitch around the top edge to secure everything.
7. Add a Closure
- Sew on a button, snap, magnetic clasp, or zipper.
🎀 Decorate (Optional)
- Add bows, patches, lace, embroidery, or fabric flowers.
- Use fun stitching or decorative thread.
✅ Why This Project Rocks:
- Great way to reduce textile waste
- Completely customizable to your style
- Makes a cute gift or personal accessory
Would you like printable purse patterns or photo examples for inspiration?
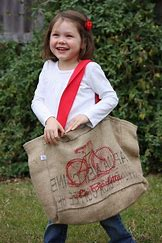
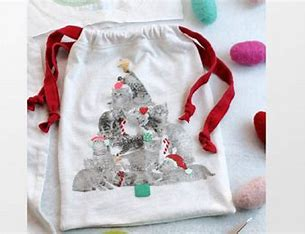
6. Cover the Logo for a Cute Bag


For swag, canvas bags are ideal. The issue is that the business’s tagline or logo endures. Repurpose them as handy totes or gift bags, but hide the branding with pockets, quilting, or interesting layers of ideas and leftovers. A lovely instruction can be found at Sum of Their Stories.
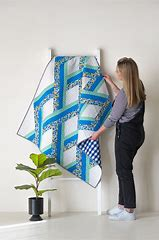
7. Ottoman from an Old Quilt
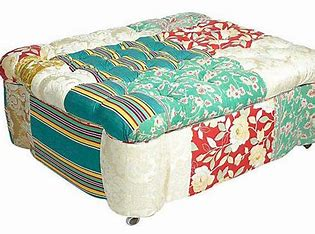
Of course! Here’s a cozy and charming DIY project: making an ottoman from an old quilt. This is a perfect way to repurpose a worn or sentimental quilt into something beautiful and functional for your home.
🪑 DIY Ottoman from an Old Quilt
🧵 Materials You’ll Need:
- Old quilt (sturdy and clean; minor wear is fine)
- Sewing machine or hand needle & strong thread
- Scissors or rotary cutter
- Stuffing (old blankets, fabric scraps, pillow stuffing, or foam)
- Zipper, buttons, or velcro (optional for a removable cover)
- Pins or clips
- Measuring tape
✂️ Step-by-Step Instructions:
1. Choose a Shape
Pick a shape that suits your space:
- Cube – simple boxy ottoman
- Round – cozy pouf style
- Rectangle – bench-style footrest
For a basic cube ottoman:
- Cut 6 equal squares from your quilt (e.g., 16” x 16” each).
2. Sew the Panels
- Sew four panels together along the sides to form a tube.
- Attach the top and bottom squares to form a cube.
- Leave a gap or install a zipper on one side if you want a removable cover.
3. Stuff the Ottoman
- Use polyfill, foam, fabric scraps, or even old clothes to stuff it.
- For a firmer ottoman, you can use a box or crate inside and wrap/stuff around it.
4. Close the Gap
- If you didn’t use a zipper, hand-stitch the opening closed once it’s stuffed.
- If using a zipper, zip it up and fluff!
5. Optional Additions
- Piping or trim around the edges for a finished look.
- Handles or straps for easy moving.
- Buttons for tufted detailing (sew through with heavy-duty thread).
✅ Why This Project Works:
- A great way to preserve a meaningful or vintage quilt
- Adds handmade charm to any room
- Fully customizable in size, shape, and firmness
- Uses up leftover stuffing and scrap materials
Would you like a printable pattern or a diagram for this ottoman style?
8. UnPaper Towels from Used Towels and Flannel
You can make adorable washcloths in any size you like by cutting an unused towel into squares and sewing a nice piece of fabric to the other side. This tutorial on upcycling demonstrates how. This year, give a pal a pair or two; I adore practical presents.
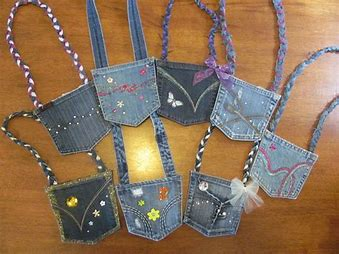
9. Chic Decor from a Denim Pocket
Absolutely! Turning an old denim pocket into chic home decor is a fun and stylish upcycling project. Whether it’s from a pair of jeans, a jacket, or a denim skirt, those sturdy little pockets can become functional and decorative pieces.
👖 DIY Chic Decor from a Denim Pocket
🧵 Materials You’ll Need:
- Denim pocket (cut from old jeans or denim clothing)
- Scissors
- Hot glue gun or needle & thread
- Embellishments (lace, buttons, fabric flowers, paint, stencils)
- Optional: small piece of wood, canvas, frame, or embroidery hoop (for mounting)
- Ribbon, twine, or magnets (depending on how you want to display it)
💡 Creative Ideas for Denim Pocket Decor:
1. Mini Wall Organizer
- Mount a denim pocket on canvas, wood, or thick cardboard.
- Add embellishments like lace trim, embroidery, or patches.
- Use it to hold pens, notes, sunglasses, or keys.
- Hang it near your desk, entryway, or kitchen.
2. Framed Denim Pocket Art
- Place the pocket inside a frame (remove the glass).
- Add flowers, vintage photos, or quotes inside the pocket.
- Perfect for a rustic or farmhouse-style wall gallery.
3. Refrigerator Pocket Magnet
- Glue a strong magnet to the back of the pocket.
- Use it on the fridge to store pens, coupons, or mini notepads.
4. Gift Wrap Accent
- Attach a denim pocket to a gift bag or wrapped package.
- Slide in a handwritten note, dried flower, or small gift card.
- Adds a handmade, personalized touch to gift giving.
5. Planter Cover
- Use the pocket to hold a small plant pot (like succulents or faux greenery).
- Mount on wood or a small pallet board for a vertical garden effect.
6. Chair or Shelf Decor
- Fill the pocket with dried lavender, herbs, or potpourri.
- Hang it on a hook, chair back, or shelf peg for a cottagecore vibe.
✅ Why You’ll Love This Project:
- Quick and easy – great for all skill levels
- Adds character and texture to any space
- A clever way to reuse worn-out denim
- Endless customization with your personal style
Would you like printable instructions or a visual guide for any of these ideas?
10. Warm Slippers from Old Sweaters

Of course! Here’s a cozy and sustainable project you’ll love: making warm slippers from old sweaters. This is a great way to upcycle wool or thick knit sweaters into comfy, handmade footwear.
🧦 DIY Warm Slippers from Old Sweaters
🧵 Materials You’ll Need:
- Old wool or thick knit sweater (felted if possible)
- Fabric scissors
- Sewing machine or needle & strong thread
- Pins or clips
- Paper to make a pattern
- Marker or chalk
- Optional: fleece or felt for lining, and grippy fabric or puff paint for soles
🧶 Step-by-Step Instructions:
1. Felt the Sweater (Optional but Recommended)
If using a wool sweater:
- Wash it in hot water and dry on high heat to shrink and felt the fibers.
- Felting makes the sweater denser and warmer, and it won’t fray.
2. Make a Pattern
- Trace your foot on paper and add about ½ to 1 inch all around for seam allowance and comfort.
- Create a top piece: half-oval or dome shape that will cover your toes and instep.
- You’ll have two pattern pieces: sole and upper.
3. Cut Your Pieces
- Cut two soles for each foot (4 total) from the sweater for extra cushion.
- Cut two uppers from the sweater, one for each foot.
- Optional: Cut fleece or felt lining pieces in the same shape for extra warmth.
4. Assemble the Slippers
- Pin the upper piece to the sole, right sides together, aligning the curve to the toe area.
- Sew around the edge, leaving the heel area open.
- Sew or attach the heel sides together to finish the slipper shape.
5. Add Finishing Touches
- Trim seams and turn the slipper right side out.
- Optional: Add fleece lining inside before final stitching.
- For safety, add a non-slip sole: sew on grippy fabric, or apply puff paint or silicone dots underneath.
🧼 Care Tips:
- Hand wash or spot clean if felted.
- Air dry to maintain shape.
✅ Why This Project Is Great:
- Gives old sweaters new life
- Keeps feet warm and cozy
- Makes a thoughtful handmade gift
- Perfect for beginner sewists
Would you like a printable pattern template or sizing guide for the slippers?
11. Useful Denim Wine Tote from Old Jeans
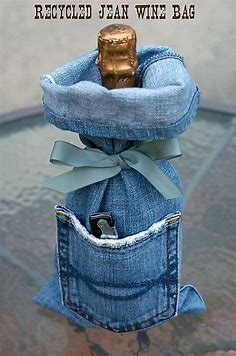
Since denim always becomes better with age, everyone likes upcycling jeans! This adorable repurposed denim wine tote is made by Spoonful of Sugar, but I think it could be used for a lot more.
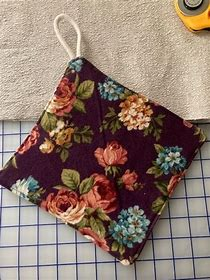
12. Handy Button Pouches from Shirt Cuffs
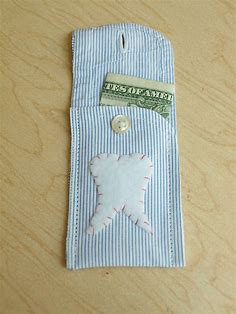
Absolutely! Making handy button pouches from shirt cuffs is a clever and easy upcycling project. Shirt cuffs already have a finished edge and a built-in button—making them perfect for turning into small pouches for coins, earbuds, jewelry, or other little items.
👔 DIY Handy Button Pouches from Shirt Cuffs
🧵 Materials You’ll Need:
- Old long-sleeve shirt (buttoned cuffs)
- Scissors
- Needle & thread or sewing machine
- Optional: fabric scraps for lining or embellishment
- Pins or clips
- Iron (optional for crisp edges)
✂️ Step-by-Step Instructions:
1. Cut Off the Cuff
- Cut the cuff off the sleeve just above the seam, leaving a bit of extra fabric if needed for sewing.
- Make sure the button and buttonhole are intact and functional.
2. Fold and Shape the Pouch
- Fold the cuff in half with the button on the outside, lining up the raw edge with the bottom of the buttoned part.
- This will create a flap that closes naturally when buttoned.
- If the cuff is long, you can fold it into thirds instead for a deeper pouch.
3. Sew the Sides
- Sew along the two raw sides (the edges without the button).
- Use a straight stitch close to the edge.
- For a cleaner finish, you can fold the raw edges inward before stitching or add a lining.
4. Add Lining (Optional)
- Cut a small piece of fabric the same size as the inside of the cuff.
- Fold and sew it inside before stitching the sides, or slip it in and stitch around the top edge after forming the pouch.
5. Add Decorative Touches (Optional)
- Add lace, embroidery, patches, or labels.
- Sew on a keyring loop or ribbon to turn it into a mini wristlet or keychain pouch.
✅ Ways to Use Your Button Cuff Pouch:
- Coin purse
- Earbud or USB holder
- Small emergency sewing kit
- Pill pouch
- Gift card holder
- Jewelry travel pouch
🪡 Why You’ll Love This Project:
- Super quick and beginner-friendly
- Gives worn shirts a new life
- Practical and great for gifts or travel
- No zipper needed—button does the work!
Would you like a printable instruction sheet or a visual pattern guide for this project?
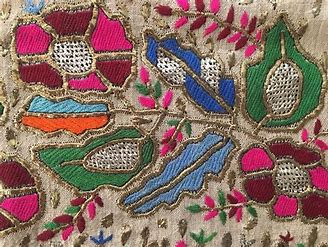
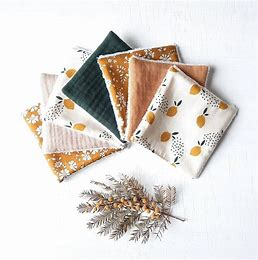
13. Decorated Tea Towels from Scraps
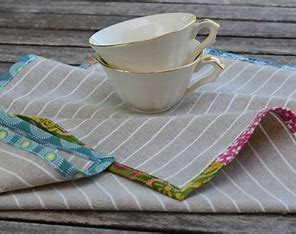
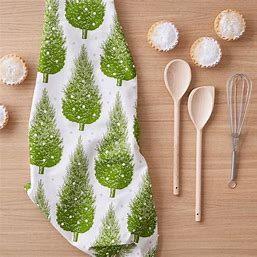
Another fantastic usage for those tiny pieces of cloth that are too small for other purposes is this one. Make some tea towels to give to a friend or to use in your kitchen. Use this DIY Mommy technique to add some colour and uniqueness.
14. Cute Tote Pocket from a Denim Pocket
Of course! Here’s a sweet and simple way to upcycle a denim pocket into a cute tote pocket — perfect for adding charm and function to any plain bag.
👜 DIY Cute Tote Pocket from a Denim Pocket
🧵 Materials You’ll Need:
- A denim pocket (cut from an old pair of jeans)
- Plain tote bag (canvas or fabric)
- Scissors
- Needle & thread or sewing machine
- Pins or fabric glue (for positioning)
- Optional: lace, ribbon, patches, fabric paint, or embroidery for decoration
✂️ Step-by-Step Instructions:
1. Cut Out the Pocket
- Carefully cut around the entire pocket, keeping the backing fabric intact.
- Avoid cutting too close to the seams so the pocket stays sturdy.
2. Position the Pocket on the Tote
- Place the pocket wherever you like on the tote — center front, off to the side, or even inside the bag.
- Use pins or fabric glue to hold it in place.
3. Sew the Pocket On
- Sew around the sides and bottom edge of the pocket only — leave the top open.
- Use a straight stitch close to the edge.
- Reinforce the corners with a few backstitches for extra strength.
4. Add Cute Details (Optional)
- Lace trim across the top edge of the pocket for a shabby chic look.
- Embroidery like a heart, flower, or your initials.
- Fabric paint for fun designs or quotes.
- Add buttons, patches, or iron-on decals for more personality.
✅ Why You’ll Love This Project:
- Adds both style and function to a basic tote
- Super easy and quick — perfect for beginners
- A fun way to reuse denim and personalize your bag
- Makes a great gift or market bag upgrade
Would you like a printable guide or some design ideas for decorating the pocket?
15. Glitter Pencil Pouch from Old Packaging
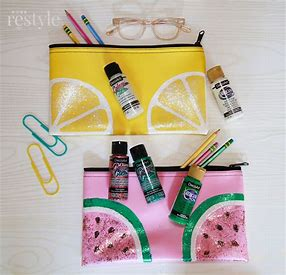
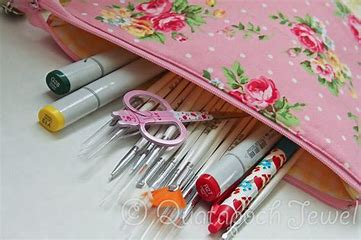
Make this glittery vinyl purse out of leftover vinyl from a package of bed linens! The repurposed vinyl, a zip and your preferred glitter are all you need!
16. Nostalgic Quilts and Soft Toys from Baby Clothes
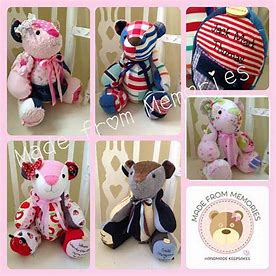
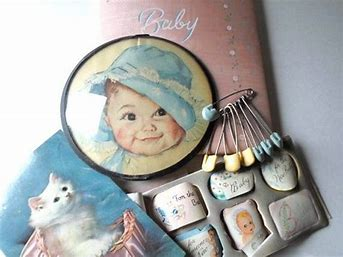
Absolutely! Turning outgrown baby clothes into nostalgic quilts and soft toys is a heartfelt way to preserve memories while creating something cozy, useful, and beautiful.
👶 DIY Nostalgic Quilts and Soft Toys from Baby Clothes
🧵 Perfect for:
- Memory keepsakes
- Baby shower gifts
- Passing down through generations
🛏️ 1. Memory Quilt from Baby Clothes
✂️ Materials:
- Baby clothes (variety of colors/textures)
- Backing fabric (cotton, flannel, or fleece)
- Batting (optional, for padding)
- Scissors or rotary cutter
- Sewing machine or hand needle/thread
- Pins, ruler, fabric marker
🪡 How to Make It:
Step 1: Prepare the Clothes
- Wash and iron all clothing.
- Cut out squares or rectangles (usually 5”–8” wide) avoiding bulky seams.
- Stabilize stretchy fabric with lightweight fusible interfacing if needed.
Step 2: Layout the Quilt
- Arrange your fabric pieces in rows.
- Mix colors and patterns for balance.
Step 3: Sew the Quilt Top
- Sew squares together in rows.
- Join the rows together to form the full quilt top.
Step 4: Layer and Finish
- Layer: backing (right side down), batting, quilt top (right side up).
- Quilt by sewing “in the ditch” (along seams) or adding decorative stitches.
- Bind the edges with bias tape or fabric strips.
🧸 2. Soft Toys from Baby Clothes
🧸 Simple Ideas:
- Stuffed animals (bears, elephants, bunnies)
- Patchwork hearts or stars
- Mini pillows or plush blocks
✂️ Materials:
- Small scraps from baby clothes
- Toy stuffing (polyfill, scrap fabric, or cotton)
- Toy pattern (downloadable or hand-drawn)
- Embroidery floss for features
- Needle, thread, or sewing machine
🪡 How to Make It:
Step 1: Choose or Make a Pattern
- Use a simple printable soft toy template.
- Or trace around a basic shape like a heart or animal silhouette.
Step 2: Cut and Sew
- Cut two matching fabric shapes from baby clothes.
- Sew around the edge, leaving a small gap for stuffing.
Step 3: Stuff and Finish
- Turn the toy right side out.
- Stuff with filling and sew the opening closed.
- Embroider eyes, mouth, or other features (avoid buttons for safety).
✅ Why These Projects Matter:
- Turn cherished memories into lasting heirlooms
- Keep favorite baby clothes out of storage or the landfill
- Create personalized, emotional gifts for loved ones
- Beginner-friendly and incredibly meaningful
Would you like printable quilt block templates or simple soft toy patterns to get started?
17. Comfy Drawstring Bag from a Shirt
If you’re learning to sew, this upcycling project is ideal. Make a fantastic drawstring rucksack out of an old t-shirt. They are used by adults, teens, and children alike!
18. Sweet Smelling Sachets from Fabric and Potpourri
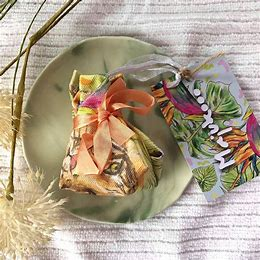

Absolutely! Making sweet-smelling sachets from fabric and potpourri is a simple and satisfying DIY project. They’re perfect for tucking into drawers, closets, bags—or giving as lovely handmade gifts.
🌸 DIY Sweet-Smelling Sachets from Fabric & Potpourri
🧵 Materials You’ll Need:
- Fabric scraps (cotton, linen, or muslin work best)
- Potpourri or dried herbs (like lavender, rose petals, chamomile, mint)
- Scissors or rotary cutter
- Sewing machine or needle & thread
- Pins or clips
- Ribbon, lace, or twine (optional for ties or decoration)
- Small funnel or spoon (optional)
✂️ Step-by-Step Instructions:
1. Cut the Fabric
- Cut two matching squares or rectangles (e.g., 4″ x 4″ or 5″ x 5″).
- You can also cut heart, star, or other fun shapes if you’d like!
2. Sew the Sides
- Place the two pieces right sides together.
- Sew around the edges with a ¼” seam allowance, leaving a 1–2 inch opening.
3. Turn Right Side Out
- Turn the sachet right side out through the opening.
- Use a pencil or chopstick to gently push out the corners.
4. Fill with Potpourri
- Use a small funnel or spoon to add potpourri or dried herbs.
- Fill it about ¾ full so it’s not too stiff.
5. Sew the Opening Closed
- Tuck in the raw edges and hand-stitch or machine-sew the opening shut.
✨ Optional Embellishments:
- Add a ribbon loop to hang it on hangers or hooks.
- Sew on lace trim or embroider initials for a personalized touch.
- Use fragrant essential oils to refresh the scent over time (just a few drops on the herbs or potpourri before filling).
🌿 Great Scent Combinations:
- Lavender + chamomile – calming and soothing
- Rose petals + orange peel – romantic and fresh
- Mint + eucalyptus – energizing and clean
- Cinnamon + cloves – warm and cozy for winter
✅ Why You’ll Love This Project:
- Uses up small fabric scraps
- Eco-friendly and zero waste
- Makes a perfect gift, wedding favor, or self-care treat
- Quick and easy—even for beginners!
Would you like a printable tag template or label ideas to go with your sachets for gifting?
19. Practical Tote from a T-Shirt


Did you know that a t-shirt can be used to create a purse with minimal sewing? This guide will teach you how to construct a book bag or shopping tote in five minutes.
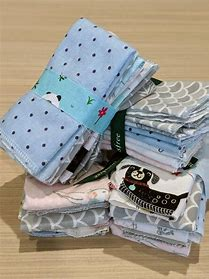
20. Reusable Makeup Wipes from Washcloths
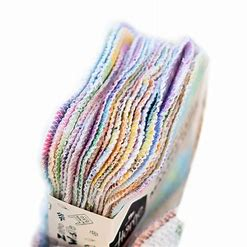
Turning old washcloths into reusable makeup wipes is a smart, eco-friendly, and cost-effective project. Here’s a simple guide on how to make them:
✂️ What You’ll Need:
- Old washcloths or soft towels
- Scissors or rotary cutter
- Ruler or measuring tape
- Sewing machine or needle & thread (optional)
- Pins or clips (optional)
- Serger or pinking shears (optional but helpful for preventing fraying)
🧵 Instructions:
1. Choose and Wash Your Fabric
- Use clean, soft cotton washcloths or towels.
- Wash and dry them first to avoid shrinkage later.
2. Cut into Squares or Circles
- Measure and cut into desired size: 3″x3″ or 4″x4″ are common.
- Use scissors, rotary cutter, or pinking shears (to minimize fraying).
- Circles work too, but squares are easier to sew and store.
3. (Optional) Finish the Edges
- Simplest: Leave edges raw if you’re okay with light fraying.
- Sewing machine: Use a zigzag or overlock stitch around the edge.
- Hand-sewing: Blanket stitch around the edges.
- Serger: A serged edge will look clean and prevent fraying best.
4. Store Your Wipes
- Stack them in a small jar, basket, or repurposed container.
- Keep a small bin or mesh bag nearby to collect used ones for washing.
🧼 How to Use and Wash:
- Apply your cleanser or micellar water to the wipe.
- Gently wipe your face and eyes.
- Toss used wipes in a laundry bag and wash with your regular laundry (no fabric softener for best absorbency).
- Air dry or tumble dry on low.
💡 Extra Tips:
- Double-layer the wipes for extra softness and durability.
- Use different colored thread or fabric for different purposes (e.g., eye makeup vs. toner).
- These make great gifts when bundled with skincare items!
Would you like a printable label or tag design for gifting them?
21. Child’s Dress from T-Shirts
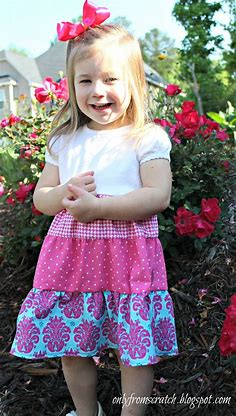
Turning adult t-shirts into a child’s dress is a fun and sustainable upcycling project! It’s perfect for beginner sewists and a great way to repurpose soft, worn-in shirts. Here’s a step-by-step guide:
🧺 What You’ll Need:
- 1 or 2 adult-sized t-shirts (cotton or cotton-blend works best)
- Scissors
- Sewing machine or needle & thread
- Pins or fabric clips
- Measuring tape or ruler
- Iron (optional but helpful)
👗 Option 1: Simple T-Shirt Dress (One Shirt)
Step-by-Step:
- Choose a T-Shirt
- Use an adult-sized t-shirt that’s soft and stretchy.
- The larger the shirt, the more length and flow for the skirt.
- Measure the Child
- Measure from shoulder to desired dress length.
- Also measure the child’s chest if you’re adjusting for fit.
- Cut the Shirt
- Keep the neckline as-is (this becomes the dress neckline).
- Trim the shirt to match the child’s length, plus 1/2″ for hemming.
- Take in the Sides (if needed)
- Turn the shirt inside out.
- Pin along the sides for a slimmer fit.
- Sew along the new lines and trim off excess.
- Hem the Bottom
- Fold the bottom edge under 1/2″ and sew to create a clean hem.
- Add Embellishments (Optional)
- Appliqués, fabric pockets, or a ribbon waist can personalize it.
👗 Option 2: T-Shirt Bodice with a Gathered Skirt
This method creates a dress with a fitted top and a flowy, gathered skirt using two t-shirts.
Step-by-Step:
- Make the Bodice
- Use one t-shirt and cut it off just under the armpits.
- This will be the top of the dress.
- Make the Skirt
- Take a second t-shirt and cut a wide rectangle from the body (below the armpits).
- Width should be 1.5 to 2x the child’s waist for gathering.
- Gather the Skirt
- Sew a loose straight stitch along the top edge.
- Pull threads gently to gather until it matches the bodice width.
- Attach Skirt to Bodice
- Pin right sides together and sew.
- Finish the seam to prevent fraying (zigzag or serge).
- Hem the Bottom
- Fold and stitch for a clean edge, or leave the original t-shirt hem.
🌟 Extra Ideas:
- Sleeveless Look: Trim and finish the armholes for a summer dress.
- Use Graphic Tees: Keep fun prints as part of the dress design.
- Add Ruffles or Tiers: Use scraps to add decorative layers or ruffles.
Would you like a printable sewing pattern or template for sizing by age (e.g., 2T, 4T, 6T)? I can generate a simple one for you.