Sure! Here’s a sample introductory article or description for “Crafta for Kids: Natural or Upcycled Projects for Your Child” that you can use for a blog, book, workshop, or website section:
Crafta for Kids: Natural or Upcycled Projects for Your Child
Welcome to Crafta for Kids—a creative space where little hands and big imaginations come together to make something beautiful, sustainable, and fun! Our goal is simple: to inspire kids to create using what nature gives us or what we already have around the house. Whether you’re a parent, teacher, or caregiver, you’ll find these projects easy, eco-friendly, and filled with opportunities for learning and laughter.
Why Natural & Upcycled Crafts?
In a world overflowing with plastic and pre-made toys, Crafta for Kids focuses on slowing down and getting back to basics. Using natural or upcycled materials teaches children:
- Environmental awareness: They learn the value of reusing and reducing waste.
- Creativity: Limited materials spark inventive ideas and problem-solving.
- Fine motor skills: Cutting, gluing, threading, and assembling all support early development.
- Mindfulness: Crafting with nature encourages calm, focused attention and appreciation for the world around us.
What You’ll Find Inside
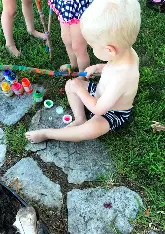
- Nature Crafts: Think pinecone owls, leaf mandalas, rock painting, or twig picture frames.
- Upcycled Projects: Turn toilet paper rolls into castles, cereal boxes into treasure chests, or old clothes into puppet friends.
- Seasonal & Holiday Themes: Celebrate the year with earth-friendly decor and gifts.
- Easy Instructions: Step-by-step guides for kids aged 3–10, using common tools and materials.
- Minimal Waste: Crafts designed with sustainability in mind—no fancy supplies required.
Who Is This For?
- Parents looking for screen-free activities
- Teachers seeking classroom projects that align with sustainability goals
- Homeschoolers incorporating nature and environmental education
- Anyone who wants to spark joy while reducing their environmental footprint
Let’s Get Crafting!
You don’t need to be an artist or spend money on expensive kits. All you need is a little time, a few items you’d normally toss in the recycling bin or find on a nature walk, and a child ready to explore, imagine, and create.
Join us on this journey of creativity with a conscience—where every stick, stone, and scrap has the potential to become a masterpiece.
Would you like some sample project ideas or step-by-step instructions next?
This might work for whatever insect your child finds most interesting.
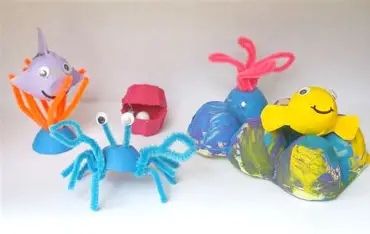
2. Recycled Egg Carton Creatures
Absolutely! Here’s a fun and engaging write-up for a project called Recycled Egg Carton Creatures, perfect for a kids’ craft activity:
Recycled Egg Carton Creatures
Turn your empty egg cartons into a zoo of adorable creatures! This simple, eco-friendly craft is perfect for kids aged 3 and up, encouraging creativity while giving new life to materials you’d usually toss in the recycling bin.
🌍 Why This Craft Rocks
- Sustainable: Uses upcycled materials you already have at home
- Budget-friendly: No need to buy anything fancy
- Creative: Endless possibilities for animals, bugs, monsters, and more
- Educational: Great for teaching about recycling, animals, or imaginative storytelling
🧰 Materials Needed:
- Empty cardboard egg carton (not plastic or foam)
- Child-safe scissors
- Non-toxic paints or markers
- Glue or glue stick
- Googly eyes (or draw your own)
- Pipe cleaners, pom-poms, buttons, felt scraps, fabric, paper scraps (optional)
🧠 Instructions:
- Cut the Egg Carton
Carefully cut out individual cups or sections from the egg carton. These will become the bodies or heads of your creatures. - Choose Your Creature
Decide what you want to make! A caterpillar? A frog? A turtle? A silly monster? You can stack cups, glue them side by side, or use just one for a simple critter. - Paint and Decorate
Paint each piece with bright colors and let them dry. Then add details like eyes, spots, stripes, or wings using markers, felt, or paper. - Add Features
Use pipe cleaners for legs, antennae, or tails. Glue on googly eyes, draw a face, or add a pom-pom nose. Get creative with whatever you have! - Let It Dry
Once everything is glued and painted, let your creature dry completely. - Play or Display
Use your egg carton creatures in imaginative play, storytelling, or as eco-friendly decorations!
🐛 Creature Ideas:
- Caterpillar: Line up 4–6 egg cups in a row, paint them green, and add pipe cleaner antennae.
- Frog: Use one cup painted green, add big eyes and long paper legs.
- Ladybug: One red-painted cup with black spots and cute paper wings.
- Octopus: One cup with dangling yarn or paper strip legs.
- Monster: Go wild with colors, extra eyes, and silly expressions.
💡 Tips:
- Use scraps from old magazines or junk mail for colorful decorations.
- No googly eyes? Just draw them or cut some out of white paper.
- If using glue and paint, protect your workspace with newspaper or a drop cloth.
🌱 Make It a Learning Moment
- Talk about the importance of recycling and reducing waste.
- Learn about the animal you’re creating—where it lives, what it eats, etc.
- Create a whole story or habitat using your creatures!
Recycled Egg Carton Creatures is a great craft that blends creativity with sustainability. It’s not just fun—it’s a hands-on lesson in how we can reuse what we already have to make something imaginative and meaningful.
Would you like printable instructions, a themed worksheet, or ideas for classroom use?

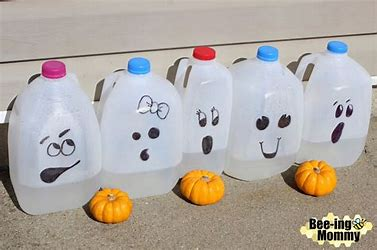
This eerie ghost also functions as a windchime. More fun outside!
Sure! Here’s a creative and sustainable kids’ craft project titled “Juice Box Pouch Belt”—perfect for upcycling and imaginative play:
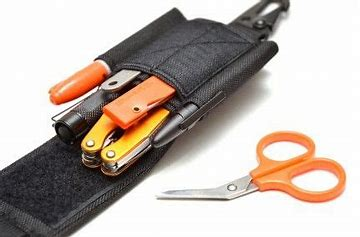
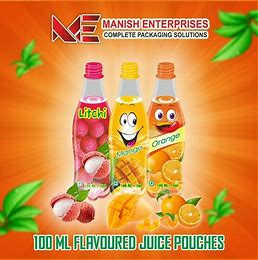
🧃 Juice Box Pouch Belt
Transform empty juice boxes into a cool, wearable pouch belt! Perfect for young adventurers, treasure hunters, or kids who just love to carry their tiny treasures in style. This eco-friendly craft teaches upcycling while creating something fun and functional.
🌟 What It Is:
A Juice Box Pouch Belt is a belt made from recycled juice boxes, designed with mini storage pouches that can hold small toys, coins, crayons, or secret notes. Great for playing dress-up, going on pretend missions, or simply learning how to make something new from waste!
🧰 Materials Needed:
- 2–4 empty juice boxes (washed, dried, and cut open)
- Child-safe scissors
- Tape (duct tape or colorful masking tape works best)
- Hole punch
- Ribbon, shoelace, fabric strip, or old belt
- Velcro dots or buttons (optional, for closures)
- Markers, stickers, or washi tape for decorating
🧠 Instructions:
- Prepare the Juice Boxes
Rinse out each juice box and let it dry. Carefully cut off the top of the box (where the straw goes) so it opens like a small pouch. You can also trim it to your desired height. - Decorate the Pouches
Use markers, stickers, paint, or washi tape to decorate your juice box pouches. Make them colorful, cool, or themed—whatever your imagination desires! - Add Closures (Optional)
If you want your pouches to close, add a small Velcro dot, button, or flap made from extra cardboard. Tape it securely in place. - Punch Holes for the Belt
Punch two holes in the back of each pouch near the top. These will be used to slide them onto the belt or ribbon. - Thread the Belt
Slide the ribbon, shoelace, or old belt through the holes to attach all the juice box pouches. Space them out evenly. Tie the ends of the ribbon or adjust the belt to fit around your child’s waist. - Ready to Wear!
Let your child fill their new belt pouches with small treasures—rocks, toy cars, crayons, or notes—and wear it on their next adventure!
🎮 Play Ideas:
- Explorer Belt: Fill with mini maps, nature finds, or bug ID cards.
- Spy Gear: Store secret messages, a magnifying glass, or decoder rings.
- Craft Supply Carrier: Use it to hold crayons, stickers, and glue sticks.
- Mini Toy Tote: Take little dolls or figures on the go!
🌍 Why It’s Great:
- Eco-conscious: Reuses items that would normally be tossed out.
- Imaginative: Encourages role play and creativity.
- Skill-building: Supports fine motor skills, design thinking, and independence.
- Customizable: Every belt is one-of-a-kind!
Juice Box Pouch Belts are a great rainy-day or weekend craft that combines creativity, sustainability, and fun. Whether your child is pretending to be an explorer, a spy, or a superhero—they’ll be ready with their hands-free storage solution made entirely by them!
Would you like a printable template for this craft or ideas for themed belts (like pirate, superhero, or explorer versions)?
At the same time, teach your child a little bit about science and upcycling.
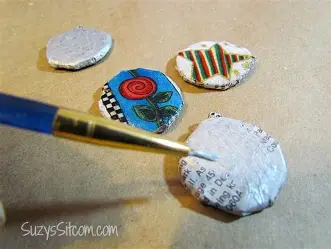
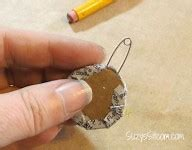
6. Upcycled Photo Ornaments
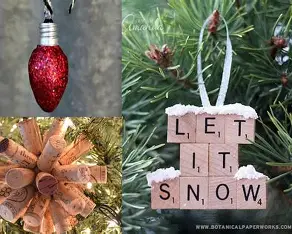
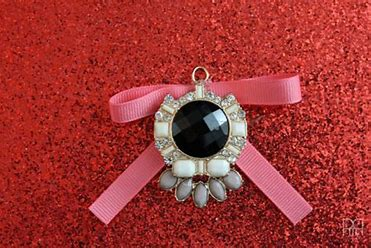
Of course! Here’s a complete project description for Upcycled Photo Ornaments—a heartwarming, eco-friendly craft that’s great for holidays, gifts, or anytime keepsakes.
📸✨ Upcycled Photo Ornaments
Turn yesterday’s junk into tomorrow’s memories! Upcycled Photo Ornaments are a meaningful and sustainable way to preserve your favorite photos while teaching kids how to creatively reuse household materials. Perfect for holiday trees, room décor, or gifts for loved ones.
🌟 Why You’ll Love This Craft
- Eco-Friendly: Reuses cardboard, jar lids, and other everyday scraps
- Personalized: Uses your own photos to make each ornament unique
- Creative & Kid-Friendly: Great for all ages with lots of room for self-expression
- Giftable: A thoughtful, handmade keepsake for friends and family
🧰 Materials Needed
- Old holiday cards, cardboard boxes, cereal boxes, or jar lids
- Printed photos (small enough to fit inside your ornament base)
- Glue stick or non-toxic craft glue
- Scissors
- String, ribbon, or yarn (for hanging)
- Hole punch (or a sharp pencil to make holes)
- Markers, stickers, buttons, fabric scraps, glitter (optional for decorating)
- Optional: Mod Podge or clear glue for sealing
🧠 Instructions
- Choose Your Base
Select a sturdy base for your ornament—try a circle or star cut from cardboard, or reuse the metal lid from a jar. Anything flat and lightweight works! - Cut Out Your Photo
Print and cut your photo to fit the size of your base. You can crop it into fun shapes (like hearts, stars, or circles) using scissors or a stencil. - Attach the Photo
Use a glue stick to attach the photo to the front of your base. Smooth it down so there are no bubbles or wrinkles. - Decorate the Edges
Add creative borders using markers, glitter, buttons, fabric, or paper scraps. Kids can personalize with names, dates, or short messages. - Punch a Hole
Use a hole punch or carefully make a small hole near the top of the ornament for hanging. - Add the Hanger
Thread a piece of string, yarn, or ribbon through the hole and tie it to create a loop. - Optional – Seal It
For extra durability and a finished look, lightly brush the front with Mod Podge or diluted glue. Let it dry completely.
🎄 Where to Use Them
- Hang on your holiday tree
- Add to a wrapped gift as a personalized tag
- Display on a bedroom wall or bulletin board
- Send as a keepsake to grandparents or friends
🌱 Upcycling Ideas
- Cardboard from cereal or tissue boxes for sturdy shapes
- Jar lids as round frames (decorate the rim for a vintage touch)
- Scrap fabric or ribbon for hanging loops
- Old holiday cards as colorful ornament backings
❤️ Memory-Making Moments
Upcycled Photo Ornaments are more than a craft—they’re a way to relive happy memories and share them with others. Perfect for birthdays, holidays, or “just because” moments, this project teaches kids that the most special gifts don’t come from a store—they come from the heart.
Would you like a printable instruction sheet or a classroom version of this craft with group-friendly steps?
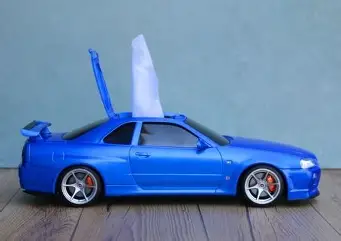
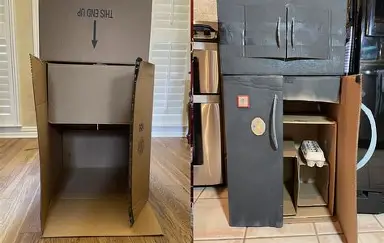
Absolutely! Here’s a fun, creative, and eco-conscious craft project called Tissue Box Car City—perfect for kids who love building, vehicles, and imaginative play:
🚗🏙️ Tissue Box Car City
Who needs expensive toy sets when you can build your own bustling city from recycled materials? Tissue Box Car City turns empty tissue boxes and cardboard scraps into buildings, garages, tunnels, and more! It’s the perfect DIY world for toy cars and imaginative play—all made from materials you already have at home.
🌟 Why Kids Love This Craft
- Hands-on and imaginative: Build your own city from scratch!
- Eco-friendly: Uses recycled materials instead of store-bought toys
- Customizable: Add shops, schools, gas stations, and more
- Great for solo or group play: Create one building or an entire city block
🧰 Materials Needed
- Empty tissue boxes (various sizes work great)
- Cardboard scraps (cereal boxes, shipping boxes, etc.)
- Glue, tape, or glue stick
- Scissors or safety cutter
- Markers, crayons, or paint
- Construction paper or old magazines (for decoration)
- Bottle caps, paper rolls, or buttons (optional details)
- Toy cars or small figures (for playing)
🧠 Instructions
- Prep the Tissue Boxes
Remove any plastic from the top openings. These can become doorways, garages, or windows! - Design Your Buildings
Turn the boxes upright to become buildings, or on their side to be garages, parking lots, or tunnels. Use markers or construction paper to decorate: add windows, signs, doors, bricks, or even people. - Create a City Layout
Use a large piece of cardboard or an old poster board as your city base. You can draw roads with markers or black tape and place your buildings on top. - Add Details
Use bottle caps as streetlights, draw sidewalks, or add trees made from paper or pipe cleaners. Want more action? Add ramps, bridges, and tunnels using paper towel rolls and cardboard strips. - Play!
Bring in toy cars, action figures, or animals and let the city come alive! Kids can drive through the car wash, stop by a store, or park in the garage.
🏙️ City Building Ideas:
- Gas Station – Add pumps with straws or caps
- Fire Station – Paint it red and make garage doors
- Car Wash – Use yarn or strips of felt for the brushes
- Parking Garage – Stack two boxes and add ramps
- Tunnel – Cut out both ends of a box for cars to drive through
- Skyscraper – Stack boxes and draw tons of windows
🌱 Why This Craft Matters
- Reduces waste by reusing common household materials
- Encourages open-ended play without screens
- Supports STEM skills like building, spatial awareness, and planning
- Fosters creativity as kids design and customize their own city
💡 Extension Ideas:
- Add street signs, stoplights, and crosswalks
- Use stickers or magazine cutouts for advertisements and store signs
- Name your city and make a map or tour guide brochure
Tissue Box Car City is a fun, low-cost way to engage kids in both crafting and imaginative play. Whether you’re building a single garage or an entire city block, this project brings hours of screen-free fun while teaching kids about creativity, sustainability, and design.
Would you like printable road templates, building signs, or a classroom version of this activity?
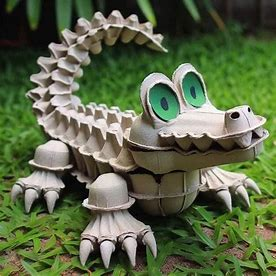
Store-bought toys are nothing compared to this repurposed gator that your child can construct on his own.
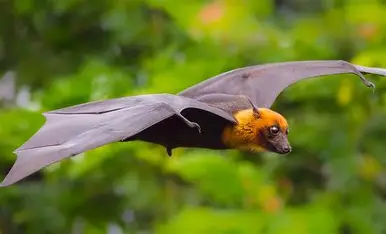
Absolutely! Here’s a fun and spooky craft called Outdoor Flying Bat—a great upcycled project perfect for Halloween, bat units, or just outdoor fun.
🦇 Outdoor Flying Bat
Make your backyard a little more batty! This Outdoor Flying Bat craft is an exciting way for kids to create their own spooky or silly bats that actually move in the wind. Made with recycled materials, this eco-friendly project is great for outdoor decorating, imaginative play, or science-themed lessons.
🌟 Why This Crafta Is a Hit
- Upcycled & eco-friendly: Uses materials you likely have at home
- Interactive: The bat moves, flutters, or “flies” in the wind
- Spooky fun: Perfect for Halloween or nature-themed learning
- Outdoor-friendly: Weather-resistant if sealed properly
🧰 Materials Needed
- Empty toilet paper roll or paper towel roll
- Black construction paper or recycled black paper (or paint)
- Scissors
- Glue or tape
- String or yarn
- Hole punch
- White crayon, googly eyes, or white paper (for eyes/teeth)
- Clear tape or Mod Podge (for weatherproofing)
- Optional: wire, sticks, or garden stakes to hang/display the bat outdoors
🧠 Instructions
- Create the Bat Body
Use a toilet paper roll as the body of your bat. Paint it black or wrap it in black paper. Let it dry if painted. - Make the Wings
Cut bat wings from black construction paper or cardboard. Make them big and curvy, like real bat wings! Glue or tape the wings to the sides of the paper roll. - Add a Face
Use white paper or googly eyes to create bat eyes. You can also cut tiny fangs for a spooky look! Draw details with a white crayon or marker. - Punch & Thread
Punch a hole at the top of the bat body (on either side). Thread string or yarn through the holes so the bat can hang. - Make It Fly
Hang your bat from a tree branch, porch, balcony, or garden hook. When the wind blows, the bat will flutter and sway like it’s flying! - Weatherproof (Optional)
If you want your bat to last outside longer, coat it with Mod Podge or cover it with clear packing tape to make it more water-resistant.
🎃 Fun Variations
- Glow-in-the-dark bat: Add glow stickers or paint
- Silly bat: Use fun colors, googly eyes, or rainbow wings
- Bat family: Make big and small bats and hang them together
🧪 Learning Tie-Ins
- Science: Teach about bats—what they eat, where they live, and why they’re important to the ecosystem
- Weather: Observe how wind affects movement
- Art: Explore symmetry while designing wings
🌱 Why It’s Great
- Encourages outdoor exploration
- Reinforces recycling habits
- Supports creative thinking and fine motor skills
- Offers a seasonal or educational craft that kids can proudly display
Outdoor Flying Bats are a fantastic way to combine creativity, sustainability, and a little bit of outdoor magic. Whether you’re decorating for fall or just having fun learning about nocturnal animals, this fluttering friend will bring smiles and maybe a few playful shivers!
Would you like printable wing templates or a classroom group version of this crafta?

Combining this activity with those recycled cardboard pendants sounds like a lot of fun.
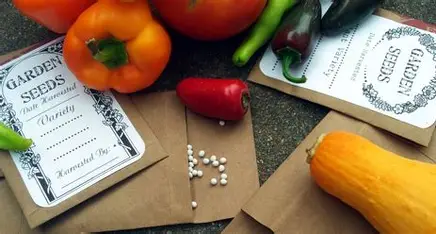
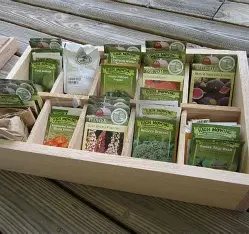
Certainly! Here’s a complete, kid-friendly project guide for Homemade Seed Packets—a wonderful activity that combines creativity, gardening, and sustainability:
🌱 Homemade Seed Packets
Turn your leftover seeds—or seeds you’ve collected—into beautifully decorated, handmade packets! Homemade Seed Packets are perfect for garden gifts, science projects, or just organizing your planting plans. Made with upcycled paper and a bit of creativity, this eco-friendly craft is fun for all ages.
🌟 Why This Craft Is Special
- Eco-conscious: Reuses paper you already have
- Educational: Teaches kids about plants, seeds, and growing cycles
- Creative: Kids can decorate and label their own seed packets
- Giftable: Makes a lovely handmade gift for family, friends, or teachers
🧰 Materials Needed
- Paper scraps (old envelopes, brown bags, printer paper, magazines, or newspaper)
- Glue stick or tape
- Scissors
- Markers or crayons
- Ruler (optional for folding)
- Seeds (saved from fruits, vegetables, flowers, or bought in bulk)
🧠 Instructions
1. Cut the Paper
Cut a rectangle about 4 x 6 inches (or smaller/larger depending on your needs).
2. Fold the Packet
Here’s an easy folding method:
- Fold the paper in half lengthwise.
- Glue or tape the two long edges, leaving the top open (like a little pouch).
- Once the seeds are inside, you’ll fold and seal the top.
3. Decorate the Front
Let your child decorate the front of the packet. Include:
- The name of the plant (e.g., “Sunflowers” or “Tomato Seeds”)
- An optional drawing of the plant
- Planting tips or the date the seeds were packed (older kids can write this on the back)
4. Add the Seeds
Once the packet is ready and dry, add your seeds. A teaspoon or less is plenty for most varieties.
5. Seal It Up
Fold over the top and seal it with tape, glue, or a cute sticker.
🪴 Where to Use Homemade Seed Packets:
- Garden planning with kids
- Gifts for birthdays, holidays, or Earth Day
- Party favors for garden-themed events
- Science lessons on plant life cycles and seed saving
- Fundraisers or school fairs with handmade touch
🌻 Seeds Kids Can Easily Save:
- Sunflowers
- Marigolds
- Zinnias
- Beans
- Peas
- Pumpkins
- Tomatoes (dried thoroughly)
🌱 Why It’s a Great Activity
- Encourages gardening and environmental responsibility
- Teaches planning and organizing skills
- Supports fine motor and writing development
- Fosters a connection to nature and where food comes from
Homemade Seed Packets are a simple but meaningful way to introduce kids to the magic of growing things from tiny seeds. Whether you’re planting them yourself or sharing them with others, these little packets are full of potential—and joy!
Would you like a printable seed packet template or instructions for saving seeds from common fruits and veggies?

When you can manufacture your own finger paints, why use petroleum products?
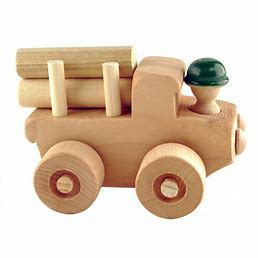
13. Paint and Seal Your Own Wood Toys
Of course! Here’s a complete guide for a hands-on, creative, and lasting craft project called Paint and Seal Your Own Wood Toys—perfect for kids, families, or classrooms.
🎨 Paint and Seal Your Own Wood Toys
Give plain wooden toys a personal touch with this creative and durable craft. Paint and Seal Your Own Wood Toys allows kids to design their own playthings—whether it’s cars, animals, blocks, or peg dolls—and finish them in a way that makes them safe, long-lasting, and totally unique.
🌟 Why This Craft Is Awesome
- Hands-on creativity: Kids get to design and personalize their own toys
- Durable and lasting: Sealed toys can be played with for years
- Customizable: Perfect for themes like animals, vehicles, people, or buildings
- Educational: Great for learning about color, design, and even woodworking
🧰 Materials Needed
- Unfinished wooden toys or wood shapes (blocks, peg dolls, cars, animals, etc.)
- Non-toxic acrylic paint or watercolor paint
- Paintbrushes (small and medium sizes)
- Palette or paper plate for mixing
- Water cup and cloth or paper towel for cleanup
- Non-toxic sealer (like water-based polyurethane or a natural beeswax finish)
- Optional: Painter’s tape or stencils for clean lines and designs
🧠 Instructions
1. Prep Your Space
Cover your table with newspaper or a craft mat. Set up paints, water, and brushes. Make sure kids are wearing old clothes or aprons.
2. Choose Your Wood Toy
Let your child pick what they want to decorate—animals, building blocks, vehicles, or little people figures. You can buy unfinished wooden toys online or from craft stores, or use scrap wood with sanded edges.
3. Paint the Toy
Use acrylic paint for bold, opaque colors or watercolor paint for a softer, natural look. Encourage creativity with stripes, polka dots, faces, or even names!
Let the paint dry completely—this usually takes 1–2 hours depending on the thickness.
4. Seal the Toy
Once dry, apply a thin, even coat of non-toxic sealer:
- For a shiny finish, use a water-based polyurethane labeled safe for toys.
- For a natural matte finish, use a homemade or store-bought beeswax and oil blend.
Let it dry fully, then apply a second coat if needed. Drying time varies by product, so check the label.
5. Ready to Play!
Once sealed and fully dried, your child’s custom toy is ready for play—or gifting!
🎁 Fun Ideas for Themes
- Nature set: Paint trees, animals, and mountains
- City set: Customize cars, buildings, and roads
- Family dolls: Decorate peg dolls to look like your family
- Alphabet blocks: Paint letters and images for early learners
🛡️ Safety Tips
- Always use non-toxic paints and sealers, especially for younger children
- If you’re making toys for toddlers or babies, avoid small pieces and be sure the finish is food-safe
- Sand any rough edges before painting
🌱 Why This Craft Matters
- Encourages imaginative play and creativity
- Promotes sustainability with natural, long-lasting materials
- Builds a sense of pride in making something by hand
- Offers a screen-free, tactile experience that kids can come back to again and again
Paint and Seal Your Own Wood Toys is more than a craft—it’s an invitation to create heirloom-quality toys that tell your child’s story. From the brush strokes to the colors, every detail is theirs to decide.
Would you like recommendations for kid-safe sealers or a printable template for painting ideas (like faces or wheels)?
Nothing compares to using your creativity in the kitchen!
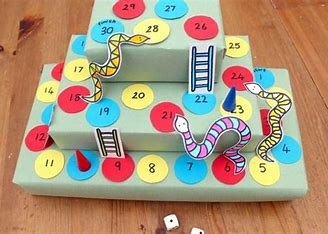
15. Upcycled Cardboard Math Game
Absolutely! Here’s a fun, hands-on project called Upcycled Cardboard Math Game—perfect for learning through play using materials you already have at home.
➗ Upcycled Cardboard Math Game
Make math fun—and eco-friendly! With the Upcycled Cardboard Math Game, kids get to create and play their own educational game using simple, recycled materials. Whether you’re practicing addition, subtraction, multiplication, or matching shapes and numbers, this DIY game makes learning interactive and exciting.
🌟 Why This Game Is Great
- Sustainable: Uses recycled cardboard and paper
- Educational: Supports math skills in a hands-on way
- Creative: Kids help design and decorate the game
- Adaptable: Works for a wide range of ages and math levels
🧰 Materials Needed
- Cardboard (from cereal boxes, shipping boxes, etc.)
- Scissors
- Markers or crayons
- Glue or tape
- Ruler (optional for clean lines)
- Small items for game pieces (buttons, coins, bottle caps, etc.)
- Dice (or make your own with cardboard or paper)
🎲 Game Ideas (Choose One or More)
1. Math Match Game
- Cut out several small cardboard cards.
- On half, write a math problem (e.g., 4 + 3). On the other half, write the answers (e.g., 7).
- Mix them up and lay them face-down.
- Take turns flipping two cards—if they match, you keep them!
- Great for addition, subtraction, multiplication, or division.
2. Roll & Solve Board Game
- Draw a simple game board path on a large piece of cardboard with spaces (like a snake or loop).
- On each space, write a math question (e.g., “What is 6 × 2?”).
- Roll a die, move that many spaces, and solve the problem to stay.
- Add challenge spaces like “Lose a turn” or “Move ahead 2 spaces.”
3. Shape & Number Sorter
- Cut out large circles, squares, and triangles from cardboard.
- Write different numbers or equations on each.
- Have kids sort by shape or solve the problems and place them in order.
4. Number Toss
- Cut holes in a large piece of cardboard, and label each with a number (e.g., 10, 20, 30).
- Toss bottle caps or coins through the holes and add up your points!
🧠 Learning Extensions
- Early learners: Use shapes, colors, and numbers 1–10
- Older kids: Practice multiplication, fractions, or even decimals
- Language connection: Write out word problems for extra challenge
- Time and money: Use cardboard clocks or coins to practice real-life math
🌱 Why It’s a Smart Activity
- Encourages critical thinking and problem-solving
- Supports fine motor skills through cutting and creating
- Fosters collaboration when played with others
- Teaches reuse and sustainability through crafting with cardboard
Upcycled Cardboard Math Games make learning both meaningful and memorable. With just a few supplies and a little imagination, kids can turn everyday recyclables into powerful learning tools—while having fun at the same time!
Would you like printable templates, game board designs, or ideas tailored to a specific math level?
16. Decorative Dipped Pine Cones
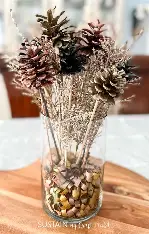
This is yet another entertaining method to add outdoor playtime to your crafting activities.
17. Make a Kid’s Walking Stick
Certainly! Here’s a fun, nature-inspired project: Make a Kid’s Walking Stick—a creative and adventurous craft that gets kids outdoors and hands-on.
🌲 Make a Kid’s Walking Stick
Give your next walk in the woods a magical upgrade by making your very own Kid’s Walking Stick! This simple outdoor project encourages exploration, builds confidence, and lets children personalize a tool they can use again and again on hikes, backyard adventures, or nature walks.
🌟 Why Kids Love It
- Hands-on crafting with nature
- Boosts independence and balance on trails
- Fully customizable: Turn it into a wizard staff, explorer’s cane, or forest wand
- Eco-friendly: Uses natural or upcycled materials
🧰 Materials Needed
- A sturdy stick or fallen branch (kid-height, about 1–2 inches thick)
- Sandpaper
- Optional decorations:
- String or yarn
- Feathers, beads, or shells
- Washable paint or wood stain (non-toxic)
- Fabric scraps or ribbons
- Glue or a hot glue gun (with adult help)
- Clear non-toxic sealant (optional, for durability)
🧠 Instructions
1. Find the Perfect Stick
Go on a short nature walk and help your child find a strong, lightweight stick. It should reach roughly chest height and be free of rot or cracks. Make sure it’s already fallen—no cutting branches from living trees!
2. Clean It Up
Use a damp cloth to wipe off dirt. Then, gently sand any rough or sharp edges using sandpaper. This helps prevent splinters.
3. Decorate!
Let kids make their walking stick their own:
- Paint: Add stripes, polka dots, or even their name
- Wrap it: Use yarn or string to wrap parts of the stick for grip or color
- Glue on natural decorations: Feathers, small pinecones, acorns, or shells
- Beads & Ribbons: Tie them on for flair and movement
- Nature symbols: Paint leaves, suns, or animal tracks
4. Seal It (Optional)
To make it last longer, coat with a non-toxic clear sealant. This helps preserve the decorations and protects the wood from weather.
5. Go on an Adventure!
Once it’s dry, your child is ready to hit the trail with their new walking stick. Whether it’s a hike in the woods or a walk around the block, it adds fun and function to outdoor time.
🗺️ Ideas for Themed Walking Sticks
- Explorer Stick: Add a compass or map pouch tied with string
- Wizard or Fairy Staff: Add crystals, glitter, or shiny stones
- Nature Stick: Only decorate with items found in the wild
- Color Stick: Paint each section a different color of the rainbow
🌱 Learning Moments
- Teach Leave No Trace and the importance of respecting nature
- Learn about types of trees and wood while choosing sticks
- Discuss balance and safety when hiking with a walking stick
- Encourage storytelling—what kind of hero uses a staff like this?
Making a Kid’s Walking Stick is more than a craft—it’s the start of an adventure. It gets kids outdoors, sparks their imagination, and gives them a tool they can proudly say they made themselves.
Would you like a printable checklist for a walking stick scavenger hunt or outdoor safety tips to go along with this project?
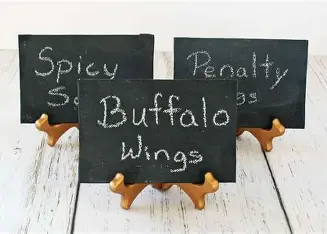
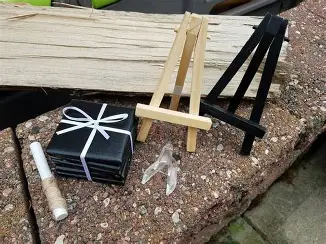
18. Reusable Chalkboard Signs
Being a child and not having a lemonade stand at some point is, in my opinion, illegal.
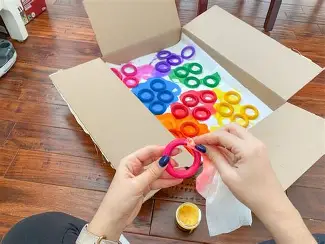
19. Recycled Cardboard Pendants
Certainly! Here’s a creative and eco-friendly jewelry craft called Recycled Cardboard Pendants—a fun and easy project for kids of all ages.
💎 Recycled Cardboard Pendants
Turn scraps of cardboard into wearable art! Recycled Cardboard Pendants are simple to make and full of possibilities for personal expression. Kids can design their own unique necklaces, charms, or keychains—while learning about sustainability and creativity.
🌟 Why This Craft Is a Favorite
- Eco-friendly: Gives new life to cardboard scraps
- Creative: Kids can draw, paint, collage, or even write secret messages
- Wearable: Turn art into something fun to wear or gift
- No special tools needed: Just glue, scissors, and imagination!
🧰 Materials Needed
- Cardboard (cereal boxes, shipping boxes, or packaging scraps)
- Scissors
- Glue stick or white glue
- Hole punch or sharp pencil
- String, yarn, or ribbon (for necklaces)
- Markers, crayons, or paint
- Optional decorations: glitter, sequins, buttons, beads, magazine cutouts, tissue paper
🧠 Instructions
1. Cut Your Pendant Shape
- Cut cardboard into fun shapes like circles, hearts, stars, or geometric patterns.
- For a layered look, cut two or three matching shapes and glue them together for a thicker pendant.
2. Decorate the Pendant
- Use markers, crayons, or paint to color your pendant.
- Add collage materials like magazine clippings, patterned paper, or fabric scraps.
- Write a word, name, or message for a personal touch.
3. Add Texture or Shine (Optional)
- Use glue to add glitter, sequins, or beads.
- Wrap part of the pendant with yarn or embroidery thread for color and texture.
4. Punch a Hole
- Use a hole punch or carefully poke a hole near the top of your pendant using a pencil or skewer (adult supervision recommended).
5. Add a String
- Thread string, ribbon, or yarn through the hole.
- Tie the ends to create a necklace, bracelet, or hanging charm.
🎨 Creative Variations
- Initial Pendants: Cut letters from cardboard and decorate them.
- Nature Pendants: Glue on dried leaves, flowers, or tiny sticks.
- Secret Message Charms: Write a tiny message on the back—only the wearer knows it’s there!
- Friendship Necklaces: Make matching sets for friends or family.
🌱 Why It’s Great
- Encourages sustainable crafting habits
- Helps develop fine motor skills and artistic expression
- Promotes creative reuse and imaginative thinking
- Makes great gifts or classroom projects
🎁 Bonus Idea: Pendant Gift Tags
Use the same idea to create reusable gift tags or name labels for backpacks or lunchboxes!
Recycled Cardboard Pendants turn something ordinary into something special. With just a few supplies, kids can create personalized, wearable art that’s lightweight, low-cost, and full of meaning.
Would you like a printable pendant shape template or ideas for using this craft in a birthday party or classroom setting.
20. DIY Tire Swing
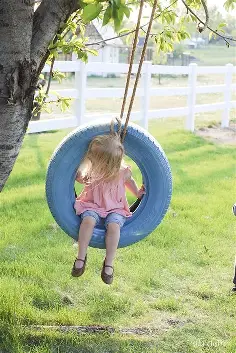
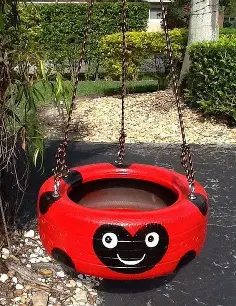
I suppose he might prefer to watch me and his father construct this, but I think the idea of an upcycled swing would add even more joy to outside playtime.
21. Preserve Autumn Leaves
Certainly! Here’s a beautiful, nature-inspired craft project called Preserve Autumn Leaves—perfect for capturing the magic of fall and creating lasting keepsakes.
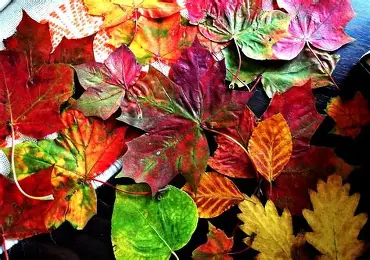
🍁 Preserve Autumn Leaves
Celebrate the beauty of fall by preserving colorful autumn leaves! Whether you’re using them for art, decoration, or nature study, preserving leaves helps kids (and adults!) connect with nature while learning about the changing seasons. Plus, it’s a fun and calming activity that turns a simple walk outside into a creative adventure.
🌟 Why It’s a Wonderful Project
- Connects kids with nature
- Teaches about the seasons and leaf science
- Creates lasting materials for crafts, decor, or gifts
- Easy and eco-friendly, using items found outdoors
🍂 Methods to Preserve Autumn Leaves
Here are four easy ways to preserve fall leaves using simple household materials. Choose the method that works best for your needs:
1. Wax Paper Method (Great for Kids!)
You’ll need:
- Fresh, dry autumn leaves
- Wax paper
- Old towel or newspaper
- Iron (with adult supervision)
Steps:
- Place leaves between two sheets of wax paper.
- Cover with an old towel or newspaper.
- Gently iron on medium heat for about 30 seconds (adult job!). The wax will seal the leaves.
- Let cool, then cut around the leaves if you want to separate them from the paper.
Best for: Window decorations, bookmarks, and hanging displays.
2. Pressing in Books (Natural and Simple)
You’ll need:
- Fresh, flat leaves
- Heavy books or a flower press
- Paper towels or parchment paper
Steps:
- Sandwich each leaf between two layers of paper towel or parchment.
- Place inside a heavy book and stack more books on top.
- Leave for 1–2 weeks until completely dry and flat.
Best for: Scrapbooking, journaling, or framed art.
3. Glycerin Bath (Soft & Flexible Leaves)
You’ll need:
- 1 part glycerin (from a pharmacy or craft store)
- 2 parts water
- Container or tray
- Leaves
Steps:
- Mix the glycerin and water in a tray.
- Submerge leaves completely for 3–5 days.
- Remove, blot dry, and let air dry fully.
Best for: Craft projects where flexible, long-lasting leaves are needed (like wreaths or garlands).
4. Mod Podge or Clear Glue (Shiny & Sealed)
You’ll need:
- Leaves
- Mod Podge or white glue mixed with a little water
- Brush
Steps:
- Brush a thin layer on both sides of the leaf.
- Let dry on wax paper or a plastic surface.
- Flip and repeat if needed.
Best for: Decorations, leaf mobiles, and ornaments.
🎨 Craft Ideas Using Preserved Leaves
- Leaf Garland: String preserved leaves with twine to hang across a mantle or window
- Leaf Suncatchers: Use the wax paper method and cut into shapes for window art
- Autumn Cards: Glue pressed leaves onto cardstock to make seasonal greeting cards
- Nature Journal: Include preserved leaves with notes and drawings
- Leaf Crowns: Use flexible glycerin-treated leaves to make wearable art
🍁 Educational Tie-Ins
- Talk about why leaves change color
- Identify different tree species using a leaf guide
- Learn about photosynthesis and seasonal cycles
- Practice observation skills during nature walks
🌱 Why It Matters
Preserving autumn leaves helps children appreciate nature’s details, learn patience, and connect seasonal changes with science and creativity. It also encourages mindful outdoor time—something kids (and adults!) can benefit from year-round.
Would you like a printable nature journal page or a leaf identification guide to go with this activity?