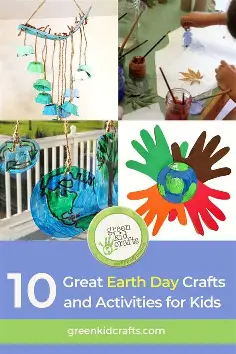
Here’s a list of the Best Earth Day Crafts for Kids — fun, eco-friendly, and educational ways to celebrate our planet!
🌍 Best Earth Day Crafts for Kids: Celebrate Earth
1. Recycled Bottle Bird Feeders
- 🐦 Turn empty plastic bottles into bird feeders.
- Decorate with paint or paper and hang them outside with string.
- Teaches kids to reuse and care for wildlife.
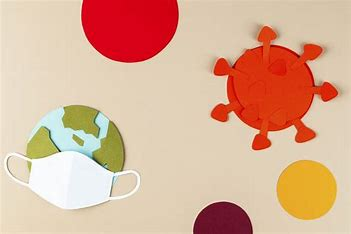
2. Earth Collage
- 🌎 Cut out blue and green magazine scraps to make an Earth shape.
- Great for learning about continents and oceans.
- Fun way to talk about protecting the planet.
3. Coffee Filter Earth
- ☕ Use coffee filters, markers, and water to create a tie-dye Earth.
- Let the colors blend to mimic Earth’s surface.
- Simple, colorful, and perfect for preschoolers.
4. Newspaper Hats or Crowns
- 👑 Reuse old newspapers to create fun hats or nature crowns.
- Kids can decorate with leaves, flowers, or drawings.
- A perfect reminder that old things can be reused in fun ways!
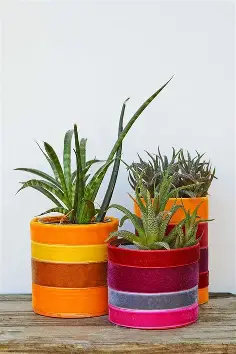
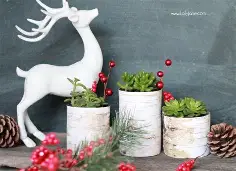
5. Tin Can Planters
- 🌱 Decorate old cans and plant herbs or flowers.
- Add googly eyes to make them look like plant pets.
- Kids can learn about growing their own food.
6. Paper Roll Binoculars
- 🔍 Use empty toilet paper rolls to make explorer binoculars.
- Decorate with paint, string, or stickers.
- Great for outdoor Earth Day scavenger hunts!
7. Nature Collage or Art
- 🍃 Use leaves, twigs, petals, and seeds to make art on cardboard.
- Helps children appreciate the beauty of natural materials.
8. Egg Carton Critters
- 🐞 Reuse egg cartons to make bugs, caterpillars, and more.
- Paint and decorate with googly eyes and pipe cleaners.
9. Recycled Paper Beads
- 📿 Roll strips of old magazines or paper to make colorful beads.
- String into necklaces or bracelets.
- A lesson in recycling and creativity!
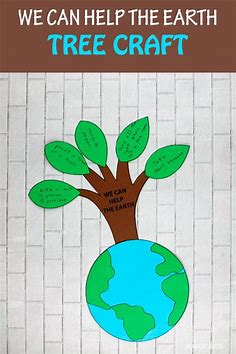
10. “I Love Earth” Handprint Art
- ✋ Trace handprints on a heart-shaped Earth drawing.
- Kids can write ways they help the Earth inside each finger.
Would you like printable instructions or a worksheet version for any of these crafts?
- Earth Day Sensory Bin Crafta
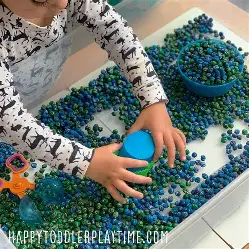
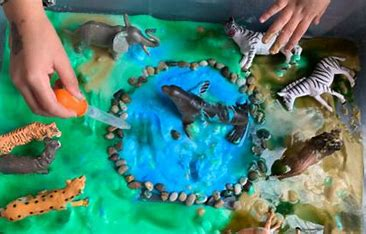
You’ll need sand toys, toy trees, soil, and any additional toys you wish to add, as well as a large box to store everything in.
How to Do It: Let the kids explore and play in the bin after filling it with soil, mud, pebbles, sand toys, tree toys, and other materials. Explain the function of each item in the sensory bin while encouraging children to touch, look at, and feel everything.
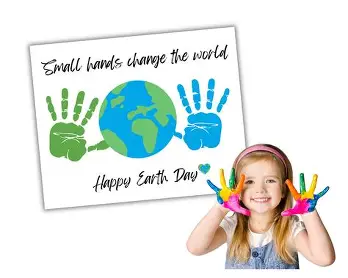
2. Earth Day Hand Imprint Crafta
Sure! Here’s a simple and meaningful Earth Day Hand Imprint Craft for kids, written in clear English:
🌍 Earth Day Hand Imprint Craft
Celebrate Earth Day with this fun and personal handprint activity! Great for classrooms, homeschooling, or just a creative afternoon.
✂️ Materials Needed:
- White paper or cardstock
- Blue and green paint
- Paintbrushes or sponges
- A marker or pen
- A small bowl of water and a towel (for cleaning hands)
🎨 Instructions:
- Draw or Print an Earth Shape
- Draw a large circle on the center of the paper (or print out a blank Earth outline).
- You can label it “Happy Earth Day!” at the top.
- Paint the Earth
- Use blue for oceans and green for land.
- Let kids paint freely or guide them where to add each color.
- Make the Handprint
- Paint the child’s hand with any color (green, blue, or rainbow!).
- Carefully press the painted hand onto one side of the Earth.
- Gently lift the hand off the paper and wash it.
- Write a Message
- Under or around the handprint, have the child write:
- “I love the Earth!”
- Or “My promise to Earth is…” and they can write or draw something like recycling, planting trees, or saving water.
- Under or around the handprint, have the child write:
- Optional Decoration
- Add stickers, glitter (eco-friendly), drawings of animals, trees, or hearts.
💡 Learning Connection:
This craft helps children understand that their hands can make a positive impact on the planet. It also creates a keepsake to remind them of Earth Day values year-round.
Would you like a printable version of this activity?
3. Crafta with Vegetables
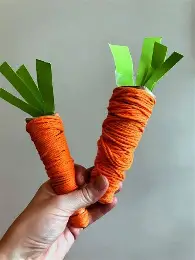
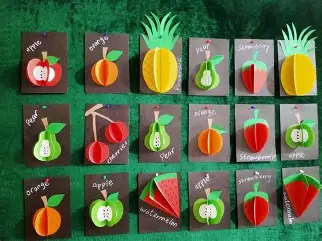
You’ll need a paintbrush, water, paper, paint, ladyfinger, and a lotus stem.
How to Do It: Encourage the children to use veggies like ladyfinger and lotus stem to paint a masterpiece as part of this Earth Day activity. To make lovely imprints on the paper, cut one side of the vegetable, dip it in paint, and use it as a stamp. To make an Earth Day painting, ask the children to repeat the steps.
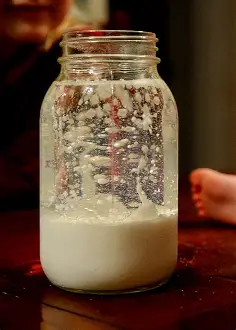
4. Snowstorm in a Jar
Of course! Here’s a fun and easy Snowstorm in a Jar activity for kids, written in simple English:
❄️ Snowstorm in a Jar
Create a magical mini snowstorm using a few items from home! This science-meets-art craft is fun, safe, and perfect for curious kids.
🧪 Materials Needed:
- A clear glass jar or plastic container with a lid
- White paint or white glitter (for the “snow”)
- Baby oil (or vegetable oil)
- Water
- Alka-Seltzer tablets (or any effervescent tablets)
- Food coloring (optional – for a snowy blue effect)
- Spoon or stir stick
🌨️ Instructions:
- Fill the Jar with Oil
- Pour baby oil into the jar until it’s about 3/4 full.
- Add Water
- Slowly pour water into the jar, filling it almost to the top.
- The water will sink below the oil – that’s part of the fun!
- Add Snow
- Mix a little white paint with water or sprinkle in some white glitter.
- Pour it into the jar to look like snow floating.
- Add Color (Optional)
- A drop or two of blue food coloring adds a wintery effect.
- Let it settle before the next step.
- Create the Snowstorm
- Break an Alka-Seltzer tablet into a few pieces.
- Drop one piece into the jar and watch the storm begin!
- Bubbles rise and carry the “snow” up, then it falls like a snowstorm.
- Repeat!
- Add more tablet pieces to start the storm again and again.
🧠 Science Tip for Kids:
The tablet reacts with water and creates gas bubbles. These bubbles lift the “snow” into the oil. When the bubbles pop, the snow gently falls — just like a snowstorm!
Would you like a printable worksheet or activity card for this?
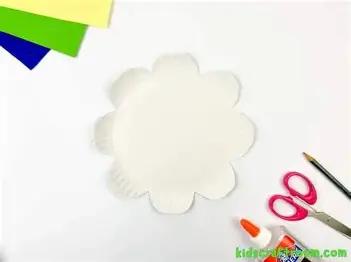
5. Tissue Paper Earth Craft
You’ll need blue tissue paper, glue, a paper plate, green construction paper, and a printable map template.
Instructions: To begin, print the map template and carefully cut it out. Cut out the green Earth form by tracing the template onto green construction paper or cardstock. To make the ocean, cut the blue tissue paper into 1-inch squares, squish them up, and adhere them to a paper plate. To facilitate it,
Before affixing the blue paper pieces to the plate, pour glue onto them and dip them into it. Place the land and continents onto the plate to make it look like the planet Earth after the tissue paper ocean has covered it. After adhering each land or map piece to the paper plate ocean, allow it to dry. This craft can be hung by punching a hole in the top of the paper plate Earth, then passing ribbon, yarn, or twine through it.
6. Suncatcher Crafta
Sure! Here’s a fun and colorful Suncatcher Craft idea for kids — simple, beautiful, and perfect for celebrating sunlight and color.
☀️ Suncatcher Craft for Kids
Let the sunshine in with these bright and cheerful suncatchers! They’re easy to make and look beautiful in any window.
🧺 Materials Needed:
Option 1: Tissue Paper Suncatcher
- Clear contact paper or wax paper
- Colorful tissue paper (cut into small squares or shapes)
- Scissors
- Black construction paper (for a frame)
- String or tape (to hang it up)
✂️ Instructions:
- Cut Out a Frame
- Cut a large shape from black paper (like a heart, flower, circle, or butterfly).
- Then cut a smaller shape out of the middle so it looks like a window or outline.
- Stick the Contact Paper
- Cut a piece of clear contact paper a little bigger than the frame.
- Stick the frame onto the sticky side of the contact paper.
- Add Tissue Paper
- Let kids place colorful tissue paper pieces inside the frame.
- Fill the whole shape with overlapping colors for a stained-glass effect.
- Seal It
- Place another sheet of contact paper on top (or cover with wax paper using glue).
- Trim around the edges if needed.
- Hang in the Window
- Use string or tape to hang the suncatcher in a sunny window.
- Watch the colors shine through when the light hits it!
🌈 Optional Themes:
- Earth shapes for Earth Day
- Leaves and flowers for spring
- Hearts for Valentine’s Day
- Stars or snowflakes for winter
💡 Why Kids Love It:
This craft is easy, colorful, and mess-free. It helps build fine motor skills and creativity — plus it makes any room feel cheerful with sunlight and color!
Would you like printable templates or themed ideas (e.g., Earth, butterfly, flower shapes)?
7. Coffee Filter Paper Crafta
You’ll need a newspaper, a coffee filter, a dropper, water, a spray bottle, and food colouring in blue and green.
How to Do It: To avoid food colouring and water stains, cover a table with newspapers and set coffee filters on top. Any extra water or colour will also be absorbed by the newspapers. Pour blue into droppers.
Alternatively, teach the children to add droplets to the coffee filters using green food colouring. The way the colour flows across the filter will captivate them. Lastly, mist the filters with water to combine the green and blue hues. Before hanging the filters on the classroom walls, let them thoroughly dry.
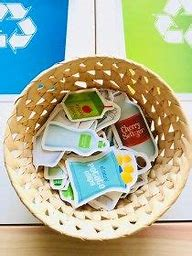
8. Plantable Seed Paper
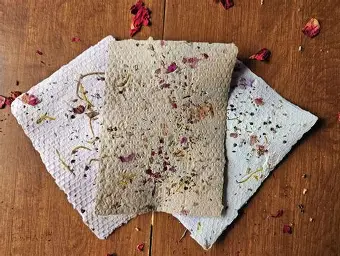
Absolutely! Here’s a fun and eco-friendly Plantable Seed Paper Craft for kids — perfect for Earth Day, gardening season, or as a thoughtful handmade gift.
🌱 Plantable Seed Paper Craft
Make your own paper that grows into flowers or herbs! This hands-on, eco-friendly activity is a great way to teach kids about recycling and plant life.
📋 Materials Needed:
- Scrap paper (newspaper, tissue, printer paper, etc.)
- Small bowl of water
- Blender (or food processor)
- Flower or herb seeds (small ones work best, like basil, marigold, or wildflowers)
- Strainer or mesh screen
- Towel or sponge
- Rolling pin or bottle (optional)
- Wax paper or parchment paper (for drying)
🧼 Instructions:
- Tear the Paper
- Tear your scrap paper into small pieces and soak in warm water for about 30 minutes.
- Blend into Pulp
- Pour the soaked paper and water into a blender.
- Blend until it becomes a soft, mushy pulp.
- Add Seeds
- Gently stir in a spoonful of seeds by hand — do not blend them (blending could damage the seeds).
- Shape the Paper
- Spread the pulp over a strainer, screen, or mesh. Press it flat with your hands or a sponge to remove extra water.
- Shape it into circles, hearts, or rectangles using cookie cutters or by hand.
- Dry the Paper
- Place your shapes on wax paper or a towel.
- Let them air-dry completely (can take 1–2 days depending on thickness).
- Use or Gift It!
- Once dry, your seed paper is ready to plant or give away.
- You can write messages on them using a marker or add a tag that says:
🪴 “Plant me and watch me grow!”
🌼 To Plant the Seed Paper:
- Place it on soil in a sunny pot or garden bed.
- Water it well and keep moist until seeds begin to grow.
💡 Learning Connection:
This activity teaches recycling, sustainability, and plant care — all while giving kids a creative, hands-on experience with nature!
Would you like a printable version or tag template for gifting these?
9. Earth Day Slime
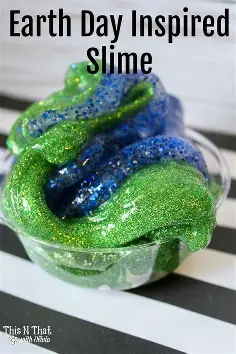
One teaspoon borax, two cups of hot water and half a cup of room temperature water, CLEAR glue, two plastic containers, blue and green litter, and a slime container are all necessary.
How to Do: Are you looking for DIY ideas for Earth Day? You’ll adore this! Start by adding ½ tsp of borax to a container with 1 cup of boiling water. Stir until all of the borax has dissolved. Pour ¼ cup of room temperature water into a different container, then squeeze a 5-ounce bottle of clear glue into the water. Purchasing larger containers could be more cost-effective if you need a lot of glue. Stir the mixture gently and well after adding the blue glitter. Depending on your preference, you can use ordinary glitter for blue and fine glitter for green.
preference. You can completely exclude the glitter and other ingredients if you like clear slime. After that, add the glue mixture to the mixture of hot water and borax, and let it settle for 20 to 30 seconds. You can use a third bowl or rinse off the empty one at this time. In hot water, the slime will begin to form quite quickly. After removing the slime, put it in a basin that is empty. The slime may be a little sticky at this stage, which is totally fine. It will thicken and set if you knead it for a few minutes. Do it again, except this time use green glitter rather than blue. Put your green and blue slime together and keep it in an airtight container.
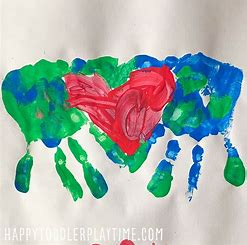
10. Hand Print Earth Day Crafta
Here’s a simple and meaningful Hand Print Earth Day Craft idea for kids:
🌍 Hand Print Earth Day Craft
Theme: “Helping Hands for the Earth”
Ideal for: Ages 3–10
Time Required: 20–30 minutes
Materials Needed:
- Blue and green paint (washable)
- White or colored construction paper
- Pencil
- Paintbrushes or sponges
- A bowl of water and towel (for cleaning hands)
- Optional: markers, glue, glitter, stickers
🖐️ Steps:
- Draw or Paint a Circle (Earth)
- Lightly sketch a large circle in the center of the paper to represent Earth.
- Use blue and green paint to fill it in (blue for oceans, green for land). Let it dry for a few minutes.
- Make the Handprints
- Paint your child’s hand with green or blue paint.
- Carefully press the handprint around the Earth circle, like a frame. These represent “helping hands” protecting the planet.
- Add a Message
- At the top or bottom of the paper, write a phrase like:
- “My Hands Help the Earth”
- “I Love My Earth”
- “Helping Hands, Happy Earth!”
- At the top or bottom of the paper, write a phrase like:
- Decorate
- Add glitter, stickers, flowers, trees, or clouds around the Earth and handprints.
💡 Learning Connection:
This activity is a great time to talk about:
- Recycling
- Saving water and electricity
- Planting trees
- Reducing plastic use
Would you like a printable template or a short poem to go with it?
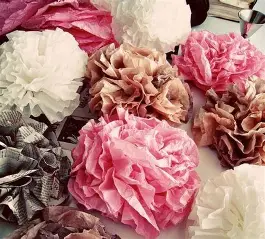
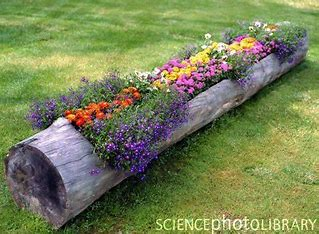
11. Craft Stick Flower Pots
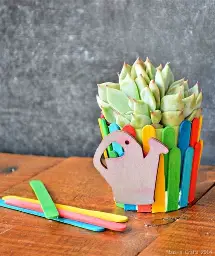
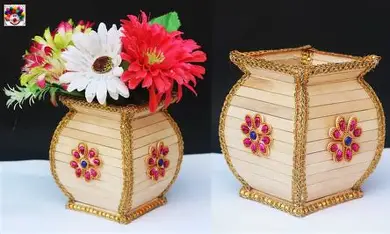
You’ll need flowers, garden soil, ribbon, tin cans, colourful craft sticks, and rubberband.
Methods: First, fill the tin can with soil, then carefully plant the flowers inside. After covering the tin can with a rubberband, begin inserting the craft sticks around it, one at a time, beneath the band. Completely fill this out, then tie a ribbon over the rubber band.
12. Collage Art
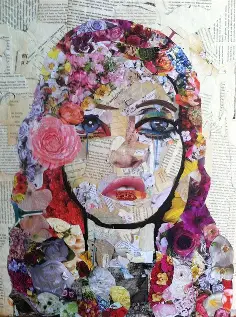
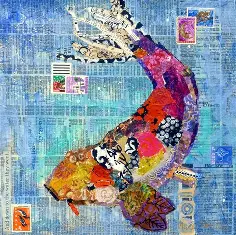
Sure! Here’s a simple and fun Collage Art project idea for kids, especially great for Earth Day or general creativity:
🎨 Collage Art for Kids
Theme: “My Beautiful Earth”
Age Group: 4–10 years
Time Required: 30–45 minutes
Materials Needed:
- Old magazines, newspapers, or colored paper scraps
- Glue stick or white glue
- Scissors (child-safe)
- Construction paper (as a base)
- Pencil (optional)
- Recyclable materials (buttons, fabric, leaves – optional)
🧩 Steps:
- Choose a Theme
- It can be nature, the Earth, animals, your neighborhood, or under the sea.
- Tear or Cut Out Pieces
- Cut or tear images, colors, or shapes from magazines or newspapers.
- Try to find green trees, blue skies, animals, flowers, etc.
- Arrange Your Design
- Before gluing, lay out the collage pieces on the base paper.
- You can create a landscape, an Earth, an animal, or even an abstract scene.
- Glue It Down
- Once you’re happy with the arrangement, glue everything in place.
- Press firmly so edges don’t curl up.
- Add Details (Optional)
- Draw or write something meaningful about your collage.
- Add natural items or reusable materials for a 3D effect.
🧠 Learning Idea:
Talk with kids about how collage art helps us reuse materials instead of throwing them away — a creative way to recycle!
Would you like some collage theme ideas (e.g., jungle, space, oceans), or should I make a printable instruction sheet?
13. Bird Feeder Craft
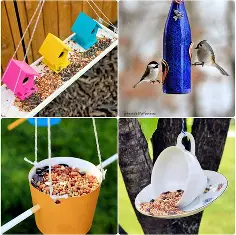
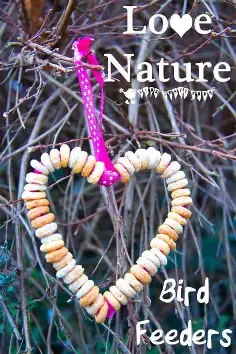
You will need scissors, a bamboo skewer, peanut butter, birdseed, twine, a cardboard tube or toilet paper roll, and a butter knife.
How to Make It: To make the bird feeder, start by making two cuts in the tube’s top and bottom. Then, to create a perch for birds, insert a bamboo skewer into the bottom hole. Next, use a butter knife to smear peanut butter on the tube’s outside, then roll it in birdseed to ensure it sticks. Finally, suspend the feeder on a higher surface by passing a string or thread through the top hole.
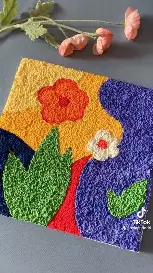
14. Watercolor Art Pillow
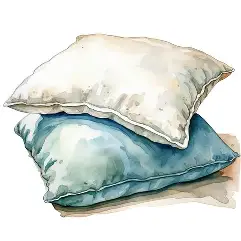

Sure! Here’s a fun and creative idea for making a Watercolor Art Pillow — a soft and colorful craft that kids (and adults) will love:
🎨🛏️ Watercolor Art Pillow
Theme: “Paint Your Dreams!”
Perfect for: Ages 5+, Earth Day gifts, bedroom decor, or keepsakes
Time Required: 1 hour + drying time
Skill Level: Easy
🧵 Materials Needed:
- Plain white cotton pillowcase or fabric square (pre-washed)
- Fabric markers or washable watercolor paints
- Water spray bottle
- Paintbrushes
- Cardboard (to place inside the pillowcase and prevent bleed-through)
- Optional: Fabric medium (if using regular watercolors)
- Iron (for adults to set the color, if needed)
- Pillow stuffing or an old pillow insert (if making your own pillow)
🎨 Instructions:
- Prep Your Pillowcase
- Slide cardboard inside the pillowcase or under your fabric.
- Lay flat on a protected surface.
- Paint with Watercolors
- Lightly mist the fabric with water using the spray bottle. This helps the colors spread like true watercolor.
- Use a brush and watercolor paints to create your design — try rainbows, abstract patterns, flowers, or even the Earth!
- Let It Dry
- Allow the fabric to dry completely — ideally overnight.
- (Optional) Heat Set the Design
- Adults only: Iron the back of the fabric on medium heat for 3–5 minutes to set the design.
- Finish the Pillow
- If you’re using a pillow insert, just slide it in!
- If you’re sewing your own, sew up three sides of the fabric, stuff it, then stitch the last side.
🌟 Creative Ideas:
- Write a message like “Dream Big”, “Love the Earth”, or “My Happy Place” on your pillow.
- Make matching pillowcases for family members with unique designs.
- Try thumbprint flowers or handprint suns with watercolor outlines!
Would you like a printable version of these steps or pillow design templates for kids?
15. Earth Day Mask Crafta
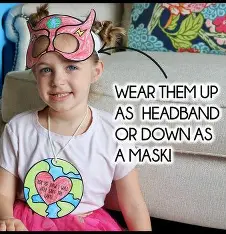
Things You’ll Need: Printed earth day mask, colors, and popsicle sticks
How To Do: Distribute a printout of the Earth Day mask to each child and allow them to color their own mask. Once completed, attach a popsicle stick to each side of the mask so that the children can hold it against their faces as a mask. This a fun activity for kids!
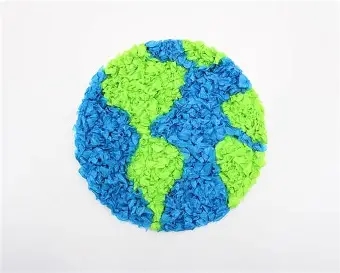
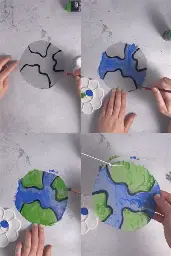
16. Mosaic Earth Crafta
Absolutely! Here’s a fun and eco-friendly Mosaic Earth Craft perfect for kids, especially around Earth Day:
🌍 Mosaic Earth Craft for Kids
Theme: “Piece by Piece, We Love the Earth”
Age Group: 4–10 years
Time Required: 30–45 minutes
Skill Level: Easy
🧩 Materials Needed:
- Blue and green paper (or old magazines, wrapping paper, newspaper you can color)
- Scissors (child-safe)
- Glue stick or liquid glue
- White or black construction paper (as background)
- Pencil
- A bowl or circular object to trace
🖍️ Instructions:
- Draw the Earth
- On your background paper, trace a large circle using a bowl or round object. This will be your Earth.
- Cut or Tear Colored Paper
- Tear or cut small pieces (about 1-inch or smaller) of green and blue paper:
- Green = Land
- Blue = Ocean
- Tear or cut small pieces (about 1-inch or smaller) of green and blue paper:
- Glue the Mosaic Pieces
- Fill in the circle with the paper pieces.
- Use green pieces to make simple continent shapes (it doesn’t need to be exact!) and blue for oceans.
- Slight overlaps or gaps are fine—it gives it a cool mosaic look!
- Add a Title
- Write a message on the top or bottom like:
- “Love Our Planet”
- “Mosaic Earth”
- “Every Piece Matters”
- Write a message on the top or bottom like:
- Optional Extras
- Add recycled material bits like fabric, buttons, or foil to make it 3D.
- Frame it with twigs, old cardboard, or decorated borders.
💡 Learning Tip:
Talk to children about how small actions (like each paper piece) add up to a big impact — just like protecting our Earth, piece by piece!
Would you like matching craft instructions for continents, animals, or recycling symbols using mosaic style?
17. Grass Crown Crafta
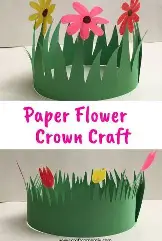
You’ll need glue, scissors, paint or coloured paper, and flower stickers.
How to Do It: Start by giving the kids the supplies they need to make their own crowns. They can use pre-colored green paper or paint white paper green. Tell them to take a measurement of the diameter
of their skulls, after which the paper is attached appropriately. Let the children end by personalising their crowns with their favourite stickers after cutting the top edge in a zigzag design.
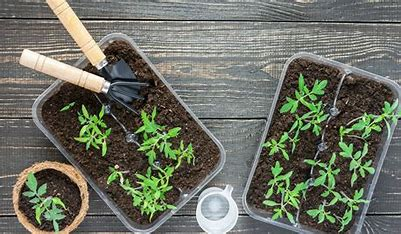
18. Tin Can Planters
Absolutely! Here’s a creative and eco-friendly Tin Can Planters craft — perfect for Earth Day or anytime kids want to get their hands dirty and learn about plants:
🌱 Tin Can Planters Crafta
Theme: “Give a Can, Grow a Plant”
Best for: Ages 4+ (with adult help for sharp edges)
Time Required: 30–45 minutes (+ drying time)
Skill Level: Easy
🪴 Materials Needed:
- Empty tin cans (cleaned and labels removed)
- Acrylic paint or spray paint
- Paintbrushes
- Permanent markers or stickers (for decorating)
- Potting soil
- Small plants, succulents, or seeds
- Pebbles (for drainage)
- Hammer and nail (optional, for making drainage holes — adult use only)
🎨 Instructions:
- Prepare the Can
- Wash and dry the can thoroughly.
- If sharp edges remain, use a can opener to smooth them or cover the rim with masking tape for safety.
- Add Drainage Holes (Optional)
- Adults can use a hammer and nail to poke 2–3 small holes in the bottom for drainage.
- Paint and Decorate
- Paint the outside of the can with bright colors or fun designs (rainbows, flowers, bugs, or Earth themes).
- Let it dry completely.
- Add stickers, drawings, or write your name!
- Add Soil and Plant
- Place a few small pebbles at the bottom for drainage.
- Fill the can with potting soil.
- Plant seeds or a small plant (herbs like mint or basil work great!).
- Water and Watch It Grow
- Gently water the plant.
- Place it in a sunny spot and watch it grow day by day!
🌎 Eco Tip:
Use this craft to talk about reusing materials and the importance of growing green. Each tin can saved from the trash can become a new home for a plant!
Would you like a printable version of this craft or matching plant care labels for kids to decorate their cans?
19. Earth Day Stained Glass Crafta
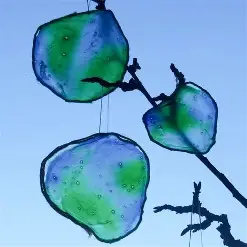
You’ll need contact paper, glue, scissors, and blue and green tissues.
How to Do It: Use contact paper to make a circle, then draw a black outline around the perimeter. Permit the kids to cut tiny tissue paper pieces and insert them inside the circle. Lastly, cover the circle with another piece of contact paper and place it next to a window that gets lots of sunlight.
20. Cardboard Sun Crafta
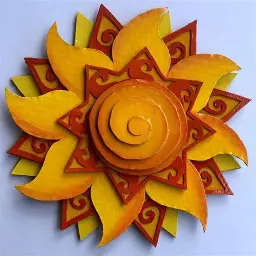
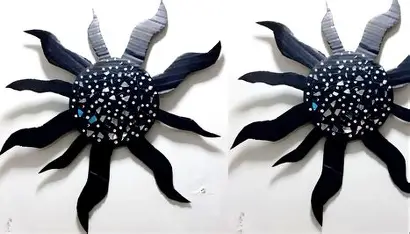
Sure! Here’s a bright and cheerful Cardboard Sun Craft — a fun and easy project for kids using recycled materials:
☀️ Cardboard Sun Crafta
Theme: “Shine Bright, Just Like the Sun!”
Ideal for: Ages 3–9
Time Required: 20–30 minutes
Skill Level: Easy
📦 Materials Needed:
- Cardboard (from a box or old packaging)
- Yellow and orange paint or crayons
- Paintbrushes or sponges
- Scissors (child-safe)
- Glue or tape
- Googly eyes, markers, glitter (optional)
- String (if hanging)
✂️ Instructions:
- Cut Out the Sun
- Cut a large circle from cardboard for the sun’s face.
- Cut triangle shapes (or long strips) for the sun’s rays — about 8–12 of them.
- Paint the Pieces
- Paint the sun’s face yellow.
- Paint the rays yellow, orange, or mix both for a fiery look!
- Let them dry completely.
- Assemble the Sun
- Glue or tape the rays around the back of the circle so they stick out like sunshine beams.
- Optional: Glue on googly eyes and draw a big smile!
- Add Extra Sparkle (Optional)
- Decorate with glitter, sequins, or stickers.
- Write a message like “Hello, Sunshine!” or “Shine On!”
- Hang It Up
- Punch a small hole at the top and tie string to hang it in a window, classroom, or on the wall.
🌞 Learning Connection:
Use this craft to teach kids about the importance of the sun — for light, warmth, growing plants, and giving us energy!
Would you like ideas for matching weather-themed crafts (like clouds, rainbows, or storms)?
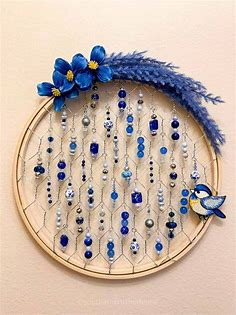
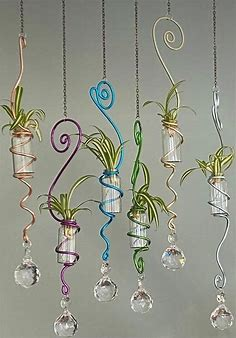
21. Hanging Planter Crafta
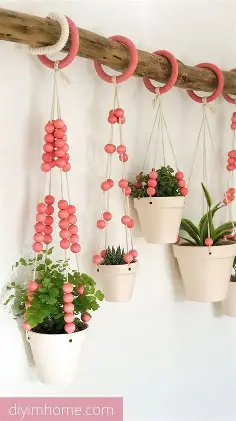
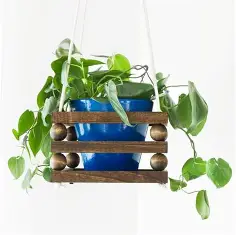
You’ll need seeds, garden soil, water, jute twine, and a planter or plastic container.
How to Do It: You can either build a holder for the pot out of jute strings or drill holes in the top of the bottle or container and insert the strings through. Hang the planter from the ceiling after tying the cords firmly in place. Encourage the children to paint the planters, add garden soil, plant the seed, and pull the strings through the holes. Additionally, to allow extra water to drain, drill a few tiny holes in the bottom.
22. Paper Quilled Earth Day Crafta
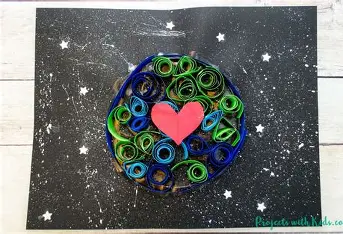
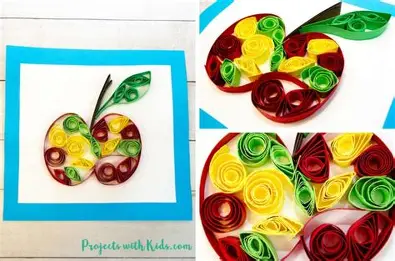
Absolutely! Here’s a beautiful and creative Paper Quilled Earth Day Craft for kids or beginners who want to try a new art technique:
🌍 Paper Quilled Earth Day Crafta
Theme: “Love the Earth, Piece by Piece”
Best for: Ages 6+ (with adult help for beginners)
Time Required: 30–60 minutes
Skill Level: Moderate (great for fine motor practice!)
📜 Materials Needed:
- Colored paper (blue, green, white, and others)
- Scissors or paper shredder
- Glue stick or craft glue
- Toothpick, quilling tool, or skewer (for rolling paper)
- Pencil and paper (for sketching the Earth shape)
- Cardstock or construction paper (as a base)
🔄 Instructions:
- Cut Paper Strips
- Cut colored paper into thin strips (about ½ cm wide and 15–20 cm long).
- Use blue for water, green for land, and other colors for hearts, leaves, or symbols.
- Sketch the Earth
- Lightly draw a circle on your base paper and sketch a simple version of Earth’s continents (no need for detail!).
- Start Quilling!
- Roll each paper strip tightly using a toothpick or quilling tool.
- Let it uncoil slightly, then glue the end to hold the shape.
- Press or pinch to create different shapes (teardrops, hearts, ovals).
- Fill the Earth
- Use green coils to fill in the land areas, and blue for the ocean.
- Glue each piece in place within your Earth outline.
- Add Details
- Add small white or yellow coils for clouds or the sun.
- Glue a heart or tree shape beside the Earth to spread the Earth Day message.
- Write a Message
- Add a title like:
- “Every Coil Cares”
- “Love Your Planet”
- “Quilling for a Greener Earth”
- Add a title like:
💚 Learning Moment:
Talk to children about how just like each small paper coil helps build a beautiful Earth, every small action (like saving water or recycling) helps protect our planet.
Would you like a printable Earth template for the base or simple quilling shape guides to go with this crafta?