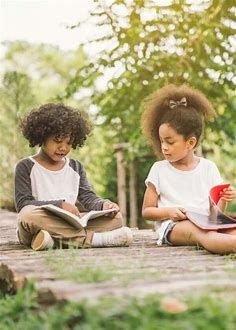

Here are lots of fun Earth Day–inspired activities from The Artful Parent, plus ideas based on their style, to help kids connect with nature, reuse materials, and get creative. If you want, I can send these as a printable list.
🌱 Picks from The Artful Parent
- 30 Earth Day Activities for Kids
A big roundup: nature-and recycled-art projects, crafts that reuse materials, and ideas to celebrate the planet. The Artful Parent - 13 Nature Walk Ideas (+ FREE Scavenger Hunt Printable)
While out walking: scavenger hunts, sound hunts, “I Spy”, leaf & bark rubbings. When you get back: make dioramas, collages, or observational drawings with nature finds. The Artful Parent - Easy Cardboard Art Forest
Recycled cardboard + paints = a “magic forest” backdrop for imaginative play. Draw, paint, cut out trees, flowers, houses, etc. The Artful Parent - Garden & Nature Crafts
Crafts using natural things and garden-themed items: flower printing, nature mobiles, painted rock houses, garden ornaments, bunting, etc. The Artful Parent
🎨 More Activity Ideas & Tips (inspired / extensions)
These are extras or ways to adapt The Artful Parent ideas:
- Make garden wish flags using old fabric or scraps, decorated with nature motifs.
- Do a color scavenger hunt in the yard or park: match leaves, flowers, stones to paint swatches.
- Create a “fix and reuse” workshop: show kids how to repair broken toys, mend clothes, or upcycle containers.
- Set up a nature table with objects like feathers, stones, seed pods, shells. Let kids observe, draw, or build with them.
- Design Earth Day cards using recycled paper, natural dyes (e.g. beet juice, turmeric), pressed leaves and flowers.
- Try nature prints or leaf pounding: place leaves under fabric, hammer them (safely) to transfer color.
- Organize a neighborhood clean-up walk: collect trash safely (with gloves), then sort recyclable vs non-recyclable items. Turn some into art.
- Use storytelling: have kids imagine being trees, rivers, animals. What do they see, feel, need? Could write/draw it.
If you like, I can put together a set of 30 ready-to-use Earth Day activities from The Artful Parent and similar sources, tailored for your children’s age and resources in Karachi. Do you want that?
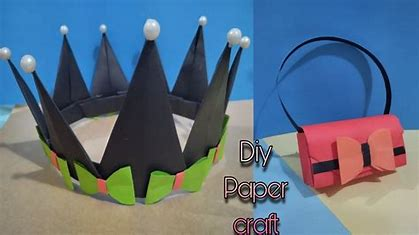
Here’s a quick and simple tutorial to make flower crowns from paper bags (kid-friendly and Earth-friendly):
🌿 Materials
- 1 large brown paper grocery bag (or kraft bag)
- Scissors
- Duct tape or masking tape (optional: double-sided tape or glue stick)
- Fresh flowers, petals, or leaves (or artificial flowers if you prefer)
- Stapler (or glue/tape to join ends)
- Optional: markers, crayons, glitter for decorating
📝 Steps
- Prepare the Bag
- Cut down one side of the bag and around the bottom so it opens up flat.
- Trim off the bottom completely.
- Cut the Crown Strip
- Cut a long strip about 3–4 inches wide from the top of the bag.
- If you want a “princess crown” shape, cut zigzags or rounded points along one edge.
- Make it Sticky (optional but easier)
- Place a strip of duct tape along the outside of the crown with the sticky side facing out (or use glue stick later).
- This is where your flowers and leaves will go.
- Add Flowers & Leaves
- Press petals, leaves, or small flowers onto the sticky area or glue them down.
- Mix colors and textures for a pretty pattern.
- Fit the Crown
- Wrap the strip around the child’s head to find the right size.
- Staple, tape, or glue the ends together to secure.
- Extra Decoration (optional)
- Add ribbons, draw patterns with markers, sprinkle a bit of eco-friendly glitter, or write names/messages.
💡 Tips
- If fresh flowers aren’t handy, use paper flowers, tissue flowers, or even painted leaves.
- You can make matching bracelets by cutting thinner strips of paper bag.
- This works great for Earth Day, birthdays, or pretend play.
Would you like me to make a one-page printable instruction sheet with pictures for this? (It’s perfect for a kids’ craft table.)
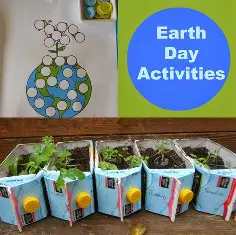
2. Milk Carton Sailboat (from Art Camp Studio)
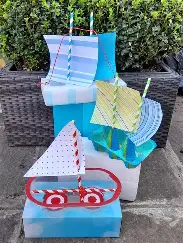
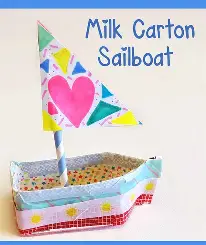
Create a fantastic tiny sailboat out of a recycled milk carton, making it the ideal gift for the child in your life who loves sailing.
3. The BEST Toddler Art Activities
Use sticks, leaves, and similar items for setups; paint a nature wall; make a collaborative recycled wall; and repurpose plastic caps and lids for sensory bins.
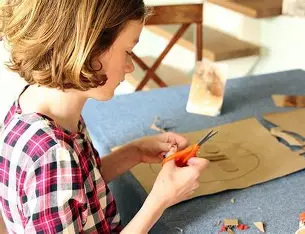
4. Make DIY Costumes from Recycled Materials
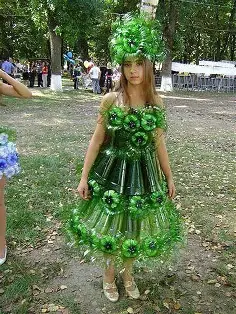
Here’s a big, practical list of DIY costume ideas made from recycled materials (fun for kids, school events, Halloween, or Earth Day parades):
🎭 How to Approach Recycled Costumes
- Start with what you have: cardboard boxes, paper bags, old clothes, bottle caps, cans, foil, newspaper, etc.
- Think theme first: animal, occupation, nature, superhero, character.
- Add details with paint, markers, or fabric scraps to make it recognizable.
📝 Costume Ideas & How to Make Them
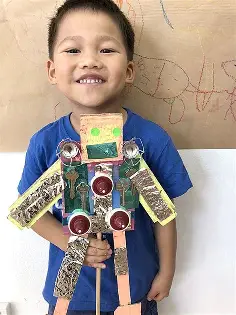
1. Robot Costume
- Materials: Large cardboard boxes, aluminum foil, bottle caps, old CDs.
- How: Cut arm/neck holes in a box, wrap it in foil. Glue bottle caps or CDs as buttons, gauges, and lights. Add a smaller box for a “helmet.”
2. Butterfly / Fairy
- Materials: Cardboard or cereal boxes for wings, leftover wrapping paper, plastic bottles for “wands.”
- How: Cut wing shapes, paint or collage them with colored paper. Attach with string or old backpack straps.
3. Knight or Princess
- Materials: Old cereal boxes for shields, foil for armor, paper bags for tunics.
- How: Wrap cardboard pieces in foil for armor plates. Cut paper bags into vests and decorate with emblems.
4. Nature Spirit / Tree
- Materials: Brown paper bags for bark, green fabric scraps or leaves from old decorations.
- How: Crumple and wrap brown paper around legs/arms, tape or staple. Glue “leaves” around shoulders and head.
5. Astronaut
- Materials: White paper bags or pillowcases, old soda bottles for “oxygen tanks.”
- How: Paint two plastic bottles silver, tape them to a backpack. Draw NASA badges on paper and glue on.
6. Bird Costume
- Materials: Old newspapers, tissue paper, or fabric scraps.
- How: Cut “feather” shapes and glue in layers on an old shirt. Add a paper cone for a beak.
7. Superhero
- Materials: Old T-shirts, pillowcases, cereal boxes.
- How: Cut a cape from an old pillowcase, make cuffs from cardboard tubes. Decorate with a bold “logo” cut from paper.
8. Jellyfish
- Materials: Clear umbrella, bubble wrap, ribbons, old plastic bags.
- How: Drape bubble wrap over the umbrella top. Tape ribbons or strips of plastic bags as tentacles.
9. Recycled Royalty (King/Queen)
- Materials: Paper bag crowns, bottle-cap jewels, old costume jewelry.
- How: Cut a paper bag crown, glue caps as jewels, add a “robe” from an old curtain or towel.
10. Cardboard Animals
- Materials: Cardboard boxes for body, paper plates for ears, old fabric.
- How: Paint the box animal colors, attach paper plate ears, tail from fabric scraps.
💡 Tips & Tricks
- Use hot glue for fast assembly, or masking tape for kids to do themselves.
- Paint last — after assembly, to avoid smudges.
- Combine texture (foil, fabric, newspaper) to make it more visually interesting.
- Add a story: Have kids name their “character” and explain how it’s eco-friendly.
Would you like me to create a step-by-step illustrated guide (like a mini e-book) with templates for these recycled-material costumes? (It’d be perfect for handing out at a school event.)
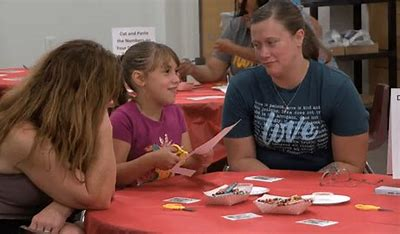
5. Self-Portrait Collages Using Recycle Bin Materials
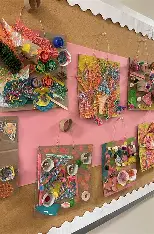
Discover how to make a collage of a self-portrait with basic materials from a recycle bin. An enjoyable and instructive activity for children that fosters self-discovery.
6. Make a Cardboard Loom for Kids
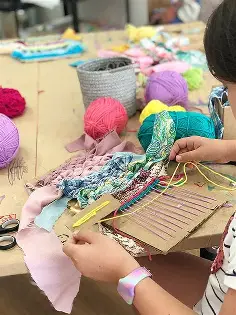
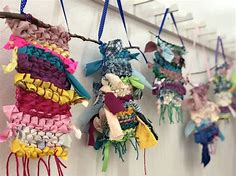
Here’s a simple guide to make a cardboard loom for kids — perfect for weaving crafts using yarn, fabric scraps, or even nature finds:
🌿 Materials
- Sturdy cardboard (like from a cereal box or shipping box)
- Scissors or craft knife
- Ruler
- Pencil
- Yarn, string, or twine (for “warp” threads)
- Tapestry needle (optional)
- Small scraps of yarn, ribbon, or fabric (for “weft”)
📝 Steps
1. Cut Your Loom
- Cut a rectangle of cardboard (about 6 x 9 inches is a good kid size).
- Smooth any rough edges so it’s safe for little hands.
2. Mark Notches
- Along the top edge, mark small lines about ½ inch apart.
- Do the same along the bottom edge, lining up with the top marks.
- You should have matching marks across both edges.
3. Cut the Notches
- Use scissors to cut small ¼ inch slits at each mark.
- These slits will hold the warp threads in place.
4. String the Warp
- Tape one end of the yarn to the back of the loom.
- Bring it up through the first bottom slit, across to the first top slit, then down to the next bottom slit.
- Keep wrapping up and down until all slits are strung.
- Tape the other end to the back of the loom. (Now you have vertical “warp” threads.)
5. Start Weaving
- Thread a tapestry needle or simply use your fingers to weave the “weft” (different colored yarn or fabric strips) over and under the warp threads.
- Alternate the over-under pattern each row.
- Push rows down gently with your fingers or a ruler to keep them snug.
6. Finish & Remove
- When done, cut the warp threads at the back of the loom.
- Tie off pairs of threads to keep the weaving from unraveling.
- You now have a finished woven piece!
💡 Tips & Variations
- Use colored cardboard for a fun look.
- Make a circular loom by cutting a circle and making notches around the edge.
- Kids can weave nature items (long grasses, flower petals) for an Earth Day craft.
- Tape a small stick to the top to turn their weaving into a wall hanging.
Would you like me to make a printable template for a kid-sized cardboard loom (with the notches pre-marked)?
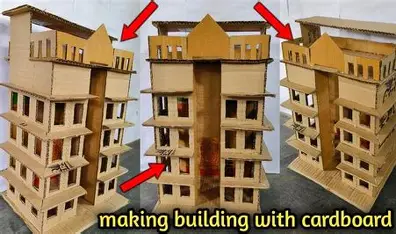
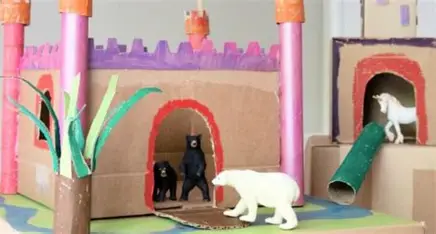
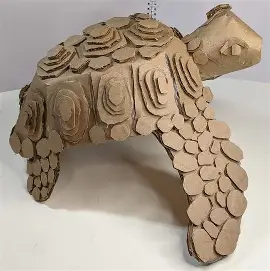
7. Create a Cardboard Art Forest
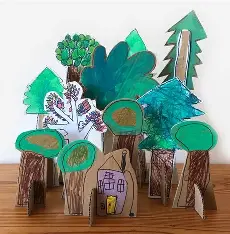
With this simple cardboard art project for kids, you can create an incredible enchanted forest. allows children to play creatively and enjoyably.
8. Make Cardboard Building Discs
Here’s how to make cardboard building discs — a simple open-ended toy kids can use to build towers, sculptures, and shapes (like wooden blocks, but free and recycled):
🌿 Materials
- Sturdy cardboard (shipping boxes or cereal boxes)
- Scissors or craft knife
- Pencil
- Circular object to trace (jar lid, cup, or compass)
📝 Steps
1. Trace Circles
- Use a cup, bowl, or lid to trace circles onto the cardboard.
- Make lots of them (20–30 is a good starter set).
- 2–3 inches in diameter works well for little hands.
2. Cut Out the Discs
- Carefully cut out each circle with scissors.
- Smooth edges so they’re safe for kids.
3. Cut Slots
- On each disc, cut 2 to 4 small slots about ½ inch deep from the edge toward the center.
- Space them evenly around the circle (like north-south, east-west).
- The slots should be just wide enough for another disc to slide in snugly.
4. Decorate (Optional)
- Kids can paint or color the discs before building.
- You can label different sets with numbers, colors, or shapes.
5. Build!
- Slide one disc’s slot into another disc’s slot to connect them.
- Keep adding discs to create 3D structures — towers, bridges, animals, flowers, etc.
💡 Tips & Variations
- Make different sizes (small, medium, large) to create variety.
- Use colored cardboard or glue scraps of colored paper on top for bright sets.
- Add longer slots to make discs “hug” sticks, straws, or popsicle sticks for hybrid builds.
- Store them in a fabric bag or recycled box for quick cleanup.
Would you like me to make a printable template with different disc sizes and slot positions so kids can trace and cut easily?
9. Make DIY Stamps with Cardboard
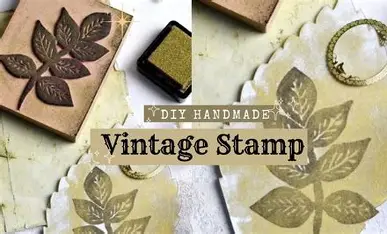
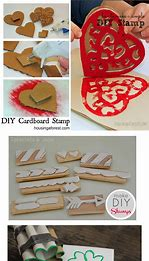
Create and design your own printing stamps.
10. Make a Cardboard Castle for Hours of Pretend Play
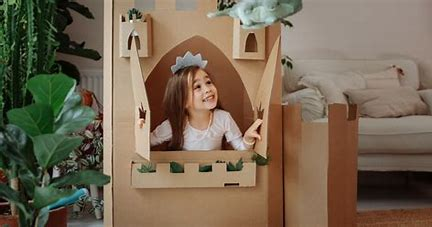
Here’s a super fun guide to make a cardboard castle — a big, hands-on craft that kids can use for hours of pretend play:
🌿 Materials
- Large cardboard boxes (appliance boxes are best, but any shipping boxes work)
- Scissors or craft knife (adult help)
- Ruler and pencil
- Tape or hot glue
- Paint, crayons, or markers
- Optional: fabric scraps (flags, curtains), toilet paper tubes (turrets), foil (armor)
📝 Steps
1. Gather and Plan
- Find one large box for the main castle and smaller boxes for towers.
- Sketch a simple layout first: main walls + 2–4 turrets.
2. Cut the Walls
- Cut open the large box so it forms a tall rectangle.
- Cut out doors and windows:
- A tall arch for the main door.
- Squares or rectangles for windows.
- Keep the cutouts to reuse as drawbridges or shields.
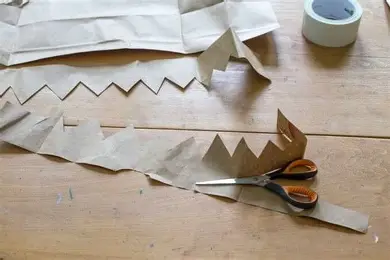
3. Add Battlements
- Along the top edges, cut out a “tooth” pattern (up-and-down squares) to look like castle walls.
4. Make Towers & Turrets
- Stack smaller boxes or use round oatmeal/Pringle cans to make towers.
- Tape or glue them to the corners of the main castle.
- Add cone-shaped “roofs” from paper or cardboard circles folded into cones.
5. Assemble
- Stand the walls upright and tape the corners together from inside for strength.
- Cut a flap at the main door to act as a drawbridge (use string to “raise” it).
6. Decorate
- Paint stones or bricks directly on the cardboard.
- Draw banners or crests with markers.
- Add fabric for curtains, flags, or a moat “bridge” rug.
- Use leftover cardboard to make shields, swords, or crowns for pretend play.
7. Play!
- Let kids bring in dolls, toy animals, or action figures.
- They can add furniture made from more cardboard: thrones, tables, treasure chests.
💡 Tips & Variations
- Mini version: Make a tabletop castle from cereal boxes for small toys.
- Foldable version: Keep walls as flat panels joined with duct-tape “hinges” so it folds away for storage.
- Theme it: Fairy-tale castle, medieval fortress, or even a space base.
- Let kids decorate themselves: Provide paints, crayons, stickers, or sponges to “stamp” stone shapes.
Would you like me to make a printable template (with wall sections, battlement outlines, and turret cones) that kids can trace and cut from cardboard?
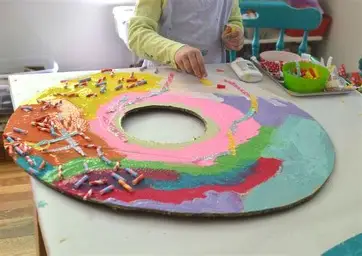
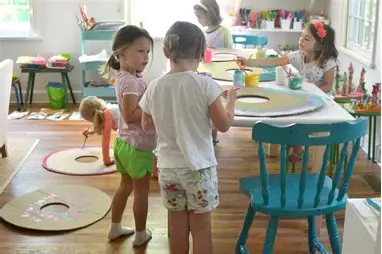
These enormous cardboard doughnuts will make you grin just by looking at them (via Art Bar Blog).
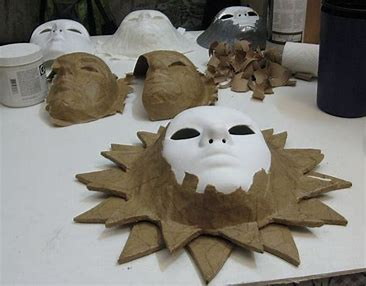
12. Make Cardboard Masks for Kids
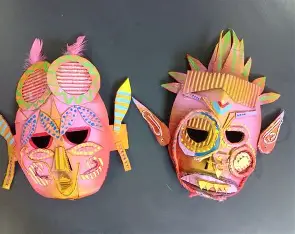
Here’s a simple guide to make cardboard masks for kids — perfect for pretend play, parties, or Earth Day crafts:
🌿 Materials
- Sturdy cardboard (cereal boxes for light masks or corrugated cardboard for stronger ones)
- Pencil and eraser
- Scissors or craft knife (adult help)
- Elastic string, ribbon, or yarn (to wear the mask)
- Paint, crayons, markers
- Optional: feathers, paper scraps, glitter, buttons, fabric, bottle caps
📝 Steps
1. Cut the Base Shape
- Draw a mask shape on cardboard (circle, oval, animal face, superhero style, etc.).
- Cut it out carefully.
2. Add Eye Holes
- Mark where the eyes should go and cut them out.
- Make sure they’re big enough for clear vision.
3. Make a Nose or Mouth Opening (optional)
- For animal or character masks, cut a small triangle or oval for a nose or mouth.
4. Decorate the Mask
- Paint or color the base.
- Glue on paper shapes, feathers, bottle caps, or fabric scraps to create patterns or features.
- Draw whiskers, scales, or designs directly on the cardboard.
5. Attach the Strap
- Punch a small hole on each side of the mask.
- Thread elastic or ribbon through and knot. Adjust length to fit the child’s head.
6. Wear & Play!
- Kids can be animals, superheroes, monsters, or invent their own characters.
💡 Tips & Variations
- Layered look: Cut extra cardboard shapes (ears, horns, crowns) and glue them on top.
- Half masks: Just cover eyes or forehead for a masquerade style.
- Use recycled decorations: magazine cutouts, tissue paper scraps, old fabric.
- Paint with natural colors: beet juice, turmeric water, or coffee for eco-friendly pigments.
- Make a set: Create a whole set of different masks for a “play theater” at home or school.
Would you like me to create a printable template pack of different mask shapes (animals, superheroes, crowns) that kids can trace and cut from cardboard?
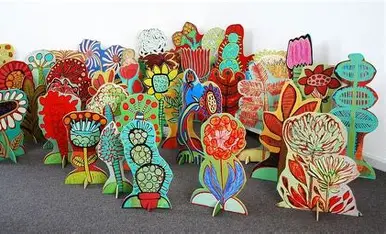
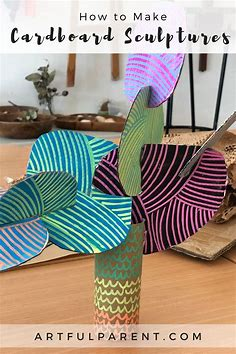
13. Make Colorful Cardboard Tree Sculptures
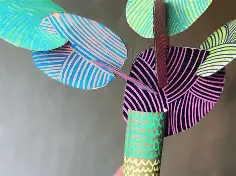
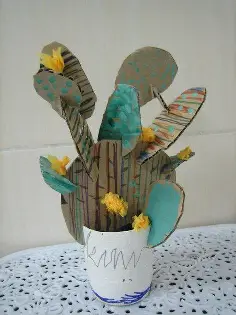
These happy cardboard trees are incredibly simple and enjoyable to construct.
14. Make Recycled Cardboard Tube Sculptures
Here’s a super easy way to make a recycled cardboard tube sculpture – a creative, open-ended craft for kids that uses toilet paper rolls, paper towel tubes, or any tubes you have:
🌿 Materials
- Cardboard tubes (toilet paper rolls, paper towel rolls, or shipping tubes)
- Scissors
- Glue or tape (hot glue for sturdier builds, adult help)
- Paint, markers, or crayons
- Optional: bottle caps, fabric scraps, colored paper for decorating
📝 Steps
1. Collect and Prep the Tubes
- Save a variety of cardboard tubes in different sizes.
- If needed, cut them into shorter lengths for variety.
2. Paint or Color the Tubes (optional)
- Before assembling, kids can paint or color the tubes.
- Bright colors make the sculpture look cheerful.
3. Cut Slots or Shapes
- Cut small slits into the sides of the tubes so they can slide into each other.
- Or cut shapes (triangles, circles, squares) out of the tubes to make them look like windows.
4. Build the Sculpture
- Stand tubes upright, lay them sideways, or stack them.
- Use glue or tape to hold them together.
- Encourage kids to experiment: towers, bridges, tunnels, abstract shapes, or even animals.
5. Add Details
- Glue bottle caps, paper flags, or fabric scraps to the tubes for extra flair.
- Add little toy figures or nature items inside the tubes for surprise elements.
6. Display
- Place the finished sculpture on a tray or cardboard base so it can be moved.
- You can keep adding tubes over time to make it bigger.
💡 Tips & Variations
- Combine tubes and cardboard discs (like you made earlier) for connectors.
- Use natural materials (sticks, leaves) with the tubes for an Earth-themed sculpture.
- Make modular pieces (painted tubes with slots) so kids can rebuild and redesign.
- Add a title card — let kids name their sculpture like an art exhibit.
Would you like me to design a simple template sheet showing different ways to cut and slot the tubes (so kids can follow and experiment)?
15. Make a Rainbow Cardboard Sculpture

Use painted cardboard rainbows to create a vibrant tiered rainbow sculpture.
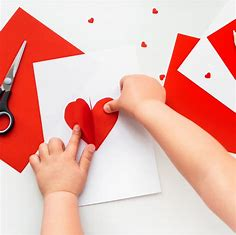
16. Make DIY Valentines for Kids
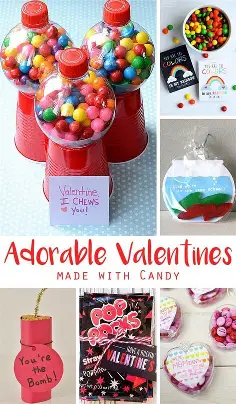
Here’s a collection of DIY Valentine’s Day cards and crafts that kids can make easily, using simple or recycled materials. They’re fun, low-cost, and creative! ❤️
🌿 Materials
- Construction paper, old greeting cards, or recycled cardboard
- Scissors
- Glue stick or tape
- Markers, crayons, or colored pencils
- Optional: buttons, stickers, fabric scraps, tissue paper, glitter, magazine cutouts
📝 Ideas & How-To
1. Folded Heart Cards
- Fold a piece of paper in half.
- Cut out a half-heart shape along the fold.
- Open to reveal a symmetrical heart card.
- Decorate with drawings, messages, or collage pieces.
2. Button Hearts
- Cut a heart from cardboard or paper.
- Glue colorful buttons all over the shape.
- Write a cute message like “You have my heart!”
3. Crayon Shaving Hearts (recycled crayons)
- Shave old crayons onto wax paper.
- Cover with another sheet and iron (adult help) to melt.
- Cut the cooled sheet into hearts for stained-glass-style Valentines.
4. Nature Valentines
- Glue pressed flowers or leaves to cardstock hearts.
- Add messages with markers: “You make my heart bloom!”
5. Puzzle Piece Valentines
- Use old puzzle pieces to make a heart shape on a card.
- Paint them red or pink first for a fun look.
- Write: “We fit together!”
6. Lollipop or Pencil Valentines
- Cut out a heart from cardstock.
- Punch two small holes.
- Slide a lollipop or pencil through as a “gift” attached to the Valentine.
7. Magazine Collage Hearts
- Cut heart shapes from recycled magazines or newspapers.
- Glue them onto a folded card.
- Kids can mix patterns for a mosaic effect.
8. Secret Message Valentines
- Write a message with a white crayon.
- Give the card with a watercolor set — the recipient paints over it to reveal the secret.
💡 Tips
- Let kids write their own short messages or jokes on the cards.
- Use recycled envelopes or make your own by folding paper.
- Turn the activity into a Valentine’s Day craft station with all supplies laid out.
Would you like me to put together a printable template pack (with heart outlines, sayings, and card designs) that kids can color and cut out?
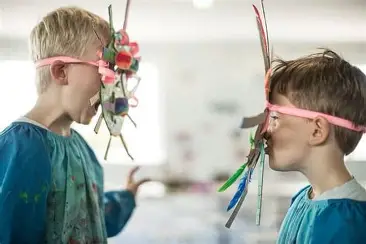
17. Make Miro-Inspired Magic Animal Masks
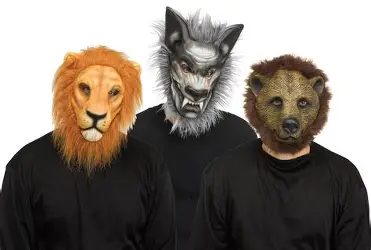
Use cardboard, paint, and a few other supplies to make vibrant, exotic animal masks.
18. Create Monochrome Art Collages
Here’s how kids (or adults!) can create monochrome art collages — a fun, color-focused activity using mostly recycled or low-cost materials:
🌿 What “Monochrome” Means
It’s art made mostly with one color (blue, red, green, yellow, etc.) and its shades. This helps kids explore tone, texture, and composition without worrying about mixing lots of colors.
🌱 Materials
- Old magazines, newspapers, or scrap paper
- Tissue paper, fabric scraps, ribbon, buttons, bottle caps (in the same color family)
- Scissors
- Glue stick or white glue
- Cardstock, cardboard, or recycled box as the base
- Optional: paint, crayons, or markers in the chosen color for extra touches
📝 Steps
1. Pick a Color
- Each child chooses a color (e.g., blue).
- Collect anything from around the house in that color: papers, wrappers, fabric, beads.
2. Prepare the Base
- Use a sheet of cardboard or thick paper as the background.
- You can paint or color it lightly in the chosen color to cover the base.
3. Cut & Arrange Pieces
- Cut out shapes, textures, and patterns from your collected materials.
- Encourage a mix of light, medium, and dark shades of the color.
4. Glue the Pieces Down
- Arrange the shapes into an image (animal, landscape, abstract) or just an abstract pattern.
- Glue them down securely.
5. Add Extra Details
- Use markers, paint, or crayons in the same color to add lines, outlines, or dots.
- Add 3D elements like buttons or small objects in the same color.
6. Display
- Mount the collage on a wall, or combine everyone’s to make a big rainbow gallery (each person a different color).
💡 Tips & Variations
- Challenge version: Only use found materials (scraps, packaging, nature items).
- Textured collages: Mix paper, fabric, and small objects for a tactile piece.
- Seasonal themes: All-green trees for Earth Day, all-red hearts for Valentine’s Day, all-white winter scenes.
- Learning twist: Kids can name shades (turquoise, navy, mint) while working.
Would you like me to make a printable worksheet (with ideas, color palettes, and a collage layout guide) for this activity?
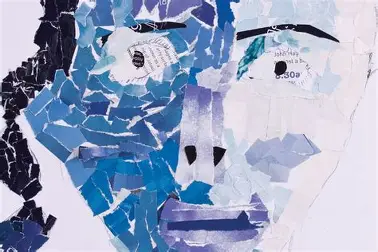
19. Mixed Media Collage Portraits for Kids
These lovely collage portraits are a fantastic way to repurpose a cardboard box.
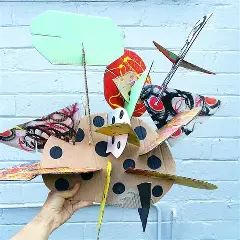
20. Make Cardboard Robot Puppets that Move

Discover a basic weaving project for children using cardboard looms and leftover fabric. After that, make a stunning artwork to display in your house!
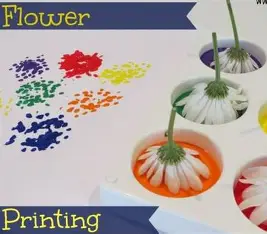
Here’s a simple guide to do flower printing with kids — a beautiful, eco-friendly art activity that’s perfect for spring, Earth Day, or just a creative afternoon:
🌿 Materials
- Fresh flowers (with interesting shapes, petals, or textures)
- Paper (white, kraft, or recycled) or fabric (like old sheets)
- Washable paint or fabric paint (if printing on fabric)
- Paintbrush or sponge
- Optional: tray or palette for the paint
- Aprons or old shirts (to protect clothes)
📝 Steps
1. Choose Flowers
Pick a variety of flowers with different shapes. Daisies, ferns, and leaves work great too.
2. Prepare Your Work Area
Cover the table with newspaper or an old cloth. Lay out paints, brushes, and paper/fabric.
3. Apply Paint to the Flower
Dip the flower head lightly into paint or use a brush/sponge to coat petals evenly.
(Too much paint will blur the print — use a thin layer.)
4. Press Onto Paper
Flip the flower paint-side down on your paper or fabric.
Press gently but firmly with your hand or a clean sponge.
5. Lift Carefully
Peel the flower off slowly to reveal its printed shape.
6. Repeat & Overlap
Use different flowers, colors, and angles to make patterns.
Try overlapping prints for a layered effect.
7. Add Details (Optional)
Use markers or paintbrushes to add stems, outlines, or patterns after the prints dry.
💡 Tips & Variations
- Use leaves or grasses for interesting textures.
- Try natural dyes (beet juice, turmeric, coffee) instead of paint for an eco-friendly option.
- Print onto recycled cardboard or make greeting cards with the prints.
- Let kids experiment by hammering fresh flowers between paper for a “botanical dye” look (adult supervision).
- Combine with a monochrome theme: pick one color of paint for a unified design.
Would you like me to give you a step-by-step printable sheet (with pictures) for flower printing that kids can follow on their own?