Here’s a list of unique upcycled garden ideas you can try to bring creativity and sustainability into your outdoor space:
🌱 Planters & Containers
- Colander Planters – Old kitchen colanders make excellent hanging planters; the built-in holes allow for perfect drainage.
- Boot & Shoe Gardens – Repurpose worn-out boots or shoes as quirky succulent planters.
- Tin Can Towers – Stack painted tin cans to create vertical herb gardens or flower towers.
- Drawers & Dresser Gardens – Use old wooden drawers as tiered planters for cascading flowers or strawberries.
- Teapot & Teacup Gardens – Plant herbs or small flowers in chipped or mismatched tea sets.
🪴 Vertical & Space-Saving Designs
- Pallet Wall Garden – Turn a discarded wooden pallet into a vertical herb garden or decorative flower wall.
- Gutter Gardens – Mount old gutters on a fence or wall to grow trailing plants or lettuce.
- Ladder Shelf Planters – Use an old wooden ladder as a rustic stand for potted plants.
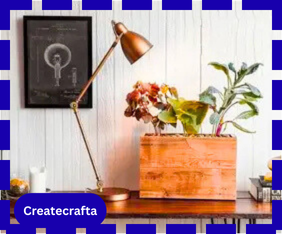
- Hanging Light Fixture Planters – Upcycle old chandeliers or pendant lights into hanging succulent planters.
🪵 Garden Décor from Salvaged Materials
- Bicycle Wheel Trellis – Old bike wheels make unique climbing plant supports.
- CD Mosaic Stepping Stones – Break old CDs to create shimmering mosaic stepping stones.
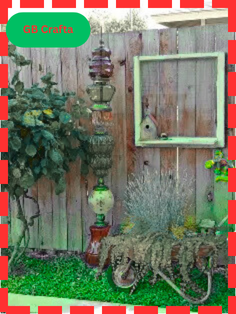
- Bottle Tree Sculpture – Place colorful glass bottles on old branches or rods for a garden art piece.
- Rustic Tool Art – Use broken rakes, shovels, or hoes as quirky plant supports or wall art.
💧 Water & Wildlife Features
- Bathtub Pond – Convert an old bathtub into a backyard water garden with lilies and small fish.
- Fountain from Stacked Buckets – Turn old galvanized buckets into a cascading fountain.
- Birdbath from a Dish & Plant Stand – Use a chipped serving dish on a plant stand as a birdbath.
- Bee & Butterfly Hotels – Fill wooden boxes or old tin containers with bamboo sticks for pollinator habitats.
🌿 Functional Upcycles
- Plastic Bottle Greenhouse – Build a mini greenhouse from clear plastic bottles.
- Tire Planters – Paint old tires bright colors and use them for raised flower beds or playground-style gardens.
- Crate Compost Bin – Make a rustic compost bin from stacked wooden crates.
- Garden Tool Rack from Pallets – Organize rakes, spades, and hoses on an upcycled pallet rack.
Would you like me to group these ideas into “easy weekend projects” vs. “bigger projects” for you? (That way, you’d instantly see which ones you could try right away.)
- Reimagined Elegant Tea Saucer and Plate Jeweled Flower

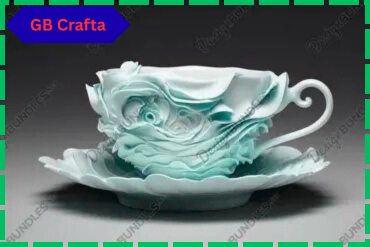
Creative and distinctive accents can make a garden glow.
When layered for an artistic effect, a sophisticated tea saucer and plate transform into a lovely flower. A big jewel in the middle catches sunlight, making for a striking display.
This charming ornament would look great in a front flower bed or make a considerate present for gardening-loving friends. These concepts highlight individual individuality while bringing glitz to outdoor areas.
2. Giddy Up Fun and Fabulous Horseshoe Flower Trio

Here’s a fun write-up you could use for a project like that:
🌸 Giddy Up Fun & Fabulous Horseshoe Flower Trio
Turn old, rusty horseshoes into a charming garden or porch decoration with this simple upcycled craft! This “flower trio” uses three horseshoes to form whimsical blooms that celebrate country charm with a modern twist.
You’ll Need:
- 3 old horseshoes (cleaned and lightly sanded)
- Strong metal adhesive or welding (for a sturdier, permanent hold)
- Spray paint or outdoor acrylic paint (bright colors for petals, green for stems/leaves)
- Metal rods or rebar (for stems)
- Optional: decorative beads, buttons, or washers for flower centers
How to Make:
- Clean & Prep – Scrub the horseshoes with a wire brush to remove dirt/rust.
- Arrange the Petals – Lay three horseshoes in a circular pattern so they resemble a flower.
- Secure Together – Either weld or glue the shoes together where they touch.
- Paint & Decorate – Spray or brush on your favorite colors—think bold sunflowers, pastel daisies, or even patriotic red, white & blue!
- Add the Stem – Attach your metal rod to the back as the stem; paint it green.
- Finish with a Center – Glue a large button, bead, or metal washer in the middle for extra flair.
Display Ideas:
- Plant your horseshoe flowers directly into garden beds.
- Place them in large outdoor planters as “blooming sculptures.”
- Mount them on a fence or barn wall for rustic yard art.
Would you like me to create a step-by-step illustration of how to arrange the horseshoes into the flower shape? (It can make it easier to visualize before you start.)
3. Grillin Up Some Garden Goodness Yard Art Idea
An enjoyable garden project is made possible by a larger grill.
A few easy measures may turn a coal barbecue into a vibrant planter. Your outdoor area will come to life if you spray it with a deep red colour, and it will feel more fresh if you fill it with dirt and flowers rather than charcoal.
In addition to becoming garden art, this inventive idea raises your plants’ profile so they are more noticeable at parties. Having this distinctive touch in your garden makes grilling even more enjoyable.
4. Natural Brown Burlap and Nautical Knot Porch Planter
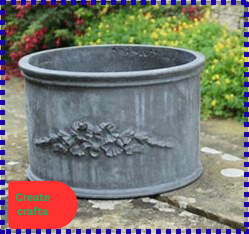

Here’s how you can make a Natural Brown Burlap and Nautical Knot Porch Planter — a rustic yet coastal-inspired piece that combines earthy textures with seaside charm:
🪴 Materials You’ll Need
- Large planter pot (plastic, ceramic, or even an upcycled bucket)
- Natural brown burlap fabric (enough to wrap the pot)
- Jute or sisal rope (thick, for the nautical knot)
- Hot glue gun or outdoor-safe adhesive
- Scissors
- Optional: White paint for rope accents or a stencil
📝 Step-by-Step Instructions
- Prepare the Planter
- Clean your pot or container to ensure the burlap and glue adhere well.
- If the pot has bold colors or patterns, give it a quick coat of neutral spray paint to avoid showing through the burlap.
- Wrap with Burlap
- Cut a piece of burlap large enough to wrap completely around the pot with a 2–3 inch overlap at the top and bottom.
- Wrap the burlap snugly and secure it with hot glue or an outdoor adhesive along the back seam.
- Fold excess burlap under the bottom of the pot and glue it down to keep it neat.
- Create the Nautical Knot Accent
- Cut a length of rope long enough to wrap once or twice around the pot.
- Tie a classic nautical knot (like a carrick bend, square knot, or figure-eight knot) at the front of the planter.
- Glue or tack the rope in place so it stays taut.
- Add Finishing Touches
- Optionally dry-brush the rope with white paint for a weathered “beachy” look.
- Place a liner inside before planting to protect the burlap from soil moisture.
- Fill with lush greenery, ferns, or colorful flowers for a porch-ready look.
🌊 Styling Tips
- Pair with a lantern, driftwood, or seashells for a full coastal vignette.
- Make two identical planters to frame your porch entryway.
- Plant ornamental grasses or white flowers for a breezy, beachy feel.
Would you like me to include instructions for tying a few simple nautical knots (like the carrick bend or bowline) to use as decorative wraps on the planter?
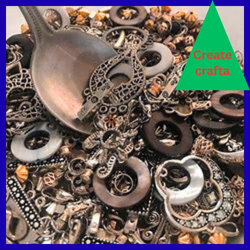
5. Unique Utensil Wind Chime Upcycling Idea
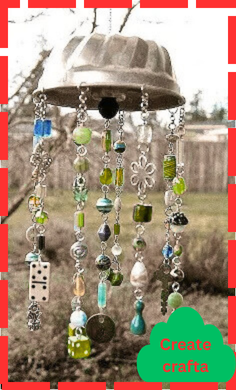
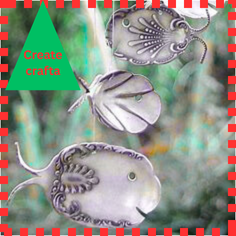
Making wind chimes out of used kitchenware is a charming way to decorate your front porch.
You may find mismatched forks, knives and spoons that require a new use as you search through yard sales, flea markets and discount bins. To hang these funny pieces together, clear string is necessary.
While lounging in your outside area, take in the soft noises this delightful addition creates. This easy DIY makes any home environment more peaceful and beautiful.
6. Mostly Mosaic Masterpiece Garden Stepping Stone
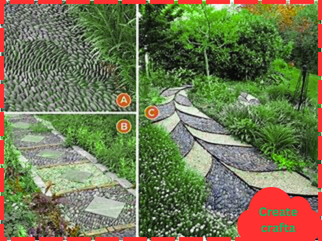
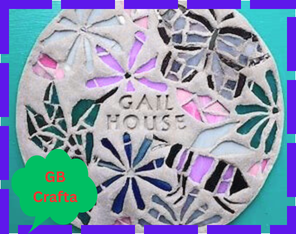
Got it — you’re drawn to mosaic-style stepping stones as an upcycled garden idea. Here’s a focused guide for making your own “Mosaic Masterpiece Garden Stepping Stones” from recycled materials:
🌟 What You’ll Need
- Old ceramic tiles, broken china, or CD/DVD fragments for a shimmering look
- Shallow plastic plant saucers or cake pans as molds
- Quick-set concrete or stepping stone mix
- Cooking spray (to release the stone from the mold)
- Protective gloves & eye protection
- Optional: glass beads, marbles, shells, or stones
📝 Step-by-Step Guide
- Prepare Your Mold
- Coat the inside of your pan or saucer with cooking spray so the stone pops out easily.
- Mix & Pour Concrete
- Follow the instructions on your concrete mix.
- Pour it into the mold, filling to about 2 inches thick.
- Tap the mold to release air bubbles.
- Design Your Mosaic
- While the concrete is still wet, press your mosaic pieces (broken tiles, china, glass, marbles, etc.) into the surface.
- Arrange a pattern — flowers, spirals, or geometric designs work beautifully.
- Smooth & Set
- Gently press down on your pieces so they’re level with the concrete surface.
- Let the stone cure for 24–48 hours.
- Release & Finish
- Pop your stepping stone out of the mold.
- If desired, brush grout between the mosaic pieces for a more defined look.
- Seal with an outdoor-grade sealer to protect your art from weather.
🌿 Upcycling Tips for a Unique Look
- Use old mirror pieces for a sparkly effect.
- Incorporate keys, coins, or buttons for a mixed-media stone.
- Make a series of stones spelling out a word or phrase to guide visitors through your garden.
- Collect flat beach stones or shells to add a natural coastal feel.
Would you like me to give you pattern templates (like sunbursts, spirals, or mandalas) you can print or trace under your mold to guide your mosaic design?
7. Charming Soup Can Special Individual Fence Planters
Cans of soup and vegetables can be recycled to make interesting planters that improve your outdoor space.
This low-cost technique makes it possible to create a gorgeous floral arrangement without spending a lot of money. These vibrant pots bring appeal to the garden and make effective use of available space when arranged along a wooden fence.
These straightforward objects may be transformed into striking decorations that liven up tiny spaces with a little imagination. Beautiful blooms don’t have to be expensive or difficult to enjoy!
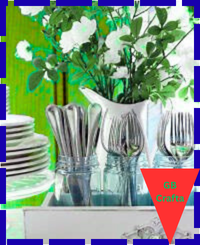
8. Water Color Glass and Pretty Plated Flower Figure
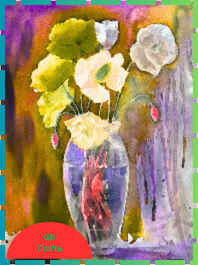
Got it — you’re talking about decorative upcycled garden art pieces, like using old glass and plates to make colorful accents. Here’s how you can create both of those ideas:
🎨 Watercolor Glass Garden Decor
This is a way to turn discarded glassware into shimmering, watercolor-style garden art.
- What you need: Old glass bottles, jars, or vases + glass paint (or food coloring with clear glue for a DIY version).
- How to make:
- Clean the glass thoroughly.
- Mix glass paint or clear glue with drops of food coloring to make a watercolor effect.
- Swirl or brush it inside or outside the glass for a marbled look.
- Let dry and seal with a clear outdoor spray (optional).
- Arrange them on stakes, hang them, or cluster them on a sunny windowsill or garden edge so they catch the light.
💡 Looks stunning when sunlight hits it — like stained glass but softer and more “watery.”
🌸 Pretty Plated Flower Figures
This is a whimsical upcycle where you turn old plates and dishes into “flowers” on stakes for the garden.
- What you need: A mix of old plates, saucers, small bowls, and a strong adhesive (like E6000) + metal rods or copper pipes for stems.
- How to make:
- Choose a large plate as the “flower base.”
- Stack a smaller plate or bowl in the center as the “flower middle.”
- Glue each layer securely and let dry overnight.
- Attach the back to a rod or pipe (this will be the “stem”).
- Paint or leave as-is — mix patterns for a colorful, mosaic garden look.
- Push the rod into the soil so the flower stands upright in your garden.
💡 Great way to use mismatched thrift-store plates — they look like giant daisies or sunflowers when assembled.
Would you like me to put together a step-by-step photo-style guide (with sketches of each step) for these two projects? It would make them super easy to follow.
9. Antique Pulley Hanging Lantern Sweet Succulent Upcycled Holder
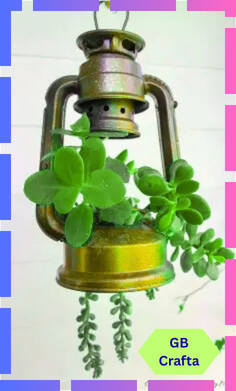
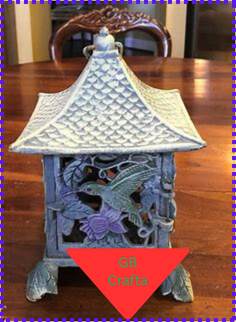
Repurpose unused home objects by creating a lovely succulent holder out of an antique pulley.
Whether they have waxy leaves or vines, your favourite plants can now be housed in the two lanterns supported by this robust design. Even though the old lanterns are no longer used to light pathways, their presence might nonetheless improve your garden haven.
Hanging this unusual planter in a comfortable porch nook gives your outside space a revitalising burst of greenery. Savour the way these imaginative suggestions revitalise lost gems!
10. Wild and Wonderful Wine Bottle Outdoor Torch Lamp
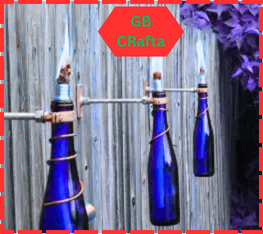
Here’s how you can make a Wild and Wonderful Wine Bottle Outdoor Torch Lamp — a striking, upcycled project that blends function and style for your garden or patio:
🛠️ Materials Needed
- Empty wine bottle (clear or colored glass works best)
- Tiki torch replacement wick (cotton or fiberglass)
- Tiki torch fuel (citronella is great for keeping bugs away)
- Copper coupling (½ inch or to fit your bottle opening)
- Plumber’s tape (for snug wick fit)
- Funnel (to pour fuel easily)
- Decorative stones or beads (optional – for weight & looks)
- Wire or bottle holder bracket (if mounting to a fence or wall)
📝 Instructions
- Clean the Bottle
Remove all labels and rinse out your wine bottle. Dry completely. - Prepare the Wick Holder
- Take the copper coupling and wrap plumber’s tape around the narrower end until it fits snugly into the bottle neck.
- Insert the wick into the coupling, leaving about ½–1 inch exposed above the coupling.
- Add Decorative Fill (Optional)
Place decorative stones, glass beads, or sand at the bottom of the bottle to weigh it down and add color. - Pour in the Fuel
Using a funnel, fill the bottle about ¾ full with tiki torch fuel. - Assemble the Torch
- Insert the wick holder into the bottle.
- Let the wick soak for at least 30 minutes before lighting.
- Mount or Place the Bottle
- If you want it freestanding, place it on a sturdy surface.
- For a wall/fence installation, use a bottle bracket or wrap heavy-gauge wire securely around the bottle and anchor it to a post.
- Light It Up!
Once the wick is saturated, light it carefully. Adjust the wick length to control flame size.
🌟 Tips to Make It Extra Wonderful
- Paint or etch the bottle for a personalized look.
- Use different colored bottles for a vibrant outdoor setup.
- Hang multiple bottles at varying heights for a magical effect.
- Add citronella or eucalyptus oil to the fuel for mosquito repelling.
Would you like me to give you a few unique design variations (like hanging wine bottle torches or table centerpiece versions)?
11. Towering Glass Bottle Decorative Garden Flowers
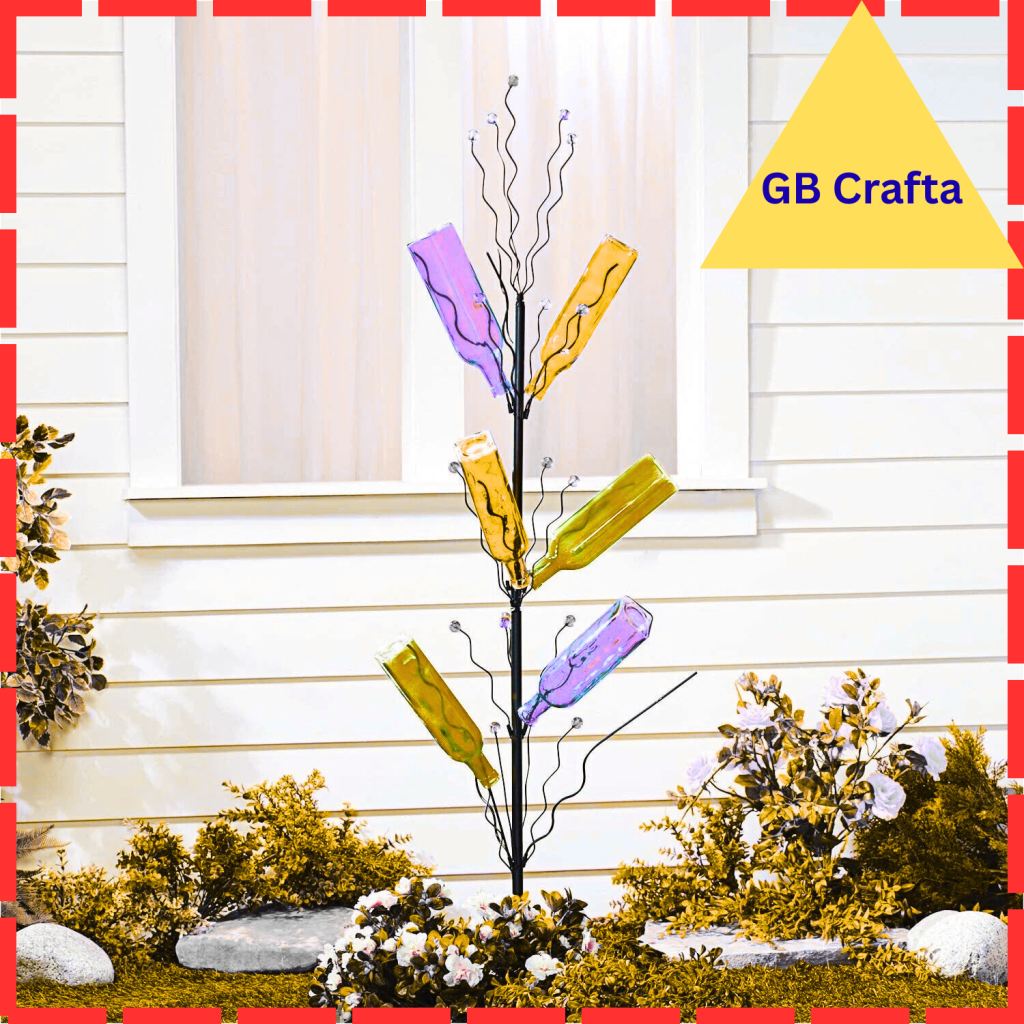
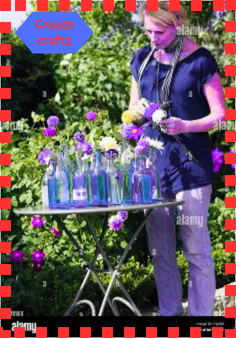
Any outdoor space can be given a distinctive appearance with three tall glass bottles and wooden flowers.
The attractiveness of your garden is increased by these striking decorations, which give it an amazing height and presence. They can be arranged in many ways and add cosiness to the room by being grouped together or dispersed throughout.
The colourful glass bottles are supported by the strong wood, which keeps them in position and highlights their beauty. This charming combo will undoubtedly give your backyard personality and cosiness this summer.
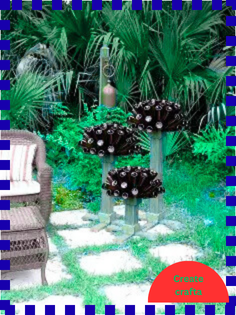
12. Upcycled Slender Spindle Single Bird House Perch Posts
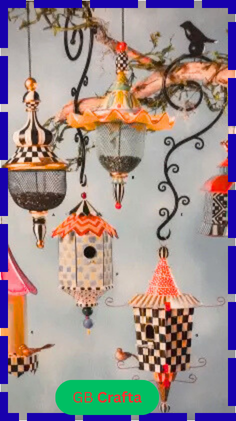

Here’s a simple and creative idea for making Upcycled Slender Spindle Single Bird House Perch Posts:
🛠️ Materials Needed
- Old chair or stair spindles (the slender wooden rods you often see in banisters or furniture)
- Wooden base or garden stake (to anchor the post into the ground)
- Small birdhouse (lightweight – can be store-bought or handmade)
- Screws or nails
- Drill and screwdriver
- Exterior wood paint or sealant (optional, for weatherproofing)
📝 Instructions
- Find a Spindle
Look for an old wooden spindle from a discarded chair, table, or banister. Choose one with a slender, decorative shape for added charm. - Prepare the Post
- Sand down rough edges.
- Apply a coat of exterior paint or sealant to protect it from weather.
- Attach the Base
Secure the spindle to a wooden base or stake using screws or nails.- If you want to push it into the ground, use a pointed garden stake.
- For a freestanding option, use a heavier wooden base.
- Add the Birdhouse
- Drill a small pilot hole in the top of the spindle.
- Screw the birdhouse directly onto the spindle top.
- Create the Perch
If your birdhouse doesn’t have a perch, drill a small hole beneath the entrance and insert a short wooden dowel or leftover spindle piece. - Install Outdoors
Place the finished birdhouse perch post in your garden, yard, or patio.
🌟 Tips to Make It Special
- Use different spindle styles for a whimsical look if making multiple posts.
- Paint the spindles in bright colors or natural wood stains.
- Add small decorative hooks to hang planters or feeders below the birdhouse.
- Plant flowers or tall grasses around the base for a natural effect.
Would you like me to sketch out a visual guide/diagram for this (so you can see how it comes together)?
13. Red Hummingbird Feeder Chandelier Upcycling Idea

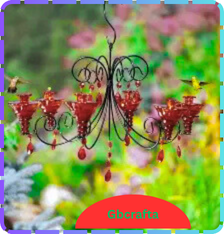
When cleverly recycled, a brilliant red chandelier becomes a visually striking hummingbird feeder.
This distinctive design features five feeders that draw a vibrant crowd of these endearing birds. If you place it close to a window, you can enjoy lovely views of their lively movement.
This ingenious concept gives any outdoor area flair and functionality. Savour the joyous scene as nature pays you a visit in style.
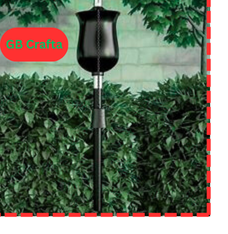
14. Solar Light Spectacular Outdoor Upcycled Centerpiece
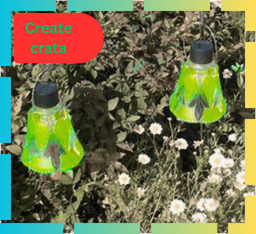
Here’s how to create a Solar Light Spectacular Outdoor Upcycled Centerpiece — a beautiful, eco-friendly decoration for your patio, balcony, or garden table:
🛠️ Materials Needed
- 1–3 solar garden lights (the kind with removable stakes)
- A large glass jar, vase, or upcycled container (mason jar, lantern, old teapot, etc.)
- Decorative fillers like pebbles, marbles, shells, or glass beads
- Wire or twine (optional, for hanging)
- Spray paint or glass paint (optional, for color or patterns)
📝 Instructions
- Choose Your Base
Select an upcycled container — a large mason jar, metal bucket, glass vase, or even an old birdcage. Make sure it’s clean and dry. - Prepare the Solar Lights
- Remove the stakes from the solar lights, leaving just the light tops.
- Check the solar panels and wipe them clean for maximum charging.
- Add Decorative Fillers
Place stones, shells, beads, or colored glass inside the container to weigh it down and create a glowing effect when lit. - Insert the Solar Lights
Nestle the solar light tops into the container so the panels are exposed to sunlight.- For jars or vases, place them directly on top of the filler.
- For taller containers, use a bit of foam or gravel to hold them at the right height.
- Optional Customization
- Paint or etch the glass with patterns (stars, leaves, swirls) for a magical glow.
- Wrap the container in twine, rope, or copper wire for a rustic look.
- Hang small versions using wire or chain for a chandelier-style effect.
- Charge & Enjoy
Set your centerpiece where it can charge during the day. As night falls, your upcycled masterpiece will glow automatically, creating a warm, eco-friendly ambiance.
🌟 Extra Ideas to Make It Spectacular
- Use different heights of jars or vases for a layered centerpiece look.
- Add tiny faux plants or succulents around the solar lights for a mini garden effect.
- Cluster several solar-lit jars together on a tray or in a crate for a “light garden” centerpiece.
- Use colored glass bottles to create a rainbow glow at night.
Would you like me to make a step-by-step photo-style guide layout (like a mini Pinterest tutorial) for this project?
15. Tiered Corner Drawer Full of Flowers Upcycled Garden Goodie
A flower-filled tiered corner drawer made from spare wood can bring elegance to your yard.
Three drawers transform trash into something extraordinary by providing beautiful homes for colourful flowers. Each drawer’s decorative knobs add character to the design and improve its visual appeal.
In addition to adding colour to a nook, this planter makes areas welcoming.