Easy to Make Paper Craft For Kids


Sure, here’s a simple and fun paper craft project for kids: making paper butterflies.
Materials you’ll need:
1. Colored paper or construction paper
2. Scissors
3. Markers or crayons
4. Pipe cleaners (optional, for antennas)
5. Glue or tape (optional)
Instructions:
1. Start by choosing the color for your butterfly’s wings. You can use one color or multiple colors for a more colorful butterfly.
2. Fold the paper in half horizontally (like a book) and cut along the fold to create two equal-sized rectangles.
3. Take one of the rectangles and fold it in half lengthwise (hot dog style). This will be the body of your butterfly.
4. On the folded rectangle, draw a butterfly’s body shape. It should look like an elongated oval with a small section in the center for the butterfly’s body. Leave some space above the body shape for the wings.
5. Carefully cut out the body shape, making sure not to cut through the folded edge. When you unfold it, you should have a butterfly body with two wings.
6. If you’d like to add antennas to your butterfly, cut two small pieces of pipe cleaner and glue them to the top of the butterfly’s body.
7. Now, let’s decorate the wings! Use markers or crayons to draw colorful patterns, dots, or stripes on the wings. Be creative and have fun with your designs!
8. Once you’ve decorated the wings, you can also add some eyes and a smile to the butterfly’s body to give it a friendly face.
9. If you’d like your butterfly to be able to stand up, you can attach a small piece of folded paper or a strip of paper to the back of the body as a support.
10. Your paper butterfly is complete! You can make more butterflies with different colors and designs to create a beautiful paper butterfly garden.
Feel free to experiment with different colors, sizes, and patterns to make a whole flock of colorful paper butterflies. It’s a great way to spark creativity and have some crafty fun with kids.
Also Like:-11 Earth Day Crafts.
Paper Red Lantern Craft


Creating a paper red lantern is a fun and creative craft project. Red lanterns are often associated with celebrations in many Asian cultures, including Chinese New Year and the Mid-Autumn Festival. Here’s a step-by-step guide to making your own paper red lantern:
Materials you’ll need:
1. Red construction paper or cardstock
2. Scissors
3. Ruler
4. Pencil
5. Glue or tape
6. String or ribbon (optional)
Instructions:
1. Prepare Your Materials: Gather all the materials you’ll need for this craft.
2. Cut the Paper: Take your red construction paper and cut it into a rectangle. The size of the rectangle will determine the size of your lantern, so you can choose the dimensions based on your preferences. A common size is around 8 inches by 12 inches.
3. Fold the Paper: With the red paper in a horizontal orientation (landscape), fold it in half lengthwise. You should now have a long, narrow rectangle.
4. Mark and Cut Slits: On the folded edge of the paper (the long edge), use your ruler and pencil to mark evenly spaced lines, leaving about an inch from the edge unmarked. These lines will be the slits in your lantern. Make sure the lines are parallel to the folded edge.
5. Cut Along the Lines: Carefully cut along the marked lines, starting from the folded edge and stopping about an inch from the open edge. Be sure not to cut all the way through to the open edge; leave that inch uncut.
6. Unfold the Paper: Carefully unfold the paper, and you’ll see the slits you’ve created.
7. Form the Lantern: Bring the short ends of the paper together to form a cylinder, with the slits running vertically. Overlap the inch of uncut paper at the top with the inch of uncut paper at the bottom. Secure the overlapping edges using glue or tape. This creates the basic lantern shape.
8. Add a Handle (Optional): If you want to hang your lantern, cut a strip of paper and attach it to the top of the lantern as a handle. You can also use string or ribbon for this purpose.
9. Decorate (Optional): Get creative and decorate your red lantern with drawings, symbols, or other decorative elements. You can use gold or black markers to add traditional Chinese designs or your own unique patterns.
10. Display or Hang: Your paper red lantern craft is now complete! You can display it on a table or hang it up to add a festive touch to your space.
Remember to exercise caution when using scissors and glue, especially if children are involved in this craft. Enjoy your beautifully crafted red lantern!
Lantern Paper Craft For Home Decor


Creating a lantern paper craft for home decor can be a fun and creative project. You can make colorful lanterns to add a cozy and inviting atmosphere to your living space. Here’s a step-by-step guide on how to make a simple paper lantern:
Materials you’ll need:
1. Colored or patterned paper
2. Scissors
3. Ruler
4. Pencil
5. Glue or double-sided tape
6. String or ribbon
7. Battery-operated tea light (for safety)
Instructions:
1. Choose your paper: Pick out the colored or patterned paper you’d like to use for your lantern. You can use a single color or mix and match different papers for a vibrant look.
2. Measure and cut: Determine the size of your lantern. A common size is about 8 inches by 8 inches (20 cm by 20 cm). Using a ruler and pencil, mark the dimensions on your paper and cut it out.
3. Fold the paper in half: Fold your paper in half diagonally, creating a triangle. Make sure the edges are aligned, and then crease the fold.
4. Mark and cut slits: Along the folded edge (the longest side of the triangle), mark evenly spaced points about 1 inch (2.5 cm) apart. These marks will serve as guides for cutting slits.
5. Cut slits: Starting from the folded edge, cut along the marked points towards the open edge of the triangle. Leave about 1 inch (2.5 cm) uncut at the top. These slits will create the decorative openings in your lantern.
6. Unfold the paper: Carefully unfold the paper, revealing the triangular shape with slits.
7. Form a cylinder: Bring the two short ends of the triangle together, overlapping them slightly, and glue or tape them together to form a cylinder. Ensure that the slits are on the outside of the cylinder.
8. Create the top and bottom: Fold and glue/tape one end of the cylinder closed. This will be the bottom of your lantern. Repeat the same for the other end, but leave it open for now; this will be the top.
9. Add a handle: Cut a piece of string or ribbon, and glue or tape it inside the open end of the lantern to create a handle.
10. Decorate (optional): You can further decorate your lantern with stickers, additional cutout shapes, or even paint if you like.
11. Insert a tea light: Place a battery-operated tea light inside your lantern, making sure it’s secure and won’t fall over.
12. Hang or place your lantern: Your paper lantern is now ready to be hung or placed on a flat surface. Be sure to keep it away from open flames or heat sources, as paper is flammable.
Enjoy the warm and cozy ambiance your homemade paper lantern adds to your home decor! You can create multiple lanterns in different colors and sizes to personalize your space even more.
DIY Beautiful Bee Lantern Craft Using Fruit Foam Net


Creating a beautiful bee lantern craft using a fruit foam net is a unique and creative project that can add a touch of nature-inspired decor to your home. Here’s a step-by-step guide on how to make this charming DIY bee lantern:
Materials you’ll need:
1. Fruit foam net (from packaging like oranges or lemons)
2. A clean, empty glass jar (with labels removed)
3. Black and yellow craft paper or foam sheets
4. Googly eyes
5. Craft glue or hot glue gun
6. Scissors
7. Black pipe cleaner (for antennae)
8. Battery-operated tea light
Instructions:
1. Collect the materials: Gather all the materials you’ll need for this craft project.
2. Prepare the fruit foam net: Cut the fruit foam net into a rectangular shape that can comfortably wrap around your glass jar. Make sure to leave some extra length at the top and bottom to secure it to the jar.
3. Wrap the net around the jar: Carefully wrap the fruit foam net around the glass jar and secure it in place using craft glue or a hot glue gun. Ensure that the net is taut and securely attached to the jar.
4. Create the bee’s body: Cut out a bee-shaped body from the yellow craft paper or foam. You can make it oval or round, depending on your preference and the size of your jar. Glue this body shape onto the front of the wrapped foam net.
5. Add bee stripes: Cut thin strips of black craft paper or foam and glue them onto the yellow body to create the bee’s stripes. Be creative with the arrangement and spacing of the stripes.
6. Attach googly eyes: Glue two googly eyes onto the bee’s body, just above the stripes, to create its eyes.
7. Make the bee’s antennae: Cut a small piece of black pipe cleaner and bend it into a V-shape. Glue the V-shape onto the top of the jar, so it looks like the bee’s antennae.
8. Complete the lantern: Place a battery-operated tea light inside the glass jar. Make sure it’s secure and sits at the bottom of the jar. The light will shine through the fruit foam net, creating a warm and soft glow.
9. Decorate as desired: You can add additional details, like paper or foam flowers around the base of the lantern or even a tiny paper or foam bee on the outside for extra decoration.
10. Display your bee lantern: Your beautiful bee lantern is now ready to be displayed. You can place it on a tabletop, hang it from a hook, or use it as a charming centerpiece for special occasions.
This DIY bee lantern craft is not only a lovely decoration but also a great way to upcycle materials like fruit foam nets and glass jars while adding a touch of nature-inspired decor to your home. Enjoy the warm and cozy ambiance it brings to your space!
Cloud Rainbow Girly Paper Craft


Creating a cloud rainbow girly paper craft can be a fun and creative project. Here’s a step-by-step guide to help you make one:
Materials you’ll need:
1. Colored paper in various rainbow colors (red, orange, yellow, green, blue, purple, pink)
2. White or light blue cardstock or construction paper for the clouds
3. Scissors
4. Glue or adhesive
5. Pencil
6. Googly eyes (optional)
7. Markers or colored pencils (for decorating)
Instructions:
1. Prepare Your Workspace: Set up a clean and well-lit workspace. Gather all your materials to make the process smoother.
2. Create Cloud Shapes:
• Take the white or light blue cardstock or construction paper and draw or trace cloud shapes. You can make one large cloud or multiple smaller clouds, depending on your preference.
• Cut out the cloud shapes carefully.
3. Cut Rainbow Strips:
• For the rainbow, cut strips of colored paper in the following order: red, orange, yellow, green, blue, purple, and pink.
• Make sure the strips are of equal width and length.
4. Create Rainbow Arches:
• Take the red strip and form a half-circle arch by overlapping the ends and gluing them together. This will be the bottom of your rainbow.
• Repeat this step with the remaining colors, creating a stack of rainbow arches in the correct order.
• Trim any excess length from the arches to ensure they fit nicely on your cloud.
5. Attach Rainbow to Cloud:
• Glue the rainbow arches onto the bottom of the cloud shape. Make sure they are evenly spaced and secure.
6. Decorate Your Cloud:
• If you like, you can add googly eyes to your cloud to give it a cute and whimsical look.
• Use markers or colored pencils to draw a smile or other facial features on your cloud.
7. Final Touches:
• Allow the glue to dry completely before handling your cloud rainbow girly paper craft.
Now, you have a lovely cloud rainbow paper craft that’s perfect for decorating your room, giving as a gift, or just enjoying as a creative project. You can personalize it further with stickers, glitter, or any other embellishments you like. Enjoy your crafting!
Easy Paper Star Craft For Home Decor


Creating paper stars is a fun and simple craft that can be used to decorate your home. Here’s an easy step-by-step guide to make paper stars for home decor:
Materials you’ll need:
1. Colored or patterned paper (square sheets work best, but you can cut larger sheets into squares).
2. Scissors
3. Glue or double-sided tape
4. String or ribbon (optional, for hanging)
Instructions:
Step 1: Gather your materials and find a flat, clean surface to work on.
Step 2: Start with a square piece of paper. If you don’t have square paper, you can easily make one by folding a rectangular sheet diagonally from corner to corner, and then cutting off the excess paper.
Step 3: Begin by folding the square in half diagonally to form a triangle. Press along the fold to create a sharp crease.
Step 4: Unfold the paper to reveal the triangle, and then fold it in half again diagonally in the opposite direction. This will give you another triangle with a crease.
Step 5: Now, open the triangle up again and fold it in half along the vertical axis to create a smaller triangle.
Step 6: Carefully cut along the two folded edges of the triangle, but be sure not to cut all the way through. Leave about half an inch uncut at the center of the triangle.
Step 7: Open up the triangle once more, and you’ll see that you have a star shape with a hole in the center.
Step 8: Apply a small amount of glue or double-sided tape to one of the flaps on the star. Then, fold it over the adjacent flap, sticking them together. Continue this process around the star until all the flaps are glued together.
Step 9: Allow the glue to dry completely. This may take a few minutes.
Step 10: If you’d like to hang your paper star, attach a piece of string or ribbon to one of the points on the star using tape or glue.
Step 11: Your paper star is now ready to be displayed! Hang it from a hook, attach it to a string of lights, or place it on a shelf for a beautiful home decoration.
Feel free to experiment with different sizes of paper and patterns to create a variety of paper stars to decorate your home with. They’re perfect for holidays, parties, or just adding a touch of whimsy to any room. Enjoy your crafting!
Paper Rainbow Card For Kids


Creating a paper rainbow card is a delightful craft project for kids. Here’s a simple step-by-step guide on how to make one:
Materials you’ll need:
1. White cardstock or heavy construction paper (for the card base)
2. Colored construction paper (for the rainbow)
3. Pencil
4. Scissors
5. Glue stick
6. Markers, colored pencils, or crayons
7. Googly eyes (optional, for added fun)
Instructions:
Step 1: Gather your materials and find a clean, flat surface to work on.
Step 2: Fold the white cardstock or heavy construction paper in half to create the card base. This will be the body of your rainbow card.
Step 3: On a sheet of colored construction paper, draw a rainbow shape. A rainbow typically consists of seven curved stripes in the following colors: red, orange, yellow, green, blue, indigo, and violet. You can use a small bowl or cup as a template to help you draw even curves. Make sure the rainbow fits nicely on the front of your card.
Step 4: Carefully cut out the rainbow shape along the lines you drew.
Step 5: Apply glue to the back of the rainbow shape and carefully place it on the front of the folded card base.
Step 6: If you have googly eyes, you can glue them onto the rainbow to create a cheerful face. Place them above the rainbow, near the center.
Step 7: Now, use markers, colored pencils, or crayons to draw a smiling face on your rainbow. You can also add cheeks, rosy cheeks, or any other cute details to give your rainbow character.
Step 8: Open the card and write a friendly message on the inside to complete your rainbow card. For example, “You brighten my day!” or “Sending you a rainbow of smiles!”
Step 9: Allow the glue and any ink to dry completely.
Your colorful and cheerful rainbow card is now ready to bring smiles to someone’s face. This is a great craft for kids to make for birthdays, get-well wishes, or just to brighten someone’s day. Have fun crafting!
Pen Holder Handmade Craft Using Fruit Foam Net


Creating a pen holder using a fruit foam net is a simple and eco-friendly craft project. Here’s how you can make a handmade pen holder:
Materials you’ll need:
1. Fruit foam net (you can find these with fruits like oranges, lemons, or avocados)
2. An empty and clean container (e.g., an empty yogurt cup, small plastic container, or a tin can)
3. Scissors
4. Glue or a glue gun
5. Decorative materials like stickers, markers, or colored paper (optional)
Instructions:
Step 1: Gather your materials and make sure your fruit foam net is clean and dry.
Step 2: Take your empty container, which will serve as the base for your pen holder. Make sure it’s clean and dry as well.
Step 3: Carefully cut a piece of the fruit foam net large enough to wrap around the outside of your container. The net should be a bit taller than your container, so it covers it completely.
Step 4: Apply glue along one edge of the fruit foam net.
Step 5: Attach the glued edge of the net to the outside of the container, making sure it’s centered and wraps around smoothly. Press it down to secure it in place. You may need to hold it for a minute to allow the glue to set.
Step 6: Trim any excess net from the top so that it’s even with the height of your container.
Step 7: If you want to add some decorative elements to your pen holder, you can use markers, stickers, or colored paper to create designs or personalize it.
Step 8: Once you’ve finished decorating, allow any glue or ink to dry completely.
Step 9: Now, your handmade pen holder is ready to use. Simply place your pens, pencils, or other stationery items into the container, and they’ll be organized in your unique and eco-friendly pen holder.
This craft is a great way to upcycle materials and reduce waste while also creating a functional and personalized item for your desk or workspace. Enjoy your handmade pen holder!
DIY instructions for kids to make a bee-related craft

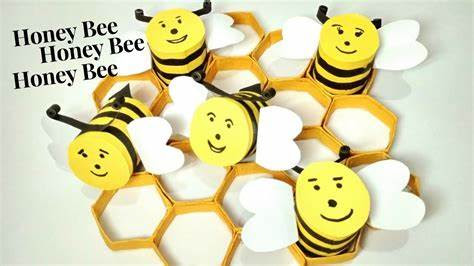
Creating a bee-related craft can be a fun and educational activity for kids. Let’s make a simple and cute paper plate bee craft. Here are the step-by-step instructions:
Materials you’ll need:
1. Paper plate
2. Yellow and black acrylic paint (or markers/crayons)
3. Paintbrushes (if using paint)
4. Googly eyes
5. Pipe cleaner (black or yellow)
6. Craft glue
7. Scissors
8. Black construction paper
9. Pencil
Instructions:
Step 1: Lay out your materials on a clean, flat surface.
Step 2: Paint the entire surface of the paper plate with yellow paint. Allow it to dry completely. If you don’t have yellow paint, you can also use yellow markers or crayons to color the plate.
Step 3: While the paint is drying, cut two small wings out of the black construction paper. These can be simple oval or teardrop shapes.
Step 4: Once the paint is dry, flip the paper plate over so that the painted side is facing down. Attach the googly eyes to the top edge of the plate using craft glue. These will be the bee’s eyes.
Step 5: Cut a small piece of pipe cleaner and bend it into a “U” shape. Glue this below the eyes to create the bee’s smile or mouth.
Step 6: Glue the black wings to the sides of the paper plate, near the top. These will be the bee’s wings.
Step 7: Using a pencil, draw black stripes across the yellow part of the paper plate. Bees typically have black stripes on their bodies, so this step will give your bee its characteristic look.
Step 8: Allow all the glue to dry completely.
Step 9: Finally, your paper plate bee craft is complete! You can display it on a wall, attach a string to the top and hang it as a decoration, or even use it as a mask by cutting out holes for the eyes and adding an elastic band.
This bee craft is not only adorable but also a great opportunity to teach kids about the importance of bees in pollination and the ecosystem. It’s a wonderful way to combine creativity and learning in one fun project. Enjoy making your buzzing bee!