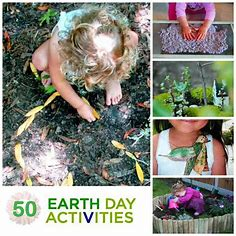

Earth Day is a great opportunity to engage children and teens in environmental awareness and action. Here are some fun and educational activities that can be tailored to different age groups:
For Children:
- Nature Scavenger Hunt: Create a list of items commonly found in nature, like different types of leaves, rocks, or insects. Kids can work in teams to find as many items as they can.
- Planting Seeds: Teach kids about the lifecycle of plants by having them plant seeds in small pots. They can decorate the pots and keep track of their plant’s growth.
- DIY Bird Feeders: Help kids make bird feeders using items like pine cones, peanut butter, and bird seed. Hang them outside and observe which birds come to visit.
- Recycled Art Projects: Collect recyclable materials such as paper rolls, bottle caps, and cardboard. Encourage kids to create art projects, like sculptures or collages.
- Story Time with an Environmental Twist: Read books about nature and conservation, then discuss the themes. Books like “The Lorax” by Dr. Seuss are both fun and educational.
- Eco-Friendly Crafts: Make crafts using natural or recycled materials. For example, create leaf prints or make jewelry from recycled paper beads.
- Trash Sort Relay: Set up a relay race where kids sort different types of trash (paper, plastic, compost) into the correct bins. It’s a fun way to learn about recycling and composting.
For Teens:
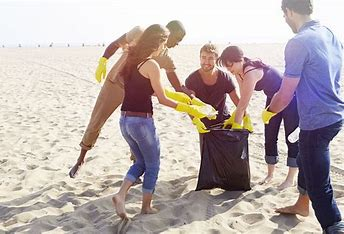
- Community Clean-Up: Organize a local cleanup event where teens can volunteer to pick up litter in parks, beaches, or neighborhoods. It’s a great way to contribute directly to their community.
- Environmental Film Screening: Host a movie night featuring documentaries or films about environmental issues, such as “The True Cost” or “Our Planet.” Follow up with a discussion on what they learned.
- Sustainable Cooking Class: Teach teens how to cook using locally sourced and sustainable ingredients. It’s a hands-on way to learn about food systems and reduce environmental impact.
- DIY Upcycling Projects: Challenge teens to create something new from old or discarded items, such as turning old t-shirts into reusable bags or repurposing glass jars into candle holders.
- Eco-Friendly Fashion Show: Organize a fashion show where teens design outfits from recycled materials. It can be a fun way to explore the concept of sustainable fashion.
- Social Media Campaign: Encourage teens to create a social media campaign or blog about environmental issues that matter to them. It’s a way to spread awareness and engage their peers.
- Nature Photography Contest: Have a photography contest with categories related to nature and the environment. Teens can capture images of wildlife, landscapes, or close-up details of plants and animals.
- Environmental Advocacy: Organize a workshop on how to advocate for environmental causes. Teens can learn how to write letters to their representatives, create petitions, or engage in community activism.
Each of these activities can be adapted to suit the interests and skill levels of the participants, making Earth Day both enjoyable and impactful!
- Do a Beach or Park Clean Up
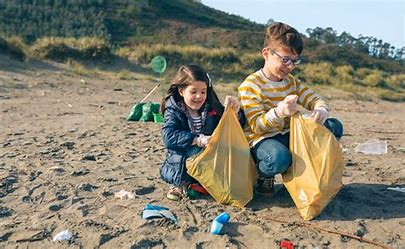
In particular, our planet needs all the assistance it can get to clean up our mess! Why not take the kids outside and tidy up the environment during the day?
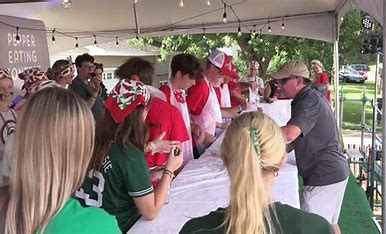
2. Paint Earth Day T-Shirts
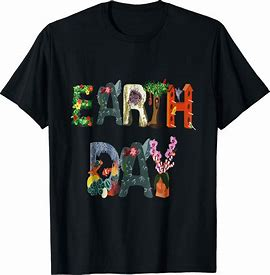
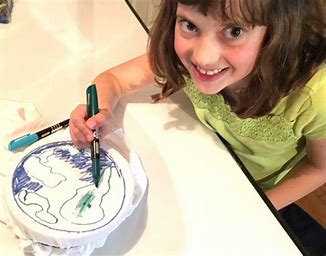
Painting Earth Day T-Shirts is a fun and creative way to celebrate Earth Day while promoting environmental awareness. Here’s a step-by-step guide for creating your own Earth Day-themed t-shirts:
Materials Needed:
- Plain white or light-colored t-shirts (cotton works best)
- Fabric paint or fabric markers
- Paintbrushes (various sizes)
- Newspaper or cardboard (to place inside the t-shirt)
- Stencils (optional)
- Water for cleaning brushes
- Aprons or old clothes (to protect clothing from paint)
Instructions:
- Prepare the Work Area:
- Lay down newspaper or cardboard on the table or floor where you’ll be painting to protect the surface from paint spills.
- Place a piece of cardboard or newspaper inside each t-shirt to keep the paint from bleeding through to the other side.
- Plan Your Design:
- Decide on a design for your t-shirt. It could be something as simple as a globe, a tree, or a recycling symbol. You can also include Earth Day slogans like “Protect Our Planet” or “Love the Earth.”
- Sketch your design on a piece of paper first, or use stencils to help with the painting.
- Prepare the Paint:
- Shake or stir the fabric paint well before using it. If using fabric markers, make sure they are working properly.
- Start Painting:
- Begin by painting your design on the t-shirt. Use different paintbrush sizes for various parts of the design. For detailed areas, a small brush or fabric marker works best.
- If using stencils, place the stencil on the shirt and carefully paint over it. Remove the stencil slowly to avoid smudging.
- Let the Paint Dry:
- Allow the paint to dry completely. This might take several hours depending on the type of paint used. Check the instructions on the fabric paint for specific drying times.
- Heat Set the Paint:
- Once the paint is dry, you may need to heat set it to make it permanent. Follow the instructions on the fabric paint for this process, which usually involves ironing the painted area on a medium heat setting with a piece of cloth between the iron and the t-shirt.
- Care for Your T-Shirt:
- To keep the design looking fresh, wash the t-shirt inside out in cold water and avoid using bleach. Air dry or tumble dry on a low setting.
Additional Tips:
- Group Activity: This can be a great group activity. Have participants create their own designs or work on a collective design.
- Incorporate Education: While painting, discuss environmental issues and what Earth Day represents to add an educational element to the fun.
- Custom Designs: Encourage creativity by allowing each participant to personalize their t-shirt with their own unique messages or designs.
Painting Earth Day t-shirts is not only an enjoyable craft but also a way to spread awareness about the importance of protecting our planet.
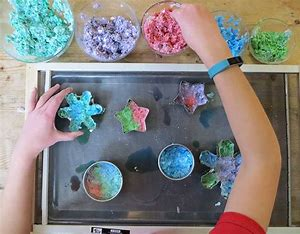
3. Paint Earth Day Rocks
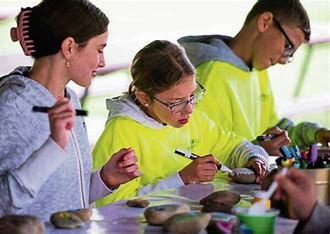
Painting Earth Day Rocks is a creative and meaningful activity that combines art with environmental awareness. It’s a fun way to celebrate Earth Day and can be done individually or in groups. Here’s a step-by-step guide to help you get started:
Materials Needed:
- Smooth, clean rocks (you can collect these from outdoors or buy them from a craft store)
- Acrylic paint (various colors)
- Paintbrushes (various sizes)
- Palette or plates for mixing paint
- Water for cleaning brushes
- Paper towels or rags for drying brushes
- Clear acrylic sealant (optional, for durability)
- Newspaper or a protective cloth (to cover the workspace)
Instructions:
- Prepare the Workspace:
- Lay down newspaper or a protective cloth on your work surface to protect it from paint spills.
- Have all your materials ready and within reach.
- Clean the Rocks:
- Wash the rocks with soap and water to remove any dirt. Let them dry completely before painting.
- Plan Your Design:
- Decide on your design. You might want to paint images related to Earth Day such as trees, the planet Earth, flowers, or recycling symbols. You can also paint inspirational messages or Earth Day slogans like “Protect Our Planet” or “Love Earth.”
- Base Coat (Optional):
- If you want a solid base color for your design, apply a coat of acrylic paint over the entire rock. Let it dry completely before adding your design.
- Start Painting:
- Use small brushes for detailed work and larger brushes for broader strokes. You can mix colors on a palette or plate to get the shades you need.
- Paint your design onto the rock. Be patient and allow each layer of paint to dry before adding additional layers or details.
- Add Details:
- Once the base coat is dry, add details to your design. You can use different colors and brushes to create patterns, outlines, or additional elements.
- Let the Paint Dry:
- Allow the painted rocks to dry completely. This may take a few hours depending on the amount of paint used and the drying conditions.
- Seal the Rocks (Optional):
- To protect your design and make the rocks weather-resistant, apply a clear acrylic sealant. Follow the instructions on the sealant for application and drying times.
- Display or Share Your Rocks:
- You can use your painted rocks to decorate your garden, leave them around your community for others to find (like a scavenger hunt), or give them as gifts.
- If you’re doing this activity with a group, consider organizing a display where everyone can showcase their painted rocks.
Additional Tips:
- Inspiration: Look up images of Earth Day themes or nature art for inspiration. Pinterest and Instagram can be great sources of ideas.
- Group Activity: This is a great activity for schools, community groups, or family gatherings. It encourages creativity and can spark conversations about environmental issues.
- Engage with Nature: Consider painting rocks with nature themes while being outdoors to combine the activity with a nature walk or park visit.
Painting Earth Day rocks is not only an enjoyable craft but also a way to spread positive messages about environmental care and sustainability.
4. Make Eco Collages

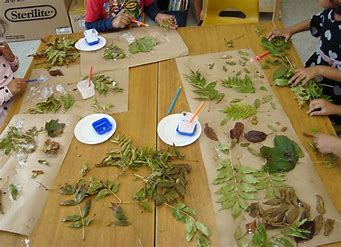
Creating eco collages is a fantastic way to combine art with environmental education. It’s an engaging activity for both children and adults that promotes creativity while raising awareness about environmental issues. Here’s a step-by-step guide to help you create eco-friendly collages:
Materials Needed:
- Old magazines, newspapers, or any other recyclable paper materials
- Scissors
- Glue or eco-friendly adhesive (such as plant-based glue)
- Poster board, cardboard, or recycled paper as a base
- Markers, colored pencils, or eco-friendly paints (optional)
- Old maps, brochures, or scrap fabric (optional for added texture)
Instructions:
- Gather Materials:
- Collect old magazines, newspapers, and other paper materials. Ensure they are clean and free from any non-recyclable elements like plastic.
- Prepare Your Workspace:
- Lay down a protective covering on your workspace to catch any glue or paper scraps. Have all your materials organized and ready.
- Choose Your Theme:
- Decide on the theme of your eco collage. Some ideas include:
- Nature and Wildlife: Create a collage featuring animals, plants, and natural landscapes.
- Recycling and Sustainability: Illustrate the importance of recycling, reducing waste, and sustainable practices.
- Climate Action: Focus on messages about climate change and ways to protect the environment.
- Community and Environment: Highlight community efforts and local environmental initiatives.
- Decide on the theme of your eco collage. Some ideas include:
- Cut Out Images and Text:
- Look through your collected materials and cut out images, text, and shapes that fit your chosen theme. You can also use stencils or draw your own elements.
- Design Your Collage:
- Arrange your cut-out images and text on your base (poster board, cardboard, or recycled paper) before gluing them down. Play around with different layouts and combinations.
- Glue the Pieces:
- Once you’re satisfied with the arrangement, start gluing the pieces onto your base. Apply glue sparingly to avoid any excess that might warp the paper.
- Add Details (Optional):
- Enhance your collage with additional details using markers, colored pencils, or eco-friendly paints. You can add borders, text, or decorative elements to complement your design.
- Let It Dry:
- Allow your collage to dry completely if you used glue or paint. This ensures that all elements are securely attached.
- Display Your Work:
- Once dry, display your eco collage in a prominent place. You can also organize a gallery or showcase event to share your work with others, raising awareness about environmental issues.
Additional Tips:
- Use Recycled Materials: Make the activity even more eco-friendly by using only recycled paper and materials.
- Educational Element: Use the collage as an educational tool by explaining the significance of each element and how it relates to environmental issues.
- Group Activity: This can be a great group activity for schools, community groups, or family gatherings, encouraging collaboration and discussion about environmental topics.
Creating eco collages not only fosters creativity but also reinforces important messages about environmental stewardship and sustainability. Enjoy the process of making art while making a positive impact on the planet!
5. Make Recycled Paper
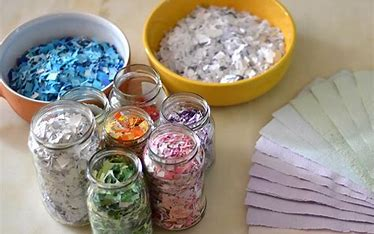
Making recycled paper is a fun and educational craft that demonstrates the importance of recycling and conservation. It’s a great project for children, teens, or anyone interested in sustainable practices. Here’s a step-by-step guide to making your own recycled paper:
Materials Needed:
- Used paper (newspaper, old letters, scrap paper, etc.)
- Water
- A blender or food processor
- A large bowl
- A screen or mesh (you can use an old window screen, a fine mesh strainer, or make a DIY screen with a frame and mesh fabric)
- A sponge
- A rolling pin (optional)
- A towel or cloth
- A large basin or tub (for dipping)
Instructions:
- Prepare the Paper:
- Tear the used paper into small pieces. The smaller the pieces, the easier they will break down.
- Soak the Paper:
- Place the torn paper pieces into a large bowl or basin. Add enough water to cover the paper and let it soak for several hours or overnight. This softens the paper fibers and makes them easier to blend.
- Blend the Paper:
- After soaking, transfer the paper and water mixture into a blender or food processor. Blend until you get a smooth, pulpy mixture. You may need to do this in batches depending on the size of your blender.
- Prepare the Screen:
- Set up your screen or mesh over a large basin or tub. If you’re using a DIY screen, make sure it’s secured tightly so that it doesn’t move while you’re working.
- Make the Paper Pulp:
- Pour the blended paper pulp into the large basin or tub filled with water. Stir to ensure the pulp is evenly distributed in the water.
- Form the Paper Sheet:
- Dip the screen into the pulp mixture, ensuring that the screen is fully submerged. Gently lift it out and shake it to distribute the pulp evenly across the screen. You can adjust the thickness of the paper by varying the amount of pulp on the screen.
- Remove Excess Water:
- Place the screen with the wet pulp on a flat surface. Use a sponge to gently press down on the pulp to remove excess water and help the fibers bond together.
- Dry the Paper:
- Carefully peel the wet paper off the screen and place it on a towel or cloth to dry. You can use a rolling pin to press out additional water if desired. Allow the paper to dry completely, which may take 24-48 hours depending on the thickness and humidity.
- Finish and Use:
- Once the paper is dry, you can trim the edges if needed. Your recycled paper is now ready to be used for crafts, writing, or other creative projects!
Additional Tips:
- Add Extras: You can mix in additional items like flower petals, seeds, or colored paper for texture and decoration.
- Try Different Papers: Experiment with different types of paper (e.g., colored paper, cardboard) to see how they affect the texture and color of your recycled paper.
- Creative Shapes: Use shaped molds or cookie cutters to make paper with fun shapes.
Making recycled paper is not only a hands-on way to learn about recycling but also a creative activity that results in beautiful, custom-made paper products. Enjoy the process and the satisfaction of turning waste into something new and useful!
6. Make an Earth-Day Gratitude Board
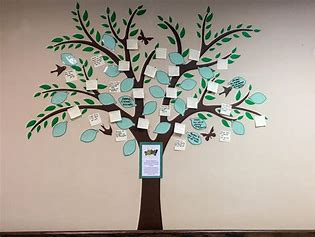

Creating an Earth Day Gratitude Board is a wonderful way to celebrate Earth Day by expressing appreciation for the environment and the positive changes we can make. It’s a collaborative and engaging activity that can be done individually or as a group. Here’s a step-by-step guide to help you create your own Earth Day Gratitude Board:
Materials Needed:
- Large board or poster (corkboard, poster board, or a wooden board)
- Paper or card stock (for writing messages)
- Markers, pens, or colored pencils
- Glue, tape, or push pins
- Scissors
- Decorative materials (e.g., stickers, washi tape, natural elements like leaves or flowers)
- Optional: A digital camera or smartphone (for taking photos)
Instructions:
- Prepare the Board:
- Choose a large board or poster as your base. This will be the canvas for your gratitude messages. Make sure it’s clean and dry.
- Design the Board:
- Decide on a layout for your gratitude board. You might want to create sections or just have a free-form design. If you’re working with a group, assign different sections or themes to different people.
- Create Gratitude Cards:
- Cut paper or card stock into small pieces or shapes for writing messages. You can use colored paper for added visual interest. Provide markers, pens, or colored pencils for writing.
- Write Messages:
- Have participants write messages of gratitude for various aspects of the Earth. Examples include:
- “I’m grateful for clean air that helps us breathe.”
- “Thank you, trees, for providing shade and oxygen.”
- “I appreciate the beauty of our oceans and wildlife.”
- “Grateful for the efforts of those who recycle and protect our planet.”
- Decorate the Board:
- Decorate the board with natural elements like pressed leaves, flowers, or twigs. You can also use stickers, washi tape, or other decorative materials to enhance the visual appeal.
- Attach the Messages:
- Once the messages are written and decorated, attach them to the board using glue, tape, or push pins. Arrange them in a visually pleasing way, allowing space for everyone’s contributions.
- Add Photos (Optional):
- If you have taken photos of nature or environmental activities, you can include these on the board. Print and attach them to complement the gratitude messages.
- Display the Board:
- Place the completed gratitude board in a prominent location where it can be admired by others. This could be at a community center, school, or your home.
- Share and Reflect:
- Use the board as a conversation starter to discuss why each message is important and how individuals can contribute to protecting and appreciating the Earth. Encourage reflection on personal actions and community involvement.
Additional Tips:
- Group Activity: This is a great activity for schools, community groups, or family gatherings. Encourage everyone to participate and share their thoughts.
- Incorporate Art: Include drawings or paintings related to the Earth and nature for a more personalized touch.
- Interactive Element: If creating the board digitally, you could use an online platform where participants can add their messages and images, and then print it out or share it online.
Creating an Earth Day Gratitude Board is a meaningful way to recognize and celebrate the beauty and importance of our planet while fostering a sense of community and environmental stewardship.
7. Visit a Local Nature Reserve
A visit to a national park or nature reserve is one of the best ways to get back in touch with nature! This is a great weekend activity to engage in.
You can go hiking, fishing, camping, and maybe even enjoy a cosy campfire beneath the stars while you’re there!
8. Go for a Hike


Take your kids on a walk as an exciting Earth Day activity if you’re seeking for ideas. There aren’t many better ways to take advantage of everything our lovely world has to offer!
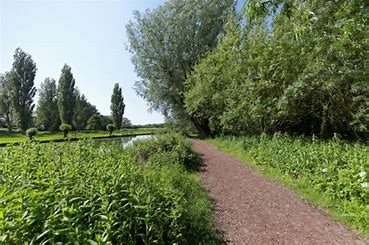
9. Take a Walk in Nature

Taking a walk in nature is a wonderful way to connect with the environment and enjoy the benefits of the outdoors. Whether you’re looking for a peaceful escape, a way to boost your mood, or an opportunity to observe wildlife, nature walks offer numerous rewards. Here’s a guide to help you make the most of your nature walk:
Preparation:
- Choose a Location:
- Select a natural area that suits your interest and fitness level. This could be a local park, nature reserve, forest trail, beach, or any green space.
- Check the Weather:
- Ensure that the weather is suitable for a walk. Dress appropriately for the conditions and bring necessary gear such as a hat, sunscreen, or rain jacket.
- Wear Comfortable Clothing:
- Opt for comfortable, weather-appropriate clothing and sturdy walking shoes. If you plan to walk on uneven terrain, supportive footwear is essential.
- Bring Essentials:
- Carry a small backpack with essentials such as water, snacks, a map of the area (if needed), and any personal items like medications or a phone for safety.
- Respect Nature:
- Remember to follow local guidelines for wildlife and plant protection. Avoid picking plants or disturbing animals.
During the Walk:
- Start Slow:
- Begin your walk at a comfortable pace, allowing yourself time to enjoy the surroundings and adjust to the environment.
- Observe and Appreciate:
- Pay attention to the sights, sounds, and smells around you. Notice the details such as the texture of tree bark, the colors of flowers, or the songs of birds.
- Practice Mindfulness:
- Use this time to be present and mindful. Focus on your breathing and the natural world around you, which can help reduce stress and increase relaxation.
- Take Photos:
- If you’re interested, take photos of interesting landscapes, plants, or wildlife. This can be a fun way to remember your walk and share your experience with others.
- Engage Your Senses:
- Listen to the rustle of leaves, the flow of a stream, or the chirping of birds. Feel the texture of different natural elements like leaves, rocks, or the breeze on your skin.
- Be Eco-Friendly:
- Follow the principles of “Leave No Trace.” Pack out any trash you bring with you, and avoid leaving anything behind.
- Consider a Nature Journal:
- If you enjoy writing or drawing, bring along a nature journal to record your observations, thoughts, and feelings about the walk.
After the Walk:
- Reflect on Your Experience:
- Take a few moments to reflect on what you experienced during the walk. Consider how the walk made you feel and what you observed.
- Share with Others:
- Share your experience with friends or family. Discuss what you saw, the benefits you felt, and any photos or observations you made.
- Regular Practice:
- Consider making nature walks a regular part of your routine. Regular walks can improve physical health, boost mental well-being, and deepen your connection with nature.
- Follow Up:
- If you enjoyed your walk, explore other natural areas or trails nearby. You can also look for local events or volunteer opportunities related to nature conservation.
Taking a walk in nature is not only beneficial for your physical health but also for your mental and emotional well-being. Enjoy the fresh air, the beauty of the natural world, and the opportunity to unwind and recharge.
10. Make Your Own Package-Free Shampoo Bars
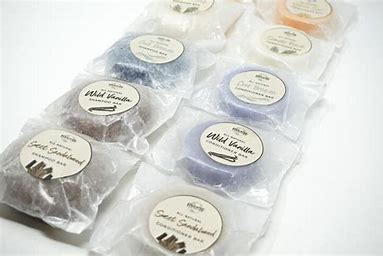
Making your own package-free shampoo bars is a fantastic way to reduce plastic waste and customize your hair care routine. These bars are eco-friendly, effective, and can be tailored to your specific hair needs. Here’s a step-by-step guide to help you create your own shampoo bars at home:
Ingredients:
- Base Ingredients:
- 1 cup (240 ml) distilled water
- 1/2 cup (120 ml) coconut oil
- 1/2 cup (120 ml) olive oil
- 1/4 cup (60 ml) shea butter or cocoa butter
- 1/4 cup (60 ml) castor oil
- Cleansing Ingredients:
- 1/4 cup (30 g) sodium hydroxide (lye)
- 3/4 cup (180 ml) distilled water (for lye solution)
- Optional Additions:
- Essential oils (for fragrance, e.g., lavender, rosemary, or peppermint)
- Natural colorants (e.g., turmeric, beet powder)
- Herbal infusions (e.g., chamomile tea or green tea)
- Optional: a few tablespoons of clay (e.g., bentonite or kaolin) for added detoxifying properties
Equipment:
- Safety goggles and gloves
- Digital scale
- Stainless steel or heat-resistant glass mixing bowls
- Silicone or plastic molds (for shaping the bars)
- Stick blender (immersion blender)
- Heat-resistant spatula
- Thermometer
- Measuring cups and spoons
Instructions:
1. Safety First
- Put on safety goggles and gloves. Lye (sodium hydroxide) is caustic and can cause burns if it comes into contact with skin or eyes.
2. Prepare the Lye Solution
- In a well-ventilated area, carefully measure 3/4 cup of distilled water into a heat-resistant glass bowl.
- Slowly add the lye to the water (never the other way around) while stirring gently. The mixture will heat up and emit fumes. Allow it to cool to about 110-120°F (43-49°C).
3. Melt the Oils
- In a separate stainless steel or heat-resistant glass bowl, combine the coconut oil, olive oil, shea butter, and castor oil.
- Heat the oils gently until fully melted and combined, then let them cool to about 110-120°F (43-49°C).
4. Combine Lye Solution and Oils
- Once both the lye solution and oils are at the same temperature (110-120°F), slowly pour the lye solution into the melted oils.
- Use a stick blender to blend the mixture until it reaches “trace” — this is when the mixture thickens to the consistency of pudding and leaves a trail when drizzled on the surface.
5. Add Optional Ingredients
- At trace, you can mix in essential oils, natural colorants, herbal infusions, or clay if desired. Blend thoroughly to ensure even distribution.
6. Pour into Molds
- Pour the mixture into silicone or plastic molds, smoothing the top with a spatula. You can also add decorative elements like dried flowers on top.
7. Let the Bars Cure
- Cover the molds with a towel or plastic wrap and let them sit in a cool, dry place for 24-48 hours until they are firm enough to unmold.
- After unmolding, allow the shampoo bars to cure in a well-ventilated area for 4-6 weeks. This curing process is essential for the bars to harden and become gentle on the hair and scalp.
Tips:
- Testing: Always perform a patch test before using the shampoo bar to ensure you don’t have any allergic reactions.
- Storage: Store your shampoo bars in a dry place to prolong their shelf life. A soap dish with drainage works well to keep them from getting soggy.
- Customization: Experiment with different essential oils and additives to find the combination that works best for your hair type and preferences.
Making your own shampoo bars is not only a step towards reducing plastic waste but also a way to enjoy customized hair care. Have fun experimenting with different ingredients and fragrances to create a shampoo bar that suits your needs and preferences!
11. Bake Earth Cookies for the Neighbours
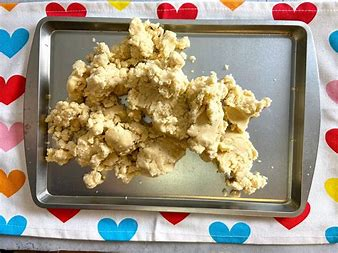
This Earth Day, spread some love among your neighbours by baking some planet-inspired cookies that you can shape like the Earth and colour with green and blue food colouring.
12. Plant an Indoor Herb Pot
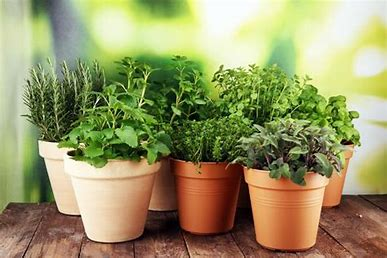
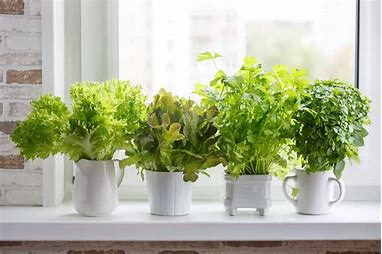
Planting an indoor herb pot is a great way to enjoy fresh herbs year-round and add a touch of greenery to your living space. Indoor herb gardening is relatively simple and can be done with minimal space and materials. Here’s a step-by-step guide to help you get started:
Materials Needed:
- Container: A pot or container with drainage holes (e.g., terracotta pot, plastic pot, or even a repurposed container)
- Potting Soil: High-quality potting mix suitable for indoor plants
- Herb Seeds or Seedlings: Common indoor herbs include basil, parsley, cilantro, mint, chives, and thyme
- Water: For watering the plants
- Plant Labels (optional): To identify different herbs
- Tray (optional): To catch excess water and protect surfaces
Instructions:
1. Choose Your Container
- Select a container with drainage holes to prevent waterlogging, which can lead to root rot. If your container doesn’t have drainage holes, you can create a few small ones or choose a different pot.
2. Prepare the Potting Soil
- Fill the container with potting soil, leaving about an inch of space from the top. Use a high-quality potting mix that provides good drainage and aeration for the herbs’ roots.
3. Plant Your Herbs
- Seeds:
- Follow the instructions on the seed packet for planting depth and spacing. Generally, herb seeds should be sown at a depth of about 1/4 inch (0.6 cm).
- Sprinkle the seeds evenly over the soil and lightly cover them with a thin layer of soil. Water gently to moisten the soil.
- Seedlings:
- If using seedlings, dig small holes in the soil and place each seedling in a hole. Gently firm the soil around the roots and water lightly.
4. Watering
- Water the herbs thoroughly after planting. Keep the soil consistently moist but not soggy. Allow the top inch of soil to dry out between waterings.
5. Provide Light
- Place the container in a sunny spot, such as a south-facing window, where the herbs can receive at least 6 hours of light per day. If natural light is insufficient, consider using grow lights to supplement.
6. Maintain Temperature and Humidity
- Most indoor herbs prefer temperatures between 65-75°F (18-24°C). Keep the herbs away from drafts, heaters, or air conditioners that could cause temperature fluctuations.
- Maintain moderate humidity. If the air in your home is very dry, consider using a humidity tray or a small humidifier.
7. Fertilize as Needed
- Indoor herbs generally don’t require heavy feeding. Apply a balanced, water-soluble fertilizer every 4-6 weeks during the growing season (spring and summer). Follow the package instructions for the appropriate amount.
8. Prune and Harvest
- Regularly pinch or prune your herbs to encourage bushier growth and prevent them from becoming leggy. Harvest leaves and stems as needed, but avoid removing more than one-third of the plant at a time to ensure continued growth.
9. Monitor for Pests
- Check your herbs regularly for signs of pests, such as aphids or spider mites. If you notice any, treat them with appropriate measures, such as insecticidal soap or neem oil.
Additional Tips:
- Mix and Match: You can plant a mix of herbs in one container, but be mindful of their light and water needs. For example, basil and parsley can often thrive together.
- Companion Herbs: Some herbs grow well together, such as chives with parsley or thyme with rosemary.
- Indoor Herb Garden Kits: Consider using an indoor herb garden kit that includes everything you need for planting, including pre-measured soil and seeds.
Planting an indoor herb pot is a rewarding way to bring a bit of nature indoors and enjoy fresh herbs for cooking and flavoring. Enjoy the process of nurturing your herbs and the convenience of having fresh ingredients at your fingertips!
13. Set Up Eco-Friendly Bird Feeders
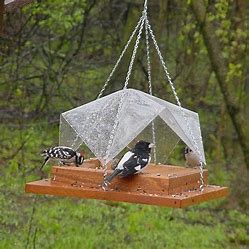
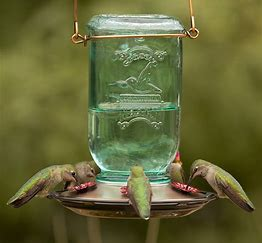
Planting some environmentally friendly bird feeders is a great way to show your respect for the earth and all its inhabitants. All you have to do is wrap waste toilet paper rolls in bird seed, then hang them!
14. Visit an Animal Shelter
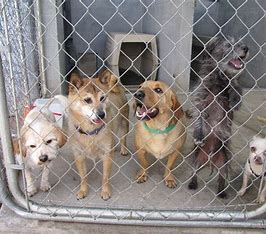
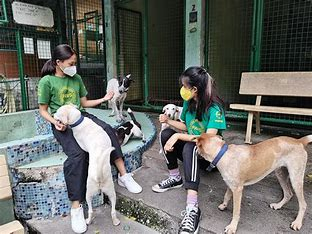
Not only does the Earth require an abundance of love, but she also wants us to cherish her priceless creatures! Take your kids to a shelter to show them some love, even if it’s just for a short stay.
15. Mend or Upcycle Some Old Clothing
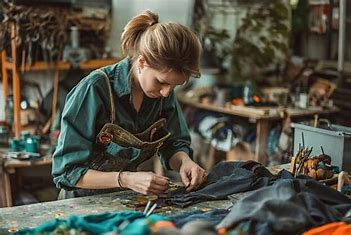
Mending or upcycling old clothing is a creative and sustainable way to breathe new life into garments that might otherwise be discarded. Whether you want to fix a tear, repurpose an old item, or give a piece a fresh look, this process can be both rewarding and environmentally friendly. Here’s a step-by-step guide to help you mend or upcycle your old clothing:
Mending Old Clothing
Materials Needed:
- Needle and thread (matching the color of the fabric)
- Fabric patches (for larger repairs)
- Iron-on adhesive (optional, for fabric patches)
- Scissors
- Pins or fabric clips
- Fabric glue (optional, for small repairs)
Instructions:
- Identify the Damage:
- Examine your clothing to locate any tears, holes, or worn areas. Assess whether the damage is small enough to mend with a needle and thread or if it requires a fabric patch.
- Prepare the Area:
- If using a patch, cut the patch slightly larger than the damaged area. For smaller holes, trim any loose threads.
- Mend with Needle and Thread:
- For small tears, thread a needle with a matching color of thread and make small, tight stitches across the tear. Use a basic running stitch or backstitch for durability.
- For larger tears or holes, place the fabric patch behind the tear, securing it with pins or fabric clips. Sew around the edges of the patch using a straight stitch or a zigzag stitch to secure it in place.
- Iron-On Patches:
- If using an iron-on patch, follow the manufacturer’s instructions. Generally, you’ll place the patch over the damaged area, cover it with a thin cloth, and apply heat with an iron to adhere the patch.
- Final Touches:
- Remove any pins or clips and trim any excess thread. For extra durability, consider applying fabric glue around the edges of the patch.
Upcycling Old Clothing
Materials Needed:
- Sewing machine or needle and thread (for sewing projects)
- Fabric paint or dye (for customization)
- Scissors
- Buttons, fabric scraps, or other embellishments
- Patterns or instructions (optional, for specific upcycling projects)
Instructions:
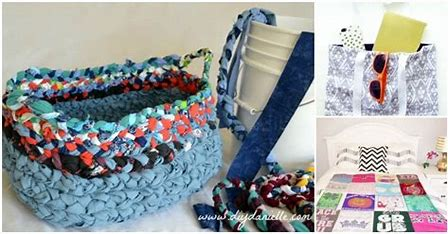
- Choose Your Project:
- Decide what type of upcycling project you want to undertake. Some ideas include turning old jeans into a tote bag, transforming a shirt into a pillow cover, or adding embellishments to make a plain dress unique.
- Plan and Prepare:
- Gather materials and tools needed for your project. If you’re using a pattern or instructions, read through them carefully to understand the steps involved.
- Modify or Customize:
- Shorten or Resize: Use a sewing machine or needle and thread to alter the length or fit of clothing. For example, shorten a pair of jeans or take in a shirt to fit better.
- Add Embellishments: Sew on buttons, patches, or fabric scraps to create a unique design. You can also use fabric paint or dye to add color or patterns.
- Repurpose: Cut and sew clothing into new items. For example, convert an old sweater into a cozy scarf or turn a dress into a stylish top.
- Sew or Glue:
- Follow your project’s instructions for sewing or gluing. For sewing projects, make sure to use the appropriate stitch for the fabric and finish edges with a zigzag stitch or serger to prevent fraying.
- Final Touches:
- Press or iron your finished project to smooth out any wrinkles and give it a polished look. Inspect your work to ensure all seams are secure and all embellishments are attached properly.
Additional Tips:
- Skill Level: Start with simple projects if you’re new to sewing or upcycling. As you gain confidence, you can tackle more complex alterations.
- Creativity: Upcycling allows for creativity—don’t be afraid to experiment with different designs, patterns, and materials.
- Resources: Look for tutorials and inspiration online if you need ideas or step-by-step guidance for specific upcycling projects.
Mending and upcycling old clothing not only extends the life of your garments but also contributes to a more sustainable and eco-friendly lifestyle. Enjoy the process of transforming your old clothes into something new and stylish!