
Look for simple recycled craft projects to help kids understand the value of recycling. These projects can be made on holidays such as Earth Day. Many of these might also be excellent subjects for your school projects, including art and crafts.
Every time we look at the clutter we keep in our houses, we ask ourselves why we can’t make better use of it. We provide to you some excellent recycling project ideas. Various types of school projects can be created using recycled materials. These fantastic recycled craft ideas for kids will undoubtedly improve the quality of life on Earth and make your house a lovely place to live.
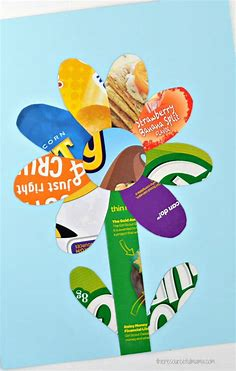
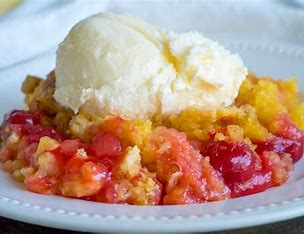
- Easter Egg Recycling Craft Ideas
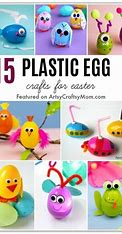
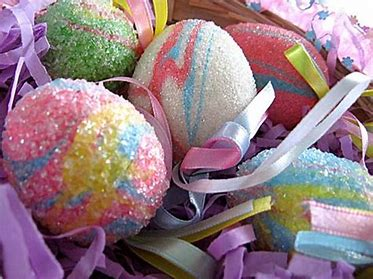
After painting and embellishing recycled Easter egg crafts, these papers give them a stunning appearance. They are simple to construct and can be decorated in any way with various types of ornamental material.
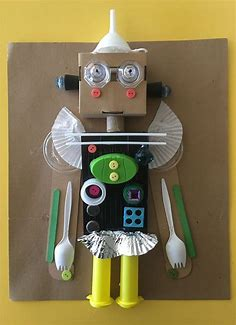
2. Paper Mache Cow Boy Hat For Kids
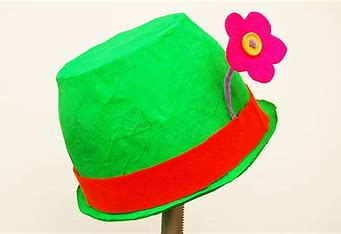
Making a paper mache cowboy hat for kids can be a fun and creative project! Here’s a simple step-by-step guide to help you through the process:
Materials Needed
- Balloons (for shaping)
- Newspaper or craft paper (torn into strips)
- Flour and water (for the paper mache paste)
- Plastic wrap (to cover the balloon)
- A mixing bowl and a whisk (for paste)
- Scissors
- Acrylic paint or markers (for decoration)
- Optional: decorations like sequins, stickers, or ribbons
Steps
- Prepare the Paste:
- Mix one part flour with two parts water in a bowl until smooth. You can also use white glue mixed with water for a quicker option.
- Prepare the Balloon:
- Inflate a balloon to a size that will fit your child’s head (you can use a smaller balloon for a mini hat).
- Cover the balloon with plastic wrap to prevent sticking.
- Tear the Paper:
- Tear the newspaper or craft paper into strips about 1-2 inches wide.
- Start Paper Mache:
- Dip a strip of paper into the paste, remove excess paste, and apply it to the balloon. Overlap the strips to ensure even coverage.
- Continue layering strips until the balloon is covered (about 3-4 layers is good). Leave a small opening at the bottom for the hat’s brim.
- Drying:
- Let the paper mache dry completely, which might take a day or two. Once dry, pop the balloon and carefully remove it from the paper mache shell.
- Shape the Hat:
- If needed, you can cut and shape the edges to create a cowboy hat look. You can also trim the bottom to make it fit better.
- Decorate:
- Once shaped, let your child paint the hat with acrylic paint. Use markers for finer details or add decorations like sequins or ribbons.
- Final Touches:
- Allow the paint and any added decorations to dry completely before wearing.
Tips
- Safety: If younger kids are involved, supervise them, especially with scissors and paint.
- Customization: Let kids choose their colors and decorations to make it unique!
- Reinforcement: If the hat feels flimsy, you can add an extra layer of paper mache or glue inside for sturdiness.
Enjoy your crafting! The finished cowboy hat will be perfect for dress-up or themed parties!
3. Easy To Make Pet Diorama
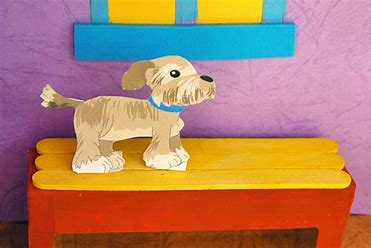
This adorable recycled DIY dollhouse or pet bed is stunning. Your kids may simply construct it out of used boxes or cardboard. The toys are able to live in peace in this house indefinitely.
4. Science Projects By Recycling Materials
This recycled science project is really clever and very simple to build. It presents the arctic environment in all of its raw beauty. Cotton can be used to depict snow and elements connected to the theme.
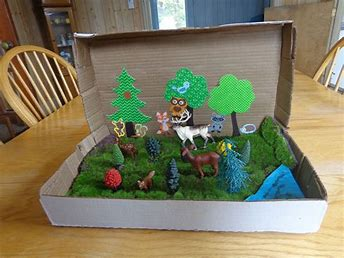
5. Rainforest Diorama

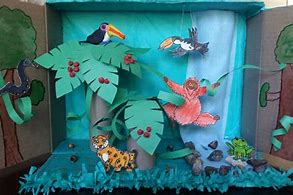
Creating a rainforest diorama can be a fun and educational project! Here’s a step-by-step guide to help you get started:
Materials Needed
- Base: A sturdy piece of cardboard or a wooden board
- Background: Blue and green construction paper or paint for sky and foliage
- Plant life: Fake plants, moss, or green tissue paper for foliage
- Animals: Toy animals (like frogs, birds, monkeys) or paper cutouts
- Water: Blue cellophane or clear plastic for rivers or lakes
- Craft supplies: Scissors, glue, markers, and optional items like sand or pebbles for texture
Steps to Create Your Diorama
- Choose Your Size: Decide how large you want your diorama to be. A 2-foot by 2-foot base is a manageable size.
- Create the Background:
- Paint or glue blue paper for the sky at the top of the diorama.
- Use green paper or paint for the foliage at the bottom.
- Add Layers:
- Create different levels in your diorama using small boxes or pieces of cardboard to represent hills or tree trunks.
- Plant Life:
- Arrange your fake plants or tissue paper to create a dense, lush environment. Use a variety of sizes and shapes to add depth.
- Water Feature:
- Cut a piece of blue cellophane and place it in a corner to represent a river or pond. You can add pebbles around it for a natural look.
- Animals:
- Position your toy animals or cutouts throughout the diorama. Think about their natural habitats—like monkeys in trees or frogs near water.
- Finishing Touches:
- Add details like butterflies made from paper, flowers, or small rocks. Use markers to label different elements or provide interesting facts about the rainforest.
- Display:
- Find a suitable spot to display your diorama, perhaps in a classroom, library, or at home!
Tips
- Research different rainforest layers (emergent, canopy, understory, forest floor) and include elements from each.
- Consider adding a small sign or booklet explaining the different plants and animals in your diorama.
Have fun with your rainforest diorama, and let your creativity shine!
6. Recycled Material Christmas Crafta
Here are some fun recycled material Christmas crafts you can try:
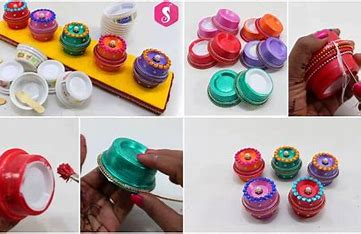
1. Bottle Cap Ornaments
- Materials: Old bottle caps, paint, glitter, string.
- Instructions: Paint the bottle caps in festive colors, add glitter for sparkle, and attach a piece of string to hang them on the tree.
2. Cardboard Christmas Trees
- Materials: Cardboard, scissors, paint, decorations (like buttons or beads).
- Instructions: Cut cardboard into tree shapes, decorate with paint or embellishments, and stand them up or hang them.
3. Egg Carton Snowflakes
- Materials: Egg cartons, scissors, paint, string.
- Instructions: Cut the egg carton into shapes resembling snowflakes, paint them, and attach string to hang them.
4. Recycled Paper Wreath
- Materials: Old newspapers or magazines, scissors, glue, and a base (like a cardboard ring).
- Instructions: Cut paper into strips, twist and glue them onto the base to create a wreath shape. Add a bow made from leftover fabric or paper.
5. Tin Can Lanterns
- Materials: Empty tin cans, hammer, nails, paint, tea lights.
- Instructions: Fill the can with water and freeze to make it sturdy. Once frozen, punch holes in patterns, remove the ice, and paint the can. Place a tea light inside for a festive glow.
6. Pinecone Reindeer
- Materials: Pinecones, googly eyes, red pom-poms, twigs.
- Instructions: Glue googly eyes and a red pom-pom for the nose onto the pinecone. Use twigs for antlers to create cute reindeer decorations.
7. Fabric Scraps Garland
- Materials: Fabric scraps, scissors, string.
- Instructions: Cut fabric into triangles or squares, tie them onto a long piece of string to create a colorful garland.
8. Toilet Paper Roll Santa
- Materials: Empty toilet paper rolls, paint, cotton balls, felt or paper for the hat.
- Instructions: Paint the roll red, add a cotton ball beard, and create a hat from felt or paper. Draw or glue on eyes.
These crafts are not only fun to make but also promote sustainability by reusing materials you already have! Enjoy your crafting!
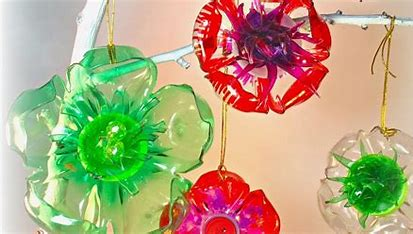
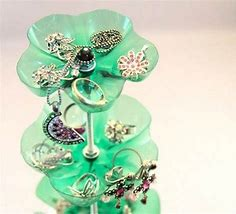
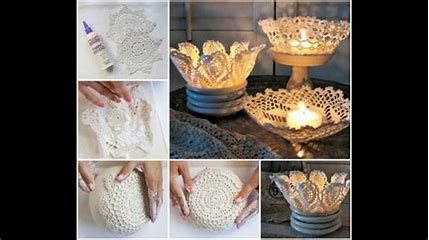
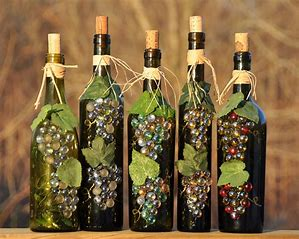
7. Stained Glass Jar to upcycle waste material
This stained glass vase has a really lovely appearance. These are simple enough for teenagers to make. These stained glass vases are simple to construct with brilliant glass paints and glass liners.
8. Learn to Make Cate from Box
It’s incredibly easy to make this lovely kitty litter out of used boxes. By creating such lovely cats, you can have a lovely collection of playmates. By doing this, you can lessen your carbon footprint as well. These kitties purr with delight at how stunning they appear.
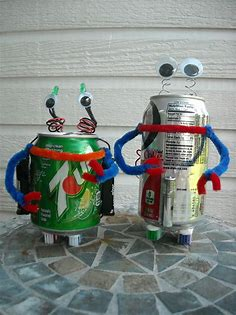
9. Recycle Craft Ideas For Kids

Here are some fun and easy recycled craft ideas for kids:
1. Bottle Cap Creatures
- Materials: Old bottle caps, paint, googly eyes, and glue.
- Instructions: Paint the bottle caps and let them dry. Use glue to attach googly eyes and create fun creatures like bugs or animals.
2. Toilet Paper Roll Binoculars
- Materials: Two toilet paper rolls, string, paint or markers.
- Instructions: Paint or decorate the rolls, glue them together side by side, and attach string to hang around the neck.
3. Egg Carton Caterpillar
- Materials: Egg carton, paint, googly eyes, and pipe cleaners.
- Instructions: Cut the egg carton into individual cups, paint them, and glue on googly eyes. Use pipe cleaners for antennas.
4. Recycled Paper Mache
- Materials: Old newspapers, flour, water, and balloons.
- Instructions: Mix flour and water to create a paste. Tear newspaper into strips, dip them in the paste, and layer them over a balloon. Once dry, pop the balloon and paint your creation.
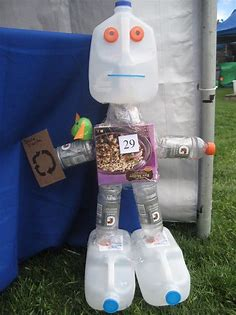
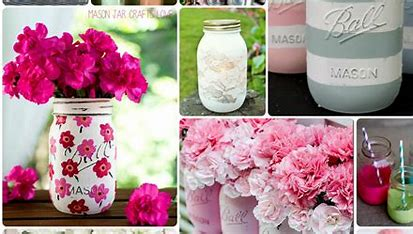
5. Plastic Bottle Planters
- Materials: Empty plastic bottles, soil, seeds, and paint.
- Instructions: Cut the bottles in half, decorate the outside, fill with soil, and plant seeds. Hang them or place them on a windowsill.
6. Jar Lid Magnets
- Materials: Old jar lids, magnets, glue, and decorative paper.
- Instructions: Cut out shapes from decorative paper, glue them inside the jar lids, and attach a magnet to the back. Use them to hold notes on the fridge!
7. Cereal Box Puzzle
- Materials: Empty cereal box, scissors, and markers.
- Instructions: Cut the front of the cereal box into various puzzle pieces. Decorate them, and then put the puzzle together!
8. Soda Bottle Whistles
- Materials: Empty soda bottles, scissors.
- Instructions: Cut the bottom of the bottle to create a whistle. Experiment with different lengths for different sounds.
9. Paper Plate Masks
- Materials: Paper plates, paint, scissors, and string.
- Instructions: Cut eye holes in a paper plate, decorate it to look like an animal or character, and attach string to wear it as a mask.
10. Tin Can Wind Chimes
- Materials: Empty tin cans, string, paint, and beads.
- Instructions: Clean the cans and decorate them. Punch holes in the bottom, string them together with beads, and hang them outside.
These crafts are not only fun but also teach kids about recycling and creativity. Enjoy crafting!
10. Tree Ornament For Christmas using Old CDs

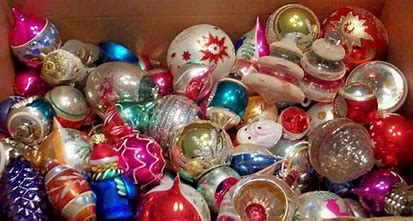
This recycled craft project is lovely and perfect for Christmas. You can gather used CDs and customise their paint job. You can use paint, glitter, stickers, and other materials. to adorn these CDs. Add a top ribbon to complete the look and hang these lovely tree ornaments.
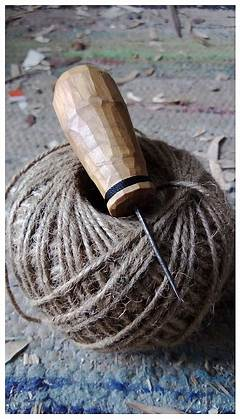
11. Good Recycling Ideas using Ice-cream Sticks
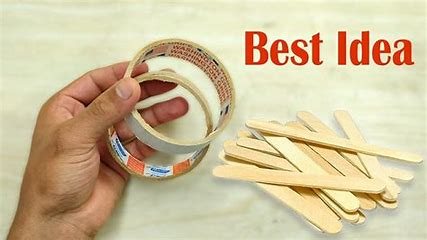
Here are some creative recycling ideas using ice cream sticks:
1. Picture Frames
- Materials: Ice cream sticks, glue, paint, and decorative items (like beads or glitter).
- Instructions: Arrange the sticks into a square or rectangle to form a frame. Glue them together, decorate as desired, and add a photo in the center.
2. Miniature Birdhouses
- Materials: Ice cream sticks, glue, scissors, and paint.
- Instructions: Build a small birdhouse shape by gluing sticks together. Create a roof and decorate it. Hang it outside or place it in the garden.
3. Coasters
- Materials: Ice cream sticks, glue, and varnish (optional).
- Instructions: Arrange sticks in a square or circle pattern, gluing them together. Once dry, you can paint or varnish them for a finished look.
4. DIY Ruler
- Materials: Ice cream sticks, a marker.
- Instructions: Mark measurements on a straightened row of ice cream sticks. Use it as a ruler or a measuring tool for crafts.
5. Stick Puppets
- Materials: Ice cream sticks, felt, googly eyes, and glue.
- Instructions: Decorate the sticks with felt and googly eyes to create fun puppets. Use them for storytelling or puppet shows!
6. Bookmarks
- Materials: Ice cream sticks, paint, and decorative paper.
- Instructions: Paint the sticks in bright colors or patterns, then use them as bookmarks. You can also attach a ribbon to one end for added flair.
7. Wall Art
- Materials: Ice cream sticks, canvas or cardboard, paint.
- Instructions: Create geometric shapes or patterns by gluing sticks onto a canvas or cardboard. Paint them in colors that match your decor.
8. Pencil Holder
- Materials: Ice cream sticks, glue, and a small container.
- Instructions: Glue sticks around a small container (like a tin can) to create a decorative pencil holder for your desk.
9. Game Board
- Materials: Ice cream sticks, a cardboard base, markers.
- Instructions: Create a simple game board (like tic-tac-toe) by arranging sticks on a cardboard base. You can use different colored sticks as game pieces.
10. Napkin Holder
- Materials: Ice cream sticks, glue, and paint.
- Instructions: Glue sticks together in a rectangular shape to create a napkin holder. You can paint it or decorate it to match your dining area.
These projects are fun and easy to do, making them great activities for kids and adults alike! Enjoy your crafting!
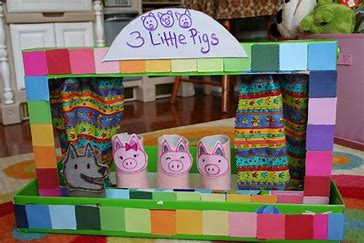
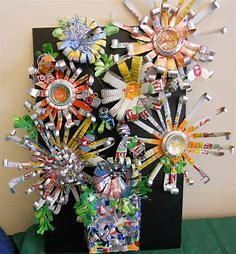
12. Good Recycling Projects For Adults
You may create a true circus stage with various types of puppets and circus scenery, and then utilise this stage to tell your stories or even present a day at the circus.
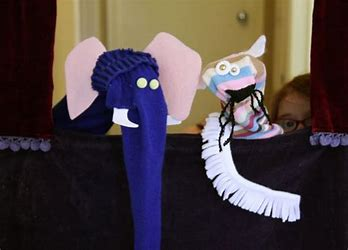
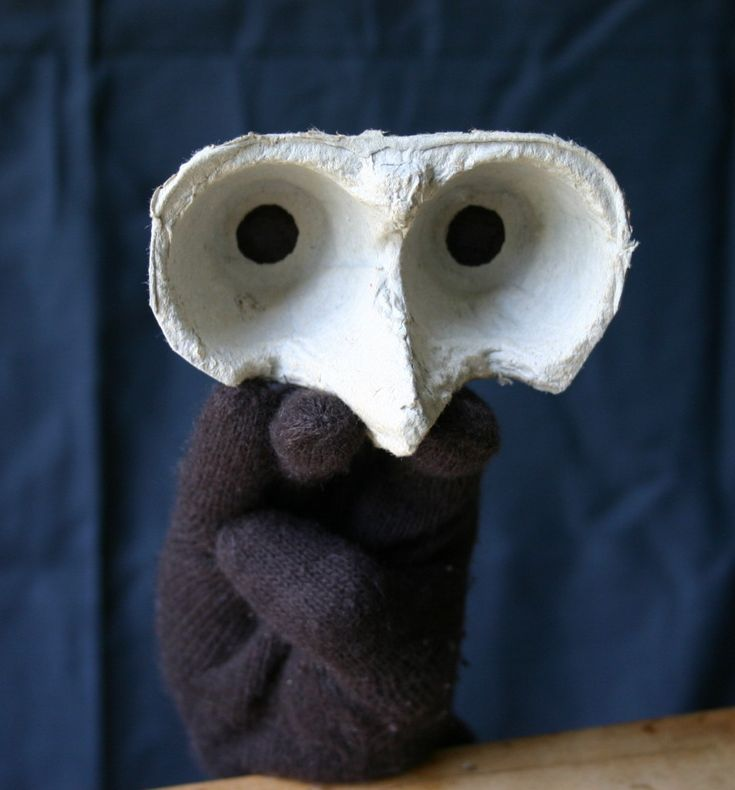
13. Puppet Figure Recycle Crafta
Here’s a fun guide to making puppet figures using recycled materials!
Materials Needed
- Old socks, gloves, or fabric scraps (for the puppet body)
- Ice cream sticks or cardboard (for puppet support)
- Googly eyes, buttons, or beads (for facial features)
- Yarn or string (for hair)
- Markers or paint (for decoration)
- Glue, scissors, and tape
Instructions
1. Choose Your Base
- Sock Puppet: Use an old sock as the base. The toe will be the puppet’s mouth, and the ankle can be the body.
- Glove Puppet: Use a glove and each finger can become a different character.
2. Create the Face
- Googly Eyes: Glue googly eyes or buttons onto the sock/glove where you want the eyes.
- Mouth: For a sock puppet, you can cut a small slit in the toe area for the mouth. Use fabric or felt to make a tongue.
- Decorate: Use markers or paint to add details like eyebrows, a nose, or cheeks.
3. Add Hair
- Yarn: Cut lengths of yarn and glue them to the top of the puppet’s head for hair. You can use different colors for fun effects.
- Fabric Scraps: Cut fabric into strips to create a unique hairstyle.
4. Support Your Puppet
- Ice Cream Stick Handle: If you want a hand puppet on a stick, glue the puppet head to an ice cream stick for easy handling.
- Cardboard Base: Create a sturdy base by gluing the puppet head to a piece of cardboard cut into a rectangle.
5. Create Accessories
- Clothes: Use scraps of fabric to create outfits. Glue or sew them onto the puppet.
- Props: Make simple props, like a cardboard sign or a small accessory, to enhance your puppet’s character.
6. Final Touches
- Make sure everything is securely glued. Add any last decorations to personalize your puppet.
7. Puppet Show Time!
- Use your newly made puppets to put on a puppet show. You can create a story and involve family or friends!
Tips
- Encourage kids to get creative with their puppet designs, using a variety of materials and colors.
- Experiment with different types of puppets, like finger puppets or marionettes, using recycled materials.
Enjoy your puppet-making adventure!
14. Recycle Craft Projects For Science – Coral Reef Diorama
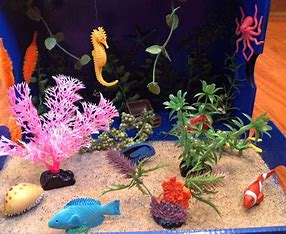
An underwater life science project can be created with recycled materials. These stunning sea animals are readily realised with garbage and discarded materials.
15. Dinosaur Diorama
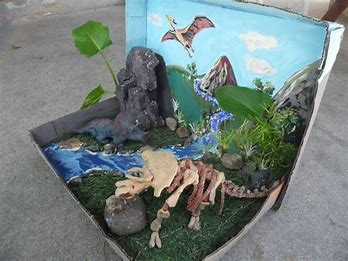
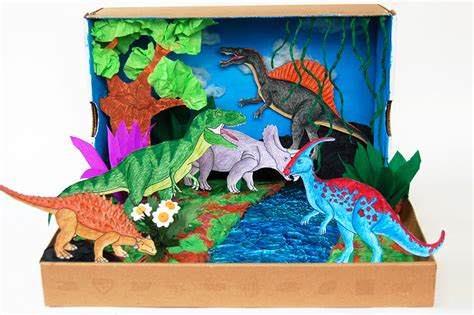
Creating a dinosaur diorama can be a fun and educational project! Here’s a step-by-step guide to help you make your own dinosaur diorama using recycled materials.
Materials Needed
- Box or shoebox (for the base)
- Cardboard (for the landscape)
- Paint (green, brown, blue, etc.)
- Plastic dinosaurs (or make your own from clay or paper)
- Natural materials (like leaves, twigs, and rocks)
- Glue (hot glue or craft glue)
- Scissors
- Paper or felt (for additional details)
Instructions
1. Prepare the Base
- Use a shoebox or any small box as the base for your diorama. This will represent the land where your dinosaurs live.
2. Create the Landscape
- Cut pieces of cardboard to create different levels in your diorama. You can make hills, valleys, or water features.
- Paint the cardboard in appropriate colors (green for grass, brown for dirt, blue for water, etc.).
3. Assemble the Background
- Use a larger piece of cardboard or a poster board to create a backdrop. Paint it with a sky or jungle scene to set the atmosphere.
- You can also draw or print pictures of volcanoes, trees, or clouds to add to the background.
4. Add Natural Elements
- Collect small rocks, twigs, leaves, and other natural materials to create a realistic environment.
- Glue these elements to the base of the diorama to represent rocks, trees, or bushes.
5. Place the Dinosaurs
- Arrange your plastic dinosaurs or any dinosaur figures you’ve created. You can make them look like they’re roaming, eating, or resting.
- Position them in a way that tells a story (e.g., a T-Rex chasing a smaller dinosaur).
6. Create Additional Details
- Use paper or felt to create features like bushes or trees. Cut them into shapes and glue them around the diorama.
- You can also make signs with dinosaur names or facts to place around your diorama.
7. Final Touches
- Make sure everything is securely glued and the diorama looks cohesive. Add any extra details to enhance the scene.
- Allow everything to dry completely.
8. Display Your Diorama
- Find a nice spot to display your dinosaur diorama. You can even host a mini “tour” for family or friends to showcase your work!
Tips
- Research different types of dinosaurs and their habitats to make your diorama more educational.
- Encourage creativity! Kids can invent their own dinosaurs or scenarios to make the diorama unique.
Enjoy your dinosaur diorama creation!
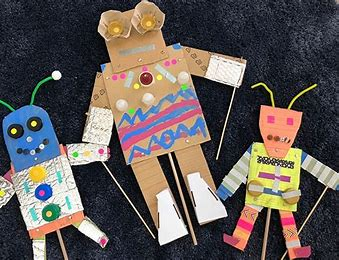
16. Recycle Craft – Family Stick Puppets
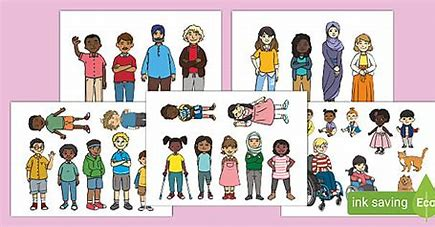
These stick puppet crafts for the family are a wonderful complement to your child’s role-playing toys or games. It’s simple to make these stick puppets out of coloured paper and ice cream popsicles.
17. Good Recycling Project – Festive Maracas
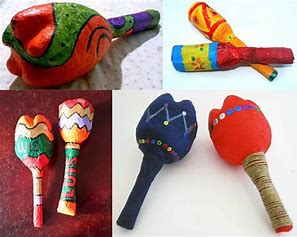
Making festive maracas is a fun and creative recycling project! Here’s how to make them using materials you might already have at home.
Materials Needed
- Plastic bottles or cups (empty and clean)
- Dried beans, rice, or small pebbles (for filling)
- Tape or glue
- Decorative materials (like markers, paint, washi tape, or stickers)
- Cardboard or paper (for handles)
- Scissors
Instructions
1. Prepare the Base
- If using plastic bottles, make sure they are empty and clean. Remove any labels for a neat appearance.
- If using cups, you can stack two cups together for a fuller sound.
2. Add the Filling
- Fill each bottle or cup about one-third full with dried beans, rice, or small pebbles. This will create the sound when shaken.
3. Seal the Containers
- If using bottles, screw on the cap securely. You can add tape around the cap to prevent it from coming off.
- If using cups, place a piece of tape or a piece of cardboard over the open end to seal it shut.
4. Create Handles
- Cut strips of cardboard or use sturdy paper to create handles. Attach these to the side of the bottle or cup using tape or glue. If using a cardboard piece, you can create a loop to hold onto.
5. Decorate Your Maracas
- Use markers, paint, or washi tape to decorate your maracas. Get creative with colors and designs to make them festive!
- You can also glue on stickers or add other decorative elements.
6. Final Touches
- Ensure everything is securely attached. Allow any glue or paint to dry completely before using.
7. Enjoy Your Maracas!
- Shake your maracas to create festive sounds! Use them for dance parties, music sessions, or any festive celebrations.
Tips
- Experiment with different fillings to see how they change the sound.
- Encourage kids to personalize their maracas with themes for different holidays or events.
Enjoy making your festive maracas and have fun making music
18. Fishing for Letter Game for Kids
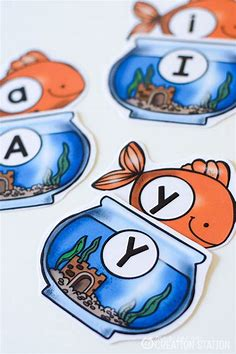
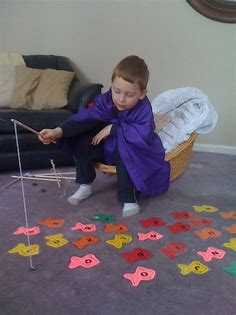
For kids, this is a really enjoyable exercise. They can play with their own homemade game after creating this creative game out of recycled materials. This is an excellent fishing game for get-togethers, birthday celebrations, and even sleepovers.
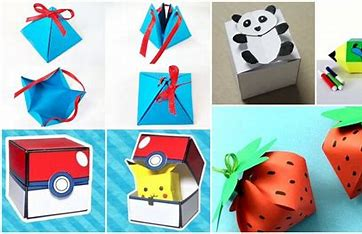
19. Easy To Make Recycle Project For Kids
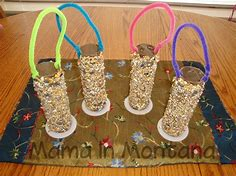
Here’s a simple and fun recycling project for kids: DIY Bird Feeders!
Materials Needed
- Empty toilet paper rolls (or pine cones)
- Peanut butter (or lard for a healthier option)
- Birdseed
- String or twine (optional, for hanging)
- Plate or shallow dish (for spreading the peanut butter)
Instructions
1. Prepare the Roll
- If using toilet paper rolls, keep them as they are. If you prefer pine cones, skip to step 3.
2. Spread Peanut Butter
- Place some peanut butter on a plate. Use a knife or spoon to spread peanut butter evenly over the outside of the toilet paper roll.
3. Add Birdseed
- Roll the peanut butter-covered roll in birdseed until it’s fully coated. Make sure the seeds stick well to the peanut butter.
4. Attach String (optional)
- If you want to hang your bird feeder, cut a piece of string or twine about 12 inches long. Thread it through the roll and tie a knot at the top.
5. Find a Good Spot
- Hang your bird feeder from a tree branch or place it on a flat surface in your garden or yard. Make sure it’s visible to the birds!
6. Observe
- Encourage kids to watch for birds visiting their feeders. You can even keep a journal to note which birds come to visit!
Tips
- Decorate: Kids can paint or decorate the toilet paper rolls before applying peanut butter for a colorful touch.
- Experiment: Try different types of birdseed or even add dried fruits for variety.
- Safety: Ensure no allergies to peanut butter before using it, or opt for lard or other bird-safe fats.
This project is not only fun and easy to make but also teaches kids about nature and the importance of helping wildlife. Enjoy crafting!
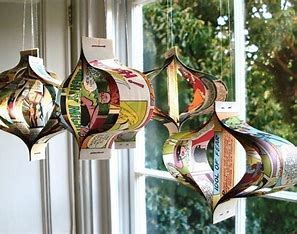
20. Good Idea For A Recycling Craft With Hot Air Balloon
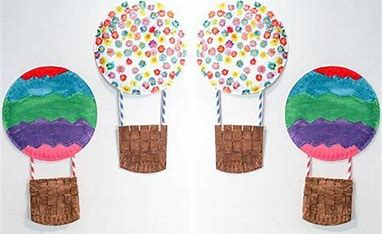
Do you want your children’s room to be as imaginative and artistic as possible? Simply dangle a hot air balloon over their chamber. No, it’s definitely a paper replica rather than the real thing. Inflate a balloon, then use glue and old paper to form a sturdy, circular construction on it. Subsequently, use a needle to puncture the balloon and paint the structure to resemble a hot air balloon.