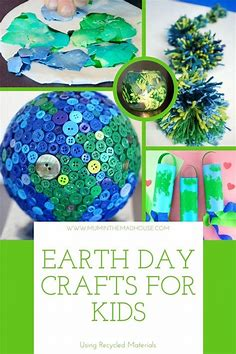

Reusing obsolete materials is best achieved through recycling operations. You can make a lot of lovely crafts to display to your loved ones if you don’t feel like selling or giving away the items you’ve amassed around your house. Best of all, you save a tonne of cash! Continue reading to find out how to recycle plastic containers and turn trash into art.
- Brick Recycling Projects
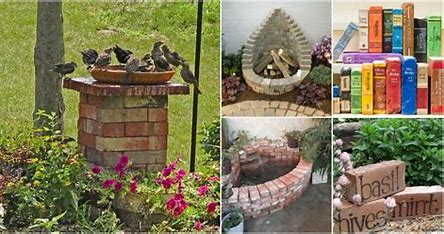
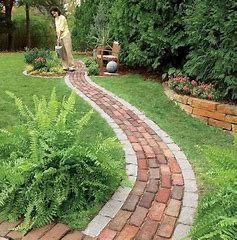
Recycling bricks can be a great way to repurpose materials while minimizing waste. Here are some creative projects you might consider:
- Garden Pathway: Use reclaimed bricks to create a charming path through your garden. Arrange them in a herringbone pattern or create a simple linear path.
- Raised Garden Beds: Stack bricks to form raised garden beds. They provide good drainage and can add a rustic aesthetic to your garden.
- Fire Pit: Construct a fire pit using bricks. This can become a cozy gathering spot for evenings outdoors.
- Planters: Create unique planters by stacking bricks in various configurations. You can leave some openings for plants to grow through.
- Outdoor Seating: Build benches or seating areas with bricks. Combine them with wooden planks for a more comfortable finish.
- Retaining Walls: If you have a sloped yard, bricks can be used to build retaining walls that help with erosion and create level spaces.
- BBQ Grill: Construct a DIY outdoor grill or smoker using bricks. It can be both functional and a decorative feature in your yard.
- Art Installations: Use bricks to create sculptures or other artistic installations. Paint or decorate them for a more personalized touch.
- Brick Pavers: Repurpose bricks as pavers for a patio or driveway. They’re durable and can add character to your outdoor spaces.
- Wall Décor: Create an interior accent wall using reclaimed bricks for a rustic look. This can be especially striking in a kitchen or living room.
When undertaking any brick recycling project, ensure that the bricks are safe to use, free from contaminants, and properly cleaned. Happy building.
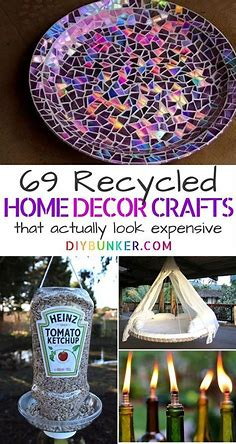
2. Mosaic Tile Birdbath
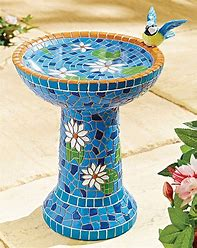
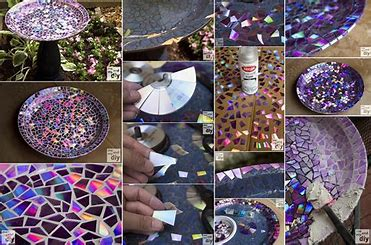
I was always amazed as a child by how amazing and glittery DVD backs are. However, with digital downloads growing in popularity, DVDs are becoming somewhat outdated. Consider turning your old DVDs into something beautiful, like this mosaic tile birdbath, rather than discarding them!
3. Hanging Light Bulb Planter
A hanging light bulb planter is a creative and stylish way to display plants, especially small succulents or air plants. Here’s how to make one:
Materials Needed:
- Old light bulbs (incandescent or LED, not CFL)
- String or twine (for hanging)
- Small rocks or pebbles (for drainage)
- Potting soil
- Small plants (like succulents or air plants)
- Wire or fishing line (optional, for extra support)
- Gloves (for safety)
Instructions:
- Prepare the Light Bulb:
- Remove the glass: Carefully break the glass bulb using pliers, making sure to wear gloves and eye protection. Alternatively, you can use a small drill to create a hole at the bottom.
- Clean the interior: Remove the filament and any other components, leaving only the outer shell.
- Create a Drainage Hole (if needed):
- If you didn’t drill a hole, make a small one in the bottom of the bulb for drainage.
- Add Rocks:
- Place a few small rocks or pebbles at the bottom of the bulb for drainage. This will help prevent overwatering.
- Add Potting Soil:
- Carefully fill the bulb with potting soil, leaving enough space for your plant.
- Planting:
- Make a small hole in the soil and gently place your plant inside. Press the soil around it to secure it.
- Hanging:
- Attach a length of string or twine around the neck of the bulb. You can also use wire for a more secure hold.
- Create a loop for hanging, or use fishing line for a more invisible look.
- Display:
- Hang your light bulb planter in a sunny spot, ensuring it gets enough light for the plant to thrive.
Tips:
- Consider using a mixture of potting soil and sand for better drainage.
- Use succulents or air plants that don’t require much soil.
- Experiment with different light bulb sizes and shapes for varied designs.
Enjoy your unique hanging light bulb planter! It’s a great conversation starter and adds a touch of greenery to your space.
4. Old Drawers
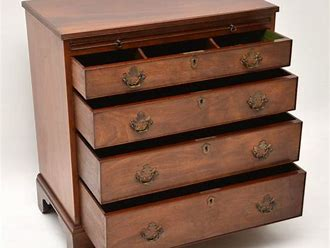
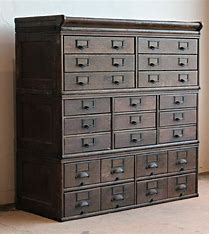
Many people can now utilise this when they intend to move homes. Try making something new out of your old furniture if you want to get new furniture but still want to use the items you spent a lot of money on.
5. Bird Feeder
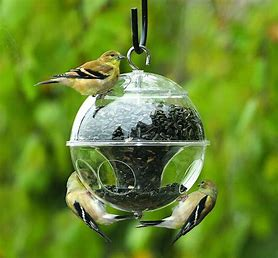
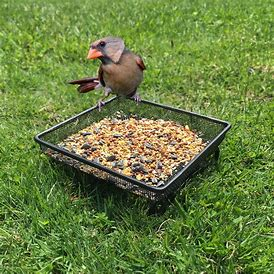
Creating a bird feeder is a fun and rewarding project that can attract various bird species to your yard. Here’s a simple guide to making a basic bird feeder:
Materials Needed:
- Empty plastic bottle or milk jug (or wooden materials if you prefer a sturdier design)
- Wooden dowels or skewers (for perches)
- Birdseed
- Scissors or a craft knife
- String or wire (for hanging)
- Optional: Paint or decorations (non-toxic)
Instructions:
- Prepare the Bottle:
- If using a plastic bottle, remove the label and clean it thoroughly. Cut small openings in the sides for birds to access the seeds. Make sure the holes are big enough for birds to get their beaks in but not so big that the seeds spill out easily.
- Add Perches:
- Poke holes below the seed openings and insert wooden dowels or skewers. These will serve as perches for the birds. Ensure they are secure so they can hold the weight of the birds.
- Fill with Birdseed:
- Fill the bottle with birdseed through the top opening. If using a milk jug, you can fill it through the spout.
- Create a Hanging Mechanism:
- Use string or wire to create a loop around the top of the feeder. This will allow you to hang it from a tree branch or hook.
- Decorate (Optional):
- If you want to personalize your feeder, consider painting it or adding decorations. Just ensure that any materials used are non-toxic and safe for the birds.
- Hang the feeder:
- Find a suitable spot to hang your bird feeder. Ideally, choose a location that is visible from your window but safe from predators. Make sure it’s easy to refill.
- Maintenance:
- Regularly check the feeder to refill it and clean it as needed. Keeping it clean will help prevent mold and disease among visiting birds.
Tips:
- Choose a seed mix suitable for the types of birds in your area.
- Consider adding a baffle or shield to protect against squirrels.
- Experiment with different designs to attract a variety of birds.
Enjoy watching the birds come to your feeder! It’s a great way to connect with nature and contribute to your local ecosystem.
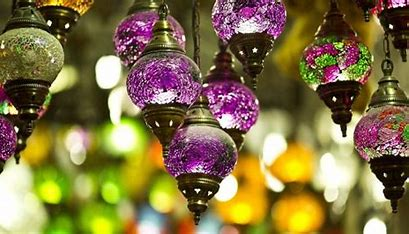
6. Lamps
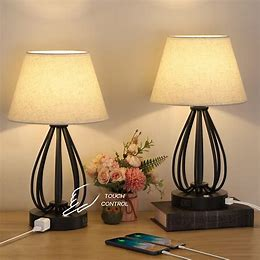
Making your own lamps can be a fun DIY project that adds a personal touch to your home. Here are a few creative lamp ideas along with basic instructions:
1. Mason Jar Lamp
Materials Needed:
- Mason jar
- Light bulb socket kit
- Light bulb
- Decorative elements (optional, like fairy lights or beads)
- Lamp base or wood for the base
- Drill (if needed for the socket)
Instructions:
- Prepare the Jar: Clean and dry the mason jar. If you want, add decorative elements inside the jar.
- Install the Socket: Drill a hole in the jar lid for the socket. Insert the socket and secure it according to the kit instructions.
- Assemble the Lamp: Attach the lamp base to the jar. Screw in the light bulb.
- Finish Up: Plug in and enjoy your new lamp!
2. Wine Bottle Lamp
Materials Needed:
- Empty wine bottle
- Lamp kit (socket, cord, and switch)
- Light bulb
- Drill with glass drill bit (optional)
- Lampshade (optional)
Instructions:
- Prepare the Bottle: Clean the wine bottle thoroughly.
- Drill a Hole: If you want to run the cord through the bottle, drill a hole in the bottom. Use a glass drill bit for this step.
- Install the Socket: Feed the cord through the hole and attach the socket.
- Add the Light Bulb: Screw in the light bulb.
- Optional Lampshade: If you want, you can add a lampshade on top for a finished look.
3. Book Lamp
Materials Needed:
- Old books
- Lamp kit (socket, cord, and switch)
- Light bulb
- Small piece of wood or sturdy base
Instructions:
- Create the Base: Stack books and secure them with glue or brackets.
- Drill a Hole: Drill a hole in the top book for the socket.
- Install the Socket: Feed the cord through the hole and attach the socket.
- Add Light Bulb: Screw in the light bulb, and your book lamp is ready!
4. Driftwood Lamp
Materials Needed:
- Piece of driftwood or branch
- Lamp kit (socket, cord, and switch)
- Light bulb
- Drill
- Base (wood or metal)
Instructions:
- Prepare the Driftwood: Clean and dry the driftwood piece.
- Attach the Base: Secure the driftwood to a stable base.
- Install the socket: Drill a hole in the driftwood for the socket and attach it.
- Add Light Bulb: Screw in the light bulb.
Tips:
- Always ensure that electrical components are safely installed to avoid hazards.
- Personalize your lamps with paint, fabric, or other embellishments.
- Choose light bulbs that suit the ambiance you want to create—warm light for coziness, cool light for a modern feel.
Enjoy your lamp-making project! Each lamp can be a unique expression of your style and creativity.
7. The Garden Glove
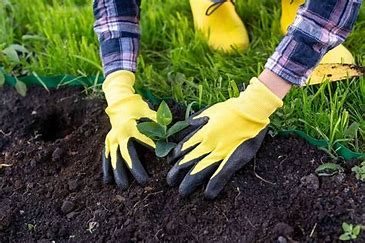
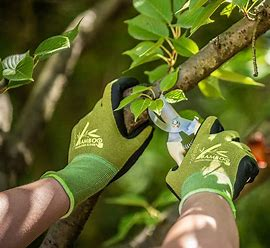
Since trampolines can be pricey, consider converting them into a gorgeous hanging bed if you don’t want to throw them away after your kids grow up.
8. Wine Bottle
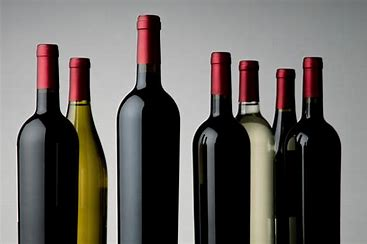
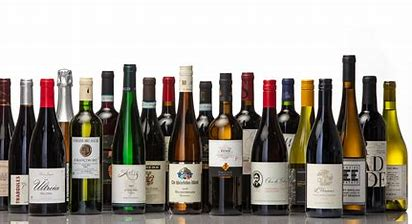
Here are some creative ideas for repurposing wine bottles into decorative and functional items:
1. Wine Bottle Candle Holders
Materials Needed:
- Empty wine bottles
- Tea lights or taper candles
Instructions:
- Clean and dry the wine bottles.
- For taper candles, you may need to drill a hole into the bottle neck for a snug fit.
- Place tea lights directly into the bottle or on a plate.
2. Wine Bottle Planters
Materials Needed:
- Empty wine bottles
- Potting soil
- Small plants or succulents
Instructions:
- Cut the wine bottle in half (safely using a glass cutter).
- Fill the bottom half with potting soil.
- Plant your chosen greenery and water appropriately.
3. Wine Bottle Lamp
Materials Needed:
- Empty wine bottle
- Lamp kit (socket, cord, and switch)
- Light bulb
Instructions:
- Clean the wine bottle thoroughly.
- Drill a hole in the bottom for the lamp cord.
- Feed the cord through and install the socket.
- Add a light bulb and enjoy your new lamp!
4. Wine Bottle Bird Feeder
Materials Needed:
- Empty wine bottle
- Wooden dowels or skewers
- Birdseed
- String or wire (for hanging)
Instructions:
- Clean the wine bottle and make holes for dowels (perches).
- Fill the bottle with birdseed and secure it in an upright position.
- Hang it from a tree branch.
5. Wine Bottle Vases
Materials Needed:
- Empty wine bottles
- Flowers
Instructions:
- Clean and dry the bottles.
- Fill with water and add fresh or dried flowers for a simple centerpiece.
6. Wine Bottle Serving Tray
Materials Needed:
- Empty wine bottles
- Wooden board or tray base
- Strong adhesive or screws
Instructions:
- Cut the bottles in half and use the base for compartments.
- Secure the bottles to the tray base with adhesive or screws.
- Use for serving snacks or as a decorative piece.
7. Wine Bottle Wall Art
Materials Needed:
- Empty wine bottles
- Paint or twine (optional)
Instructions:
- Clean and dry the bottles.
- Decorate with paint, twine, or other materials.
- Hang on a wall or use as part of a gallery display.
Tips:
- Always ensure that the bottles are clean and dry before starting any project.
- Use safety equipment (gloves, goggles) when cutting or drilling glass.
- Personalize your projects to match your home decor or style.
Repurposing wine bottles can add charm and creativity to your space while being environmentally friendly. Enjoy crafting.
9. How to Upcycle Milk Jugs
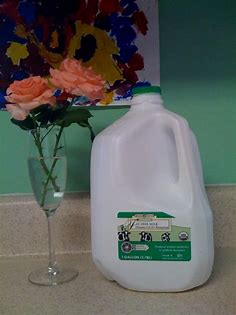
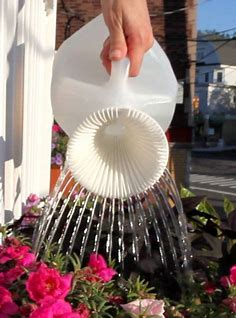
The variety of ways milkjugs can be recycled will astound you. These upcycling ideas for milk jugs will teach you how to make a DIY plant pot, a DIY bird feeder, and a DIY watering can. Let Cool DIY Ideas demonstrate the process for you.
10. Tin Can Recycling Projects
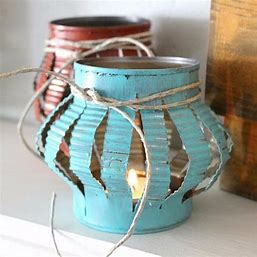
Recycling tin cans can lead to some fun and practical DIY projects. Here are several creative ideas to transform tin cans into useful items:
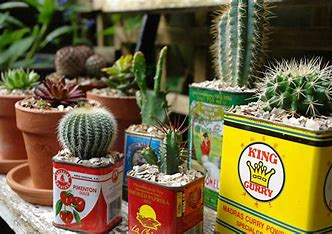
1. Tin Can Planters
Materials Needed:
- Empty tin cans
- Potting soil
- Small plants or seeds
- Paint (optional)
Instructions:
- Remove the labels and clean the cans.
- Punch holes in the bottom for drainage.
- Paint or decorate the outside if desired.
- Fill with soil and plant your chosen greenery.
2. Candle Holders
Materials Needed:
- Empty tin cans
- Tea lights or votive candles
- Water and freezer (optional, for easy cutting)
- Decorative elements (like paint or twine)
Instructions:
- Fill the can with water and freeze overnight.
- Once frozen, use a hammer and nail to create patterns or holes in the can.
- Let the ice melt, then remove the remaining water.
- Place a candle inside and decorate as desired.
3. Storage Containers
Materials Needed:
- Empty tin cans
- Paint or decorative paper
- Labels (optional)
Instructions:
- Clean and remove labels from the cans.
- Paint or wrap the cans in decorative paper.
- Use them to organize office supplies, kitchen utensils, or craft materials.
4. Wind Chimes
Materials Needed:
- Empty tin cans
- String or fishing line
- Beads or bells (optional)
- Paint (optional)
Instructions:
- Clean and decorate the cans.
- Punch holes in the bottom and thread string through.
- Hang them at different lengths for a chime effect.
5. Wall Art or Garden Art
Materials Needed:
- Empty tin cans
- Paint
- Wire or string for hanging
Instructions:
- Clean and paint the cans in bright colors or patterns.
- Create a design to hang on a wall or in the garden.
- Attach with wire or string.
6. DIY Utensil Holder
Materials Needed:
- Empty tin cans
- Paint or decorative paper
Instructions:
- Clean and decorate the cans.
- Use them on your kitchen counter to hold utensils, pens, or other items.
7. Tin Can Lanterns
Materials Needed:
- Empty tin cans
- Hammer and nail
- Tea lights or LED candles
- Wire (for hanging)
Instructions:
- Fill the can with water and freeze overnight.
- Once frozen, create designs by punching holes in the can.
- Remove the ice, place a candle inside, and hang with wire.
Tips:
- Always ensure cans are clean and safe to handle.
- Use safety equipment (gloves, goggles) when cutting or puncturing cans.
- Personalize your projects to match your style and preferences.
These tin can projects can add a touch of creativity to your home while promoting sustainability! Enjoy crafting!
11. Water Bottle Wind Spirals

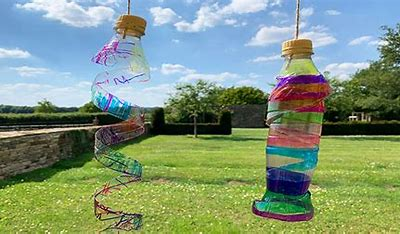
Creating water bottle wind spirals is a fun and eco-friendly project that can add a colorful touch to your garden or outdoor space. Here’s how to make them:
Materials Needed:
- Plastic water bottles (empty and clean)
- Scissors or a craft knife
- Paint or permanent markers (optional for decoration)
- String or fishing line (for hanging)
- Wire or a sturdy stick (for support, optional)
Instructions:
- Prepare the Bottles:
- Remove labels and caps from the water bottles and clean them thoroughly.
- Cut the Bottles:
- Using scissors or a craft knife, carefully cut the bottom off each bottle.
- Next, cut a spiral shape starting from the top of the bottle down to the bottom. Aim for about 1-2 inches wide for each spiral. The more you cut, the longer the spiral will be.
- Decorate (Optional):
- If you’d like, use paint or permanent markers to decorate the spirals. Bright colors and patterns can enhance their visibility in the wind.
- Create a Hanging Loop:
- At the top of the spiral, make a small hole (or use the existing bottleneck) to thread a piece of string or fishing line through. This will be used for hanging.
- Add Support (Optional):
- If you want the spirals to be more stable, you can attach them to a sturdy stick or wire. Simply poke the stick through the spiral or attach it to the bottom.
- Hang Your Wind Spirals:
- Choose a spot in your garden or outdoor area where they can catch the wind, such as from a tree branch, a hook, or a stake in the ground.
- Enjoy:
- Watch your water bottle wind spirals spin and dance in the breeze!
Tips:
- Experiment with different sizes and lengths of spirals for varied effects.
- Use bottles of different colors or shapes for a more dynamic display.
- If you live in a windy area, ensure your spirals are securely hung to avoid damage.
This project is a great way to repurpose plastic bottles while adding some fun decoration to your outdoor space! Enjoy crafting!
12. 2+Uses for K-Cups

There are many useful uses for K-Cups that you’ve probably never thought of before. You can always find something to do, from playing card holders to kid crafts to planting seeds. Find out more from Happy Hooligans.
13. Toilet Paper Craft
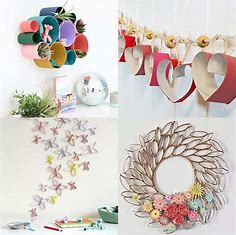
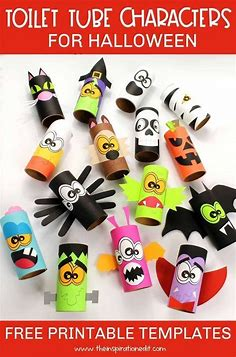
Toilet paper rolls are versatile and can be transformed into a variety of fun and creative crafts. Here are some engaging project ideas:
1. Toilet Paper Roll Animals
Materials Needed:
- Empty toilet paper rolls
- Paint or markers
- Googly eyes (optional)
- Construction paper
- Glue
Instructions:
- Paint or color the toilet paper roll in your desired animal colors.
- Cut out shapes from construction paper to create ears, tails, or other features.
- Glue on googly eyes and any other decorations.
- Let dry and display your animals!
2. Mini Organizer
Materials Needed:
- Empty toilet paper rolls
- Adhesive or tape
- Decorative paper or paint
Instructions:
- Decorate the rolls with paint or wrap them in decorative paper.
- Arrange the rolls vertically and glue them onto a piece of cardboard or a small tray to create compartments for organizing small items like pens, scissors, or craft supplies.
3. Bird Feeder
Materials Needed:
- Empty toilet paper roll
- Peanut butter or lard
- Birdseed
- String
Instructions:
- Spread peanut butter or lard over the outside of the toilet paper roll.
- Roll the coated tube in birdseed until covered.
- Thread a piece of string through the roll and hang it outside to attract birds.
4. Toilet Paper Roll Bracelets
Materials Needed:
- Empty toilet paper rolls
- Scissors
- Paint or markers
- Decorative elements (beads, glitter, etc.)
Instructions:
- Cut the toilet paper roll into smaller rings (about 1 inch wide).
- Decorate each ring with paint or markers.
- Add beads or other embellishments if desired.
- Wear them as bracelets!
5. Toilet Paper Roll Flowers
Materials Needed:
- Empty toilet paper rolls
- Scissors
- Paint or markers
- Glue
- Green paper (for leaves and stems)
Instructions:
- Cut the toilet paper roll into sections to create petal shapes.
- Paint or color the sections as desired.
- Glue the sections together to form flowers.
- Attach leaves and stems made from green paper.
6. DIY Binoculars
Materials Needed:
- Two empty toilet paper rolls
- String
- Tape or glue
- Paint or decorative paper
Instructions:
- Decorate the rolls with paint or wrapping paper.
- Tape or glue the rolls together side by side.
- Punch holes in each end and attach a string for wearing.
7. Toilet Paper Roll Rocket
Materials Needed:
- Empty toilet paper roll
- Colored paper or foil
- Scissors
- Glue
Instructions:
- Cut out a cone shape from colored paper for the rocket’s top.
- Decorate the toilet paper roll with colors or stickers.
- Attach the cone to the top and add details like flames at the bottom.
Tips:
- Always supervise young children during crafting.
- Use non-toxic materials for safety.
- Encourage creativity by letting kids design their projects however they like!
These toilet paper roll crafts are not only fun but also a great way to promote recycling and creativity! Enjoy crafting!