
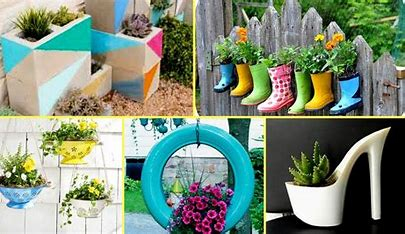
Upcycling is a creative and eco-friendly way to breathe new life into old items, turning them into something functional, decorative, or useful. Here are some DIY upcycling ideas and projects to help you transform things you already have:
1. Old T-Shirts into a T-Shirt Rug
- Materials: Old t-shirts, scissors, hot glue gun or needle and thread.
- How-To: Cut your old t-shirts into strips and braid or knot them together to create a unique, colorful rug. You can also sew the strips together in a spiral pattern to form a round rug.
2. Upcycled Tin Can Lanterns
- Materials: Empty tin cans, hammer, nails, spray paint, candles or LED lights.
- How-To: Clean the cans and use a hammer and nail to create patterns or designs on the surface. Once done, spray paint them for a sleek look and place candles or LED lights inside. They make beautiful lanterns for outdoor spaces.
3. Wine Cork Bulletin Board
- Materials: Wine corks, picture frame, glue.
- How-To: Collect wine corks and glue them to the backing of a picture frame, arranging them in a grid or in a fun pattern. This makes a unique and functional bulletin board.
4. Old Jeans to Denim Tote Bag
- Materials: Old jeans, scissors, sewing machine (or needle and thread).
- How-To: Cut the legs off old jeans, and use the fabric to make a sturdy tote bag. Sew the sides together and add handles using leftover denim or fabric.
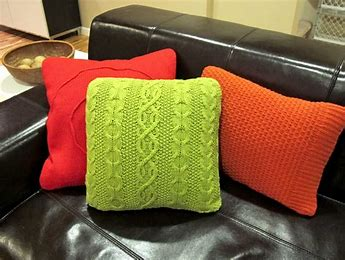
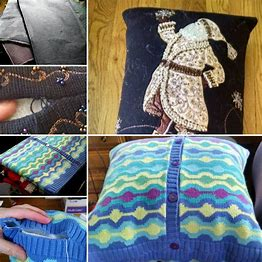
5. Upcycled Sweater Pillow Covers
- Materials: Old sweaters, scissors, sewing machine or needle and thread, pillow insert.
- How-To: Cut an old sweater into square or rectangular pieces that fit your pillow insert. Sew the edges together, leaving one side open to insert the pillow. This project adds a cozy touch to any living space.
6. Drawer to Floating Shelf
- Materials: Old wooden drawer, screws, wall brackets, paint or stain (optional).
- How-To: Remove the bottom of an old drawer, paint or stain it, and mount it to the wall using wall brackets to create a floating shelf. You can use it for displaying decorative items or as a small storage space.
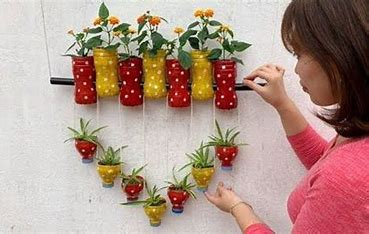
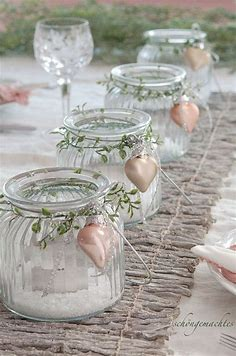
7. Glass Jar Herb Garden
- Materials: Empty glass jars, soil, small plants or herbs, pebbles for drainage.
- How-To: Use old glass jars like mason jars or yogurt containers as planters. Add a layer of pebbles for drainage, then fill with soil and plant small herbs like basil, thyme, or mint. These jars can be displayed on windowsills or countertops.
8. Old Ladder to Book Shelf
- Materials: Old wooden ladder, screws, wood planks, paint (optional).
- How-To: If you have an old wooden ladder, you can upcycle it into a stylish bookshelf. Attach wood planks horizontally across the rungs of the ladder to create shelves. Sand and paint or stain for a finished look.
9. CD Mosaic Mirror Frame
- Materials: Old CDs, scissors, glue, mirror, picture frame.
- How-To: Cut old CDs into small pieces and glue them onto the frame of a mirror. The shiny surface will create a cool, reflective effect, giving your mirror a modern, upcycled look.
10. Upcycled Magazine Wall Art
- Materials: Old magazines, scissors, canvas, glue.
- How-To: Cut out shapes, words, or images from old magazines and arrange them on a canvas. This can make for a colorful and unique piece of wall art to decorate your home.
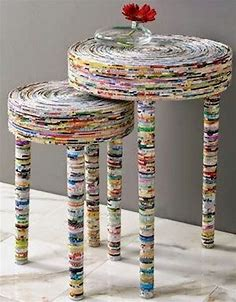
11. Upcycled Wooden Pallet Coffee Table
- Materials: Wooden pallets, sandpaper, screws, table legs (optional), paint or stain.
- How-To: Take old wooden pallets and sand them down. You can stack them to create a coffee table, or add table legs for a more formal look. Paint or stain to finish the look, and add a glass top if you want a smoother surface.
12. Shoe Organizer from Old Boxes
- Materials: Old cardboard boxes, wrapping paper or fabric, scissors, tape/glue.
- How-To: Use old boxes to make a shoe organizer. Wrap them in fabric or decorative paper and stack them to create a DIY shoe storage system. Label each box to keep things organized.
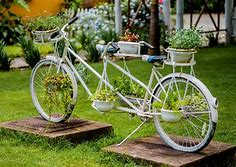
13. Upcycled Bike Wheel Mirror
- Materials: Old bicycle wheel, mirror, glue, paint (optional).
- How-To: Remove the spokes from an old bicycle wheel, leaving just the outer rim. Attach a circular mirror to the center of the wheel, and mount the entire structure on the wall. This creates a unique and industrial-looking mirror.
14. Upcycled Wine Bottle Lamp
- Materials: Empty wine bottle, lamp kit, paint or fabric (optional).
- How-To: Hollow out the wine bottle to fit a lamp kit, then add a lampshade. You can paint the bottle or cover it with fabric for a personalized touch. This makes for a great accent piece in a living room or bedroom.
15. Upcycled Plastic Bottle Planters
- Materials: Plastic bottles, scissors, paint, soil, small plants.
- How-To: Cut plastic bottles in half, then use the bottom half as a planter. You can paint the bottles for a decorative touch and add soil and plants inside. Hang them from a fence or place them on your porch for a fun and eco-friendly garden.
These are just a few ideas to get you started. Upcycling is all about creativity and finding new uses for things that might otherwise end up in a landfill. The possibilities are endless, so go ahead and get crafty!
- How to Make Personalized Map Chairs

Give your room a particular touch by changing old chairs into one-of-a-kind masterpieces using maps from specific places. For those who appreciate memorable trips, this DIY project is a fantastic way to infuse your furniture with emotional meaning. You may make original pieces that not only communicate stories but also spark conversations in any space by repurposing maps of nearby or far-off places. This project is not only affordable, but it also offers a chance to transform commonplace objects into priceless mementos.
2. Store All of Your Kid’s Crafts for Under
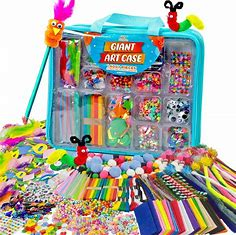

It sounds like you’re looking for ideas on how to store your kid’s crafts in an organized, space-efficient way. Here are a few affordable and creative storage solutions for kids’ crafts:
1. Storage Bins or Baskets
- What to use: Plastic bins, wicker baskets, or fabric storage baskets.
- Cost: Can often be found for under $20 each.
- How to use: Label each bin with categories like “paper crafts,” “paintings,” or “clay sculptures.” Store similar items together to keep things organized.
2. Clear Plastic File Boxes
- What to use: File storage boxes, with dividers.
- Cost: Typically under $15.
- How to use: For flat crafts like drawings or paintings, you can store them in clear plastic file boxes with dividers. This keeps them neat and accessible.
3. Art Display Wire or String
- What to use: Simple wire or twine with clips.
- Cost: Under $10 for basic supplies.
- How to use: Hang your child’s favorite pieces of art on a string or wire using clothespins. This can be a rotating display of their best creations.
4. Accordion Folder
- What to use: Large accordion-style folders.
- Cost: Under $15.
- How to use: Store artwork and smaller crafts in sections within the folder. This works great for paper crafts that might be too large for regular folders.
5. Drawer Organizers
- What to use: Simple drawer organizers or tackle boxes.
- Cost: Under $10.
- How to use: For smaller items like beads, buttons, and supplies, drawer organizers can help keep everything in place and easy to access.
6. Memory Boxes
- What to use: Decorative boxes or large photo storage boxes.
- Cost: Under $20.
- How to use: These are great for saving those sentimental crafts you want to hold onto. Label each box by year or age for easy reference.
7. Hanging Shoe Organizer
- What to use: Over-the-door shoe organizers.
- Cost: Usually under $15.
- How to use: Use the pockets to store smaller items like crayons, markers, and scissors, or even smaller crafts.
8. Repurposed Containers
- What to use: Old cereal boxes, jars, or tins.
- Cost: Free, if you’re reusing what you already have.
- How to use: Repurpose containers to store supplies or even to display finished crafts.
These options are all cost-effective, and many can be found at stores like Target, Walmart, or even thrift stores. The key is to categorize the crafts and use clear, labeled containers to make it easy to find what you’re looking for when you need it!
3. Easy DIY Kids Play Kitchen From a Cube Shelf
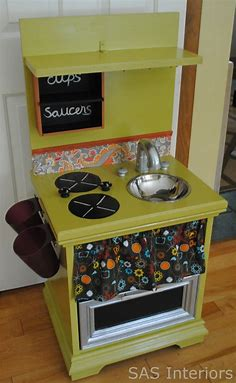
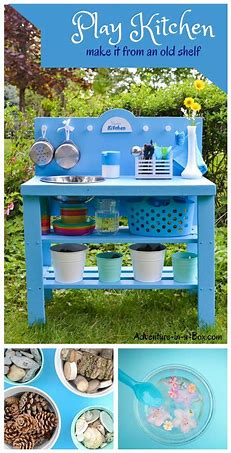
Using a creative and economical do-it-yourself technique, turn a cube shelf into a quirky play kitchen for kids. You can transform a regular shelf into a fantastic play space that your kids will love by following Remodelaholic’s detailed instructions. This makeover focusses on bringing creativity to life, from creating a lovely washbasin to adding a cosy and welcoming oven light. This do-it-yourself activity is a great method to promote constructive playtime, and since most of the materials are easily found at home, even adults might join in on the fun!
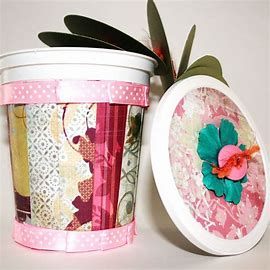
4. Handmade Coffee Can Planter

Creating a handmade coffee can planter is a fun and eco-friendly project that allows you to recycle old coffee cans while giving them a new purpose as plant containers. Here’s a simple step-by-step guide to help you make your own:
Materials Needed:
- Empty Coffee Can (or any metal can)
- Paint (acrylic paint works well, or you can use spray paint)
- Paint Brushes (if using acrylic paint)
- Drill or Nail and Hammer (to create drainage holes)
- Soil (potting soil works best)
- Small Plant or Seeds (succulents, herbs, or flowers)
- Optional: Decorative items (ribbons, stickers, or fabric)
Steps to Create a Handmade Coffee Can Planter:
1. Clean the Can
- Remove any labels or stickers from the coffee can. You can soak it in warm soapy water to make peeling the labels easier. Dry it thoroughly after cleaning.
2. Create Drainage Holes
- Using a drill or a hammer and nail, create a few small holes in the bottom of the can. This will allow water to drain out and prevent the plant from becoming waterlogged.
3. Paint the Can (Optional)
- You can paint the outside of the can with your favorite colors or patterns to match your style or décor. Use acrylic paint for a long-lasting finish, and apply multiple layers if needed. If you want a rustic look, you can leave the can unpainted or add a distressed touch by sanding the edges lightly.
4. Decorate (Optional)
- If you’d like to add a personal touch, you can decorate the planter with ribbons, fabric, or stickers. You could even add a fun quote or design with markers or paint pens.
5. Add Soil
- Once your can is dry and decorated, fill it with potting soil, leaving some room at the top for the plant.
6. Plant Your Seed or Plant
- If you’re using seeds, plant them according to the package instructions. If you have a small plant, gently place it in the soil and press down around it to secure it.
7. Water and Care
- Water the plant lightly and place it in a location where it will get enough sunlight. Be sure to water it as needed, depending on the type of plant you’ve chosen.
8. Enjoy Your New Planter!
- You now have a beautiful, handmade planter that’s not only functional but also a great way to repurpose a coffee can.
This project can also be a fun activity to do with kids or as a gift for someone who loves plants! Let me know if you’d like more tips or ideas on how to customize your coffee can planter.
5. Turn a Broken Wine Glass Into a Fairy Garden Cloche
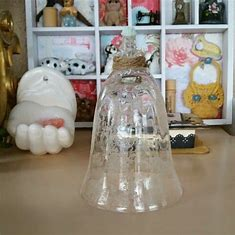
Turn a broken wine glass into a charming fairy garden cloche to discover the power of upcycling and give unwanted objects new life. In addition to restoring shattered glassware, this eco-friendly do-it-yourself project gives your home’s decor a whimsical touch. You may make an engaging miniature world with just a few basic supplies, such as glue, a cork or decorative knob, and tiny accessories. This project gives you the chance to create a little, enchanted environment that will captivate you, regardless of your level of experience with crafts or your desire for a novel do-it-yourself challenge. Go to acraftymix.com for a detailed tutorial on making your own fairy garden cloche.
6. DIY No-Sew Zipper Case From Plastic Bottles
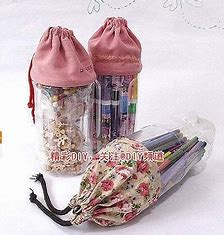
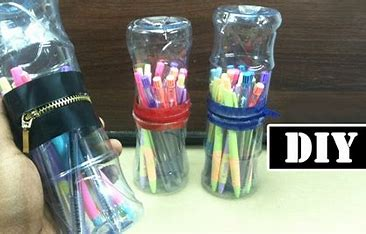
Creating a DIY No-Sew Zipper Case from plastic bottles is a fantastic way to recycle materials and make something useful! It’s a simple and creative project that requires no sewing skills. Here’s how you can do it:
Materials Needed:
- Plastic Bottle (preferably a clear one, like a water or soda bottle)
- Zipper (you can repurpose a zipper from an old pouch or buy one from a craft store)
- Scissors (or a utility knife)
- Hot Glue Gun (or super glue)
- Ruler (to measure the bottle)
- Marker/Pen (for marking cutting lines)
- Optional: Decorative items (stickers, paint, washi tape)
Steps to Make the Zipper Case:
1. Prepare the Plastic Bottle
- Choose a plastic bottle with a smooth surface. It can be a small bottle, like a water bottle, or a larger soda bottle, depending on the size of the case you want.
- Use scissors or a utility knife to cut the bottle in half vertically. You want to separate the top portion (the part with the neck) from the bottom portion. The bottom part will form the base of the case, and the top part will become the lid.
2. Smooth the Edges
- After cutting, the edges of the plastic may be sharp or uneven. Use scissors to trim the edges carefully and make them smooth. You can also use sandpaper or a nail file to round off the edges for safety and a cleaner finish.
3. Attach the Zipper
- Measure the length of the edge of your plastic bottle where the zipper will be attached (the top edge of the bottom portion and the top edge of the lid).
- Use a hot glue gun to apply glue along the edge where the zipper will go. Be careful not to burn yourself with the hot glue!
- Press the zipper onto the glued edge, ensuring that it is securely attached. If you’re using a zipper that is too long, you can trim it to fit the size of your case.
4. Glue the Two Parts Together
- Apply hot glue to the edges of the bottom portion and the top portion of the bottle where you want them to join. Carefully press the two pieces together, ensuring the zipper is aligned and working properly.
- Allow the glue to set and dry completely.
5. Test the Zipper
- Once the glue has dried, test the zipper to make sure it opens and closes smoothly. If there are any issues, you may need to reapply glue to strengthen the attachment.
6. Decorate (Optional)
- You can add a personal touch to your zipper case by decorating it with stickers, paint, washi tape, or fabric. You can even add a small charm or keychain to the zipper for an extra flair.
7. Use Your Zipper Case!
- Your no-sew zipper case is now ready to use! You can use it to store small items like cosmetics, stationery, or coins. It’s also a great way to organize your things in a fun and eco-friendly way.
Additional Tips:
- If the zipper isn’t long enough for your case, you can attach two shorter zippers to each side of the bottle and make it a double-zipper case.
- If you prefer a more polished look, you can paint the inside of the bottle for a pop of color or add fabric lining to the case.
This project is a great way to reuse plastic bottles and create something both practical and stylish!
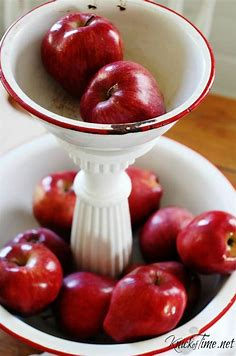
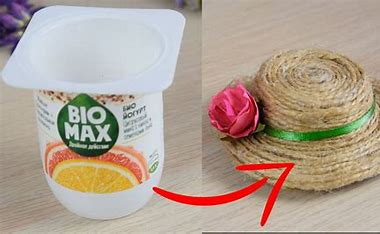
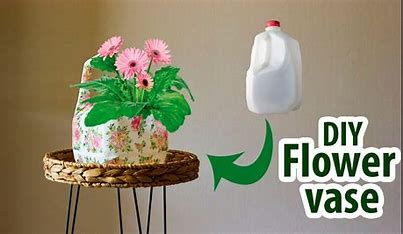
7. Creative Way to Make a Flower Pot
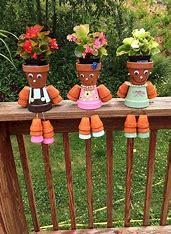
One trip can inspire imagination and turn an ordinary flower pail into a charming do-it-yourself flower pot. This creative project demonstrates how a common object can be repurposed to become a unique piece of home décor. Imagine the many possibilities for your own creative endeavours as you follow the transformation path, from picking the ideal accessories to painting.
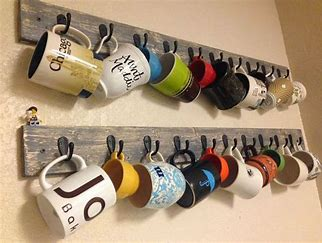
8. Affordable DIY Enamel Mug Organizer

Creating an affordable DIY enamel mug organizer is a fun and functional project! Here’s a simple step-by-step guide to make your own mug organizer on a budget:
Materials Needed:
- Wooden board or reclaimed wood (size depends on how many mugs you have and want to display)
- Screws or nails (for hanging the board)
- Screw hooks or peg hooks (to hold the mugs)
- Paint or stain (optional, for decorating the wooden board)
- Sandpaper (optional, if you’re using raw wood)
- Measuring tape and pencil
- Drill (for making holes for hooks)
- Screwdriver or hammer (for mounting)
Instructions:
- Prepare the Board:
- Start by cutting your wooden board to the desired length. If you don’t have tools, you can use a wooden shelf from a thrift store or repurpose an old piece of wood.
- Sand the board to remove any rough spots (if needed) and smooth the edges.
- If you want to paint or stain the wood, do that now. Let it dry completely before moving on to the next step.
- Measure and Mark Hook Placement:
- Decide where you want the hooks to go on the board. Measure evenly spaced spots (usually around 4-6 inches apart, depending on the size of your mugs).
- Mark the spots with a pencil so you know where to drill the holes.
- Drill Holes for Hooks:
- Using a drill, make holes at the marked spots where the hooks will go. Make sure the holes are slightly smaller than the size of the screw hooks to ensure a tight fit.
- Attach the Hooks:
- Screw the screw hooks into the holes. If you’re using peg hooks, make sure they’re secure and at the right height to hang your mugs comfortably.
- Mount the Organizer:
- If the board doesn’t have pre-existing hanging hardware, you can attach picture hooks to the back of the board or drill directly into the wall.
- Use screws or nails to hang the organizer at the desired location, ensuring it’s secure enough to hold the weight of the mugs.
- Hang Your Enamel Mugs:
- Hang your enamel mugs by their handles on the hooks. You can arrange them by color or size for a decorative look.
Optional Additions:
- Decorative Elements: You can add a rustic or modern touch by decorating the board with stencils, a coat of paint, or even small shelves for other kitchen essentials like tea bags or sugar.
- Personalize the Hooks: You could paint or decorate the hooks for a more customized look.
This DIY mug organizer not only helps save space but also adds a charming touch to your kitchen, especially for displaying your enamel mugs!
9. Make a Three Tiered Stand From Baking Tins
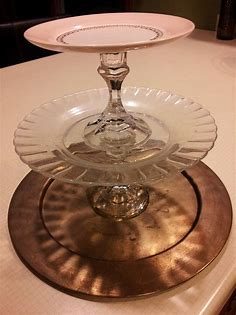
With this simple do-it-yourself tutorial, you can turn old baking tins into a multi-tiered masterpiece that is perfect for people who appreciate unique home décor. A beautiful three-tiered stand that is both distinctive and useful can be made by fusing artistic flair with practical ingenuity. To learn the art of combining lazy Susan mechanisms and defeating the obstacle of utilising a rivet gun, watch this step-by-step lesson from Grillo Designs. As you elevate your home’s style while exhibiting your making prowess, you’ll be happy with the outcome.
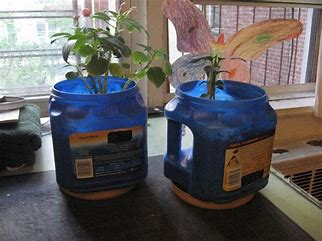
10. Homemade Plastic Bottle Planters
Creating homemade plastic bottle planters is a fun and eco-friendly DIY project! Here’s a simple step-by-step guide to help you repurpose plastic bottles into beautiful planters for your garden or home.
Materials Needed:
- Plastic bottles (any size, depending on the size of plants you want to grow)
- Scissors or utility knife
- Acrylic paint or spray paint (optional, for decorating)
- Soil
- Plants or seeds
- Drill or nail (for drainage holes)
- String or twine (optional, for hanging planters)
Instructions:
1. Choose and Prepare the Bottle:
- Select a plastic bottle (such as a soda or water bottle) that fits your needs. A larger bottle is ideal for bigger plants, while a smaller one works for herbs or flowers.
- Clean the bottle thoroughly to remove any labels or sticky residue.
2. Cut the Bottle:
- Using scissors or a utility knife, carefully cut the plastic bottle in half or slightly above the middle, depending on the type of planter you want.
- The top part (with the neck) can be used for a hanging planter, or you can use the bottom part as a simple pot.
3. Create Drainage Holes:
- It’s important to create drainage holes to avoid waterlogging your plants. Use a drill, nail, or heated nail to make 3-5 holes in the bottom of the bottle.
4. Decorate the Planter (Optional):
- If you want to personalize your planter, you can paint it with acrylic or spray paint. You can also use fabric, decorative tape, or add stickers to make it more colorful.
- Allow the paint to dry completely before moving on to the next step.
5. Add Soil:
- Fill the bottle with soil, leaving a little space at the top for the plant. You can add a layer of pebbles at the bottom for better drainage if desired.
6. Plant Your Seeds or Plant:
- Insert your plant or seeds into the soil. If you’re using seeds, make sure to follow the planting instructions on the seed packet. For small plants, gently plant them in the soil, making sure the roots are covered.
7. Water and Place:
- Water your new planter gently and place it in a sunny spot or wherever your plant will thrive.
8. Optional – Make it a Hanging Planter:
- If you cut the bottle in a way that leaves the top portion with the neck, you can make it a hanging planter. Simply make two holes near the top of the bottle, tie some string or twine through the holes, and hang it in your desired spot.
Additional Tips:
- Vertical Garden: You can create a vertical garden by cutting several bottles and stacking them or attaching them to a wooden board. This is perfect for herbs, small flowers, or succulents.
- Self-Watering Planter: For a self-watering system, you can cut the bottle so that the top part fits inside the bottom. Fill the top with water and use a piece of cloth to allow water to gradually seep into the soil.
- Decorative Touches: Add stones, pebbles, or even fairy lights to make your plastic bottle planters stand out.
These homemade plastic bottle planters are not only a creative way to upcycle waste but also provide a fun way to decorate your space and grow plants!
11. Cute DIY Knot Pillow From Old Sweaters
Easily turn your beloved sweater sleeves into a comfortable and fashionable do-it-yourself knot pillow. From choosing the proper sweaters to learning the Celtic knot, this entertaining tutorial makes every step simple, making it the perfect project for anybody wishing to repurpose their old favourites while bringing some cosiness to any space. By taking on this project, you’ll not only revitalise your wardrobe but also enjoy making a one-of-a-kind cushion that blends sustainability with creativity. And visit Pillarboxblue for all the tools and motivation you require to get going.
12. How to Make a Mason Jar Night Light
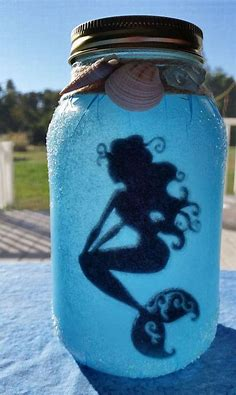
Convert trash into useful, distinctive pieces that give your house a stylish touch. Upcycling a mason jar into a magical night light for your child’s room is one inventive approach to accomplish this. This project is ideal for do-it-yourself novices and is a wonderful opportunity to spend quality time with your children while making something useful and lovely. A mason jar, Mod Podge, food colouring, glitter, and a tealight candle that runs on batteries are all you’ll need to create this stunning project. To make this glittering night light a reality, follow the detailed instructions at Mod Podge Rocks Blog. Your kids will love this entertaining craft, which is ideal for sleepovers or as a way to kill boredom.
13. Gray and White Chevron Scarf Camera Strap
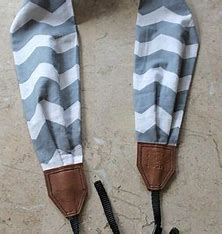
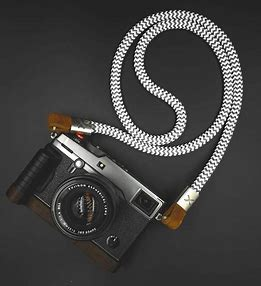
A Gray and White Chevron Scarf Camera Strap sounds like a stylish and functional accessory for photographers who want to add some flair to their gear. These straps are designed to provide comfort and durability while offering a fashionable touch. The chevron pattern, which consists of a series of V-shaped stripes, adds a modern look, and the combination of gray and white gives it a neutral yet eye-catching aesthetic.
Typically, scarf-style camera straps are made from soft fabric, which makes them more comfortable around the neck compared to traditional leather or nylon straps. They are also adjustable, so you can change the length for a better fit, and some even feature padded areas to reduce neck strain during long shooting sessions.
Would you like to know where to find one, or perhaps ideas on how to style it with your camera setup?
14. DIY Cell Phone Holder From Lotion Bottle
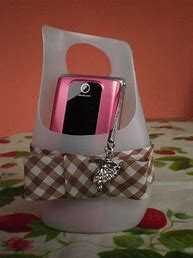

Creating a DIY cell phone holder from a lotion bottle is a fun and eco-friendly way to repurpose an old item while also getting a functional accessory for your phone. Here’s a step-by-step guide to help you make your own:
Materials Needed:
- Empty lotion bottle (plastic)
- Scissors or utility knife
- Hot glue gun and glue sticks
- Decorative items (optional, such as paint, stickers, or fabric)
- Ruler or measuring tape (optional)
- Marker or pen
Instructions:
- Clean the Lotion Bottle:
- Ensure the lotion bottle is empty and clean. You can rinse it out with warm water to remove any leftover lotion.
- Cut the Bottle:
- Using scissors or a utility knife, cut the bottle just below the neck to create a flat base. The size of the cut will depend on how tall or short you want the holder to be.
- Make sure to leave enough of the bottle at the bottom so that it can stand up properly and hold your phone securely.
- Create a Phone Slot:
- Mark a horizontal line in the center of the bottle (or slightly below the center) where you want the phone to rest.
- Use scissors or a utility knife to cut a semi-circle or rectangle on the marked line, big enough to hold your phone. This will act as the slot for your phone.
- Smooth the Edges:
- After cutting the hole for the phone, use scissors or a knife to smooth out any rough edges around the cut to avoid scratching your phone or hands.
- Add Stability:
- If your bottle is not sturdy enough to stand up on its own, you can add weight to the bottom by filling it with rice, sand, or even small pebbles. Alternatively, you can glue the bottom of the bottle to a flat piece of cardboard or a small wooden base for extra stability.
- Decorate (Optional):
- You can paint the bottle, wrap it with fabric, or add stickers to personalize your phone holder. This step is optional, but it will make your creation more unique.
- Use Your New Phone Holder:
- Once everything is set and the glue is dry, you can place your phone in the slot to hold it upright. This can be used as a desk stand for video calls, watching movies, or keeping your phone handy while working.
Tips:
- Make sure the slot for the phone is wide enough for your device to fit in comfortably, but not too wide that it causes the phone to slide around.
- If you want extra cushioning for your phone, you can line the inside of the slot with fabric or felt.
This DIY project is a great way to reuse materials you already have at home while crafting something useful and stylish! Let me know if you need more details or have any questions!
15. Upcycle Old Yogurt Cups to Make a Wreath
Upcycling old yogurt cups into a wreath is a fun and creative way to reuse materials you may have around your house! Here’s a simple guide on how you can do it:
Materials Needed:
- Old yogurt cups (preferably plastic or paper)
- A wreath form (foam, wire, or cardboard)
- Hot glue gun or strong craft glue
- Scissors
- Acrylic paint or spray paint (optional)
- Decorative elements (e.g., ribbon, artificial flowers, beads, etc.)
- String or twine for hanging (optional)
Instructions:
- Clean and Prep the Yogurt Cups:
- Wash the yogurt cups thoroughly to remove any yogurt residue.
- Let them dry completely before using them for your project.
- Cut and Shape the Cups:
- If you’re using plastic yogurt cups, you may want to cut them into strips or even petals for a flower-like effect. For paper cups, you can cut them into small pieces, creating a texture or design you prefer.
- For a more cohesive look, you could leave the cups whole and arrange them around the wreath base.
- Paint the Cups (Optional):
- If you want a uniform color for your wreath, you can paint the yogurt cups with acrylic paint or spray paint. Let the paint dry completely before proceeding. Choose colors that match the theme of your wreath (e.g., holiday colors, spring hues, etc.).
- Prepare the Wreath Form:
- If you’re using a cardboard wreath form, you can wrap it in fabric or paint it for a more polished look.
- If you’re using a foam or wire form, make sure it’s sturdy and ready to hold the yogurt cups in place.
- Attach the Cups to the Wreath Form:
- Use your hot glue gun or craft glue to attach the yogurt cups to the wreath form. Start at one end and work your way around, placing cups next to each other so they form a complete circle.
- For a more textured wreath, layer the cups slightly, so they create a fuller, more dynamic look.
- Decorate Your Wreath:
- Once all the yogurt cups are attached, you can add decorative elements. For example, add a ribbon for hanging, or glue artificial flowers, beads, or glitter to enhance the look. If you want a holiday-themed wreath, you can add small ornaments, pine cones, or seasonal decor.
- You can also add a bow at the top for a finishing touch.
- Let it Dry:
- Allow the wreath to dry completely before hanging or displaying.
Additional Tips:
- Add Texture: You can make a more textured wreath by cutting the cups into strips or petal shapes and layering them.
- Customize for Seasons: Customize your wreath to suit the seasons (e.g., pastel colors for spring, red and green for Christmas).
- Go Eco-Friendly: Consider using biodegradable materials if possible or avoid excessive painting to keep it eco-friendly.
That’s it! You’ve upcycled your old yogurt cups into a charming wreath, and it’s a great conversation starter too!
16. Beginner-Friendly DIY Paint Chip Lampshade

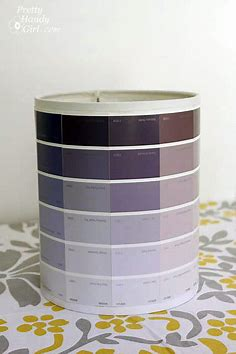
With this inventive do-it-yourself project, you can turn your assortment of paint chips into a colourful and distinctive lamp shade. This tutorial demonstrates how to turn paint chips into a visually appealing piece of home décor, making it ideal for people who enjoy upcycling and crafts. Take these simple actions: Use a hot glue gun to secure the chips after arranging them, taping them together, and trimming them to fit your shade. The end effect is a vibrant lamp that looks beautiful whether it is illuminated or not. Go to Pretty Handy Girl for a comprehensive guide on creating your own paint chip lampshade. This easy, fun activity will give your space a splash of colour!
17. Turn Almond Milk Bottle Into Dolls Vases
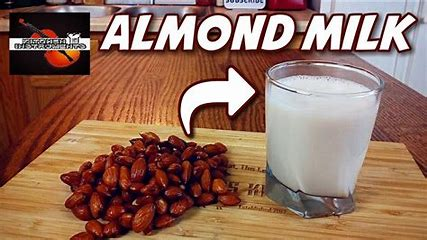
Turning almond milk bottles into doll vases is a fun and creative way to repurpose those bottles while adding a unique touch to your home decor. Here’s a step-by-step guide on how to transform almond milk bottles into stylish doll vases:
Materials Needed:
- Empty almond milk bottles (glass or plastic)
- Doll heads (can be bought online or repurposed from old dolls)
- Hot glue gun or strong craft glue
- Acrylic paint (optional, for decoration)
- Decorative elements (e.g., fabric, lace, ribbon, beads, flowers)
- Scissors
- Small artificial flowers or plants (for the vase)
- Craft knife (optional, for cutting)
Instructions:
1. Clean the Almond Milk Bottle:
- Thoroughly wash the almond milk bottle to remove any residue or labels. You can soak it in warm soapy water to make the labels come off more easily.
- Let the bottle dry completely before starting your project.
2. Prepare the Doll Head:
- You can use old dolls from around the house or purchase doll heads online (usually available at craft stores or marketplaces).
- If the doll head is attached to a body, you may want to carefully cut the neck area off using a craft knife, so only the head remains. Ensure it is clean and smooth.
3. Decorate the Bottle (Optional):
- If you’d like to customize the look of your bottle, consider painting it with acrylic paint. You could paint it a solid color, create patterns, or add texture (e.g., a rustic look with jute twine or a modern look with metallic paints).
- Allow the paint to dry fully before proceeding.
4. Attach the Doll Head to the Bottle:
- Take the doll head and apply a generous amount of hot glue or strong craft glue to the neck area.
- Position the doll head on the top of the almond milk bottle, ensuring it is centered and standing upright.
- Hold it in place for a few seconds until the glue begins to set. Allow it to dry completely to ensure the head stays securely attached.
5. Create a Doll “Dress” (Optional):
- If you want to make the doll look more like a vase, you can create a “dress” for the doll using fabric, lace, or ribbons.
- Wrap the fabric or lace around the body of the bottle, securing it with glue as you go. You could also add a bow or decorative beads for a more detailed touch.
- Alternatively, you can leave the bottle exposed for a cleaner look, especially if you want the vase effect to be more prominent.
6. Add Floral Arrangement:
- Once the doll head is attached, fill the bottle with small artificial flowers or a plant. Choose flowers or greenery that fit the theme of your decor (e.g., fresh flowers for a spring look, dark colors for a rustic autumn vibe).
- Trim the flower stems to fit inside the bottle and arrange them to your liking.
7. Finishing Touches:
- You can further decorate your doll vase with small details, such as beads, sequins, or glitter on the doll’s “dress” or the bottle.
- For a whimsical touch, you could even add a small crown or hat to the doll’s head.
8. Display Your Doll Vase:
- Once everything is dry and set, your doll vase is ready for display! You can place it on a shelf, mantel, or as a centerpiece for a table.
- You can also make a set of these doll vases in various sizes and styles for an eclectic collection.
Additional Tips:
- Vintage Look: To achieve a vintage or shabby chic look, consider using distressed paint techniques on the bottle or add lace, burlap, and natural elements.
- Change the Hair: If you’re using an old doll, you might want to change the hair or paint over it for a more unique appearance.
- Themed Vases: Create themed vases for holidays or events, such as adding holiday-themed decorations (e.g., pumpkins for Halloween, snowflakes for winter).
This upcycling project is an easy way to make charming, one-of-a-kind doll vases that will add character and personality to your home decor!
18. Making Your Own Mason Jar Organizer
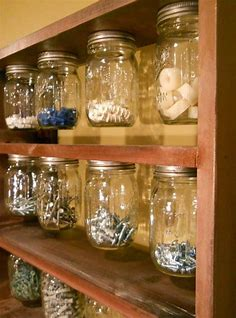

Use Mason jars to add a little rustic appeal to your house! Mason jars are ideal for decorating or organising, and the choices are unlimited. Discover how to create a do-it-yourself Mason Jar Organiser that will not only be useful but also give any room a country chic feel. This organiser keeps necessities close at hand and is perfect for kitchens, bathrooms, and creative spaces. For a straightforward tutorial on creating this multipurpose item, along with supply lists, detailed instructions, and cleaning advice, see The DIY Playbook. Up your storage game right now!
19. Simple and Easy DIY Rag Rug Basket
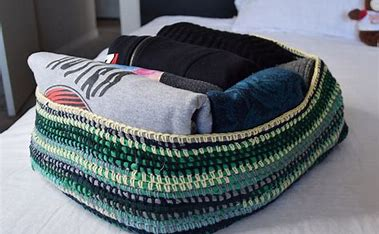
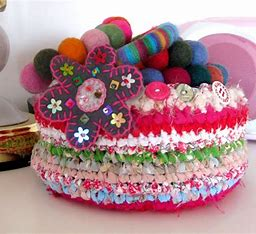
Add some creativity to your house organisation to make it even better! With the help of our DIY Rag Rug Basket Ikea Hack, you can turn an ordinary rag rug into a chic storage option. Ideal for providing a pop of colour while maintaining a clean environment. This project works with any rag rug you love and is a creative way to repurpose an Ikea rag rug.
Explore this simple project to find a useful and adorable method to organise your necessities, such as linens and art items, while also making decluttering seem nice. For those who love home décor, this 30-minute do-it-yourself project is revolutionary.
20. Handmade Soap Dispenser Using Alcohol Bottle
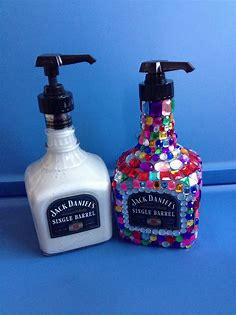
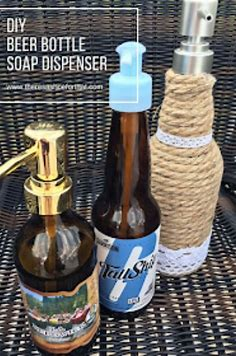
Making a handmade soap dispenser using an alcohol bottle is a great DIY project, and it’s an excellent way to upcycle and give a second life to a glass bottle. Here’s a step-by-step guide on how to turn an alcohol bottle into a functional and stylish soap dispenser.
Materials Needed:
- Empty alcohol bottle (glass)
- Soap dispenser pump (you can repurpose an old soap dispenser or buy a new one)
- Drill with a glass drill bit (appropriate for glass)
- Sandpaper (optional, for smoothing rough edges)
- Strong adhesive (e.g., E6000 or hot glue)
- Paint or decorative materials (optional, for customizing the bottle)
- Clean rag or paper towels
Instructions:
- Clean the Bottle:
- Start by thoroughly cleaning the alcohol bottle. Remove any labels, adhesive residue, and any remaining liquid.
- You can soak the bottle in warm water and use a scrub brush to get rid of any stubborn residue.
- Prepare the Pump:
- If you have an old soap dispenser, you can remove the top pump from the old bottle and repurpose it.
- If you don’t have a spare pump, you can purchase a pump dispenser from a store or online. Look for a pump that fits your alcohol bottle’s neck or that can be easily trimmed to fit.
- Drill a Hole in the Bottle:
- Mark the center of the bottle’s cap or neck, where you want to insert the pump.
- Use a glass drill bit to carefully drill a hole in the cap of the alcohol bottle. Make sure the hole is slightly smaller than the diameter of the soap dispenser pump’s neck, so the pump can fit snugly. You may also drill through the neck if you plan to insert the pump directly into the bottle.
- Smooth the Edges:
- After drilling, there may be some rough edges around the hole. Use sandpaper to smooth them out and prevent any sharp edges that could cause injury.
- Attach the Soap Dispenser Pump:
- Insert the soap dispenser pump into the hole you drilled. If necessary, use a strong adhesive to ensure the pump stays in place and is sealed tightly.
- Allow the adhesive to cure for the time specified on the product instructions.
- Customize the Bottle (Optional):
- If you want to give your bottle a more personalized look, you can paint the bottle with glass paint, or use decorative materials like twine, fabric, or decals to dress it up.
- You can also sand the glass for a frosted look or create unique designs.
- Fill the Bottle:
- Once everything is dry and set, fill the bottle with your favorite liquid soap.
- Use and Enjoy:
- Now you have a stylish and functional soap dispenser made from a recycled alcohol bottle! It’s a perfect eco-friendly and creative addition to your bathroom or kitchen.
Feel free to get creative with the design and color! Let me know if you need further help or details.
21. How to Make a Copper Pipe iPad Holder
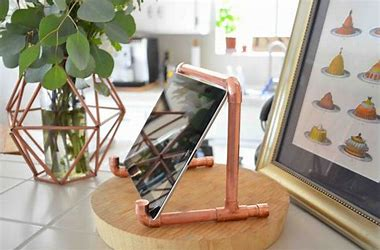
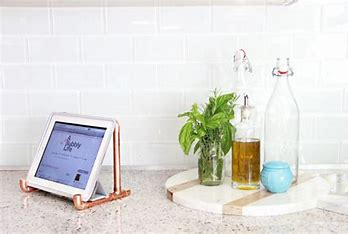
With this DIY Copper Pipe iPad Holder, you may find a straightforward yet fashionable method to keep your iPad safe and handy. Ideal for people with hectic schedules who balance working, dancing in the kitchen, and cooking. This project is very cost-effective in addition to being simple.
You can create a robust and stylish tablet stand by getting some basic plumbing components from your neighbourhood home improvement store. Visit A Bubbly Life for comprehensive guidelines and innovative suggestions on how to keep it looking brand new. Prepare to improve your workstation or kitchen with this stylish and useful iPad holder.
22. Cool DIY Chalk Paint Chair Makeover
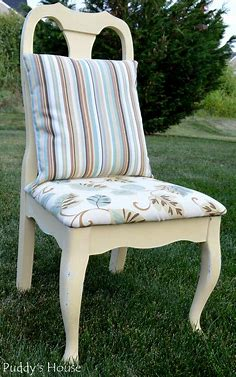

Sure! Here’s a guide on how to do a cool DIY chalk paint chair makeover:
Materials Needed:
- A wooden chair (or any chair you want to makeover)
- Chalk paint (you can use store-bought or make your own with paint and a mixing medium like Plaster of Paris)
- Paintbrushes (one for base coat, one for details)
- Sandpaper (medium and fine-grit)
- Painter’s tape (if you want clean lines)
- Wax or clear sealer (to finish the project)
- Drop cloth or old newspaper (to protect the work surface)
- Optional: Decorative stencils or transfers for added design
Steps:
- Preparation:
Start by cleaning the chair to remove any dirt or dust. Wipe it down with a damp cloth, then dry it thoroughly. - Sanding:
Lightly sand the surface of the chair to remove any old finish or rough patches. You don’t need to strip it down entirely, just smooth it out for the chalk paint to adhere better. After sanding, wipe the chair down with a clean cloth to remove the dust. - Tape Off Areas (Optional):
If you want to paint certain sections of the chair in different colors or create clean lines, use painter’s tape to mask off areas you don’t want to paint. - First Coat of Chalk Paint:
Start applying your first coat of chalk paint using a brush. Use long, even strokes for a smooth finish. Don’t worry if the first coat looks uneven, as chalk paint often needs a couple of coats. Let the first coat dry completely. - Apply Additional Coats:
Once the first coat is dry, apply a second coat of paint. If needed, apply a third coat for full coverage. Allow each coat to dry before applying the next. - Distressing (Optional):
If you want a distressed look, take some fine-grit sandpaper and lightly sand the edges or areas that would naturally wear over time. Focus on corners, curves, and any raised details on the chair. - Sealing the Paint:
Once the paint is fully dry and you’re happy with the look, apply a coat of clear wax or sealer to protect the paint and give it a smooth finish. This step is crucial if you want your chair to last longer and avoid chipping. Apply the wax with a soft cloth in a circular motion, and then buff it to a soft sheen. - Finishing Touches:
If you want to add extra details, you can use stencils, transfers, or even a contrasting paint color for some fun designs. Let your creativity run wild! - Let It Cure:
Allow the chair to sit for a couple of days before using it. This gives the chalk paint and wax time to fully cure and harden.
Tips:
- Chalk paint dries faster than regular paint, so you may need to work a little quicker.
- If you don’t want to buy wax, you can use a polycrylic or other clear sealant.
- Chalk paint is very versatile, so feel free to experiment with different techniques and finishes.
With just a little bit of effort, you can give an old chair a fresh, trendy look and make it a standout piece in your space!