Sure! Here’s a list of recycling ideas and crafts for Earth Day that are fun, easy, and perfect for kids or adults—tailored with a friendly tone for someone like Sadie:
🌍 Recycling Ideas & Crafts for Earth Day
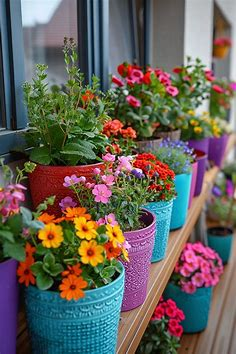
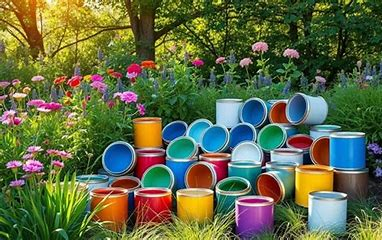
1. Tin Can Planters
- Materials: Empty tin cans, paint, soil, and seeds.
- Instructions: Clean the cans and paint them with fun designs. Add soil and plant herbs or flowers.
- Why it’s great: Upcycles cans and adds greenery to your space!
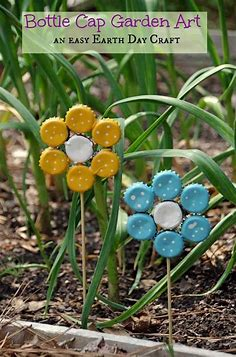
2. Bottle Cap Mosaic Art
- Materials: Plastic bottle caps, cardboard, glue.
- Instructions: Arrange colorful caps into shapes (like hearts, trees, or animals) and glue them onto cardboard.
- Why it’s great: Gives plastic a second life while sparking creativity.
3. T-Shirt Tote Bags
- Materials: Old T-shirts, scissors.
- Instructions: Cut off the sleeves and neckline, tie the bottom ends, and voilà—a no-sew tote bag!
- Why it’s great: Replaces plastic bags and reuses old clothes.
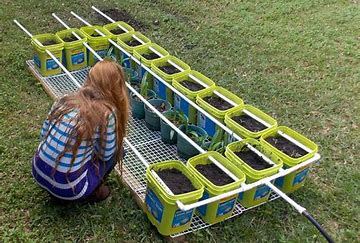
4. Newspaper Seed Starters
- Materials: Old newspapers, water, muffin tin, soil, seeds.
- Instructions: Mold wet newspaper into the cups of a muffin tin, let dry, then fill with soil and seeds.
- Why it’s great: Compostable and perfect for planting season.
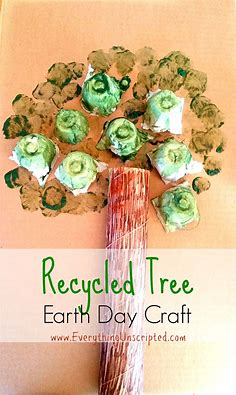
5. Egg Carton Critters
- Materials: Paper egg cartons, paint, googly eyes, glue.
- Instructions: Cut up cartons to make little bugs, frogs, or caterpillars. Paint and decorate!
- Why it’s great: Turns trash into adorable toys or decorations.
6. Cardboard Tube Bird Feeder
- Materials: Toilet paper rolls, peanut butter (or honey), birdseed, string.
- Instructions: Spread peanut butter on the tube, roll in birdseed, and hang outside with string.
- Why it’s great: Helps feed birds and reuses common household waste.
7. Recycled Art Collage
- Materials: Magazine pages, junk mail, scrap paper.
- Instructions: Cut shapes or words from recycled paper and arrange into a collage.
- Why it’s great: A fun way to turn trash into personal expression.
Would you like a printable version of these ideas or step-by-step instructions for a specific craft?
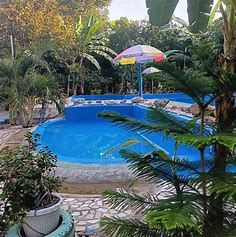
- Recycling Ideas with Glass Jars
Isn’t it perfect for growing plants like these in those glass spaghetti jars and soda bottles? It’s a great way to grow plants from cuttings using something you’d normally throw in the trash, and you can decorate them if you like.
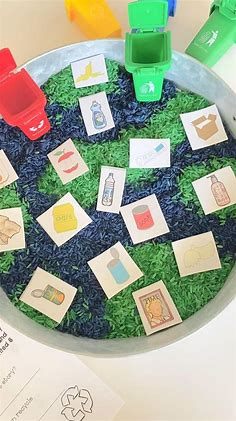
2. Seed Bombs from Paper Mailers
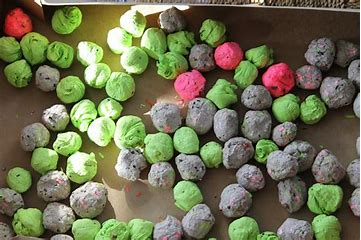
Great idea, Sadie! Making seed bombs from paper mailers is a fun and eco-friendly Earth Day activity. Here’s a simple guide in English:
🌱 DIY Seed Bombs from Paper Mailers
🌿 What You’ll Need:
- Used paper mailers or junk mail (non-glossy, uncoated paper)
- Water
- A large bowl
- Wildflower seeds (native to your area is best)
- A blender or your hands for mixing
- A strainer or towel
- A tray for drying
🛠️ Instructions:
- Tear the Paper Mailers
Rip the paper mailers into small pieces (about 1-inch squares). Aim for about 2 cups of torn paper. - Soak the Paper
Place the pieces in a bowl and cover with warm water. Let soak for at least 30 minutes (or overnight for best results). - Blend into Pulp
Pour the soaked paper and water into a blender. Pulse until it becomes a pulp (like oatmeal). If you don’t have a blender, you can mash the paper by hand—it just takes longer. - Strain Out Excess Water
Use a strainer or press the pulp gently in a towel to remove excess water. It should be damp but not dripping. - Mix in Seeds
Add a spoonful of wildflower seeds to the pulp and mix gently with your hands. Be careful not to crush the seeds. - Shape the Seed Bombs
Take small amounts of the mixture and roll them into balls (about the size of a marble). You can also press them into silicone molds for fun shapes. - Dry Them Out
Place the seed bombs on a tray or newspaper and let them dry for 24–48 hours in a warm, dry place.
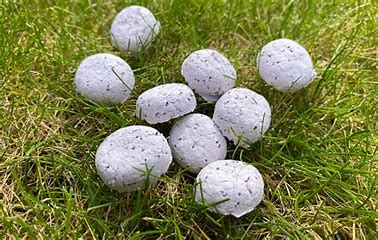
🌼 How to Use:
Once dry, your seed bombs are ready to plant! Just toss them onto soil in your garden or a bare patch of earth. Rain will break them down and help the seeds grow.
💡 Tips:
- Use native wildflower seeds to support local pollinators.
- These make great Earth Day gifts for friends, family, or teachers!
Would you like a printable craft sheet or a version with pictures for kids?
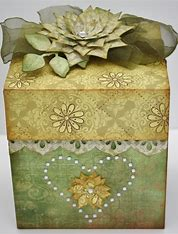
3. Recycling Ideas from the Junk Drawer
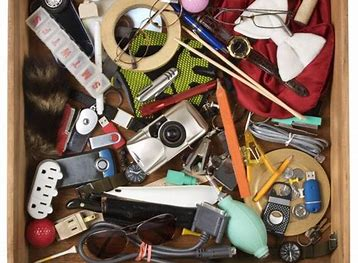
In our household, the trash drawer is frequently referred to as “Trash Purgatory” because it eventually contains items that we ought to discard but choose not to. Fortunately, you can use trash like pizza box savers and bottle caps to make cute fairy garden furniture like this. Making recycled projects with your children, such as fairy garden pieces, is especially enjoyable because the materials are essentially free.
4. DIY Flower Press
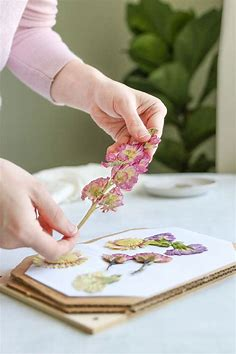
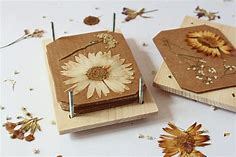
Absolutely, Sadie! Here’s a simple and eco-friendly guide for making your own DIY Flower Press — perfect for preserving flowers and leaves for crafts, journals, or gifts.
🌸 DIY Flower Press
🌼 What You’ll Need:
- 2 small wooden boards (about 6×6 inches or any size you like)
- Cardboard (cut to the same size as the boards)
- Parchment paper or plain paper
- Flowers or leaves (fresh, not too thick)
- 4 bolts with wing nuts (or strong rubber bands for a no-tool version)
- Drill (if using bolts)
🛠️ Instructions:
Option 1: Bolt Style Press (Sturdy & Reusable)
- Drill the Boards
Drill a hole in each corner of the wooden boards (about 1 inch from the edges). Make sure the holes on both boards align. - Cut Cardboard & Paper
Cut several pieces of cardboard and paper to fit between the boards. You’ll layer these to press your flowers. - Layer It Up
Stack like this:- Bottom board
- Cardboard
- Paper
- Flowers (spread flat, not overlapping)
- Paper
- Cardboard
- Repeat as needed
- Top board
- Secure It
Slide the bolts through the holes and twist on the wing nuts. Tighten to press the layers together. - Wait & Check
Leave the press in a dry place for 1–2 weeks. Check your flowers after a week—they should be flat and dry!
Option 2: No-Tool Rubber Band Press
- Stack the layers as above, but instead of bolts, wrap 2–3 strong rubber bands tightly around the press in both directions to hold it together.
🌿 Tips:
- Choose thin flowers or petals (like daisies, pansies, or ferns).
- Pressed flowers are great for cards, bookmarks, or framed art.
- Keep everything dry to avoid mold.
Would you like a printable instruction sheet or a kid-friendly version with illustrations?
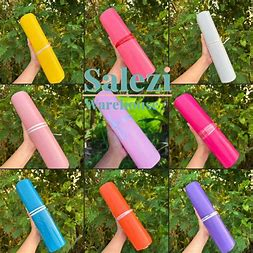
5. Pill Bottle Repurpose
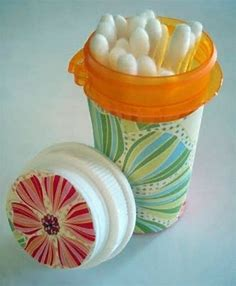
Not every pill bottle is made equally. However, for child-proof bottles like these, here’s a suggestion that could save you from embarrassment. You’ll have a neat little key hider to put in your garden if you add a do-it-yourself concrete stepping stone. This useful project will eliminate your frustration of being locked out!
6. Boho Planters
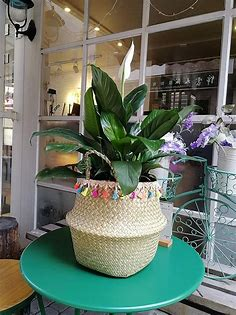
Sure, Sadie! Here’s a fun and stylish guide to making your own Boho Planters — a great Earth Day project that adds a cozy, creative touch to any space using recycled or natural materials.
🌿 DIY Boho Planters
✨ What You’ll Need:
- Old plant pots, tin cans, or jars (reuse what you have!)
- Jute rope, twine, or macramé cord
- Fabric scraps (lace, burlap, or patterned cloth)
- Hot glue gun or strong craft glue
- Beads, feathers, or charms (optional for decorating)
- Scissors
- Small indoor plants or succulents
🛠️ Instructions:
- Clean Your Container
Wash and dry the planter, jar, or can you’re reusing. Remove any labels or stickers. - Wrap with Rope or Twine
Starting at the bottom or top, apply glue in small sections and tightly wrap the rope or twine around the container. You can cover the whole thing or just part of it for a half-wrapped look. - Add Boho Flair
- Tie on beads, feathers, or charms to the rope.
- Use fabric scraps to create fringe, bows, or bands around the pot.
- Try a little macramé knotting around the top or make a hanging planter with a simple knot pattern.
- Plant Something Pretty
Fill your boho planter with soil and add a small plant like a cactus, succulent, or herbs.
🌼 Boho Style Tips:
- Use natural colors: creams, browns, soft pinks, or muted greens.
- Mix textures like lace + rope, or burlap + beads.
- Display in a sunny windowsill or hang near a window.
♻️ Why It’s Perfect for Earth Day:
- Reuses materials you already have.
- Adds greenery to your space.
- Encourages a sustainable, handmade lifestyle.
Would you like ideas for simple macramé knots or plant suggestions that do well indoors?
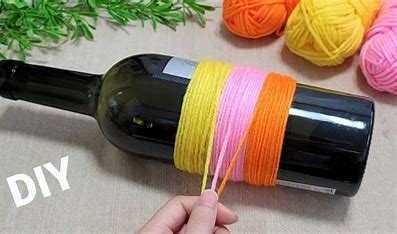
7. Wine Bottle Tiki Torches
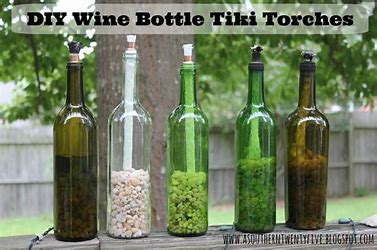
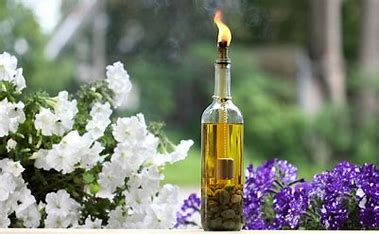
Handmade wine bottle For your next outdoor gathering or party, tiki torches are a creative way to repurpose those empty wine bottles. They provide your backyard gathering a little ambiance while also looking classy and fitting the theme.
Bonus: you may use essential oils to help repel bugs while doing the do-it-yourself project!
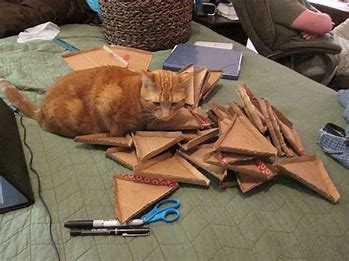
8. Cardboard Cactus
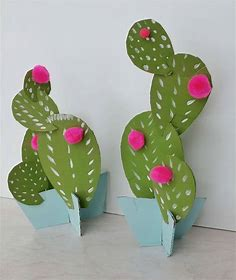
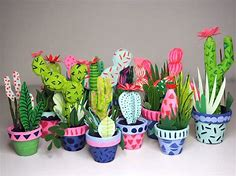
Absolutely, Sadie! A Cardboard Cactus is a super cute, eco-friendly craft—perfect for Earth Day and great for decorating without needing to water a thing! 🌵
🌵 DIY Cardboard Cactus
📦 What You’ll Need:
- Recycled cardboard (from boxes, packaging, etc.)
- Green paint or markers
- Scissors or a craft knife (with adult help if needed)
- Glue (hot glue works best) or tape
- White paint or marker (for cactus spines)
- Small pot, cup, or jar (optional)
- Pebbles, paper shreds, or dried moss (for decoration)
🛠️ Instructions:
- Draw the Cactus Shapes
On your cardboard, draw two identical cactus shapes (like tall ovals with arms). One will be the front and one the back. - Cut Slits to Connect
- On one piece, cut a slit from the top down to the middle.
- On the other piece, cut a slit from the bottom up to the middle.
- Slide them together so they cross and stand up!
- Paint & Decorate
Paint your cactus green. Once dry, add little white lines or dots for “spines.” You can even glue on tiny paper flowers or pom-poms for a fun touch. - Plant Your Cardboard Cactus (optional)
Place it in a small pot or recycled jar. Fill with pebbles, shredded paper, or moss to keep it upright.
🌿 Why It’s Great for Earth Day:
- Uses recycled cardboard.
- No water needed = sustainable decoration.
- Totally customizable!
Would you like a printable template for cactus shapes or ideas for other paper plant crafts?
9. Recycling Ideas with Tin Cans
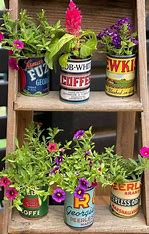
After cooking in the kitchen, there are many ways to reuse soup cans or cans made from beans or vegetables. You may repurpose them to hold a variety of objects because they are simple to paint and embellish. They are ideal for keeping items like paintbrushes, markers, and pens and pencils organised for those of us with children or a lot of art supplies.
10. Padded Mailers as Leather Pouches

That’s a super creative upcycling idea, Sadie! Turning padded mailers into faux leather pouches is a fun, Earth Day-friendly craft that gives packaging a stylish second life.
✨ DIY Faux Leather Pouches from Padded Mailers
📦 What You’ll Need:
- Used padded mailers (bubble-lined envelopes work best)
- Scissors
- Ruler & pencil
- Brown or black acrylic paint (for a leather look)
- Paintbrush or sponge
- Hole punch or sharp tool
- Yarn, cord, or shoelaces (for ties)
- Optional: Button, snap, or velcro for closure
🛠️ Instructions:
- Cut the Pouch Shape
Open the padded mailer flat and cut out a rectangle—about 8″ x 6″ is a good starter size. You can round the top corners for a softer look. - Paint for a Leather Look
Use a sponge or brush to paint the outer side with brown, black, or tan paint. Add texture by dabbing slightly unevenly—it’ll mimic worn leather! - Fold & Seal the Sides
Once dry, fold your rectangle in half (like a wallet) or fold the bottom up to create a pouch with a flap. Glue or tape the sides closed—or use a hole punch and yarn to lace up the sides for a rustic, stitched look. - Add a Closure
- For a wrap-around tie, punch two holes near the flap and thread yarn or cord through.
- Or glue on a button or snap.
- Velcro dots work too for easy open-and-close!
- Personalize It!
Decorate with beads, paint patterns, or add a name tag. You can even use a metallic marker to draw faux stitching or designs.
🌎 Why It’s Perfect for Earth Day:
- Reuses waste that usually goes to the landfill.
- Encourages creativity and low-waste living.
- Makes a great gift or reusable storage pouch!
Would you like a template or a version sized for gift cards, pencil cases, or phone sleeves?
11. Recycling Ideas for Tissue Boxes
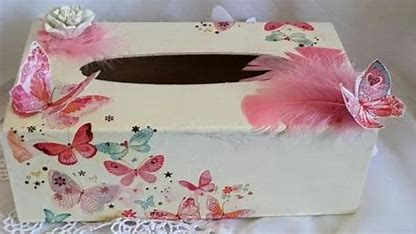
This is undoubtedly one of those unexpected recycling concepts! Do you know those tissue boxes with their beautiful designs and patterns? With a “shade” created from cutouts from one of those tissue boxes, this desk light received the upgrade of a lifetime!
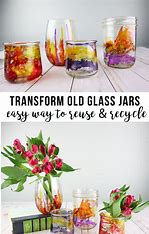
12. DIY Sea Glass Bottles
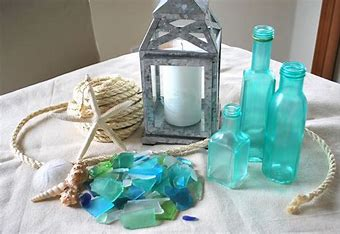
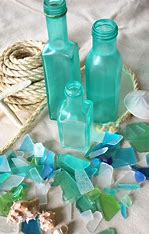
Of course, Sadie! Making DIY Sea Glass Bottles is a lovely way to reuse old glass jars or bottles and give them a soft, beachy look—perfect for Earth Day or coastal-style decor. 🌊
🧴 DIY Sea Glass Bottles
🌿 What You’ll Need:
- Clean glass bottles or jars (recycled soda, wine, or condiment bottles work great)
- White glue (like Elmer’s) or Mod Podge
- Food coloring (blue, green, teal, etc.)
- Small mixing bowl
- Foam brush or paintbrush
- Optional: Sandpaper or twine for extra beachy vibes
🛠️ Instructions:
- Prepare Your Bottles
Remove all labels and adhesive. Wash and dry your bottles completely. - Mix the “Sea Glass” Paint
In a small bowl, mix:- 1 tablespoon of white glue or Mod Podge
- A few drops of food coloring (blue, green, or a combo for sea glass effect)
- 1–2 drops of water to thin it slightly
- Paint the Bottles
Use a foam brush to apply a thin, even layer of your mixture to the outside of the glass. Brush in long strokes. It will look streaky at first but will dry with a frosted, sea glass look. - Let It Dry
Allow bottles to dry for at least an hour. You can add a second coat for deeper color. - Optional Finishing Touches
- Lightly sand random spots for a weathered effect.
- Wrap twine or jute around the neck and tie a shell or charm.
- Place a dried flower, feather, or battery tea light inside.
🌊 Why It’s Great for Earth Day:
- Reuses glass instead of throwing it away.
- No harsh chemicals or special tools needed.
- Makes beautiful vases, candle holders, or beach-themed decor.
Would you like color combo ideas for a sea glass palette or printable tags for gifting these bottles?
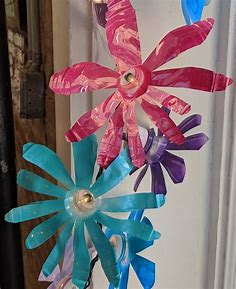
13. Recycling Ideas with Plastic Bags
In many yards, the emergence of flowering Forsythia plants is one of the first indications of spring. They only stay for a little while, but they are incredibly joyful and upbeat. Fortunately, this fake-out art project utilising yellow plastic shopping bags allows you to enjoy them all year long.
14. Cat Cave from a Cardboard Box
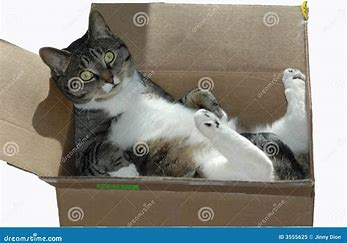
Sure, Sadie! Here’s a simple, step-by-step guide to making a Cat Cave from a Cardboard Box—a fun and sustainable Earth Day craft your cat will love! 🐾📦
🐱 DIY Cat Cave from a Cardboard Box
📦 What You’ll Need:
- 1 sturdy cardboard box (big enough for your cat to fit inside)
- Box cutter or strong scissors
- Pencil or marker
- Tape or glue (optional)
- Blanket, towel, or small pillow (for coziness)
- T-shirt or fabric (optional for covering)
- Paint or markers (optional for decorating)
🛠️ How to Make It:
- Choose a Good Box
Find a box that’s clean, strong, and roomy enough for your cat to sit, turn, and lie down comfortably. - Cut the Door
On one side of the box, draw a circle or oval (about 6–8 inches wide, depending on your cat’s size). Cut it out carefully to make the entrance. - Optional: Cut Windows or Air Holes
You can add small holes on the sides or top for light and ventilation—but keep it cozy! - Line the Inside
Put a soft blanket, towel, or cushion inside the box to make it warm and comfy for your cat. - Optional: Cover with a T-shirt
Pull a large T-shirt over the box, with the neck hole lined up with the door. Tuck the sleeves and bottom under the box. It gives the cave a smooth, snug finish. - Decorate the Outside (Optional but fun!)
Use markers, stickers, or paint to write your cat’s name or draw cute designs like paw prints or fish. - Set It Up
Place the cat cave in a quiet, cozy spot—like near a window or in a corner where your cat likes to relax.
🌍 Why It’s Perfect for Earth Day:
- Reuses old boxes and fabric.
- No plastic or store-bought materials needed.
- Gives your pet a cozy space made with love!
Would you like ideas for homemade cat toys to go with the cave?
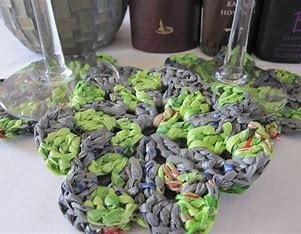
15. Earth Day Crafts with Wine Corks
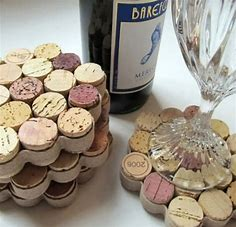
Look, I will not pass judgement on you if you have an ever-increasing collection of wine corks. It seems foolish to throw them in the trash, but this recycling concept uses a lot of them and just takes five minutes to prepare. In my kitchen, this wine cork trivet has also emerged as one of the most useful items!
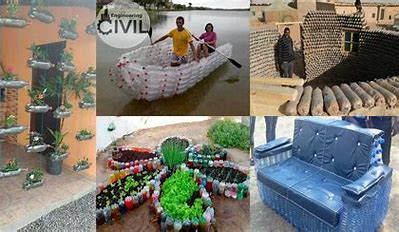
16. Plastic Bottle Terrariums

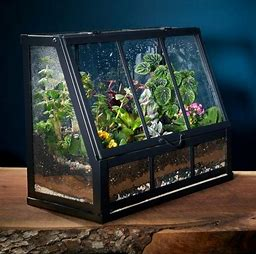
Absolutely, Sadie! Making Plastic Bottle Terrariums is a fun and green way to reuse bottles while creating a mini garden—perfect for Earth Day or as a classroom or home activity. 🌱🌍
🌿 DIY Plastic Bottle Terrariums
🧴 What You’ll Need:
- Clear plastic bottle (1-liter or 2-liter soda bottle works best)
- Scissors or craft knife (with adult help if needed)
- Small rocks or pebbles (for drainage)
- Activated charcoal (optional but helps keep it fresh)
- Potting soil
- Small plants or moss (succulents, ferns, or air plants work well)
- Spray bottle with water
- Spoon (for adding soil)
- Decorations (tiny figurines, shells, or stones — optional)
🛠️ Instructions:
- Clean and Cut the Bottle
- Rinse your plastic bottle and remove the label.
- Cut the bottle about ⅓ from the top. You’ll have a bottom base and a top “lid.”
- Create the Base Layers
- Add a layer of small rocks at the bottom (for drainage).
- Add a thin layer of activated charcoal (optional, but keeps mold and odor away).
- Add about 2–3 inches of potting soil.
- Plant Your Greenery
- Use a spoon to dig small holes in the soil.
- Gently place your plants or moss in the soil and press around them to secure.
- Mist lightly with water.
- Assemble the Terrarium
- Place the top of the bottle back on like a lid, or leave it open for more airflow.
- You can tape the top and bottom together, or leave it loose for easy access.
- Add Personal Touches(Optional)
- Decorate with small pebbles, shells, or mini figurines.
- Use markers or paint pens to draw on the outside.
🌍 Why It’s Great for Earth Day:
- Reuses plastic that would otherwise be tossed.
- Teaches about ecosystems and plant care.
- Brings a bit of nature indoors—without needing much space!
Would you like plant suggestions based on how much sunlight your space gets?
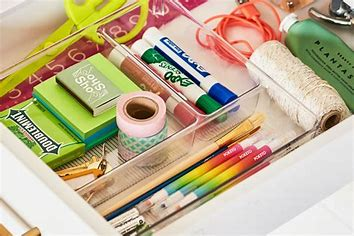
17. Tuna Cans for Office Supplies
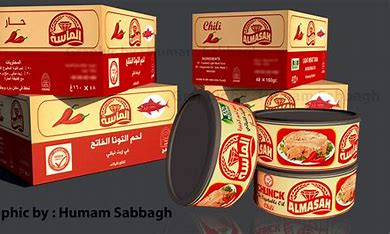
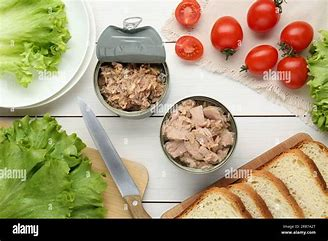
Cans of tuna or cat food that are typically thrown out or recycled can be creatively repurposed. And the same goes for your office supplies. This desk organiser that swings out is a fantastic recycling idea, isn’t it?
18. Recycling Ideas from Kitty Litter Pails
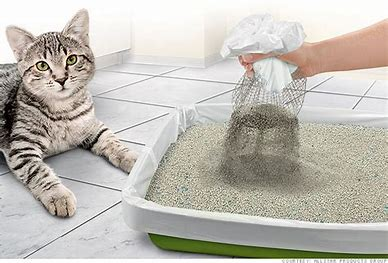
Absolutely, Sadie! Kitty litter pails are sturdy, reusable containers that are perfect for upcycling projects. Instead of tossing them out, turn them into practical and creative items for your home, garden, or even crafts.
🐾 Recycling Ideas from Kitty Litter Pails
1. 🌱 Garden Tool Caddy
- How to do it: Clean the pail and add a few holes in the bottom for drainage. Use it to carry gardening tools, gloves, and small pots.
- Optional: Paint the outside or label it for a fun touch.
2. 💦 Portable Watering Station
- Use it for: Hauling water to plants, especially helpful in larger gardens or during droughts.
- Bonus tip: Drill a small hole in the lid and insert a spout for a DIY watering can!
3. 🧺 Storage Bins
- Use in: Garages, closets, or kids’ rooms for storing toys, tools, pet food, or seasonal items.
- Decorate with: Contact paper, paint, or chalkboard labels.
4. 🌾 Compost Collector
- How to do it: Cut a hole in the lid, add air holes on the sides, and use it to collect kitchen scraps before adding them to a larger compost pile.
- Tip: Line it with a compostable bag for easy cleaning.
5. 🪑 Stool or Seat with Storage
- How to do it: Add a cushioned lid or pad on top and store items inside—perfect for a craft room or garden shed.
- Use for: Holding tools, yarn, or pet supplies while doubling as a seat.
6. 🧼 DIY Cleaning Supply Tote
- Use it for: Holding all your sprays, cloths, and scrubbing tools in one place.
- Tip: Add dividers made from cardboard for extra organization.
7. 🐶 Pet Food Container
- Label and Store: Use a clean pail to store dog or cat food. Use a scoop for easy feeding!
8. 🚗 Car Trunk Organizer
- How to use: Keep emergency supplies, reusable bags, jumper cables, or winter gear neatly stored in the back of your car.
🌍 Why These Are Great for Earth Day:
- Keeps durable plastic out of landfills.
- Encourages reuse and sustainable habits.
- Saves money by repurposing what you already have!
Would you like decorating ideas for making the pails look cuter or more stylish for indoor use?
19. Fabric Christmas Crackers

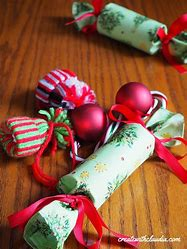
Christmas crackers are an entertaining way to wrap little presents or add a little surprise to dinner gatherings. Even while these lack the classic “pop,” they are double-purposed because they use cardboard tubes from paper towels or gift wrap and used flannel shirts as the fabric.
My book, “Crafting with Flannel,” by Sarah Ramberg, contains the project’s tutorial.
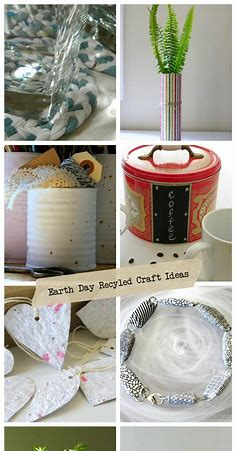
20. Recycling Ideas and Craft Projects for Earth Day
You see? I hope I altered your thinking regarding the common Earth Day craft projects and recycling ideas that are floated. Many of them have beautiful effects that are suitable for everyday (or seasonal) décor, and not all of them are for children! Do you think your perspective on the items you discard or put in the recycling bin will change as a result?