Here are some easy and fun St. Patrick’s Day craft ideas that are festive, budget-friendly, and perfect for kids and adults alike. These crafts are definitely “as good as gold” in terms of creativity and charm!
🍀 1. Pot of Gold at the End of the Rainbow
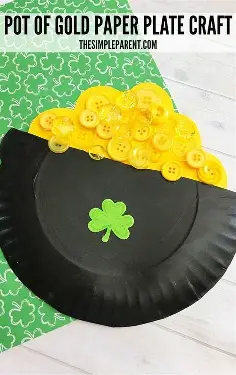
Supplies: Black paper cup, gold-wrapped chocolate coins, rainbow-colored pipe cleaners, glue.
Instructions:
- Fill the cup with gold coins.
- Stick rainbow pipe cleaners in an arch to mimic a rainbow coming out of the pot.
- Optional: Add cotton balls for clouds!
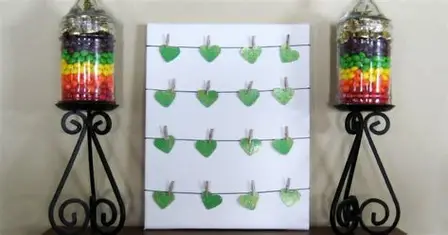
🌈 2. Rainbow Paper Chain Garland
Supplies: Construction paper (rainbow colors), scissors, glue or tape.
Instructions:
- Cut strips of paper and loop them to create interlocking rings.
- Arrange in rainbow order and hang as a festive decoration.
🍀 3. Shamrock Sun Catchers
Supplies: Green tissue paper, wax paper, glue, scissors.
Instructions:
- Cut out shamrock shapes from wax paper.
- Tear tissue paper into small pieces and glue them to the shamrock shape.
- Hang on windows for a stained-glass effect.
👣 4. Leprechaun Footprint Hunt
Supplies: Green paint, sponge or brush, cardstock.
Instructions:
- Use a sponge or finger to paint tiny leprechaun “footprints” around the house.
- Lead the trail to a “pot of gold” (candy or small prize).
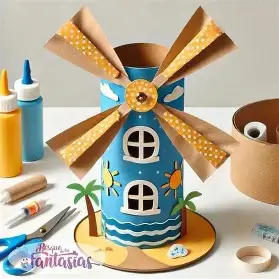
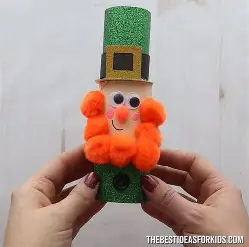
🎩 5. Mini Leprechaun Hats
Supplies: Toilet paper rolls, green paper, black and yellow paper for the band.
Instructions:
- Wrap the roll in green paper.
- Add a black strip and yellow buckle to resemble a hat band.
- Optional: Glue to a circle base for more realism.
💚 6. Shamrock Salt Dough Ornaments
Supplies: Salt, flour, water, shamrock cookie cutter, green paint.
Instructions:
- Mix 1 cup flour, 1/2 cup salt, and 1/2 cup water.
- Cut shamrock shapes, bake at 200°F until hard (1-2 hours), and paint when cool.
🎨 7. Handprint Rainbow with Pot of Gold
Supplies: Paint (rainbow colors + black/gold), paper.
Instructions:
- Use each finger with different paint colors to create a rainbow arc.
- Add a black “pot” under one end, and glue on gold glitter or sequins.
Would you like templates or printables for any of these crafts?
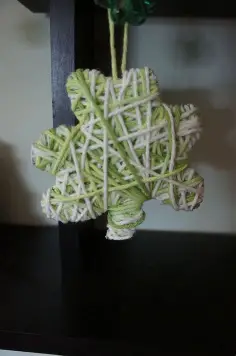
- Pot of Gold Hanging Mobile

To serve as a reminder that all of your dreams and aspirations—as well as pots of gold—are always attainable, hang this cute craft from a windowpane, door frame, or shelf.
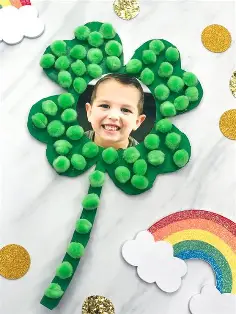
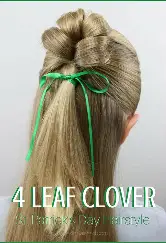
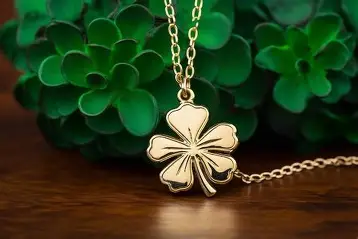
2. Four-Leaf Clover Hair Clip
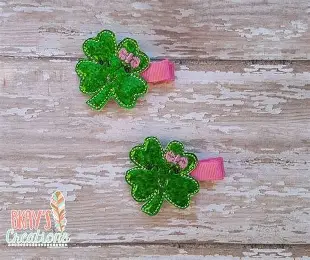
Sure! Here’s a simple and adorable Four-Leaf Clover Hair Clip craft you can make for St. Patrick’s Day:
🌿 Four-Leaf Clover Hair Clip – DIY Craft
⭐ Perfect for:
Kids, teens, and adults who want a touch of St. Paddy’s Day luck in their outfit!
✂️ Supplies Needed:
- Green felt (or green foam sheet)
- Scissors
- Hot glue gun (or craft glue)
- Small green button or gem (optional)
- Hair clip (alligator clip or snap clip)
- Pen or chalk (for tracing)
🍀 Instructions:
- Draw and Cut the Leaves
- Draw a heart shape on the green felt.
- Cut out 4 hearts — these will be the leaves of your four-leaf clover.
- You can also fold the felt and cut a heart shape for a symmetrical look.
- Form the Clover
- Arrange the four heart shapes with the points meeting in the center to form a clover.
- Use hot glue (or strong craft glue) to glue them together where the tips meet.
- Add the Center Accent (Optional)
- Glue a small button, rhinestone, or green gem in the center to add a cute detail.
- Attach to Hair Clip
- Add a dot of hot glue to the top of the hair clip.
- Press your felt four-leaf clover onto the glue and hold in place for a few seconds.
- Let It Dry
- Allow the glue to dry completely before using the clip.
🌟 Style Tips:
- Pair with a green outfit or pin to a headband for a festive touch.
- You can also make a matching set for friends or siblings!
Let me know if you’d like a printable template for the heart shapes or want ideas for a matching accessory!
3. Hat Leprechaun Trap
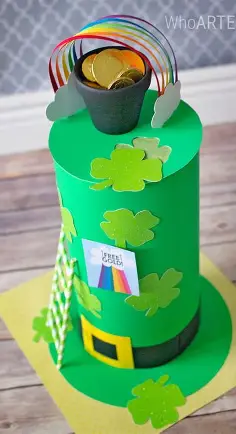
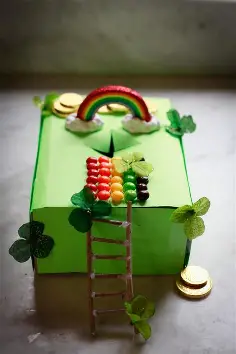
Get the gold by climbing the ladder to the top of the hat; it’s easy money for a leprechaun, isn’t it? False! This clever leprechaun trap has a hole underneath the gold pieces for the leprechaun to fall into.
4. Paper Plate Unicorn
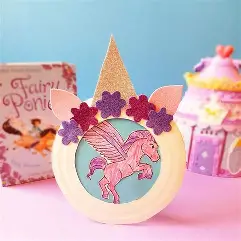
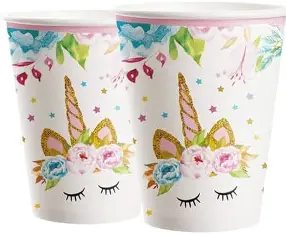
Absolutely! Here’s a fun and magical Paper Plate Unicorn craft that’s perfect for kids and unicorn lovers of all ages.
🦄 Paper Plate Unicorn – DIY Craft
✨ Perfect for:
Birthday parties, rainy day fun, or a whimsical St. Patrick’s Day twist (add a rainbow mane and gold horn!).
✂️ Supplies Needed:
- 1 white paper plate
- Pink, purple, yellow (or gold), and blue paper (for mane and horn)
- Black marker or googly eyes
- Scissors
- Glue or glue stick
- Glitter, sequins, or stickers (optional)
- Cotton balls (optional for a fluffy mane)
🛠️ Instructions:
- Make the Face
- Turn the paper plate upside down (the smooth side will be the unicorn’s face).
- Draw on closed eyes with long lashes using a black marker, or glue on googly eyes.
- Create the Horn
- Cut a triangle shape from yellow or gold paper to make a horn.
- You can draw spiral lines on it to make it look more magical!
- Glue the horn to the top center of the plate.
- Add Ears
- Cut out two ear shapes from white paper and smaller inner ear shapes from pink paper.
- Glue the pink pieces inside the white ones, then attach the ears beside the horn.
- Make the Mane
- Cut strips or curved shapes from colored paper (pink, purple, blue, etc.).
- Glue them along the top of the plate to form the unicorn’s mane.
- You can curl the strips slightly by rolling them around a pencil.
- Add Extra Sparkle (Optional)
- Decorate the horn or mane with glitter, sequins, or stickers for extra sparkle.
- Add cotton balls around the ears or mane to make it fluffy and fun.
🌈 Bonus Idea:
Use rainbow colors and call it your Lucky Unicorn for a St. Patrick’s Day version. Add a tiny shamrock to the mane or cheek for a lucky charm!
Let me know if you’d like a printable horn template or a coloring version for little ones!
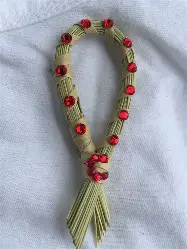
4. Beaded Leprechaun Hat
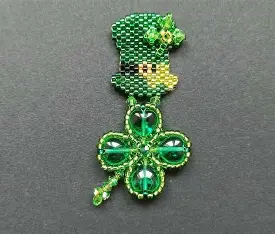
You’ll be transported back to your childhood summer camp days with this creation. You may make a bookmark, home decoration, or backpack charm by stringing these pony beads together.
5. Lucky Shamrock Coin Bags
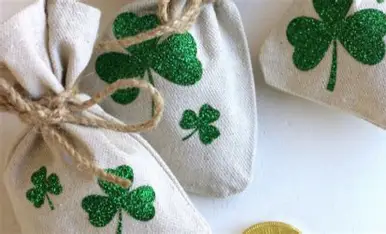
Sure! Here’s a fun and festive idea for Lucky Shamrock Coin Bags—perfect for St. Patrick’s Day party favors, class treats, or small gifts.
🍀 Lucky Shamrock Coin Bags – DIY Craft
🪙 Perfect for:
Kids’ parties, classroom giveaways, treasure hunts, or adding a little extra “luck” to your day!
✂️ Supplies Needed:
- Small green fabric bags, organza bags, or clear treat bags
- Gold-wrapped chocolate coins or plastic gold coins
- Green felt or craft foam
- Shamrock template (optional)
- Hot glue or fabric glue
- Ribbon or twine (optional for tying)
- Tag or label (optional: “Lucky You!” or “Pot of Gold”)
🛠️ Instructions:
- Cut Out Shamrocks
- Use green felt or craft foam to cut out shamrock shapes.
- You can draw them freehand or use a printable template.
- Add glitter, a button, or a gem to the center for sparkle (optional).
- Decorate the Bags
- Glue a shamrock onto the front of each bag.
- If using clear treat bags, you can tie the shamrock to the ribbon instead.
- Fill with “Gold”
- Add several gold chocolate coins (or plastic coins) into each bag.
- You can also include small green candies, stickers, or a lucky note.
- Seal and Tag
- Tie the bag closed with ribbon or twine.
- Add a small tag that says something like:
- “You’re My Lucky Charm!”
- “A Little Luck & Gold for You!”
- “Happy St. Patrick’s Day!”
🌟 Tip:
If you’re doing this as a class craft, pre-cut the shamrocks so little hands can focus on decorating and filling the bags.
Would you like a printable shamrock template or gift tag designs to go with this craft?
6. DIY Shamrock Word Pins
Stay clear of pinches with these DIY pins, which give any outfit a festive spin. You can make whatever message you want by painting alphabet pasta.
7. Irish Mug
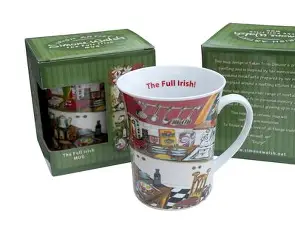
Use a tonne of glitter and shamrock stickers to add some flair to a white or green coffee mug. This is a simple craft for children of all ages, as blogger Linda added tiny dots around her sticker using a gold glitter pen.
8. Shamrock Man
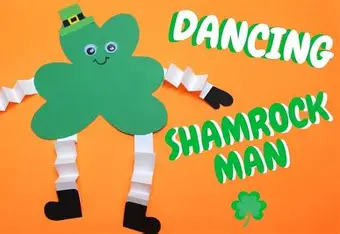
Of course! Here’s a fun and silly craft idea called the Shamrock Man — perfect for kids to make during St. Patrick’s Day celebrations.
🍀 Shamrock Man – DIY Craft
😄 Perfect for:
Classroom activities, home crafts, or festive St. Patrick’s Day decorations.
✂️ Supplies Needed:
- Green construction paper or cardstock
- Scissors
- Glue stick
- Googly eyes (or black marker)
- Black marker or crayons
- Tape (optional)
- Shamrock template (or draw your own)
🛠️ Instructions:
- Make the Body (Shamrock)
- Cut out a large shamrock shape from green paper.
- This will be Shamrock Man’s head and body.
- Add a Face
- Stick on two googly eyes or draw eyes with a black marker.
- Add a big smile and maybe even some rosy cheeks with crayon or pink paper circles.
- Create Arms and Legs
- Cut 4 long strips of green paper (about 1 inch wide).
- Accordion-fold the strips to make springy arms and legs.
- Attach the Limbs
- Glue or tape two strips to the sides of the shamrock for arms.
- Attach the other two at the bottom for legs.
- Add Hands and Feet
- Cut small shamrocks or oval shapes for the hands and feet, and glue them to the ends of the arms and legs.
- Optional Accessories
- Add a mini leprechaun hat, bow tie, or glittery gold details!
- You can even give your Shamrock Man a little pot of gold to hold.
🧲 Display Ideas:
- Hang on the fridge or classroom wall
- Use as a puppet by taping to a craft stick
- Create a group of Shamrock Men for a St. Patrick’s Day parade scene
Would you like a printable shamrock template or coloring version to go with this craft?
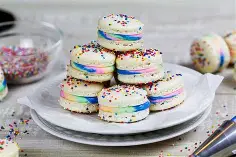
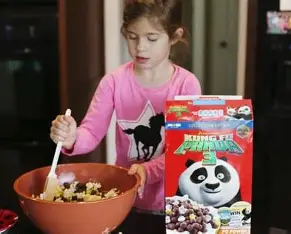
9. Rainbow Rice Krispy Treats
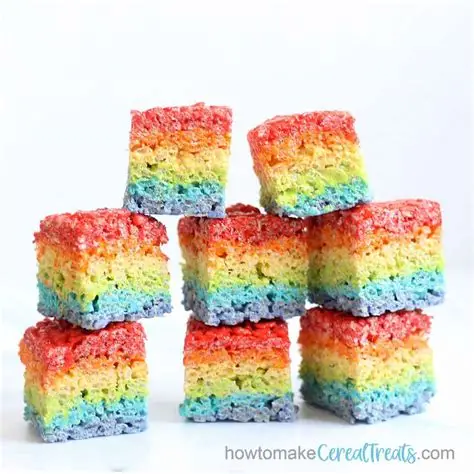
Show your kids how to prepare these rainbow goodies if you want to share your fond memories of your favourite cereal from childhood. They are not only tasty but also cunning.
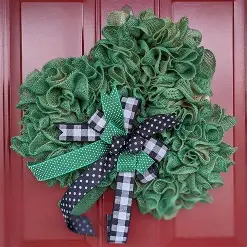
10. Popsicle Stick Wreath
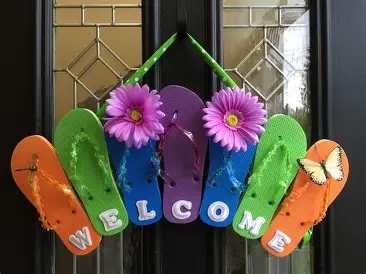
Absolutely! Here’s a festive and fun Popsicle Stick Wreath craft that’s perfect for St. Patrick’s Day—or easy to customize for any holiday.
🍀 Popsicle Stick Wreath – DIY Craft
🎉 Perfect for:
Kids’ crafts, classroom decorations, or a handmade touch to your front door!
✂️ Supplies Needed:
- Popsicle sticks (craft sticks) – about 12–15
- Green paint or green markers
- Glue (hot glue for faster drying, or school glue for kids)
- Green construction paper or foam (for shamrocks)
- Ribbon (for hanging)
- Glitter, sequins, buttons (optional for extra flair)
- Shamrock stickers or cutouts (optional)
🛠️ Instructions:
- Paint the Popsicle Sticks
- Paint all the sticks green (or use green markers if you’re short on time).
- Let them dry completely.
- Form the Wreath Base
- Arrange the sticks in a circle, overlapping the ends slightly (like a sunburst or flower).
- Glue them together where they overlap to form a solid ring.
- Let it dry thoroughly before moving on.
- Decorate with Shamrocks
- Cut out several small shamrocks from green paper or foam.
- Glue them around the wreath, evenly spaced or clustered at one side.
- Add Details (Optional)
- Glue on sequins, glitter, buttons, or stickers for sparkle.
- Write a message like “Lucky Day” or “Happy St. Patrick’s Day” on one of the sticks.
- Attach a Ribbon
- Glue or tape a ribbon loop to the back of the wreath for hanging.
🌟 Tips:
- You can make a mini version using small popsicle sticks and hang it on a doorknob or locker.
- Use different shades of green for a textured look.
Would you like a printable shamrock template or a sign you can glue to the wreath center?
11. Pinch Proof Ribbon

Here, pinching is not permitted! On March 17th, everyone will be grateful to have a ribbon to wear. Yes, it can be considered your daily green.
12. Rainbow Macarons
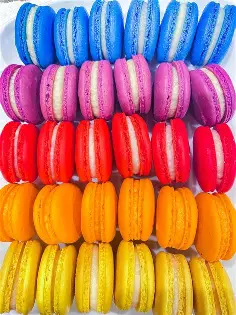
Absolutely! Here’s a colorful and delightful idea for Rainbow Macarons—a perfect treat for St. Patrick’s Day, birthday parties, or anytime you want to add a pop of color!
🌈 Rainbow Macarons – Sweet & Festive Treat
🍬 Perfect for:
St. Patrick’s Day dessert tables, party favors, or just a fun baking day!
🧁 Ingredients & Supplies:
- Macaron shells (homemade or store-bought in rainbow colors: red, orange, yellow, green, blue, purple)
- Buttercream or ganache filling (your favorite flavor!)
- Food coloring (gel works best)
- Piping bags and tips
- Optional: Edible glitter, gold sprinkles, or mini shamrock decorations
🛠️ Instructions (Homemade Version):
- Make the Macaron Batter
- Prepare your macaron batter (almond flour, powdered sugar, egg whites, granulated sugar, etc.).
- Divide into 6 bowls and tint each with a different rainbow color using gel food coloring.
- Pipe and Bake
- Pipe small circles onto parchment paper or a silicone baking mat.
- Let them rest until a skin forms (20–30 minutes), then bake according to your recipe.
- Make the Filling
- Whip up your favorite buttercream or ganache.
- You can keep it plain white or tint it a color to match or contrast with your shells.
- Assemble the Macarons
- Pair matching shell colors together.
- Pipe a small amount of filling onto one shell and gently sandwich with another.
- Decorate (Optional)
- Add a light dusting of edible glitter or brush with luster dust.
- Stick on a mini shamrock decoration or gold sprinkle to give it that lucky charm!
💡 Short on Time?
Buy plain vanilla or coconut macarons and paint them with food-safe brushes and edible gel colors for a rainbow look.
🎁 Serving Idea:
Place a few rainbow macarons in a clear treat bag and tie with gold ribbon for a “Pot of Gold at the End of the Rainbow” favor!
Would you like a basic macaron recipe or ideas for naturally coloring them without food dye?
13. Melty Bead Rainbow
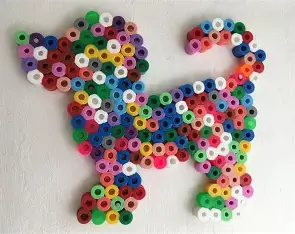
Do you recall the melted beads you used to make crafts as a child? To create some vibrant rainbow patterns to put on display throughout the house this season, you might want to employ them once more. Of course, there are many more shapes you can make.
14. 20-Minute Sign


Sure! Here’s a simple idea for creating a “20-Minute Sign”—this could be used for a classroom, event, activity station, or craft area to let people know an activity takes 20 minutes to complete.
🕒 20-Minute Sign – Quick DIY Display
✅ Purpose:
To inform participants or attendees that the activity, craft, or session takes approximately 20 minutes.
✂️ Supplies Needed:
- Cardstock or construction paper
- Markers or bold pens
- Stickers or decorations (optional)
- Lamination sheet or clear sleeve (optional, for reuse)
- Tape, easel, or stand to display the sign
🛠️ Instructions:
- Choose Your Sign Shape
- Rectangle, circle, or fun shape (like a shamrock for St. Patrick’s Day, or a clock face).
- You can print a template or cut one out from cardstock.
- Write the Message Clearly
- Use large, bold letters:
“This Activity Takes About 20 Minutes”
or
“20-Minute Craft Zone”
- Use large, bold letters:
- Add Visual Elements
- Draw a small clock showing 20 minutes past the hour.
- Add themed images (e.g., rainbows, clovers, stars, or paintbrushes).
- Decorate (Optional)
- Use stickers, glitter, or borders to make it eye-catching and festive.
- Display It
- Tape it to a table, hang on a wall, or place it in a stand-up frame.
🖨️ Want a Printable Version?
I can make a simple printable “20-Minute Activity” sign for you—just let me know the theme (e.g., rainbow, St. Patrick’s Day, general classroom, etc.) and preferred colors!
15. Popcorn Cereal Balls
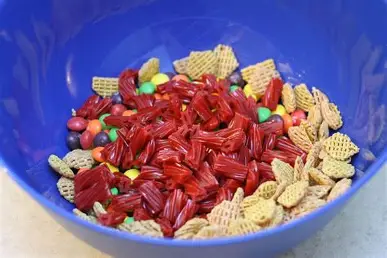
As if you needed another reason to eat Lucky Charms for breakfast, make these delicious popcorn balls and serve them on the morning of the 17th. What could be better than being reminded of your childhood while simply taking half an hour to prepare?
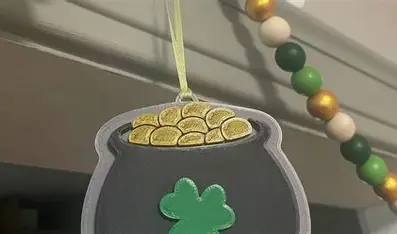
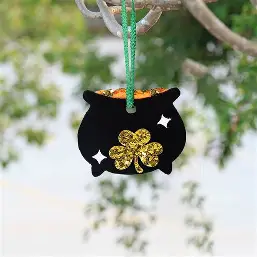
16. Pot of Gold
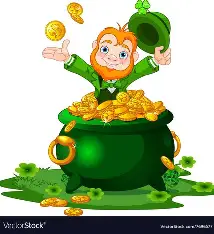
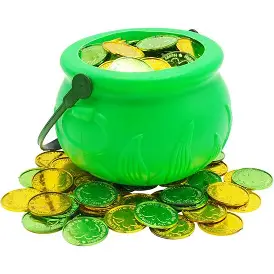
Gold is all that glitters! Here’s another method that uses a little cauldron if you don’t like a paper box of sweets (no, they’re not just for Halloween!).
17. Leprechaun Handprint Card
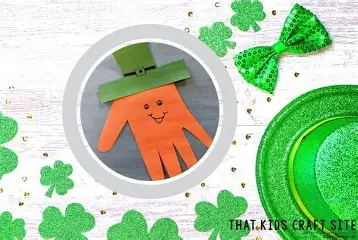
A Leprechaun Handprint Card is a fun and festive St. Patrick’s Day craft that’s perfect for kids. It involves using a child’s handprint to create a leprechaun character, often on a folded card to be given as a holiday greeting or keepsake. Here’s how to make one:
🖐️ DIY Leprechaun Handprint Card
🎨 Materials Needed:
- Green, orange, black, and white construction paper (or cardstock)
- Scissors
- Glue stick
- Markers or crayons
- Pencil
- Googly eyes (optional)
✂️ Step-by-Step Instructions:
- Fold the Card:
- Take a piece of cardstock and fold it in half to create the base of your card.
- Make the Handprint Beard:
- Have your child trace their hand on orange construction paper.
- Cut out the handprint — this will become the leprechaun’s beard.
- Glue the handprint to the front of the card, fingers pointing down.
- Create the Leprechaun’s Face:
- Cut out a circle from peach or light tan paper for the face.
- Glue the face on top of the handprint (palm area).
- Add googly eyes or draw eyes, a nose, and a smile with markers.
- Make the Hat:
- Cut a green rectangle for the top hat.
- Add a black band and a yellow square buckle.
- Glue the hat on top of the face.
- Decorate and Personalize:
- Add shamrocks, a rainbow, or a pot of gold using stickers, drawings, or cut-outs.
- Inside the card, write a festive message like: “Wishing you a lucky and magical St. Patrick’s Day!”
✅ Tips:
- Use paint instead of paper for a real handprint effect.
- Add glitter for a magical touch.
- Perfect keepsake for parents, grandparents, or teachers!
Would you like a printable template for this craft?
18. Green Beaded Bracelets
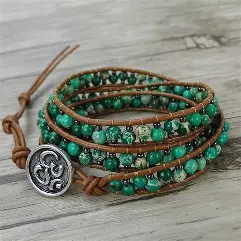
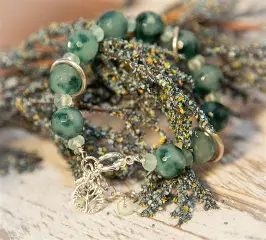
Why not wear a green bracelet on St. Patrick’s Day in addition to a green shirt? Making and giving these beaded beauties to friends on the 17th is a lot of joy.
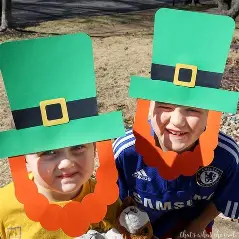
19. Green Paper Hat

Here’s how to make a simple and fun Green Paper Hat — perfect for St. Patrick’s Day celebrations, especially to go along with your Leprechaun Handprint Card!
🎩 How to Make a Green Paper Leprechaun Hat
🟢 Materials Needed:
- Green construction paper or cardstock
- Black and yellow paper (for the hat band and buckle)
- Scissors
- Glue stick or tape
- Pencil or ruler
✂️ Instructions:
Option 1: Flat Leprechaun Hat (Great for Cards or Wall Decor)
- Cut the Hat Shape:
- Cut a rectangle (about 6 inches wide by 4 inches tall) from green paper.
- For the brim, cut a longer, thinner rectangle (about 7 inches wide by 1 inch tall).
- Add the Band:
- Cut a black strip (same width as the hat, about 1 inch tall).
- Glue it across the lower third of the hat.
- Add the Buckle:
- Cut a small yellow square.
- Cut out a smaller square inside it to make a “frame” or buckle shape.
- Glue it in the center of the black band.
- Assemble:
- Glue the brim at the bottom of the main hat rectangle.
- Add extra decorations if you’d like: shamrocks, glitter, a name tag, etc.
Option 2: Wearable Green Paper Hat (Headband Style)
- Make the Headband:
- Cut two long strips of green paper (about 2 inches wide).
- Tape or glue them end-to-end to fit around your head comfortably.
- Create the Hat Front:
- Follow steps 1–3 from the flat version above to make a mini hat front (about 4–5 inches wide).
- Attach the Hat to the Headband:
- Glue or tape the mini hat front to the headband strip.
- Wear and Celebrate!
- Place it on your head like a crown — now you’re ready to be a leprechaun!
Would you like a printable version or a hat template to cut out?
20. Ombre Shamrock Wreath
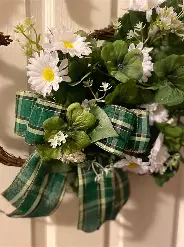
Who is not a fan of ombre? When guests approach your front entrance, they will notice this cheery wreath right away. You may use this decoration year after year because the real shamrock form is made of strong MDF.
21. Lucky Banner
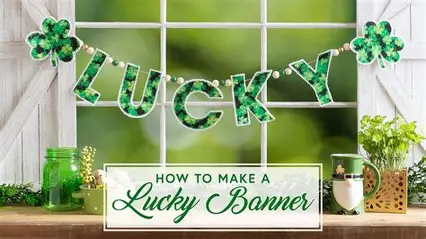
Here’s a fun and festive way to make a “Lucky” Banner – perfect for St. Patrick’s Day classroom decor, parties, or a cheerful home display!
🍀 DIY “Lucky” Banner
🎨 Materials Needed:
- Green, gold, and white construction paper or cardstock
- Scissors
- Glue or tape
- Hole punch
- String, ribbon, or yarn
- Alphabet stencils, letter stickers, or markers
- Optional: Glitter, shamrock cutouts, mini clothespins
✂️ Instructions:
1. Choose a Banner Shape:
Pick a style for each letter’s background:
- Triangle pennants (pointed at the bottom)
- Rectangles with V-cut bottoms (called swallowtail or fishtail)
Cut out 5 banner pieces (one for each letter in L-U-C-K-Y) from green or alternating green/gold cardstock.
2. Add the Letters:
- Cut out or stencil one letter per piece: L, U, C, K, Y
- Use bold white or gold letters for contrast.
- You can draw them, use stickers, or print and cut.
3. Decorate Each Piece:
- Add shamrock shapes, rainbows, gold coins, or glitter to each banner piece.
- Consider using gold foil or glitter paper for a sparkly effect.
4. Assemble the Banner:
- Punch two holes at the top of each banner piece.
- Thread your string, ribbon, or yarn through the holes in order to spell LUCKY.
- Leave some extra string on each end for hanging.
5. Hang It Up!
- Drape across a mantle, bulletin board, classroom wall, or doorway.
✅ Bonus Ideas:
- Add extra banner pieces before or after that say “I Am” or “So” to make “So Lucky” or “I Am Lucky”.
- Want a kid-friendly version? Let kids decorate each letter themselves with markers and stickers.
- Use mini clothespins to clip the pieces onto string for an easy no-glue version.
Would you like a printable “LUCKY” banner template or shamrock shapes to go with it?
22. Shamrock Keychain
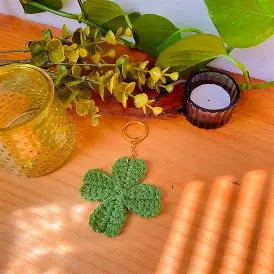
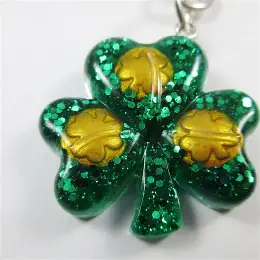
With this vibrantly coloured shamrock-shaped keychain, you won’t ever lose your keys again! Kids and adults will love this keychain, which is simple to make and environmentally friendly (you can upcycle an old bag or use unused leather bits).