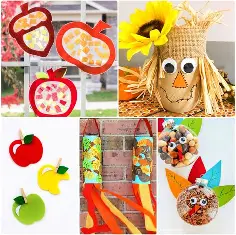

Here are wonderful fall crafts for kids of all ages, inspired by Craftsy-style creativity and age-inclusive approaches from top sources:
🍂 Featured Fall Crafts for Every Age
1. Leaf-Rubbing & Collages
Kids place colorful leaves under paper and rub with crayons to reveal patterns, then glue these leaves into beautiful collages or seasonal art displays. Parents+15Gathered+15Craftsy Hacks+15
Reddit users also praise this idea:
“Crushed up leaves on top of glue to make an autumn tree.” Arty Crafty Kids+8Reddit+8Messy Little Monster+8Reddit
2. Suncatchers (Pumpkin, Apple & Acorn Shapes)
Craft stunning window art using colored tissue paper and contact paper in fall shapes. Bright, simple, and fast to make. Craftulate
3. Pinecone & Leaf Creations
Fun crafts include pinecone owls, pom‑pom pinecones, hedgehogs, or bats—just glue Pinecones with felt, paper or yarn to build cute fall animals. Reddit+8The Pioneer Woman+8Country Living+8
4. Handprint & Fingerprint Crafts
- Handprint Trees or Turkeys: Dip hands in paint or use fingerprint dots to design colorful fall trees or pumpkins. Great for preschoolers. Verywell Family+1SplashLearn+1
- Fingerprint Pumpkins: Kids use paint to dot pumpkins and embellish with stems and decorations. The Pioneer Woman+1activekids.com+1
5. Scarecrows & Paper Roll Crafts
Simple and imaginative: use paper plates, sticks, toilet rolls to build scarecrows you can customize with funny faces and dress‑ups. goodhousekeeping.comrediscoveredfamilies.com
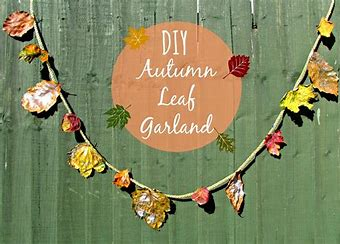
6. Nature Garlands & Wreaths
String real dried leaves, acorns, or paper cut leaves into garlands or wreaths you can hang as seasonal décor. Great family activity. Craftsy Hacksrediscoveredfamilies.com
7. Bookmarks & Ornaments with Pressed Leaves or Origami
- Pressed leaf bookmarks make beautiful keepsakes. Gathered
- Origami leaf crowns, owl bookmarks, or fox puppets suit older kids. artsycraftsymom.com+1rediscoveredfamilies.com+1
8. Pumpkin Seeds & Bean Mosaics
Get creative using natural materials: arrange pumpkin seeds or dried beans into mosaic art in autumn colors. Care.comThe Pioneer Womangoodhousekeeping.com
9. Egg Carton & Cardboard Crafts
Recycled egg cartons become turkeys, woodland animals, and other charming models with glue, paint, and a little imagination. Gatheredactivekids.com
🎯 Why These Crafts Work for All Ages
- Preschool & toddlers: Handprints, fingerprint pumpkins, pinecone critters (with adult help).
- Elementary & older kids: Origami leaves, suncatchers, mosaics, wreath-making.
- Creative skills: All levels promote fine motor development, color recognition, sensory fun, and artistic expression.
- Budget‑friendly: These crafts mainly use inexpensive or recycled items—paper, leaves, pasta, pinecones, seeds, glue. lovecrafts.comrediscoveredfamilies.com
🛠️ Quick Tips to Get Crafting
- Let kids collect items on a nature walk—like leaves, pinecones, acorns—and turn them into art. cntraveler.comCraftsy Hacks
- Offer a mix of guided and open-ended crafts: Provide templates for younger kids, while older ones can design their own paper trees or leaf puppets.
- Embrace process art: focus on exploration over perfection—like blending paint or layering tissue paper. RedditPink Stripey Socks
- Create collaborative group art: e.g. a big fall tree mosaic made by combining everyone’s leaf rubbings or cut-outs. RedditReddit
📋 Fall Craft Planner
| Craft Idea | Age Range | Materials Needed | Benefits |
|---|---|---|---|
| Leaf rubbings & collages | 3+ | Leaves, paper, crayons, glue | Creativity, nature appreciation |
| Suncatchers | 4–12+ | Tissue paper, contact paper, templates | Color, light exploration |
| Pinecone critters | 3+ (with help for younger) | Pinecones, felt, yarn, pom‑poms | Fine motor, imaginative storytelling |
| Fingerprint pumpkins | 1+ (finger painting) | Paint, paper | Sensory fun, color recognition |
| Paper roll & plate crafts | 2–8 | Cardboard, paper plates, glue, paint | Simple, hands-on |
| Garland/Wreath making | 3–10+ | Twine, collected leaves, ribbon | Teamwork, décor crafts |
| Bookmarks/Origami | 6+ | Paper, markers, pressed leaves | Fine motor, reading encouragement |
| Seed Mosaics | 5+ | Beans, seeds, glue, cardboard | Texture art, planning |
💡 Final Thoughts
Adding these fall crafts to your season will create great memories, build kids’ skills, and brighten your home with DIY artwork. From toddlers painting leaves to older children folding origami leaves or making clay squirrels, there’s a craft for every age and mood.
Would you like step‑by‑step instructions or printable templates for any specific project? Just let me know!
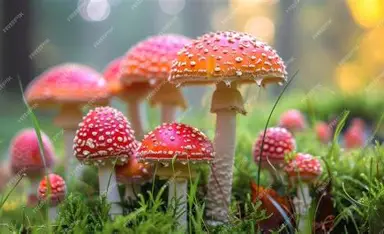
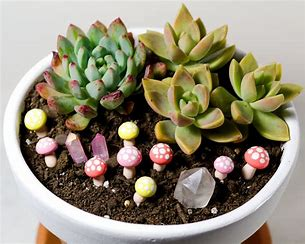
The children are always fascinated by fairies and toadstools. They serve as an essential component of imaginary fairy tales that you can reenact during craft time.
These fairy toadstools, which are composed entirely of natural and biodegradable materials, are also whimsical and artistic. You may be confident that they will decompose and genuinely blend in with nature once you place them in your garden.
A few coconut shells, some wood pieces or branches to start cracking, and some milk-based paint from this source are required.
Sure! Here’s a simple and fun Leaf Painting activity for kids of all ages:
🍁 Leaf Painting Craft for Kids
🧒 Ages:
Suitable for toddlers (with help) to older kids and even teens!
🎨 Materials:
- Fresh or dried leaves (different shapes and sizes)
- Washable paint (acrylic or tempera works well)
- Paintbrushes or sponges
- Paper (white or colored), cardstock, or canvas
- Paper towels or a drop cloth (to keep your workspace clean)
- Optional: markers, glitter, glue, or cotton swabs for detailing
✅ Instructions:
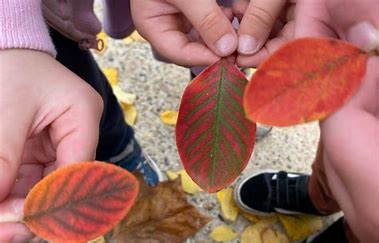
1. Gather Leaves
Take a nature walk and collect a variety of leaves—look for different shapes, edges, and textures.
2. Prep Your Area
Lay down newspaper or a drop cloth to protect your table. Place all materials within easy reach.
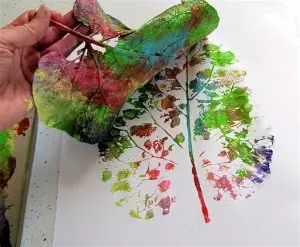
3. Paint the Leaves
Using a paintbrush or sponge, apply paint to the textured (veiny) side of the leaf. Use multiple colors if you like!
4. Press and Print
Gently press the painted side of the leaf onto your paper or canvas. Press down evenly. Then slowly peel it off to reveal the print.
5. Repeat
Use different colors and types of leaves to create a full fall scene. Overlapping prints can create a layered, textured effect.
6. Let It Dry
Once done, let the painting dry completely.
7. Optional Decorating
After drying, kids can decorate their prints using markers, glitter, or stickers for extra flair.
💡 Ideas & Variations:
- Leaf Rainbow: Use a rainbow of paint colors across different leaves.
- Leaf Creatures: Turn each leaf into a bug, fish, or animal by adding eyes and legs with markers.
- Thankful Tree: Write something you’re thankful for on each painted leaf and glue them onto a tree trunk drawing.
- Fall Garland: Cut out each print and string them together to hang as a banner.
🧠 Learning Benefits:
- Encourages creativity and color mixing
- Teaches about nature and leaf types
- Builds fine motor skills
- A calming, sensory activity for all ages
Would you like a printable template or step-by-step visual guide for this crafta.
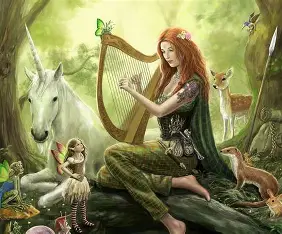
Did you not have such short-lived dreams in which you dressed up as a fairy and flew into the woods to meet other fairy friends? What was absent from this dream, do you know?
That’s what these beautiful fall fairy wings and crown are. Without your fairy wings, you can’t take off, can you?
Encourage your children to collect a variety of fall foliage, pine cones, sycamore seeds, and unusual branches. Additionally, you’ll need some adhesive tape from here and ribbon like this.
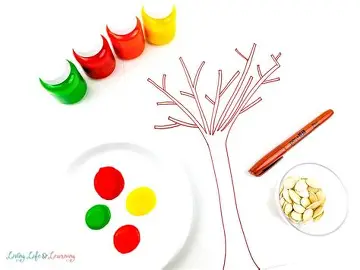
Absolutely! Here’s a fun and easy Wooden Pumpkin Ornament craft perfect for fall:
🎃 Wooden Pumpkin Ornament Craft
🧒 Ages:
Best for ages 4 and up (younger kids with adult help)
🎨 Materials:
- Small wooden circles or discs (available at craft stores or online)
- Orange acrylic paint
- Green and brown paint (for stem and leaves)
- Paintbrushes or sponge brushes
- Twine, ribbon, or string (for hanging)
- Hot glue gun (or strong craft glue)
- Optional: googly eyes, markers, glitter, felt, or buttons
✅ Instructions:
1. Paint the Wooden Disc
Paint one side of the wooden disc orange (this will be your pumpkin). Let it dry, then paint the other side if you want it double-sided.
2. Add the Stem and Leaves
Use green and brown paint to add a small stem and leaves at the top of the pumpkin. Let dry.
3. Decorate (Optional)
Customize your pumpkin! Add:
- A silly or spooky face (with black paint or a marker)
- Googly eyes or a felt smile
- Glitter accents or buttons
4. Attach the String
Use hot glue or thread twine through a pre-drilled hole (if the disc has one). Tie a loop so you can hang your ornament.
5. Let it Dry and Hang It Up!
Once everything is dry, hang your pumpkin on a fall tree, doorknob, classroom display, or anywhere you’d like a little autumn cheer!
💡 Craft Variations:
- Mini Pumpkin Patch: Make several and display them in a bowl or basket.
- Name Tags: Write names on each ornament for a personalized place setting or gift tag.
- Pumpkin Faces: Create a set with different expressions—happy, sad, silly, spooky—for a playful fall garland.
🧠 Learning Benefits:
- Improves fine motor skills and hand-eye coordination
- Encourages creativity and seasonal awareness
- Offers a sense of accomplishment and pride in handmade décor
Would you like a printable instruction sheet or visual sample to go along with this?

Time spent in the garden is something I adore. Spending time in the chilly autumn months can be quite uncomfortable, even when the spring and summer are beautiful and warm.
It does not, however, imply that you can bring the garden to you. With this kid-friendly art project, you can enjoy your time outside—inside—by recreating your fall garden!
Gather the necessary items for your garden, such as leaves, twigs, acorns, dried berries, and the like, by having the children scurry outside. Then, string them through some robust hessian twine to make a wreath.
6. Pumpkin Handprint and Photo Keepsake
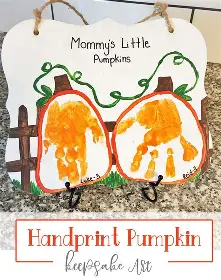

ure! Here’s a sweet and memorable fall craft: Pumpkin Handprint and Photo Keepsake — perfect for parents, grandparents, or classroom gifts.
🧡 Pumpkin Handprint and Photo Keepsake
🧒 Ages:
Great for toddlers, preschoolers, and early elementary kids (with adult assistance)
🎨 Materials:
- White cardstock or canvas board
- Orange, green, and brown paint (washable/acrylic)
- Paintbrushes or sponge
- A recent photo of the child (small, headshot works best)
- Scissors
- Glue stick or school glue
- Black marker (optional for writing name/date)
- Optional: ribbon, stickers, or a clear protective sleeve/frame
✅ Instructions:
1. Paint the Child’s Hand
Paint the child’s palm and fingers with orange paint. (Avoid the thumb—it will look more pumpkin-shaped!)
2. Make the Handprint
Help them press their painted hand down firmly onto the paper or canvas. This will be the pumpkin body. Let it dry completely.
3. Add a Stem and Leaves
Once the orange handprint is dry:
- Use brown paint or a marker to draw a small stem at the top of the “pumpkin.”
- Use green paint to add curly vines or leaves around the top.
4. Add the Photo
Cut the child’s photo into a small circle or oval. Glue it in the middle of the handprint pumpkin or above it like a sunburst.
5. Personalize It
- Write the child’s name and age or “Fall [Year]” underneath.
- Optional: Write a sweet message like “Picked just for you!” or “My Little Pumpkin”.
6. Finish and Display
- Let it dry.
- Optionally, frame it, laminate it, or add a ribbon loop to hang it as a wall or tree ornament.
💡 Variations:
- Footprint Version: Use a foot instead of a hand for a larger pumpkin (especially for babies).
- Classroom Display: Have every student make one for a fall bulletin board or family gift.
- Holiday Gift: Great for Thanksgiving or early Christmas gifts from little ones.
🧠 Learning Benefits:
- Encourages sensory play and motor skill development
- Helps kids connect art to memory and family
- A sentimental keepsake for years to come
Would you like a printable version or a visual layout idea for this keepsake?
As easy as they come, this fingerprint craft project is another one. You only need kitchen paper towels to absorb spills and muck, and some kitchen towels from here for the basis. Cardstock is not even necessary.
Because you’re using kitchen towels, you may also preserve them as mementos that you can look back on over time as a parent. To begin creating these handprint acorns, gather your paint, towels, and your children’s handprints.
8. Spider Crafta

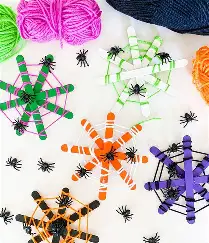
Got it! Here’s a fun and simple Spider Craft idea for kids — perfect for fall or Halloween:
🕷️ Spider Craft for Kids
🧒 Ages:
Ideal for ages 4 and up (younger kids with help)
🎨 Materials:
- Black construction paper or cardstock
- Googly eyes (or draw eyes with marker)
- Pipe cleaners (black or any color)
- Glue or tape
- Scissors
- Optional: pom-poms, markers, glitter
✅ Instructions:
1. Make the Spider’s Body
Cut out two circles from black paper — one bigger (body) and one smaller (head).
2. Attach the Head and Body
Glue or tape the smaller circle (head) on top of the bigger one (body).
3. Add Eyes
Glue googly eyes onto the smaller circle (or draw eyes with a marker).
4. Create Legs
Cut 8 pipe cleaners about 4-5 inches long each. Bend each slightly in the middle to create legs.
5. Attach the Legs
Glue or tape 4 legs on each side of the spider’s body.
6. Optional Decorations
Add pom-poms for extra texture, or use markers and glitter to decorate the spider’s body.
7. Display Your Spider
Use your spider as Halloween décor, a classroom project, or a fun fall craft to hang around the house!
💡 Variations:
- Hanging Spider: Attach a piece of string to hang the spider from the ceiling or doorframe.
- Spider Web Background: Draw or paint a web on paper and glue your spider on it for a complete scene.
- Storytelling Spider: Give your spider a name and tell a spooky or silly story about it.
🧠 Learning Benefits:
- Builds fine motor skills with cutting and gluing
- Encourages imaginative play and creativity
- Great for seasonal themes and sensory exploration
Want me to help with printable templates or step-by-step photos?
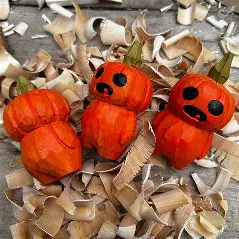
9. Pumpkin Cat
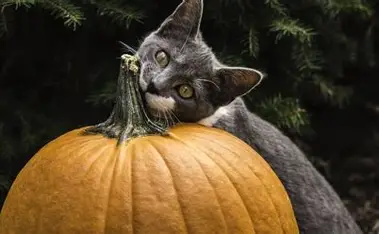
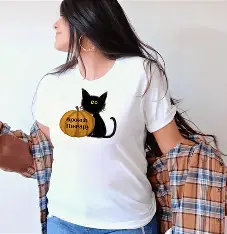
What if I told you that you could combine two essential elements of Halloween—pumpkins and black cats—by creating a pumpkin cat?
A DIY pumpkin, a few spray paint cans, and a few non-flammable tea lights are required. Now go ahead and get your materials.
Additionally, since this creative activity can—and will—be messy, you might want to spread out some newspapers to catch spillage.
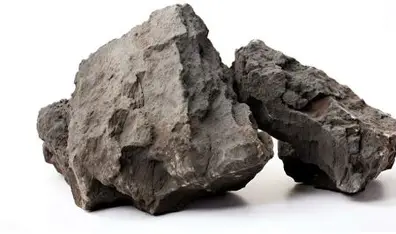
10. Hot Rocks

Sure! Here’s a simple and fun craft idea called Hot Rocks — great for kids and adults alike:
🔥 Hot Rocks Craft
What Is It?
A creative way to decorate smooth rocks by painting them to look like glowing hot coals or fiery lava rocks — perfect for fall or Halloween decorations!
🧒 Ages:
Recommended for ages 6+ (younger kids with supervision)
🎨 Materials:
- Smooth, flat rocks (washed and dried)
- Acrylic paints: black, red, orange, yellow, and white
- Paintbrushes (various sizes)
- Palette or paper plate for mixing paints
- Newspaper or drop cloth to protect your workspace
- Clear sealant spray (optional, to protect finished rocks)
✅ Instructions:
1. Prep Your Rocks
Choose smooth, flat rocks. Wash and dry them well to remove dirt and dust.
2. Base Coat
Paint the entire rock black and let it dry completely. This will be the “charcoal” base.
3. Add Fiery Colors
Using a small brush or sponge, dab on red, orange, and yellow paint randomly over the black base to create a glowing effect. Focus on blending colors to imitate hot embers or lava.
4. Highlight with White
Add small touches of white or light yellow to the very hottest spots for a glowing highlight effect.
5. Let Dry and Seal
Once dry, you can spray the rocks with clear sealant to make them last longer (optional).
6. Display Your Hot Rocks
Place them as table décor, in a garden, or use them for storytelling or sensory play.
💡 Tips:
- Use sponges or your fingers to blend colors for a more natural look.
- Experiment with different rock shapes and sizes.
- Combine with other fall decorations like leaves, pinecones, or candles.
🧠 Learning Benefits:
- Encourages color blending and creativity
- Develops fine motor control
- Introduces kids to natural textures and rock collecting
Would you like ideas for other nature-inspired crafts or a step-by-step guide with photos?
11. Bat Craft
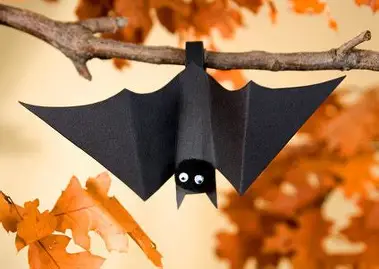
Halloween bats that are spooky? Please sign me up! As part of your Halloween décor, don’t you just like these winged creatures hanging from the ceiling?
Yes, I do!
Even preschoolers may join in on the craft time fun and make a dozen of them because they are so simple to make. Googly eyes, black construction paper, white or yellow chalk, and, if you want them, bat stickers are required.
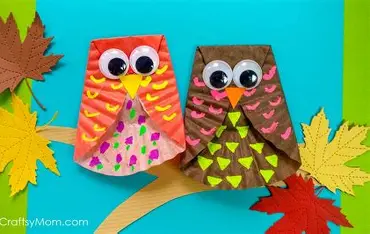
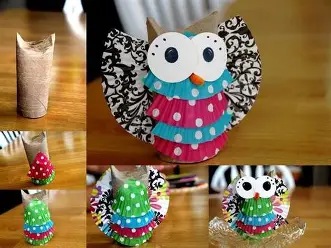
Of course! Here’s a cute and easy Cupcake Liner Owl craft for kids:
🦉 Cupcake Liner Owl Craft
🧒 Ages:
Perfect for ages 3 and up (with adult help for younger kids)
🎨 Materials:
- Paper cupcake liners (brown, orange, or any fall colors)
- Construction paper (white, yellow, and black)
- Glue stick or liquid glue
- Scissors
- Googly eyes or markers to draw eyes
- Optional: feathers, buttons, or glitter for decoration
✅ Instructions:
1. Flatten the Cupcake Liner
Press down the cupcake liner so it’s flat. This will be the owl’s body.
2. Make the Wings
Cut two smaller cupcake liners in half or quarters for wings. Glue these on each side of the flat liner.
3. Create the Eyes
Glue two googly eyes onto a piece of white construction paper cut into circles or ovals. Or, cut out white circles and draw black pupils with a marker.
4. Make the Beak
Cut a small triangle out of yellow or orange construction paper and glue it below the eyes.
5. Assemble the Owl
Glue the eyes and beak onto the center of the cupcake liner body.
6. Add Details (Optional)
You can glue on feathers, buttons, or sprinkle glitter to decorate your owl.
💡 Fun Ideas:
- Create a whole family of owls in different sizes and colors.
- Use googly eyes that blink or light up for extra fun.
- Make a fall-themed garland by stringing several cupcake liner owls together.
🧠 Learning Benefits:
- Builds fine motor skills through cutting and gluing
- Encourages creativity and color recognition
- Great for seasonal or classroom decoration projects
Would you like a printable template or photos to help guide the craft?
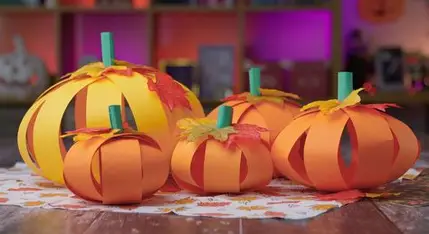
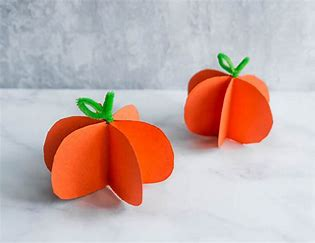
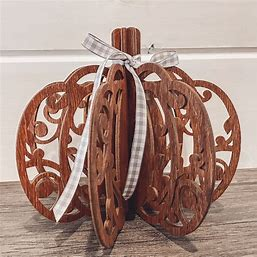
Even while painting on paper is a tremendously enjoyable creative project, there are occasions when you just want something more…physical. Maybe something 3D?
In keeping with Halloween, let’s look at how to create this 3D pumpkin. It’s a fun and unusual craft project that will keep your children busy during craft time.
After downloading the helpful template that is supplied, you may either wing this project or follow the pattern. You may create a dozen of them to adorn your house once you and the children have mastered the technique.
14. Pointillism
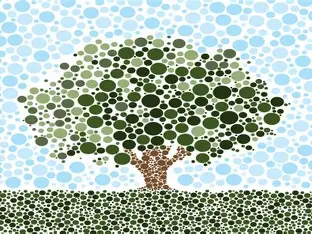
Absolutely! Here’s a fun and kid-friendly explanation and activity for Pointillism:
🎨 Pointillism Art for Kids
What Is Pointillism?
Pointillism is a painting technique where you use tiny dots of color to create an image. Instead of mixing colors on a palette, artists place small dots next to each other and let your eyes do the blending!
It was made famous by artists like Georges Seurat and Paul Signac in the late 1800s.
🧒 Ages:
Great for ages 4 and up (with younger kids using larger dots or fingers)
🎨 Materials:
- White paper or cardstock
- Cotton swabs, paintbrush tips, or the back of a pencil (for dotting)
- Washable paint or acrylic paint
- Paper plate or paint palette
- Pencil (to sketch your design lightly)
- Optional: markers or crayons to add outlines
✅ Instructions:
1. Choose a Simple Design
Lightly draw a simple shape or outline on your paper — like a tree, apple, sun, leaf, or pumpkin.
2. Dip and Dot
Dip a cotton swab or tool into paint and gently dot along your design. Don’t smear or drag — just press and lift.
3. Use Different Colors
Add more dots of other colors next to or over each other. For example, red + yellow dots can create an orange look from a distance.
4. Fill in the Picture
Continue dotting until your whole image is filled in. You can do the background, too!
5. Let It Dry
Once you’re finished, let your artwork dry completely.
💡 Ideas for Designs:
- Fall leaves with red, orange, and yellow dots
- A pumpkin patch scene
- A tree with colored leaves
- A rainbow or heart
- Abstract dot patterns just for fun!
🧠 Learning Benefits:
- Improves fine motor control and patience
- Encourages creativity and understanding of color mixing
- Teaches a real art technique used by famous artists
- A calming, focused activity for all ages
Would you like a printable Pointillism template to get started or examples of famous Pointillism artwork to show kids?
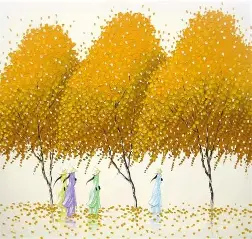
15. Fall Tree Crafta
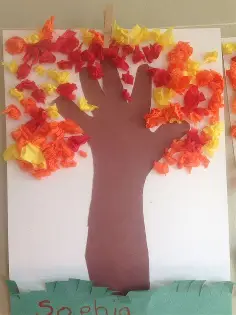
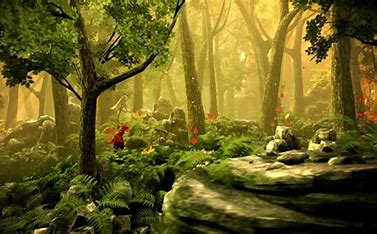
Trees in the autumn are magnificent and stunning to see. They remain strong even in the autumn of their lives, when the leaves are falling and winter is only a few months away.
Let’s honour those towering trees and assist them in celebrating the changing of the seasons by using this DIY activity. To start, get a pair of scissors, some coloured tissue paper, and some construction paper.
Look out these construction paper projects as well. For an additional craft activity, see how to create tissue paper pom poms if you have any leftover coloured tissue paper.
16. Salt Painting
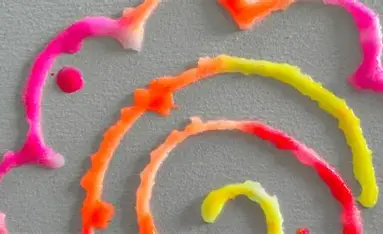

Of course! Here’s a fun and creative art activity: Salt Painting — a magical craft where kids watch colors spread and sparkle!
🧂🎨 Salt Painting Craft for Kids
🧒 Ages:
Great for ages 3 and up (younger kids with supervision)
🎨 Materials:
- White cardstock or thick paper
- White glue (like Elmer’s)
- Table salt
- Watercolor paints or food coloring + water
- Paintbrushes or pipettes (droppers)
- Tray or baking sheet (to catch salt)
✅ Instructions:
1. Draw with Glue
Use white glue to draw a design on your paper. You can make shapes, letters, a name, or seasonal drawings (like leaves or snowflakes).
2. Sprinkle Salt
While the glue is still wet, generously sprinkle salt over it—just like glitter. Shake off the extra onto a tray.
3. Prepare Your Paint
If you’re using watercolor paints, make sure they’re nice and watery. If using food coloring, mix a few drops with a bit of water in small cups.
4. Paint the Salt
Dip your paintbrush (or use a dropper) in the paint and gently touch it to the salted glue lines. Watch the color magically spread along the salt!
5. Let It Dry
Lay the artwork flat and let it dry completely. The raised, sparkly design will look amazing!
💡 Craft Ideas:
- Write a child’s name in glue and salt paint it in rainbow colors
- Make fall leaves, fireworks, or snowflakes
- Create abstract art using squiggly glue lines
- Try a spider web for Halloween with black and purple paints!
🧠 Learning Benefits:
- Develops fine motor skills and hand-eye coordination
- Encourages creativity and exploration of color
- Teaches absorption and color blending in a fun, visual way
- Great sensory experience for young kids
Would you like themed salt painting templates (e.g. pumpkins, leaves, snowflakes) to print and trace with glue?
17. Pumpkin Seed Painting Crafta
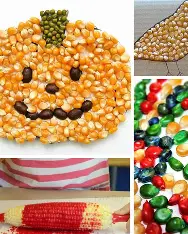
As a child, I was constantly nourished and satisfied with baked goods, pumpkin-based snacks, and Halloween treats. Pumpkin seeds were, and still are, my favourite delight.
You must purchase some pumpkin seeds from this store in order to do this craft. Before utilising seeds straight from the pumpkin, make sure they are thoroughly cleaned, washed, and dried.
I would never condemn you, so feel free to put some in your mouth!
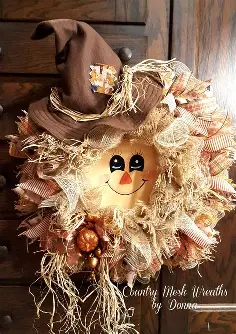
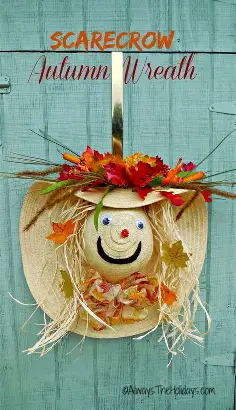
Absolutely! Here’s a fun and festive Scarecrow Wreath Craft perfect for fall decorating and creative play:
🎃🌻 Scarecrow Wreath Craft
🧒 Ages:
Great for ages 5 and up (with adult help for cutting or hot glue)
🎨 Materials:
- Paper plate (cut out the center to make a ring)
- Construction paper (tan, orange, yellow, black, red)
- Scissors
- Glue stick or white glue
- Googly eyes (or white paper to make eyes)
- Markers or crayons
- Fabric scraps, buttons, raffia, or straw (optional for decorating)
- Optional: felt, ribbon, fake flowers, popsicle sticks, or mini hay bales
✅ Instructions:
1. Make the Wreath Base
Cut the center out of a paper plate to make a ring shape. This will be the base of your wreath.
2. Build the Scarecrow’s Face
Cut a circle (or oval) from tan or brown construction paper and glue it toward the bottom of the wreath as the scarecrow’s head.
3. Add a Hat
Cut a triangle or trapezoid shape from colored paper to make a hat for the scarecrow. Glue it above the head.
Decorate it with a flower, patch, or ribbon to make it extra cute!
4. Make the Face
- Glue on googly eyes (or cut white and black circles for DIY eyes)
- Use orange paper to cut a triangle nose
- Draw or glue on a stitched smile with a marker or yarn
- Add “hair” on the sides using raffia, shredded paper, or yellow strips
5. Decorate the Wreath
Glue on fall-themed shapes like:
- Paper leaves, mini pumpkins, sunflowers, apples
- Buttons or felt patches
- Fabric squares to look like scarecrow clothing
6. Add a Hanger
Tape or glue a loop of ribbon or yarn to the back so it can hang on a door or wall.
💡 Craft Variations:
- Add a name sign like “Welcome” or “Happy Fall!”
- Use real straw for an authentic scarecrow look
- Make a mini version using smaller paper plates for classroom crafts
🧠 Learning Benefits:
- Boosts creativity and imagination
- Builds fine motor skills through cutting, gluing, and layering
- Encourages seasonal awareness and holiday participation
- A fun way to mix art and storytelling
Would you like printable face parts or hat templates to make this even easier?
19. Corn Craft
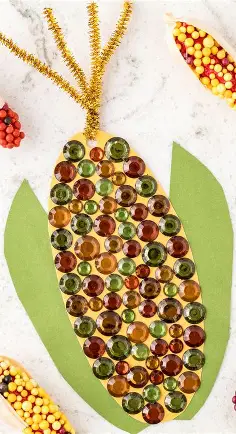
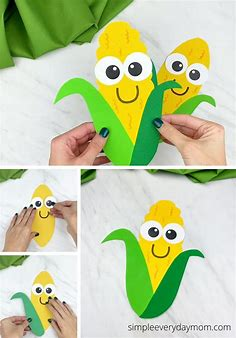
Let’s look at an easy corn craft that the smaller children may make. You hardly need any materials to construct it, and it’s adorable.
That’s pretty much all, though you might want to get a maize template to help you. You can actually just wing it because it’s that simple!
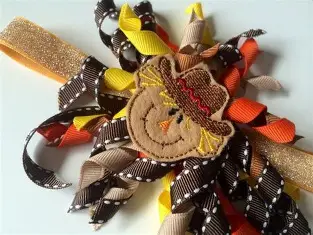
Sure! Here’s a simple and adorable Scarecrow Headband craft for kids — perfect for fall parties, school events, or dress-up fun:
🎩🌽 Scarecrow Headband Craft
🧒 Ages:
Best for ages 3 and up (younger kids will need a little help)
🎨 Materials:
- Brown, tan, and yellow construction paper
- Orange and black construction paper (for nose and mouth)
- Scissors
- Glue stick or tape
- Stapler (for securing the headband ends)
- Googly eyes or white/black paper for eyes
- Markers or crayons
- Optional: Raffia, yarn, fabric scraps, fake leaves, or stickers
✅ Instructions:
1. Make the Headband Band
- Cut two long strips of brown or tan paper (about 2–3 inches wide).
- Staple or tape them together to form one long band.
- Wrap it around the child’s head to size it, then staple or tape the ends together to make the headband base.
2. Create the Scarecrow Face
- Cut a circle or oval from tan or light brown paper to be the scarecrow’s face (about 4–5 inches wide).
- Glue it to the front center of the headband.
3. Add the Face Details
- Glue on googly eyes (or cut and draw paper eyes).
- Cut a triangle nose from orange paper and glue it on.
- Draw a stitched smile using a black marker or pen.
- Optional: Add little blush cheeks using pink crayon or paper.
4. Make the Hair
- Cut strips of yellow paper or use raffia/yarn to create “straw” hair.
- Glue them to the sides and top of the scarecrow’s head so they stick out from under the hat.
5. Make a Hat
- Cut a simple hat shape from brown or red construction paper.
- Add a patch, flower, or button for decoration.
- Glue the hat on top of the scarecrow’s head (tilted or straight).
6. Decorate More!
- Add felt patches, mini paper leaves, or fabric scraps for a fun, festive look.
💡 Craft Variations:
- Add a name tag like “Farmer Sam” or “Scarecrow Lily”
- Use this for a Thanksgiving or Harvest Day costume
- Create a classroom photo booth where kids wear their headbands
🧠 Learning Benefits:
- Develops fine motor skills through cutting and assembling
- Encourages creativity, pretend play, and confidence
- Teaches about seasonal traditions and character building
Would you like printable templates for the face and hat shapes.