Here’s a list of the best DIY upcycled ideas to turn trash into treasure — fun, sustainable, and budget-friendly projects you can try at home:
♻️ Best DIY Upcycled Ideas
- Tin Can Lanterns
- Clean old tin cans, punch decorative holes, and place a candle inside to make rustic outdoor lanterns.
- Plastic Bottle Planters
- Cut plastic bottles in half, paint them, and use them as mini planters for herbs and flowers.
- Jar Storage Containers
- Upcycle glass jars into chic storage containers by painting lids, adding labels, or wrapping with twine.
- CD Mosaic Art
- Break old CDs into small shiny pieces and glue them onto frames, mirrors, or flowerpots for a sparkling mosaic effect.
- T-Shirt Tote Bags
- Repurpose worn-out t-shirts into reusable grocery bags by cutting and tying the bottom edges.
- Wine Cork Bulletin Board
- Glue wine corks into a frame to create a rustic pinboard for notes, photos, or reminders.
- Broken Furniture Makeover
- Turn an old ladder into a bookshelf, a chair into a plant stand, or drawers into wall-mounted shelves.
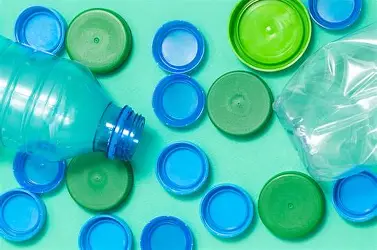
- Bottle Cap Magnets
- Paint and decorate bottle caps, then glue magnets on the back to use on your fridge.
- Pallet Furniture
- Repurpose wooden pallets into coffee tables, benches, or even bed frames with a little sanding and paint.
- Upcycled Denim Projects
- Transform old jeans into cushion covers, aprons, or patchwork rugs.
- Light Bulb Terrariums
- Hollow out old light bulbs and fill them with moss or tiny plants for a mini eco-terrarium.
- Cardboard Organizers
- Reuse shipping boxes to make drawer dividers, magazine holders, or kids’ craft supplies organizers.
- Plastic Spoon Decorations
- Use cut plastic spoons to create decorative flower wall art or DIY lampshades.
- Bicycle Wheel Wall Art
- Old bicycle wheels can be repainted and turned into creative wall clocks or garden trellises.
- Upcycled Mason Jar Lamps
- Insert fairy lights into mason jars for a cozy, glowing lamp effect.
✨ These upcycling ideas not only reduce waste but also give everyday “trash” a stylish new purpose.
Would you like me to create a step-by-step guide with pictures for a few of these projects (like tin can lanterns or plastic bottle planters)?
- New Table From Vintage Luggage
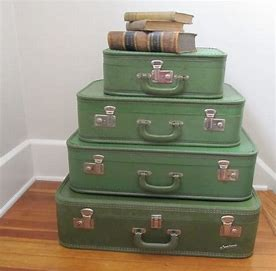
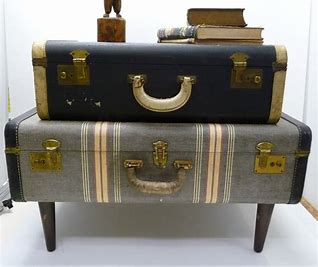
Because of their weight, the vintage luggage can no longer be used for their intended purpose. But it’s illegal to throw them away because of how distinctive their design is.
Their strength and form allow them to be easily incorporated into functional furniture. The trash suitcase may be made into a coffee table by adding hairpin legs to the bottom, or it can be used as an ottoman by lining the lid with a pillow.
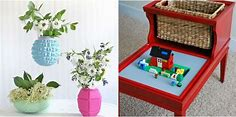
2. Repurposed Pallet Vase Shelf
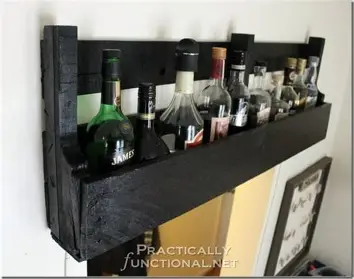
Here’s a simple and creative idea for making a Repurposed Pallet Vase Shelf – perfect for adding rustic charm to your home while reusing old wood pallets.
🪵 DIY Repurposed Pallet Vase Shelf
Materials Needed:
- A wooden pallet (or pallet planks)
- Small glass jars, test tubes, or mini vases
- Hose clamps or strong twine (to hold the vases)
- Screws and nails
- Drill and screwdriver
- Sandpaper
- Paint or wood stain (optional, for finishing)
Steps:
- Prepare the Pallet Wood
- Select a section of pallet wood or cut it down to the size you want.
- Sand it thoroughly to remove splinters and smooth the surface.
- Create the Shelf Base
- Use one wider pallet plank as the backboard.
- Attach smaller planks or a ledge at the bottom to support the jars.
- Secure the Vases
- Attach hose clamps (or loops of twine/metal wire) evenly spaced along the board.
- Slide the jars or test tubes into the clamps and tighten so they stay in place.
- Finishing Touches
- Paint, stain, or leave the wood natural for a rustic farmhouse look.
- Add hooks underneath if you want extra storage (keys, mugs, etc.).
- Decorate
- Place fresh flowers, dried blooms, or greenery inside the jars.
- Hang the shelf on your wall or lean it against a corner for a cozy vibe.
✅ This project turns an old pallet into a functional and decorative wall piece, ideal for kitchens, hallways, or patios.
Would you like me to design a step-by-step illustrated guide (with sketches or styled photos) so it’s easier to follow along visually?
3. Upcycled Tin Can Utensil Storage
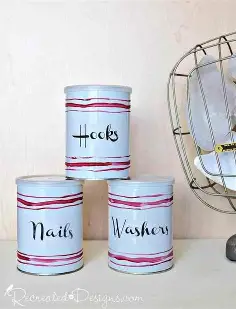
Baby food cans will give your kitchen a splash of colour. Throwing them away is difficult because they are a sentimental remembrance of the child’s early years.
This concept provides them with a new application that aids in kitchen countertop decluttering.
4. Candle Holder Mason Jar Project
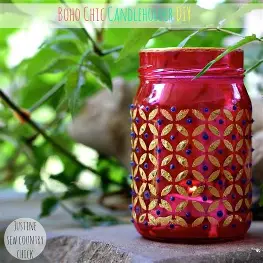
Here’s a lovely DIY Candle Holder Mason Jar Project that’s easy, budget-friendly, and perfect for cozy home décor or gifts.
🕯️ DIY Mason Jar Candle Holder
Materials Needed:
- Mason jar (any size)
- Tea light or LED candle
- Mod Podge (or clear glue)
- Tissue paper, dried leaves, lace, or fabric scraps (for decoration)
- Paintbrush or sponge brush
- Twine, ribbon, or burlap (optional for finishing)
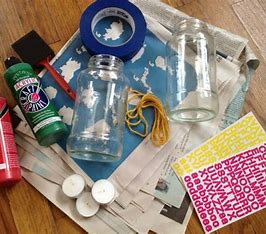
Steps:
- Clean the Jar
- Wash and dry the mason jar so it’s free from dust or grease.
- Decorate the Outside
- Brush a thin coat of Mod Podge (or clear glue) on the jar.
- Press tissue paper, lace, or dried leaves onto the glued surface.
- Apply another light coat of Mod Podge on top to seal. Let it dry.
- Add Finishing Touches
- Wrap twine, ribbon, or burlap around the rim for a rustic effect.
- You can also stencil shapes (hearts, stars, or initials) with paint for a personal touch.
- Insert the Candle
- Place a tea light or LED candle inside the jar.
- For safety, LED candles are best if you plan to use lots of jars indoors.
- Display
- Arrange them on your dining table, windowsill, or patio.
- Group several jars together for a beautiful glowing centerpiece.
✨ Variations:
- Frosted Effect: Use frosted glass spray paint before decorating.
- Beach Theme: Fill the bottom with sand and seashells before adding the candle.
- Holiday Style: Add red ribbon and pine sprigs for Christmas, or pastel lace for Easter.
Would you like me to give you 5 different themed versions of this mason jar candle holder (like rustic, boho, beachy, holiday, and modern chic)?
5. Easy Decorative Boxes
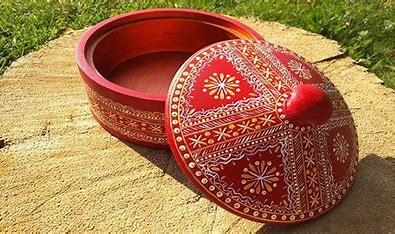
Using coffee bean bags, cardboard boxes may be upcycled into rustic storage containers.
They can serve a variety of purposes, such as organising makeup in the bedroom, serving as a table centrepiece in the living area, or serving as spices in the kitchen.
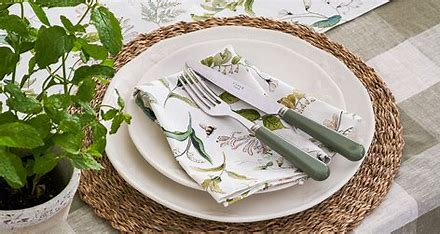
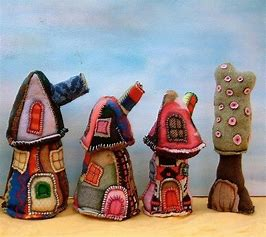
6. Add Charm With Unusual Textiles
Here are some creative ways to add charm with unusual textiles when decorating or upcycling:
🌿 Add Charm With Unusual Textiles
- Burlap Accents
- Use burlap for table runners, pillow covers, or plant pot wraps. Its rustic texture adds warmth and farmhouse charm.
- Vintage Scarves & Shawls
- Turn old silk scarves into wall hangings, lampshades, or even patchwork curtains for a bohemian vibe.
- Denim Revamps
- Upcycle worn-out jeans into chair cushions, storage baskets, or rug pieces for a casual, cozy touch.
- Crochet & Lace Layers
- Add vintage lace or crochet doilies to lampshades, jars, or clothing for a delicate, romantic style.
- Old Quilts
- Repurpose quilts into throws, tote bags, or framed textile wall art to bring character and nostalgia into your space.
- Jute & Hemp Fabrics
- Use jute or hemp for placemats, storage bins, or woven wall hangings. These earthy materials fit perfectly in eco-friendly décor.
- Patchwork Creations
- Mix mismatched fabric scraps into quilts, cushions, or chair covers for a colorful and artistic look.
- Upcycled Curtains & Drapes
- Old curtains can be transformed into slipcovers, tablecloths, or even reusable shopping bags.
- Textile-Wrapped Furniture
- Wrap stool tops, headboards, or cabinet doors with patterned fabric for a bold, stylish upgrade.
- Rugs from Fabric Scraps
- Braid or weave leftover textile pieces into DIY rugs — a charming way to recycle while adding color to the floor.
✨ Using unusual textiles adds texture, personality, and eco-friendly creativity to any DIY project.
Would you like me to combine this with the “trash to treasure” upcycled ideas so you get a list of projects where both waste materials and textiles are used together?
7. Cable Spool Bookcase Stool
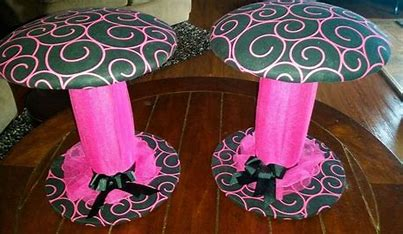
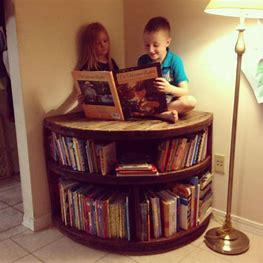
Here’s a simple idea for making a Cable Spool Bookcase Stool – a functional and stylish upcycle project:
📚 DIY Cable Spool Bookcase Stool
Materials Needed:
- 1 wooden cable spool (medium or large size)
- Sandpaper
- Paint or wood stain (optional)
- Small casters or legs (optional, for mobility/height)
- Cushion or upholstery foam
- Fabric (for covering the cushion)
- Staple gun & staples
- Screws & screwdriver
Steps:
- Prepare the Spool
- Clean the wooden cable spool and sand down any rough edges to avoid splinters.
- Add Storage Slots
- Use the spaces between the spool’s top and bottom rounds as natural shelves.
- You can add extra dividers (wood planks) inside to create book compartments.
- Paint or Stain
- Apply paint or stain to match your home décor. A distressed or rustic finish works especially well.
- Attach Casters/Legs (Optional)
- For easier movement or added height, screw on small furniture casters or short legs at the base.
- Make the Seat Cushion
- Cut upholstery foam to fit the top of the spool.
- Cover with fabric and staple it neatly underneath.
- Place (or fix) it securely on top of the spool.
- Arrange Books
- Place books around the sides in the storage slots. You can also add magazines, toys, or craft supplies.
✅ End Result:
You now have a multi-functional piece — a cozy stool to sit on, a small bookcase for storage, and a stylish piece of upcycled furniture that saves space.
Would you like me to also give you design variations (e.g., turning the spool into a coffee table with hidden storage or a kids’ reading nook)?
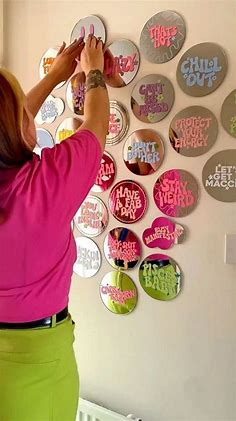
8. New Life For A Vintage Mirror
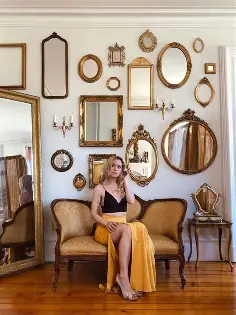
Don’t go through broken things when you’re at the thrift store. Instead, consider the potential uses for the intact parts.
A broken mirror, for instance, is still alive. A piece of chalkboard or a wooden board painted with chalk paint can be used in place of the mirror. The new wall art can be used for a variety of purposes, such as jotting notes, generating ideas, or just enhancing the farmhouse’s interior.
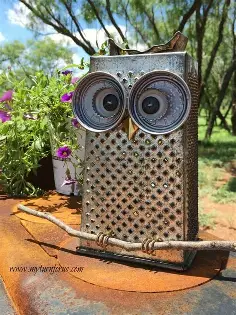
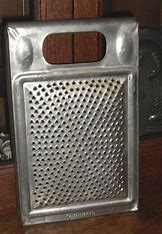
9. Get Creative With Coffee Cans
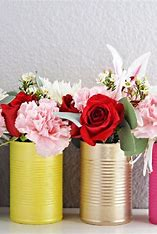
Here are some fun and practical ways to get creative with coffee cans instead of tossing them away:
☕ Creative Coffee Can Upcycling Ideas
- Planters for Herbs & Flowers
- Paint or wrap coffee cans in fabric/jute and use them as planters for a mini indoor garden.
- Kitchen Utensil Holder
- Decorate the outside and place it on your counter to keep spatulas, ladles, and whisks organized.
- Craft Supply Organizer
- Store paintbrushes, markers, yarn, or buttons in labeled cans to keep your craft space tidy.
- Lanterns or Candle Holders
- Punch decorative holes into the sides, add a tea light inside, and watch the pretty patterns glow.
- Desk Organizer
- Use multiple cans glued together to hold pens, scissors, and office supplies. Cover with washi tape or paper for style.
- Bird Feeder
- Lay the can sideways, fill with birdseed, and hang it from a tree with rope. Add a little perch for feathered friends.
- Mini Drum for Kids
- Stretch a balloon or fabric over the opening to make a DIY percussion instrument.
- Gift Packaging
- Wrap coffee cans in colorful paper and ribbons to use as reusable gift containers.
- Bathroom Storage
- Use them to hold hairbrushes, combs, or rolled-up washcloths.
- Hanging Lights
- Turn metal coffee cans into rustic pendant lights by cutting holes and fitting a bulb inside.
- Cookie or Snack Jar
- Clean and decorate, then use it to store homemade cookies, nuts, or treats.
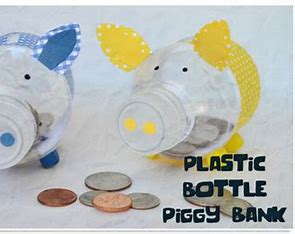
- Piggy Bank
- Cut a coin slot in the lid and let kids decorate it into a fun savings bank.
✨ With a little creativity, coffee cans can become stylish storage, fun crafts, or even functional décor.
Would you like me to put together a step-by-step guide for one of these (like the lanterns or bird feeder)?
10. Upcycled Lotion Bottle Phone Caddy

Here’s how you can make an Upcycled Lotion Bottle Phone Caddy — a smart and eco-friendly way to turn empty bottles into something useful:
📱 DIY Lotion Bottle Phone Caddy
Materials Needed:
- 1 large empty lotion/shampoo bottle (plastic)
- Scissors or craft knife
- Sandpaper or nail file (to smooth edges)
- Pencil & marker
- Decorative paper, fabric, or paint (optional)
- Mod Podge or glue (if decorating)
Steps:
- Clean the Bottle
- Wash out the empty lotion bottle thoroughly and remove the label.
- Mark the Shape
- Using a pencil/marker, outline the shape of your caddy:
- The front should be cut lower (so the phone can slide in easily).
- Leave the back higher with a curved or rectangular section for the plug hole.
- Using a pencil/marker, outline the shape of your caddy:
- Cut the Bottle
- Carefully cut along your outline with scissors or a craft knife.
- Smooth any rough or sharp edges with sandpaper or a nail file.
- Make the Charger Hole
- Cut a hole in the upper back portion so it can hang on your wall plug while charging.
- Decorate (Optional)
- Wrap it in fabric, contact paper, or washi tape for a stylish finish.
- You can also paint it with spray paint for a sleek look.
- Use It
- Hang the caddy on your charger plug.
- Place your phone inside while charging—no more tangled cords or phones on the floor!
✅ End Result:
A handy phone caddy made from something you’d normally throw away — practical, space-saving, and eco-friendly.
Would you like me to also suggest variations (like making a multi-pocket caddy from several bottles for keys, pens, or remotes)?
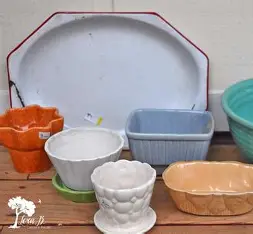
11. Decorative Plate To Decorative Mirror
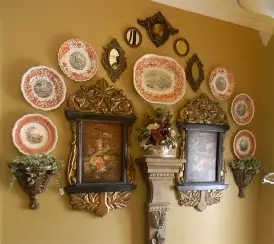
Here’s how you can turn an old decorative plate into a decorative mirror — a simple and stylish upcycling project:
🪞 DIY Decorative Plate to Decorative Mirror
Materials Needed:
- 1 large decorative plate (ceramic, wood, or metal works best)
- Round mirror (slightly smaller than the plate’s inner circle)
- Strong adhesive (E6000 or mirror glue)
- Ruler & pencil (for centering)
- Hanging hardware (plate hanger, picture wire, or adhesive wall hooks)
Steps:
- Clean the Plate
- Wipe the plate thoroughly so the glue sticks well.
- Measure & Center
- Place the mirror in the middle of the plate.
- Use a ruler or pencil marks on the back to ensure it’s centered.
- Glue the Mirror
- Apply strong adhesive to the back of the mirror.
- Press it firmly onto the plate and let it dry according to the glue instructions.
- Add Hanging Hardware
- Attach a sturdy plate hanger or picture hook to the back so it can be mounted on the wall.
- Optional Decoration
- Embellish the plate edges with beads, gems, shells, or metallic paint for extra charm.
✅ End Result:
A beautiful decorative mirror framed by your plate, perfect for adding character to entryways, bathrooms, or gallery walls.
Would you like me to also give you some design themes (like boho with mosaic tiles, farmhouse with rustic paint, or glam with metallic finishes) for different home styles?
12. Recycled Bottles Allow Clear Storage
Repurposing the broken wine glass into a bell jar turns it into an elegant adornment. Covering the jagged glass end with thick rope is the secret to turning it into a valuable treasure.
The adorned end serves two purposes by adding a rustic shade to the exquisite piece.
13. New Use For Old Baking Tins
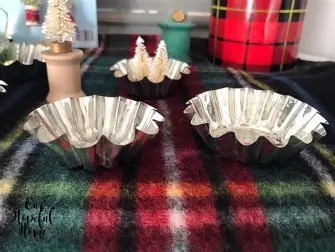
Here are some creative ideas for giving old baking tins a brand-new purpose:
🧁 New Uses for Old Baking Tins
- Wall-Mounted Organizers
- Muffin tins make great wall storage for craft supplies, office items, or jewelry.
- Drawer Organizers
- Place muffin tins inside drawers to keep small items like buttons, screws, or paper clips sorted.
- Mini Planters
- Fill cupcake or muffin tins with soil and use them to grow succulents, herbs, or small flowers.
- Candle Molds
- Pour melted wax into greased baking tins (like muffin pans or tart molds) to make homemade candles.
- Serving Trays
- Repurpose cake pans or pie tins into rustic serving trays for snacks, fruits, or condiments.
- Bird Feeders
- Hang old cake tins or bundt pans outside, fill with birdseed, and watch the birds enjoy.
- Jewelry Display
- Line muffin tin cups with fabric to display rings, earrings, and beads.
- Shadow Box Frames
- Turn cake pans into deep-set frames to display photos, shells, or small trinkets.
- Paint Palettes
- Muffin tins work perfectly as paint palettes for kids’ crafts or DIY projects.
- Outdoor Garden Decor
- Spray paint old bundt pans or tart molds and hang them as quirky, decorative garden art.
✅ With a little creativity, baking tins can become storage solutions, garden planters, or even décor pieces — keeping them out of the landfill and giving them a second life.
Would you like me to write a step-by-step guide for one of these (like the muffin tin planter or candle mold)?
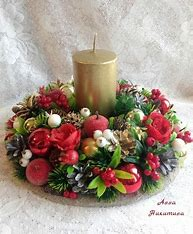
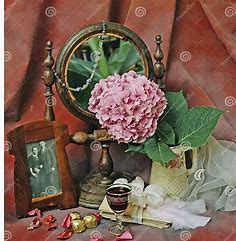
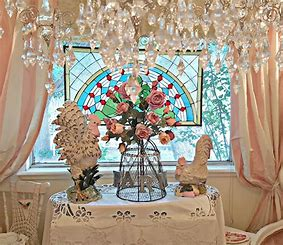
14. Spring Centerpiece Of Waterfall Blooms


Repurposing the broken wine glass into a bell jar turns it into an elegant adornment. Covering the jagged glass end with thick rope is the secret to turning it into a valuable treasure.
The adorned end serves two purposes by adding a rustic shade to the exquisite piece.
15. Refresh Vintage Finds With Paint
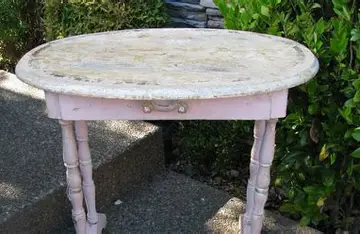
Here’s how you can easily refresh vintage finds with paint and give them a new lease on life:
🎨 Ways to Refresh Vintage Finds with Paint
- Furniture Makeovers
- Old wooden chairs, dressers, or tables can look brand new with a coat of chalk paint or spray paint.
- Distress lightly with sandpaper for a shabby-chic effect.
- Picture Frames
- Update vintage frames with metallic spray paint (gold, silver, bronze) for an elegant touch or bright colors for a modern vibe.
- Mason Jars & Bottles
- Paint glass jars with frosted or pastel paints for chic storage, vases, or candle holders.
- Metal Trays & Tins
- Revive old serving trays, cake tins, or cookie boxes with enamel or spray paint. Add stencils for extra charm.
- Vintage Luggage
- Give old suitcases a bold coat of paint, then use them as stylish storage or stack them as quirky décor.
- Ceramic & Porcelain Pieces
- Use ceramic paint pens or enamel paint to refresh old mugs, plates, or bowls (great for display, not food use).
- Mirrors & Wall Décor
- Repaint vintage mirror frames, plaques, or wall hangings to match your interior theme.
- Garden Finds
- Spray paint old watering cans, buckets, or plant stands to create colorful garden décor.
- Textured Finishes
- Experiment with metallic paints, matte chalk paint, or color washes to highlight the vintage charm of old objects.
- Stencil & Pattern Fun
- Use stencils to add floral, geometric, or lettering designs onto old furniture, trays, or boxes.
✅ End Result: With just a few coats of paint, your old treasures can turn into stylish, personalized décor that blends beautifully with modern spaces while keeping their vintage soul.
Would you like me to suggest specific color palettes (like farmhouse neutrals, boho brights, or industrial metallics) to go with different styles of vintage finds?
16. Upcycle An Old Tire To A Cozy Seat
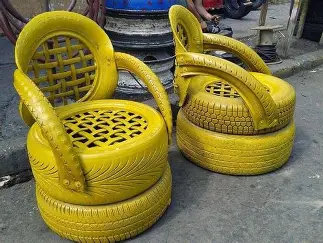
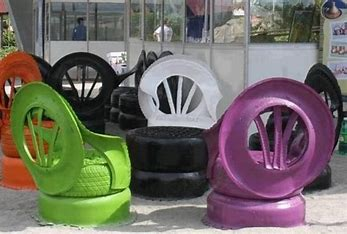
Here’s a creative way to upcycle an old tire into a cozy seat — practical, budget-friendly, and stylish:
🪑 DIY Tire Seat
Materials Needed:
- 1 old tire (clean and dry)
- Thick plywood (cut into a circle the size of the tire opening)
- Foam cushion or upholstery padding
- Upholstery fabric or strong cloth
- Staple gun & staples
- Screws and drill
- Rope or jute (optional, for a rustic look)
- Furniture legs or casters (optional, if you want height/mobility)
Steps:
- Prepare the Tire
- Wash and scrub the tire thoroughly. Let it dry completely.
- Cut the Base
- Place the tire on plywood and trace a circle the size of the tire opening.
- Cut out the circle with a jigsaw. This will serve as the seat base.
- Add Cushioning
- Place foam padding over the plywood circle.
- Cover with fabric and pull tightly around the edges.
- Staple the fabric securely at the back of the plywood.
- Attach the Seat
- Screw the padded plywood circle onto the tire’s top opening.
- Make sure it fits snugly and is safe to sit on.
- Optional Decoration
- Wrap the outer tire with jute rope for a natural, rustic finish.
- Or spray-paint the tire in bold colors for a modern look.
- Add Legs (Optional)
- For a raised seat or stool, attach short furniture legs or casters to the bottom of the tire.
✅ End Result:
You now have a cozy, stylish seat made from an old tire — perfect for a kids’ room, reading nook, or even outdoor patio seating.
Would you like me to also share a coffee table version of this project (using a tire with a glass or wooden top)?
17. Upgrade Your Trash Cans With Rope

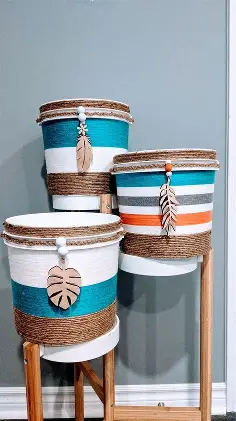
The plastic container may be transformed into a rustic bathroom accessory for less than $4. Additionally, you already have six glue sticks, correct?
18. Repurposed Sweater Adds Texture To A Lampshade
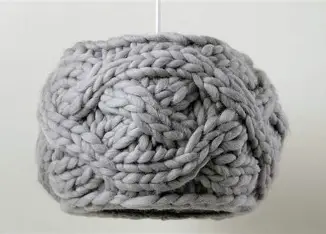
Here’s a cozy and creative idea: repurpose an old sweater to add texture to a lampshade. It’s simple, budget-friendly, and brings warmth to any room.
🧶 DIY Sweater Lampshade
Materials Needed:
- 1 old sweater (chunky knits work best)
- Plain lampshade (fabric or plastic base)
- Scissors
- Hot glue gun or fabric glue
- Measuring tape
Steps:
- Choose the Sweater
- Pick a sweater with an interesting knit pattern or texture (cable knit, ribbed, etc.) for a cozy look.
- Cut to Size
- Measure the height and circumference of the lampshade.
- Cut a section of the sweater (usually the body or sleeve) to fit around it.
- Wrap the Shade
- Slide the sweater piece over the lampshade like a sleeve.
- Adjust it so the knit pattern sits evenly.
- Secure the Fabric
- Fold the sweater edges neatly over the top and bottom rims of the shade.
- Glue them down inside the shade so the edges stay hidden.
- Finishing Touches
- Trim off any excess fabric.
- Add a ribbon, leather strap, or buttons as accents for extra charm.
✅ End Result:
A warm, textured lampshade that instantly transforms your lighting into a cozy, soft-glowing feature — perfect for bedrooms, reading nooks, or winter décor.
Would you like me to also give you some style variations (like rustic farmhouse, Scandinavian minimal, or boho chic) using different sweater types and colors?
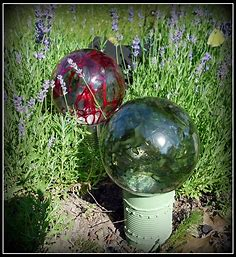
19. Colorful Hanging Flowerpot Colander
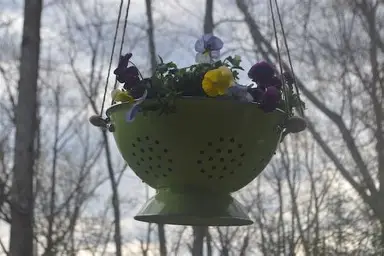
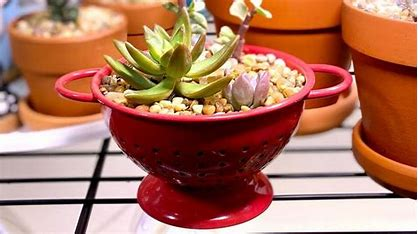
The colander’s original design allows it to be converted into a hanging planter.
The handles make it simple to hang it from the ceiling or the pergola, and the existing holes handle drainage.
20. Dramatic Chicken Wire Lampshade
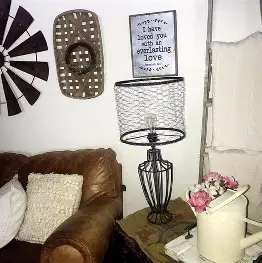
Here’s a bold and rustic idea: make a dramatic chicken wire lampshade — a unique upcycle project that adds farmhouse or industrial charm.
🔆 DIY Chicken Wire Lampshade
Materials Needed:
- Chicken wire (cut to size)
- Wire cutters
- Pliers
- Old lampshade frame (or make one from sturdy wire)
- Gloves (to protect your hands)
- Spray paint (optional: black, gold, bronze, or white for style)
- String lights, Edison bulb, or standard light fixture
Steps:
- Prepare the Frame
- Remove the old fabric from a lampshade frame, keeping only the metal skeleton.
- If you don’t have one, create a simple frame with thick craft wire shaped into a cylinder or dome.
- Cut the Chicken Wire
- Measure and cut a piece of chicken wire large enough to wrap around the frame.
- Wear gloves to avoid scratches from sharp edges.
- Wrap & Secure
- Wrap the chicken wire around the lampshade frame.
- Use pliers to bend and twist the ends securely in place.
- Paint for Drama (Optional)
- Spray paint the wire in a dramatic color — matte black for industrial, gold for glam, or white for shabby chic.
- Let it dry fully.
- Add the Light
- Place the chicken wire shade over your bulb or fixture.
- Edison bulbs or fairy lights look especially striking with this style.
- Final Touches
- For extra flair, weave in ribbons, faux greenery, or fabric strips through the wire for a softer, decorative effect.
✅ End Result:
A dramatic, rustic-meets-industrial lampshade that makes a statement while casting beautiful light patterns around the room.
Would you like me to also suggest decorative variations (like farmhouse cozy with burlap accents or modern edgy with geometric wire shapes)?
21. Creative Towel Holder From Old Mugs
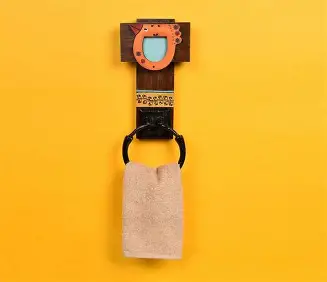
Are you trying to find another kitchen organiser? Make a vertical, small towel organiser out of the old metal cups.
22. Upcycled Plain Plastic Bucket
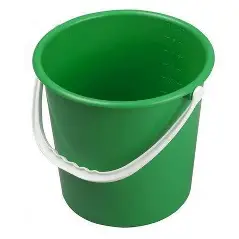
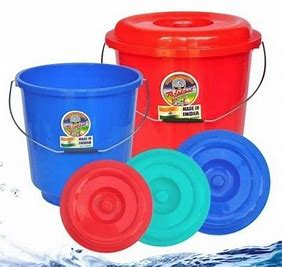
The fact that this silky beauty was once a black plastic bucket will astound you. those where you can purchase a new plant or flowers from a florist. What is the secret?
23. Rope Wrapped Box Basket
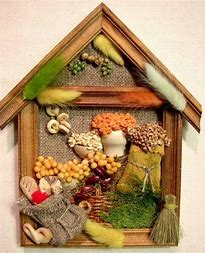
Here’s a simple DIY guide to make a Rope Wrapped Box Basket – perfect for turning an old cardboard box into a stylish storage solution:
🧺 DIY Rope Wrapped Box Basket
Materials Needed:
- Old cardboard box (any size)
- Jute rope, cotton rope, or sisal rope
- Hot glue gun + glue sticks
- Scissors
- Fabric (optional, for lining inside)
Instructions:
- Prepare the Box
- Take an old cardboard box and cut off the flaps on top if you want an open basket look.
- Make sure it’s sturdy; reinforce weak spots with extra cardboard or tape.
- Start Wrapping with Rope
- Begin at the bottom of the box.
- Apply hot glue along the base edge and press the rope firmly onto it.
- Continue wrapping the rope tightly around the box, adding hot glue every few inches.
- Keep Wrapping Upwards
- Work your way up the box until the entire outer surface is covered with rope.
- Try to keep the rope rows close together so no cardboard shows through.
- Finishing the Top
- Once you reach the top, cut the rope neatly and glue the end securely.
- For a polished look, you can wrap the rope slightly inside the rim.
- Add Handles (Optional)
- Create small handles using extra rope loops and glue them to opposite sides of the basket.
- Line the Inside (Optional)
- Cut fabric to fit the inside of the box and glue or tape it in place for a cleaner look.
Tips & Ideas:
- Use colored rope or paint plain rope for a decorative effect.
- Add decorative trims (lace, ribbon, or leather straps) around the top edge.
- Works great as storage for toys, towels, craft supplies, or magazines.
Would you like me to also suggest other variations (like rope-wrapped planters, jars, or trays) that match this basket idea?