Here’s a list idea you could use for “24+ Recycled Materials Projects for Kids – Natural and Creative Fun”:
24+ Recycled Materials Projects for Kids
Fun, eco-friendly crafts using natural and everyday items!
- Tin Can Planters – Paint and decorate old cans for mini gardens.
- Bottle Cap Flowers – Turn colorful caps into pretty blossoms.
- Cardboard Tube Bird Feeders – Roll in peanut butter and seeds.
- Egg Carton Bugs – Cute caterpillars, ladybugs, and bees.
- Newspaper Hats – Fun dress-up made from folded paper.
- Plastic Bottle Rockets – Build and decorate space toys.
- CD Mosaic Art – Shiny broken CDs make sparkly designs.
- Cereal Box Puzzles – Cut favorite box images into puzzle pieces.
- Nature Collage Frames – Use sticks, leaves, and pressed flowers.
- Toilet Roll Binoculars – For backyard adventures.
- Milk Jug Scoopers – Handy beach or sandbox toys.
- Paper Bead Jewelry – Roll magazine strips into beads.
- Shoebox Dioramas – Create scenes of forests, oceans, or space.
- Bottle Cap Stamps – Glue foam shapes for DIY stamps.
- Cardboard Tube Owls – Fold and paint into fun animals.
- Jar Lanterns – Decorate glass jars for candle holders.
- Old T-Shirt Tote Bags – No-sew reusable bags.
- Plastic Spoon Flowers – Paint and glue for blooming art.
- Stick Weaving Looms – Use twigs and yarn for nature weaving.
- Recycled Magazine Collages – Bright, bold artwork.
- Pinecone Bird Feeders – Roll in peanut butter and seeds.
- Bottle Cap Tic-Tac-Toe – Reuse caps as game pieces.
- Cork Stamps – Cut fun shapes to print.
- Upcycled Puppet Theater – Made from a cardboard box.
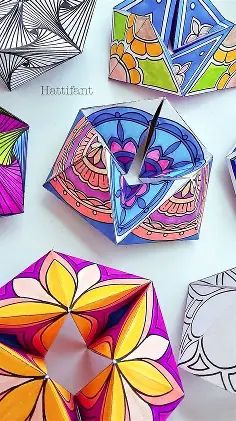
- Nature Mandalas – Arrange stones, leaves, and petals.
Would you like me to make this into a kid-friendly blog-style article (with descriptions for parents/teachers), or keep it as a straightforward activity list?
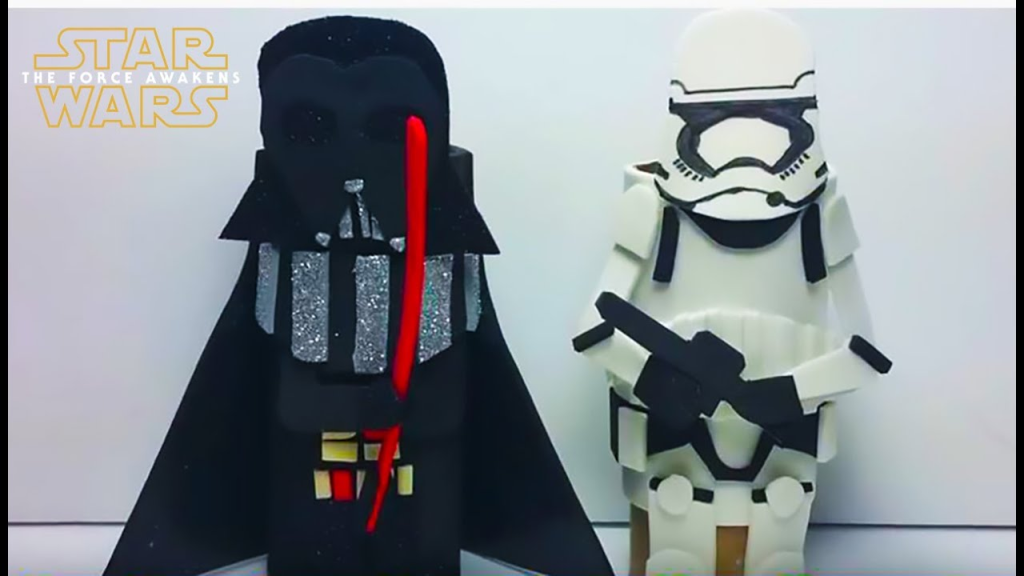
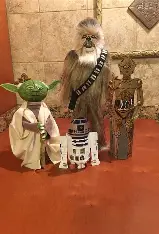
According to rockyourhomeschool.net, these Star Wars toilet paper roll figures: If you’re a fan of Star Wars, raise your hand! Use toilet paper rolls to make an entertaining and affordable set of figures! In addition to being entertaining to play with, they will also look great in a space with a Star Wars theme.
2. Toilet Paper Roll Butterfly
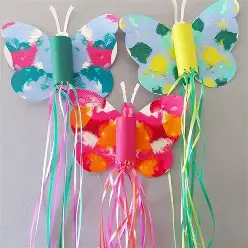
Here’s a simple guide for making a Toilet Paper Roll Butterfly Craft 🦋:
Toilet Paper Roll Butterfly
Materials Needed:
- Empty toilet paper roll
- Colored construction paper or foam sheets
- Markers, crayons, or paint
- Googly eyes
- Glue or tape
- Scissors
- Pipe cleaners (for antennae)
Instructions:
- Prepare the Roll – Paint or color the toilet paper roll. Let it dry. This will be the butterfly’s body.
- Make the Wings – Cut out two large wing shapes from colored paper or foam. Decorate with markers, stickers, glitter, or scraps of tissue paper.
- Attach the Wings – Glue or tape the wings to the back of the toilet roll.
- Add the Face – Stick on googly eyes and draw a smile.
- Create Antennae – Twist two short pieces of pipe cleaner into antennae and glue or tape them inside the top of the roll.
- Final Touches – Add extra decorations like sequins, buttons, or paper cutouts to make your butterfly unique.
Fun Idea:
- Make a whole butterfly family in different colors!
- Use string to hang them as a mobile or window decoration.
Do you want me to also make a printable step-by-step activity sheet (with pictures/icons) for kids to follow?
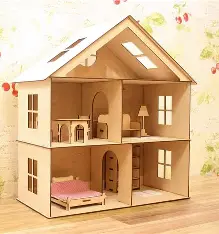
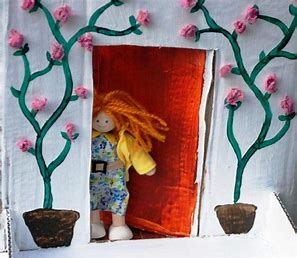
From redtedart.com, the cardboard doll house: Big boxes have a lot of potential, don’t they? Make a personalised playhouse out of one for the kids to play with. Use beautiful paper or paint to adorn each space.
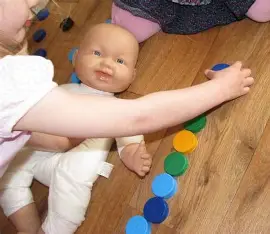
Here’s a fun idea for a Bottle Top Toddler Toy made from recycled materials:
DIY Bottle Top Toddler Toy
Materials Needed:
- A sturdy cardboard box or shoebox with lid
- Plastic bottle tops (different colors and sizes)
- Craft knife or scissors (for adults only)
- Marker
- Glue (optional, for added durability)
Instructions:
- Prepare the Box: Cut several holes in the lid of the box, each just big enough for a bottle top to fit through.
- Decorate: Write numbers, shapes, or colors around each hole to make it more educational.
- Playtime: Give your toddler the bottle tops and show them how to drop them through the holes. They’ll love the sound and action!
- Learning Twist:
- Use different colors and encourage color sorting.
- Label holes with numbers so toddlers can practice counting.
- Mix in different sized tops for problem-solving fun.
Why It’s Great:
- Fine motor skill development
- Hand-eye coordination practice
- Color and number recognition
- Eco-friendly and inexpensive
👉 Would you like me to give you a few more variations of bottle top toys (like a matching game, rattle, or stacking toy), so you have multiple play options?
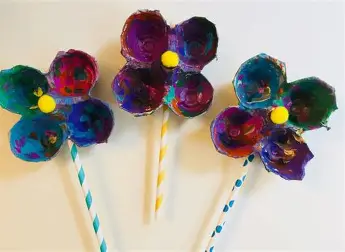
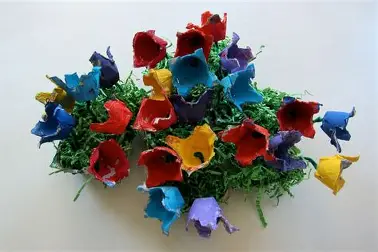
Flowers in egg cartons from artsycraftsymom.com: You may create beautiful flowers for Mother’s Day or spring by combining egg carton pieces with cupcake liners, buttons, and paper straws.
6. Junk Model Astronaut Helmet

Here’s a fun idea for making a Junk Model Astronaut Helmet craft:
Junk Model Astronaut Helmet 🚀🪐
Materials you’ll need (all recycled if possible):
- A large balloon or round cardboard base (for the helmet shape)
- Old newspapers or scrap paper (for papier-mâché)
- Flour + water paste or glue
- A cardboard box or plastic jug (for visor frame)
- Clear plastic sheet from packaging (for visor)
- Foil, bottle caps, or yogurt pots (for controls & decorations)
- Paint (white, silver, or metallic colors)
- Tape and scissors
Steps:
- Create the helmet shape – Inflate a balloon, then cover it with strips of newspaper dipped in flour paste or glue. Apply 3–4 layers, letting each dry.
- Cut the opening – Once dry, pop the balloon and cut out a large front hole for the visor.
- Add the visor – Cut a visor frame from cardboard and glue a clear plastic sheet inside it. Attach over the opening.
- Decorate – Wrap parts in foil for a space-age look, stick on bottle caps or yogurt pots as “oxygen valves,” and paint the helmet white or silver.
- Finishing touches – Add a NASA logo, stars, or your child’s name as their astronaut call sign!
This makes a fantastic space role-play prop for kids and encourages creativity while reusing junk materials. 🌍✨
Do you want me to also make a quick printable step-by-step version (like a one-page instruction sheet for kids), or a longer blog-style guide with pictures and extra tips?
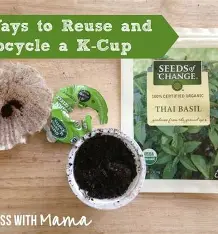
K-Cup Tiger recycled from artsymomma.com: Don’t throw those K-cups in the garbage, coffee drinkers. To make adorable tiny crafts like this adorable k-cup tiger, empty the coffee grounds and clean the cups.
8. Upcycled Necklace from Plastic Lids
Here’s a simple and creative idea for making an Upcycled Necklace from Plastic Lids:
Upcycled Necklace from Plastic Lids 💚✨
Materials You’ll Need:
- Clean plastic lids (from milk, juice, or yogurt containers)
- Hole punch or heated nail (with adult help)
- Paint, permanent markers, or nail polish
- Beads, buttons, or sequins (optional for decoration)
- String, ribbon, or yarn
Steps:
- Prepare the lids – Wash and dry the plastic lids.
- Decorate – Paint them, draw patterns, or glue on beads/sequins for sparkle.
- Punch a hole – Use a hole punch or carefully poke a hole near the edge of each lid (adults should help with this step).
- Thread them – String the lids onto yarn, ribbon, or cord. You can alternate with beads or buttons for extra style.
- Finish the necklace – Tie the ends together to complete your one-of-a-kind recycled accessory!
💡 Variations:
- Use different lid sizes for a layered effect.
- Paint them metallic for a “coin necklace” look.
- Add names, letters, or symbols to make a personalized pendant.
This is a fun, eco-friendly jewelry project that kids can proudly wear or give as a gift!
Would you like me to also create a classroom-friendly version (easy steps with visuals for groups of kids), or a stylish DIY blog-style write-up with extra design ideas?
9. Rainstick Musical Sensory Bottle
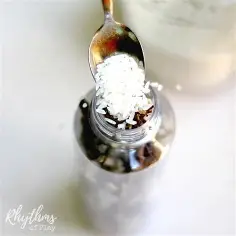
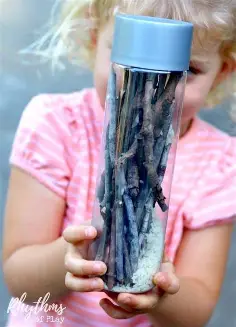
Rhythmsofplay.com’s Rainstick Musical Sensory Bottle: Give the children a musical sensory bottle to shake things up (literally). Play some entertaining music as you recycle an old plastic bottle, add sticks and rice, and shake everything around.
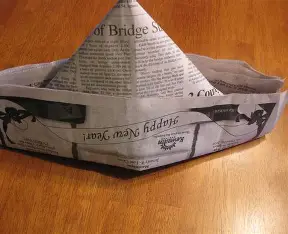
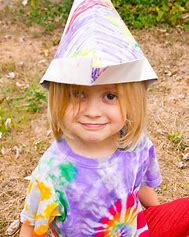
Here’s a simple guide for making a Newspaper Hat for Kids – a classic recycled craft that’s fun and eco-friendly!
📰 How to Make a Newspaper Hat for Kids
Materials Needed:
- A large sheet of newspaper (broadsheet size works best)
- Tape or glue (optional, for extra hold)
- Crayons, markers, or stickers for decorating
Steps:
- Start with a full sheet of newspaper
Lay the newspaper flat on a table, folded in half (like a rectangle). - Fold the corners down
Take the top two corners and fold them diagonally to meet in the middle, forming a triangle shape on top. - Fold the bottom edges up
- Fold the top layer of the bottom edge up to meet the base of the triangle.
- Flip the hat over and fold the other bottom edge up as well.
- This locks the hat shape.
- Secure the folds
Use tape or a dab of glue if needed to keep the folds in place. - Decorate!
Kids can color with crayons, add stickers, or glue on paper cutouts to personalize their hats.
Fun Ideas:
- Turn it into a pirate hat with a skull and crossbones.
- Make a party hat with glitter and streamers.
- Create a gardener’s sunhat by adding paper flowers.
Would you like me to also make a step-by-step picture guide/printable template for this newspaper hat, so it’s easier for kids to follow along visually?
11. Phonics Boards
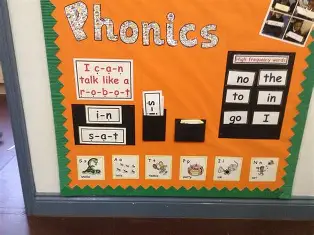
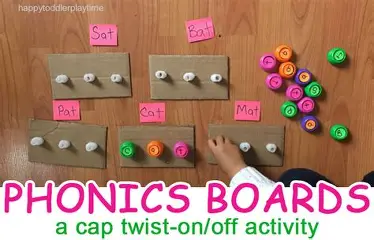
From happytoddlerplaytime.com, phonics boards: Another entertaining usage for twist-off tops from food pouches is this phonics exercise. What a clever method to practise word building!
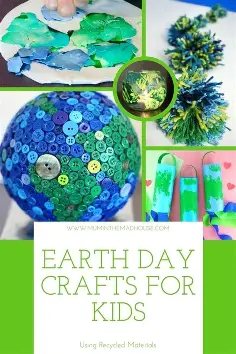
12. Recycled Newspaper Earth Day Garland

Here’s a fun eco-friendly craft idea for kids: Recycled Newspaper Earth Day Garland 🌍✨
📰 Recycled Newspaper Earth Day Garland
Materials Needed:
- Old newspapers
- Scissors
- A round template (like a cup or lid)
- Pencil
- Green and blue paint or markers (or crayons)
- Hole punch (or carefully poke holes with a pencil)
- String, yarn, or twine
- Optional: glitter glue, stickers, or eco-friendly decorations
Steps:
- Cut Out Circles
Trace circles onto newspaper using your template, then cut them out. These will be your “mini Earths.” - Paint Your Earths
Use blue for oceans and green for continents. Let kids be creative—no two Earths have to look the same! - Dry and Decorate
Once the paint is dry, kids can add extra details like stars, hearts, or positive Earth messages (“Love Our Planet,” “Reduce, Reuse, Recycle”). - Punch Holes
Punch a hole at the top of each circle. - String Them Together
Thread the circles onto yarn or twine, spacing them evenly. Tie knots between some circles to keep them in place if needed. - Hang Your Garland
Display it in a classroom, living room, or outdoor space for Earth Day celebrations.
Fun Variations:
- Alternate Earth circles with cut-out leaves or recycled cardboard stars.
- Add nature finds (pressed leaves, small pinecones, flowers) between the newspaper Earths.
- Write eco-friendly pledges on the back of each circle (like “I will plant a tree” or “I will turn off lights”).
Would you like me to also draft a short kid-friendly poem or slogan that can go on each circle to make the garland more educational for Earth Day?
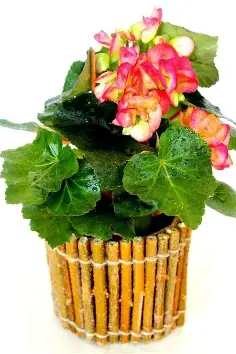

Twig-Wrapped Flower Pots from growingfamily.co.uk: Repurpose natural objects to give outdated products a completely new appeal. These flower pots wrapped in twigs seem so charming and natural.
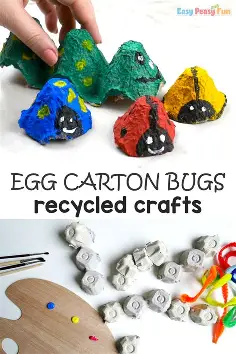
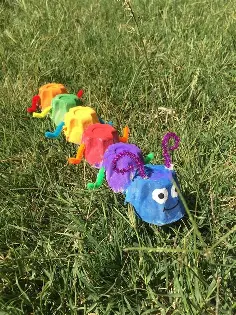
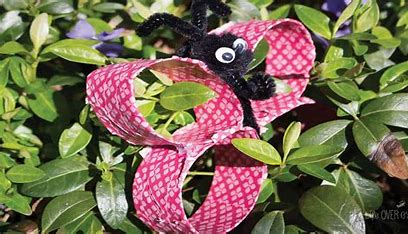
Here’s a fun little write-up for Egg Carton Spring Bugs:
Egg Carton Spring Bugs 🐞🦋🐝
Transform a simple egg carton into a whole family of colorful springtime critters! This recycled craft is perfect for kids to celebrate the season and learn about nature.
Materials Needed:
- Cardboard egg carton (cut into individual cups)
- Non-toxic paint or markers
- Pipe cleaners (for legs, antennae, or wings)
- Googly eyes (or draw your own)
- Glue
- Scissors
How to Make Them:
- Cut & Paint – Snip apart the egg carton cups and paint them in bright spring colors. Think red for ladybugs, yellow for bees, or rainbow for butterflies.
- Add Legs & Antennae – Use pipe cleaners to poke through the carton for wiggly legs or twist them into antennae.
- Decorate – Glue on googly eyes, draw spots, stripes, or wings with markers or paint.
- Bring Them to Life – Arrange your bugs in a little garden or string them together to make a cheerful spring mobile.
Bug Ideas:
- 🐞 Ladybug – Red paint with black spots.
- 🐝 Bumblebee – Yellow with black stripes and paper wings.
- 🦋 Butterfly – Paint colorful wings and add pipe cleaner antennae.
- 🐛 Caterpillar – Glue a row of carton cups together and paint them green.
This project is easy, eco-friendly, and sparks kids’ creativity while reusing materials that might otherwise go to waste. 🌱
Do you want me to also create a short kid-friendly version (with simple step-by-step wording just for children)?
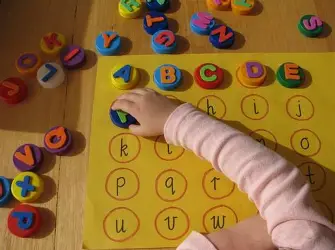

Using activelittles.com, create your own alphabet match: A box and some popsicle sticks can be reused with this easy project. Of course, if you don’t want to consume a lot of sugary popsicles, you may also use craft sticks. For toddlers and preschoolers, it’s an enjoyable method to practise letter recognition.
16. Egg Carton Jellyfish Puppets
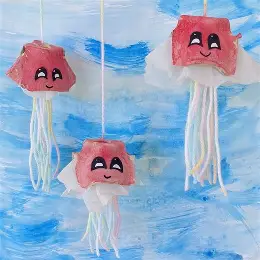
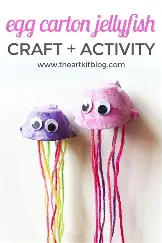
Here’s a fun guide for making Egg Carton Jellyfish Puppets – a colorful ocean-themed recycled craft:
Egg Carton Jellyfish Puppets 🪼
Turn leftover egg cartons into wiggly, jiggly jellyfish! These puppets are simple to make and great for pretend play or an under-the-sea theme.
Materials Needed:
- Cardboard egg carton (cut into cups)
- Paint and brushes
- Googly eyes or markers
- Colorful yarn, ribbon, or streamers (for tentacles)
- Craft stick or straw (for puppet handle)
- Glue and tape
- Scissors
How to Make Them:
- Prepare the Body – Cut out an egg carton cup. This will be the jellyfish’s bell (head).
- Paint & Decorate – Paint the cup in bright ocean colors like blue, purple, or pink. Let it dry, then glue on googly eyes or draw eyes with a marker.
- Add Tentacles – Cut yarn, ribbon, or streamers into strips. Glue or tape them inside the cup so they dangle down like jellyfish tentacles.
- Attach the Handle – Tape or glue a craft stick or straw to the top of the cup so you can hold and wiggle your jellyfish puppet.
- Play & Perform – Make a whole school of jellyfish and put on an under-the-sea puppet show! 🌊🐠
Extra Fun:
- Use glow-in-the-dark paint for a magical jellyfish effect.
- Add glitter glue for sparkly ocean vibes.
- Make different sizes for baby and giant jellyfish puppets.
Do you want me to also create a short rhyming version (like a little poem craft guide for kids)?
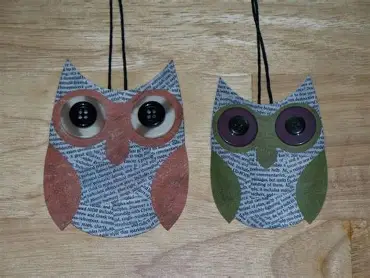
Newspaper Owls with Colours from iHeartcraftythings.com: This vibrant owl project can make your day if you have some old newspapers sitting around the home. We adore that the print is still visible through the watercolours.
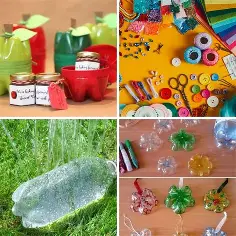
18. Recycled Water Bottle Suncatchers
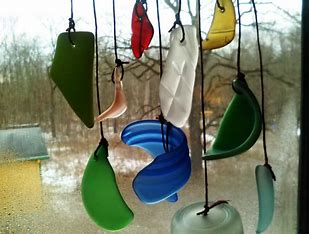
Here’s a cheerful eco-craft idea for Recycled Water Bottle Suncatchers:
Recycled Water Bottle Suncatchers 🌞✨
Turn old plastic bottles into colorful suncatchers that sparkle in the sunlight! This craft is easy, eco-friendly, and perfect for brightening up windows, gardens, or classrooms.
Materials Needed:
- Clear plastic water bottles (clean and dry)
- Permanent markers or acrylic paint
- Scissors (adult help recommended)
- Hole punch (optional)
- String, yarn, or fishing line
- Beads (optional for extra sparkle)
How to Make Them:
- Prepare the Bottle – Cut the bottle into rings or spiral strips (adults should help with cutting). You can also cut flat panels to draw on.
- Decorate – Use permanent markers or paint to create colorful patterns, doodles, or even stained-glass designs. Bright rainbow colors work best for catching the light.
- Punch a Hole – Make a small hole at the top of each piece.
- Hang It Up – Thread string or yarn through the hole, add beads if you like, and hang your suncatcher in a sunny window, porch, or tree branch.
- Watch Them Shine – When sunlight hits, your recycled creation will sparkle with color!
Extra Ideas:
- Cut flower shapes, butterflies, or stars from the bottle for themed suncatchers.
- Use multiple bottle pieces to make a hanging mobile.
- Try layering translucent paint for a stained-glass effect.
Do you want me to write this in a step-by-step kids’ instruction style (super simple and playful), or keep it more detailed for teachers/parents?
19. Pouch Cap Threading Activity
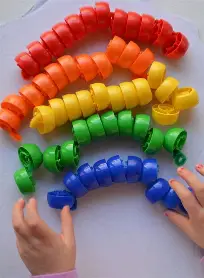
Activity for Pouch Cap Threading from normallifemom.com: You probably go through a lot of baby food or fruit pouches if you have a newborn or toddler. Crafting is the perfect use for those plastic caps that screw off the top. Make them into a garland to adorn the playroom or a vibrant bracelet or necklace for the child.
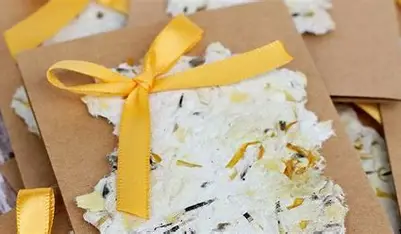
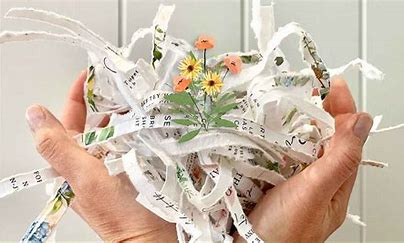
Here’s a simple kid-friendly project idea for Recycled Paper Seed Cards 🌱💌:
Recycled Paper Seed Cards
A fun eco-friendly craft where kids turn old paper into beautiful cards that can be planted to grow flowers or herbs!
Materials Needed:
- Scrap paper (newspaper, old homework, junk mail, etc.)
- A blender
- Water
- Small bowl or tub
- Seeds (wildflowers or herbs work best)
- Strainer or fine mesh
- Towels or felt sheets
- Cookie cutters (optional, for fun shapes)
Instructions:
- Tear the Paper – Rip old paper into small pieces and soak in warm water for a few hours.
- Blend into Pulp – Add soaked paper and water to a blender and blend until mushy.
- Mix in Seeds – Stir in small flower or herb seeds.
- Shape the Paper – Spread pulp thinly onto a strainer, towel, or inside a cookie cutter shape. Press out extra water.
- Dry the Cards – Let them dry completely (overnight works best).
- Decorate & Write – Kids can draw or write a message with markers or pencils.
- Plant It! – Gift the card to someone who can plant it in soil, water it, and watch the seeds grow.
🌼 This project teaches kids about recycling, sustainability, and the joy of giving something that grows.
Do you want me to also write a short version (like a one-paragraph activity idea) for quick sharing, or keep it as this step-by-step guide?
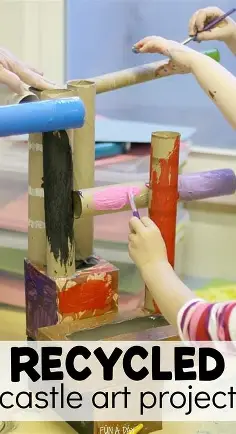
21. Cardboard City

Using boxes, milk cartons, and cardboard tubes, create a whole city of houses, buildings, and other structures with Cardboard City from boxofideas.uk. Even though it takes some effort at first, youngsters will play with these for hours on end, and they will also last for a long time.
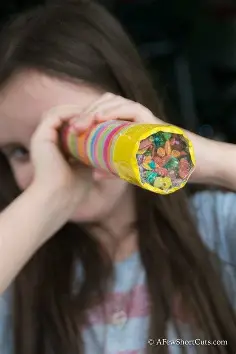
Here’s a simple and fun Kaleidoscope Craft for Kids:
Fun Kaleidoscope Craft 🌈✨
Materials Needed:
- Empty cardboard tube (paper towel or toilet roll)
- Aluminum foil (for the mirrors)
- Clear plastic or wax paper
- Beads, sequins, or confetti
- Tape and scissors
- Construction paper for decorating
Instructions:
- Make the Mirrors – Cut three strips of aluminum foil and fold them around stiff paper to create shiny “mirrors.” Tape them into a triangular prism shape and slide it into the cardboard tube.
- Create the Viewing End – Cover one end of the tube with clear plastic or wax paper. Secure with tape.
- Add the Colorful Bits – Place sequins, beads, or confetti between two small circles of clear plastic, then tape them to the other end of the tube.
- Decorate the Tube – Wrap the outside with colored paper, stickers, or drawings.
- Look and Enjoy! – Hold the tube up to the light, spin it gently, and watch the magical patterns appear.
✨ This craft is perfect for combining science and art — kids learn about reflection while making something beautiful.
Would you like me to also create a short “quick version” of this craft for easy classroom use?

Polar Bear newspaper from iheartcraftythings.com: This polar bear activity is a clever way to recycle the newspaper and would be great for a winter project or an arctic animal theme. It’s a simple craft for preschoolers with straightforward directions and basic shapes.

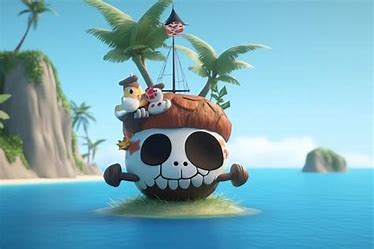
Here’s a playful DIY idea for a Floating Pirate Ship Craft ⛵🏴☠️:
Floating Pirate Ship Craft
Materials Needed:
- Empty juice box or small plastic bottle (the ship’s base)
- Straws or wooden skewers (for masts)
- Paper or fabric (for sails and flags)
- Tape or glue
- Scissors
- Markers or stickers for decoration
Instructions:
- Make the Ship Base – Rinse and dry the juice box or bottle. This will be your floating hull.
- Add the Mast – Stick a straw or skewer upright in the top (tape or poke a small hole to hold it in place).
- Create Sails – Cut small rectangles or triangles from paper or fabric. Punch holes and slide them onto the mast.
- Add a Pirate Flag – Draw a skull-and-crossbones on a small piece of paper and tape it to the top of the mast.
- Decorate the Ship – Use markers, stickers, or paper cutouts to make it look like a real pirate ship.
- Set Sail! – Place the ship in a sink, bathtub, or kiddie pool and watch it float. Kids can even race their ships!
🏴☠️ This craft mixes creativity with a bit of science (floating and balance) and is perfect for pretend pirate adventures.
Do you want me to also include a STEM extension (like explaining why the ship floats and how kids can experiment with it)?