🌎 The Best Earth Day Crafts Your Kids Will LOVE to Make!
Celebrate Earth Day with fun, hands-on projects that teach creativity and care for the planet! These eco-friendly crafts are perfect for kids of all ages — simple, colorful, and great for family time.
Try these Earth-loving ideas:
- Recycled Bottle Planters: Turn plastic bottles into cute mini gardens for flowers or herbs.
- Paper Roll Bird Feeders: Spread peanut butter on toilet paper rolls, roll them in birdseed, and hang them outside.
- Earth Collage Art: Use old magazines, newspapers, or scraps to create a beautiful Earth-shaped collage.
- DIY Reusable Bags: Decorate old tote bags with fabric paint or markers for stylish, waste-free shopping.
- Nature Paintbrushes: Gather leaves, twigs, and grass to make your own natural paintbrushes and create textured art.
🌱 These crafts not only spark creativity but also inspire kids to care for the Earth every day!
Would you like me to write a matching intro line (like your “Get Rid of That Spare Tire” or “Break Out the Binoculars” entries) to keep the tone consistent across all your pieces?
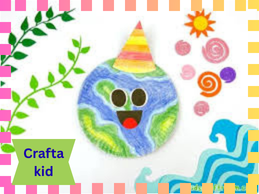
- Earth Day Coffee Filter Craft
This exquisite art resembles stained glass.
It shows the shadow of two hands reaching out to one another in front of the translucent planet Earth.
This beautiful project serves as a reminder that humans are a part of the world as well as a creative way for kids to demonstrate their affection for it.
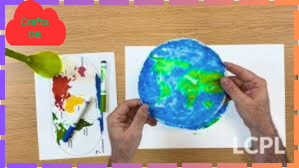
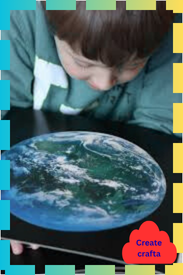
2. Simple Earth Suncatcher Earth Day Craft
☀️ Simple Earth Suncatcher Earth Day Craft
Bring a little sunshine and color into your home with this easy Earth Day craft! This project helps kids appreciate our planet’s beauty while learning about recycling and creativity.
Here’s how to make it:
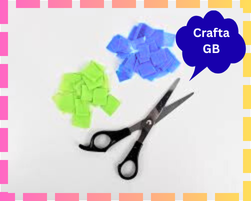
- What you’ll need: Coffee filters or clear contact paper, blue and green tissue paper, scissors, and glue.
- Step 1: Cut your base into a circle — this will be your “Earth.”
- Step 2: Tear or cut tissue paper into small pieces.
- Step 3: Glue the blue and green pieces to your base to represent oceans and continents.
- Step 4: Once dry, hang your suncatcher in a sunny window and watch the colors glow!
🌍 A simple, beautiful way to remind everyone how bright and special our planet truly is.
Would you like me to adapt this into the same short, punchy style as your other activity blurbs (like “Break Out the Binoculars” and “Have a Backyard Movie Night”)?
3. Butterfly Life Cycle Craft
In addition to being a lot of fun for kids to do, this craft teaches them all about butterflies.
Your children get to make everything, from tiny eggs on a leaf to the stages of caterpillar and chrysalis to a fully developed butterfly.
What a wonderful way to commemorate Earth Day!
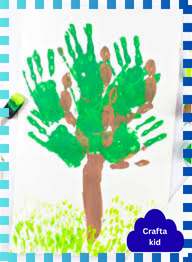
4. Gorgeous Newspaper Earth Day Craft
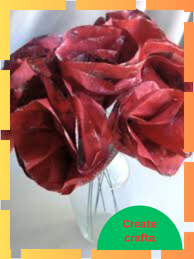
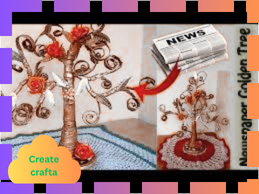
📰 Gorgeous Newspaper Earth Day Craft
Turn yesterday’s news into today’s masterpiece! This Earth Day, teach kids how to reuse and recycle by creating beautiful planet art from old newspapers.
Here’s how:
- Gather materials: Old newspaper, blue and green paint, scissors, and glue.
- Step 1: Cut out a large circle from the newspaper — this will be your Earth.
- Step 2: Paint the oceans blue and the continents green. Don’t worry about perfection — abstract looks great!
- Step 3: Mount your finished Earth on recycled cardboard or colorful paper for display.
🌎 A creative reminder that even the simplest materials can make something truly gorgeous — just like our planet!
Would you like me to give this a short tagline (like “Get creative while going green!”) to match your other entries’ upbeat tone?
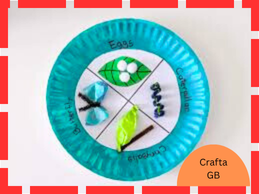
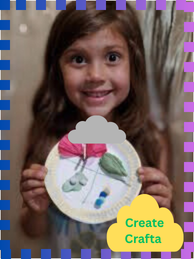
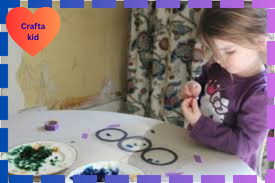
5. Tissue Paper Planet Earth Paper Plate Craft
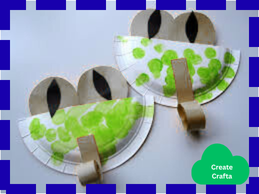
Giving children the chance to attempt a new craft is always enjoyable.
This is an enjoyable Earth Day craft for your children if they haven’t worked with tissue paper in a long time.
Your youngsters can construct a great sea out of bits of tissue paper and cover it with cut-out land continents.
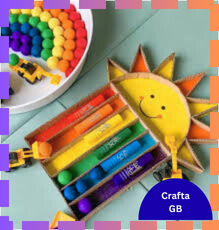
6. Upcycled Plastic Egg Music Shakers
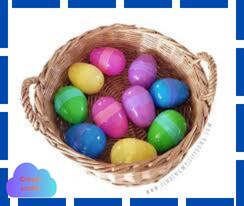
🥚 Upcycled Plastic Egg Music Shakers
Give those leftover plastic eggs a new life — and a great beat! This fun Earth Day craft turns recyclables into mini instruments kids will love to shake, rattle, and roll.
Here’s how to make them:
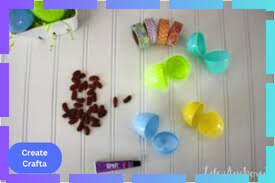
- What you’ll need: Empty plastic eggs, dry rice or beans, tape or glue, and markers or stickers for decorating.
- Step 1: Fill each egg halfway with rice or beans.
- Step 2: Seal the eggs tightly with tape or a dab of glue.
- Step 3: Let kids decorate their shakers with fun designs or Earth Day themes.
- Step 4: Shake along to music or make your own rhythm band!
🌍 A simple, musical way to teach kids about reusing materials — and celebrating the planet with a little groove! 🎶
Would you like me to make this and your other Earth Day craft blurbs match in tone and length for a single themed article or list?
7. Earth Day Stained Glass Craft
You’ll need contact paper, glue, scissors, and blue and green tissues.
How to Do: Using contact paper, draw a circle and trace a black outline around its perimeter. Let the kids cut tiny pieces of tissue paper and put them inside the circle. Lastly, cover the circle with another piece of contact paper and place it next to a window that gets lots of sunlight.
8. Cardboard Sun Craft
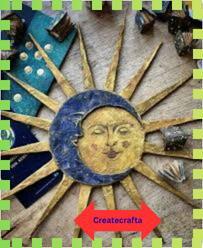
Here’s a fun and easy Cardboard Sun Craft idea — perfect for kids, summer projects, or classroom art! 🌞
🌟 Cardboard Sun Craft
Materials Needed:
- A piece of cardboard (from an old box works great)
- Scissors or a craft knife (adult supervision for cutting)
- Yellow and orange paint (or markers/crayons)
- Paintbrushes
- Glue
- String or yarn (optional, for hanging)
- Googly eyes and a marker (optional for a face)
Instructions:
- Cut Out the Sun Shape
- Draw a large circle on the cardboard for the sun’s center.
- Around the circle, draw triangle “rays” coming out all around.
- Cut out the whole sun shape carefully.
- Paint Your Sun
- Paint the center bright yellow.
- Paint the rays orange or red-orange for a glowing effect.
- Let it dry completely.
- Add a Happy Face (Optional)
- Glue on googly eyes and draw a smiling mouth with a marker — perfect for a cheerful touch!
- Hang It Up (Optional)
- Punch a hole at the top and tie a piece of string or yarn to hang your sun in a window or from the ceiling.
✨ Extra Ideas:
- Add glitter or gold foil for sparkle.
- Make a mobile with several smaller suns.
- Use tissue paper or cellophane in the rays for a stained-glass effect.
Would you like me to make this into a printable instruction sheet (PDF) with images and steps for kids?
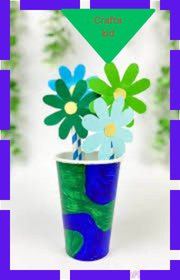
9. Hanging Planter Craft
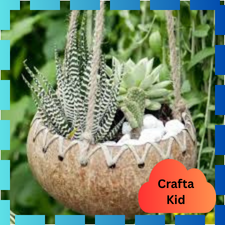
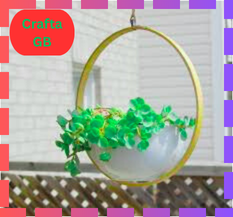
Items You’ll Need: Water, garden soil, seeds, jute string, and a planter or plastic container
How to Do: You may either build a holder for the pot out of jute strings or drill holes in the top of the bottle or container and thread the strings through. After the threads are safely fastened, hang the planter from the ceiling. Encourage the children to add garden soil, insert the seed, pull the strings through the holes, and paint the planters. To let extra water drain, be sure to drill a few tiny holes at the bottom.
10. Paper Quilled Earth Day Craft
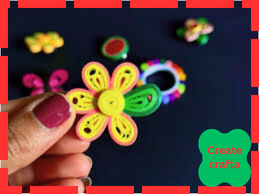
Here’s a beautiful and creative idea for a Paper Quilled Earth Day Craft — perfect for celebrating our planet while practicing fine motor skills and creativity! 🌍💚
🌎 Paper Quilled Earth Day Craft
Recommended for: Kids (ages 8+), classrooms, or family craft time
Theme: Love the Earth 🌱
🧰 Materials Needed:
- Blue, green, and white quilling paper strips (or cut colored paper into thin ¼” strips)
- Quilling tool or a toothpick
- Glue (craft glue or glue stick)
- White or black cardstock (for background)
- Pencil and eraser
- Scissors
- Optional: a printed Earth template or a heart shape to trace
🪡 Instructions:
- Prepare Your Base
- Draw or print a simple Earth outline (a circle with continents) on your cardstock.
- You can also draw a heart shape around the Earth to symbolize “Love Our Planet.”
- Quill Your Paper Strips
- Take your blue strips and roll them into small coils — these will form the oceans.
- Use green strips for the landmasses.
- You can shape the coils into teardrops, ovals, or squiggles to fit the continents.
- Arrange and Glue
- Apply a thin line of glue inside your Earth outline.
- Gently place each quilled piece into position using tweezers or your fingers.
- Fill the circle completely with blue and green coils.
- Add Details
- Use white strips to make little clouds or swirls.
- Optionally, write “Love the Earth” or “Every Day is Earth Day” at the bottom.
- Let It Dry
- Allow your craft to dry completely before displaying it.
- You can frame it or turn it into a card, poster, or gift tag!
✨ Creative Variations:
- Add brown quills for mountains or yellow for the sun.
- Create a heart-shaped Earth instead of a circle.
- Use recycled paper strips to make it more eco-friendly.
Would you like me to design a printable template + step-by-step instruction sheet (PDF) for this craft (with an Earth outline and photo examples)? It’s perfect for classroom or group activities.
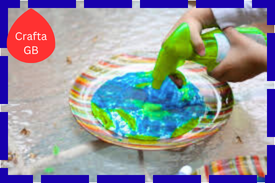
11. No Mess Painting Craft
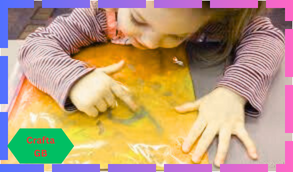
Items You’ll Need: A plastic bag, blue and green paint, and a printout of the earth to be colored
How to Do: Putting a printout or cutout of the world in a plastic bag with some blue and green coloring is one of the most fun world Day projects for kids. After that, give the children the bag and watch as they color the dirt with their tiny hands without making any mess.
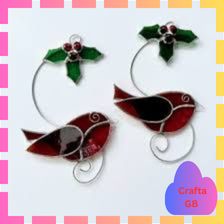
12. Birdseed Ornament Craft
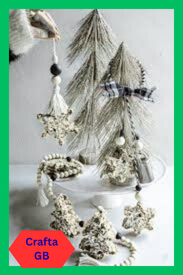
Here’s a sweet and simple Birdseed Ornament Craft — a fun way to feed the birds and celebrate nature! 🐦💚
Perfect for Earth Day, winter bird-feeding, or outdoor family activities.
🌾 Birdseed Ornament Craft
Recommended for: Kids (ages 4+ with supervision), classrooms, or family nature projects
Theme: Caring for wildlife 🌍
🧺 Materials Needed:
-
2 cups birdseed (any mix birds love)
-
½ cup warm water
-
2 envelopes unflavored gelatin (or about 4 tsp)
-
String, twine, or ribbon
-
Cookie cutters (stars, hearts, circles, etc.)
-
Wax paper or parchment paper
-
Spoon and mixing bowl
-
Straws (for making the hanging hole)
🪶 Instructions:
-
Prepare the Gelatin
-
Mix gelatin and warm water in a bowl until fully dissolved.
-
Let it sit for a minute to thicken slightly.
-
-
Add the Birdseed
-
Stir in the birdseed until it’s evenly coated and slightly sticky — not soupy.
-
If it’s too wet, add a bit more seed.
-
-
Shape the Ornaments
-
Place cookie cutters on a sheet of wax paper.
-
Spoon the birdseed mixture into the cutters, pressing it down firmly.
-
-
Make a Hanging Hole
-
Gently insert a straw near the top of each shape to create a hole for the string.
-
Let the ornaments sit and harden for several hours (or overnight).
-
-
Remove and Hang
-
Once dry, carefully remove the cookie cutters and straws.
-
Thread a piece of string or twine through each hole.
-
Hang your ornaments on tree branches for the birds to enjoy!
-
🌿 Tips & Variations:
-
Add dried fruit (like cranberries or raisins) for extra color and nutrients.
-
Use pinecones instead of cookie cutters — coat them with peanut butter and roll in birdseed.
-
Make it an Earth Day activity by talking about caring for wildlife and the environment.
Would you like me to make a printable instruction card (PDF) for this craft — with cute illustrations and easy kid-friendly text? It’s great for classrooms or activity boards.