

Here are fresh, fun, and easy Earth Day crafts for kids in 2025 — perfect for classrooms, homes, and community events! All use simple, mostly recycled materials and focus on nature, sustainability, and creativity.
🌍 Earth Day Crafts for Kids (2025 Edition)
1. Recycled CD Earth Suncatchers
Materials: old CDs, tissue paper, glue, markers
How it works: Kids cover the shiny side with blue/green tissue pieces to make a bright Earth that sparkles in sunlight.
2. Egg Carton “Mini Greenhouses”
Materials: egg cartons, soil, seeds
Activity: Kids plant seeds in each cup and watch them sprout. Great for teaching sustainability and plant life cycles.
3. Newspaper Earth Mosaic
Materials: old newspapers, glue, cardboard circle
Craft: Tear newspaper into tiny pieces and create a mosaic-style Earth. Minimal materials — maximum impact!
4. Plastic Bottle Bird Feeders
Materials: used plastic bottles, sticks, string, birdseed
Bonus: Helps reuse plastic while helping local wildlife.
5. Handprint Earth Keepsake (2025 Update)
Materials: paint, paper
How to do it: Kids paint their hands blue and green, press them down to form a handprint Earth. Add “Love Your Planet – 2025”.
6. Cardboard Tube Rainforest Animals
Materials: toilet paper rolls, markers, scrap paper
Animals to make: parrots, frogs, sloths, butterflies
Perfect for teaching biodiversity!
7. Nature Paintbrushes
Materials: leaves, flowers, sticks
Kids collect natural materials and tie them to sticks to create unique brushes. Use with eco-friendly paints.
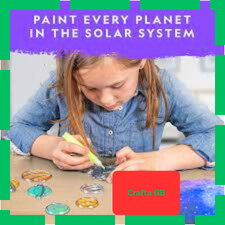
8. Rock Planet Painting
Let kids paint rocks to resemble different planets — including Earth — using leftover craft paint.
9. Upcycled Magazine Collage Poster
Kids cut old magazines and create a “Protect Our Planet” poster with pictures representing recycling, energy saving, plants, and animals.
10. Solar Print Art (Sun Prints)
Materials: leaves, flowers, paper
Leave items in sunlight on paper to create natural silhouettes — an eco-friendly science + art activity.
🌱 Want themed crafts?
I can create lists for:
✔ Preschoolers
✔ Elementary grades
✔ Outdoor Earth Day crafts
✔ Recycled-only crafts
✔ 10-minute easy crafts
✔ Printable templates
Just tell me what you’d like!
- Juice Can Lid Garland
This adorable project from 30 Minute Crafts makes a vibrant garland out of the lids of frozen juice concentrate containers. Choose colors that go well with your child’s bedroom so they may use their project as a new room decoration, or paint a blue and green version for Earth Day to string across the fireplace.
2. Bird Feeder Bottles
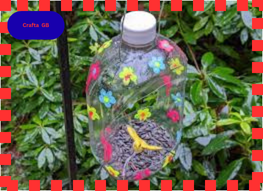
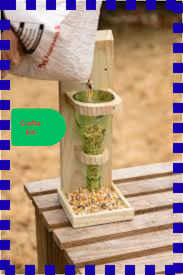
Here are easy and kid-friendly Bird Feeder Bottle ideas using recycled plastic bottles. Perfect for Earth Day or any nature-themed activity!
🐦 Recycled Bottle Bird Feeders (Simple & Fun!)
1. Classic Hanging Bottle Feeder
Materials:
- Plastic water bottle
- 2 wooden spoons / sticks
- String
- Birdseed
How to Make:
- Poke two holes on opposite sides of the bottle (slightly larger than your wooden spoon handle).
- Slide the handle end through the holes so the spoon sticks out — this creates a perch.
- Make a tiny hole above each spoon so seed can trickle onto it.
- Fill with birdseed and tie a string around the neck to hang.
Why it works: Birds can sit on the spoon and peck the seeds as they spill out.
2. Paint & Decorate Bottle Feeder
Materials:
- Plastic bottle
- Acrylic paint or markers
- Twine
- Birdseed
Steps:
- Clean the bottle and remove labels.
- Let kids decorate and paint the bottle (avoid painting the feeding hole).
- Cut a small window halfway up for seed access.
- Punch two holes at the top and tie twine for hanging.
Tip: Use bright colors to attract kids’ attention — but keep the feeding hole large enough for small birds.
3. Perch Ring Bottle Feeder
Materials:
- Plastic bottle
- A small plastic lid or wooden ring
- String
Steps:
- Cut a wide oval opening in the bottle.
- Glue a small ring or lid under the opening to create a platform.
- Add birdseed and hang from a tree.
Best for: Sparrows, chickadees, and small garden birds.
4. Milk Bottle Bird Feeder (Bigger & Sturdier)
Materials:
- 1-liter or gallon milk jug
- Scissors
- Birdseed
Steps:
- Cut a large window on the side of the jug.
- Leave a lip at the bottom to hold the seed.
- Add holes at the top to hang.
Great for younger kids because the plastic is softer and easier to cut with help.
🌿 Tips for Success
- Hang feeders near trees so birds feel safe.
- Avoid placing them in full afternoon sun (seeds spoil faster).
- Clean feeders weekly to keep birds healthy.
If you want, I can make:
👉 Step-by-step printable instructions
👉 A 1-page classroom handout
👉 A video-style script for teachers
👉 More recycled-material bird feeder ideas
Just tell me!
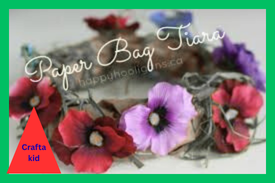
3. DIY Flower Crown
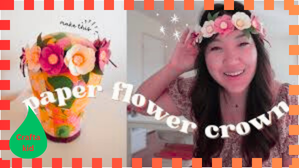
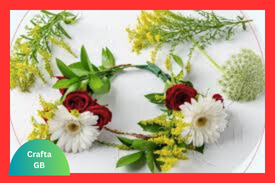
Aidez vos enfants à se rapprocher de la nature en leur proposant de réaliser cette couronne florale DIY grâce aux instructions de la blogueuse Julie Blanner. Ce tutoriel spécifique utilise des roses fraîchement coupées, mais vous pouvez également cueillir des fleurs et des plantes lors d’une promenade en nature ou dans votre propre jardin qui fonctionneront tout aussi bien.
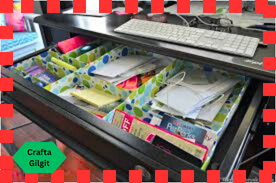
4. Upcycled Cereal Box Envelope
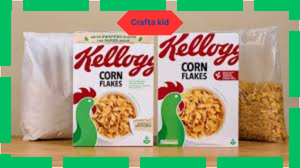
Here’s a cute, simple, and eco-friendly “Upcycled Cereal Box Envelope” craft—perfect for Earth Day, classroom activities, or organizing small papers at home.
📬 Upcycled Cereal Box Envelope (Easy DIY)
Materials Needed
- Empty cereal box
- Scissors
- Glue or double-sided tape
- Pencil
- Ruler
- Optional: stickers, markers, washi tape
✂️ How to Make It
1. Prepare Your Cereal Box
- Open the cereal box completely so it lies flat.
- Use scissors to cut out one flat rectangle panel (front or back works best).
2. Draw the Envelope Template
On the printed side of the cereal box, use a pencil and ruler to sketch:
- Main rectangle: Your envelope size (e.g., 6″ × 4″)
- Side flaps: Two narrow triangles/rectangles on left and right
- Bottom flap: A slightly longer flap for sealing
- Top flap: A triangle or curved shape for opening/closing
(Think of a standard envelope outline.)
3. Cut Out the Envelope Shape
Cut along the outer lines of your drawing to get one full envelope piece.
4. Fold the Flaps
- Fold the side flaps inward.
- Fold the bottom flap up over the side flaps.
- Fold the top flap downward.
Use your fingernail or ruler edge to make sharp creases.
5. Glue It Together
- Glue or tape the bottom flap onto the side flaps (do NOT glue the top flap).
- Press firmly to secure.
Now you have a fully functioning envelope!
🎨 6. Decorate (Optional but Fun!)
- Cover the printed side with wrapping paper or leftover craft paper
- Add stickers or drawings
- Use washi tape to seal
- Add labels or tags
This step makes the cereal-box design disappear and gives your envelope a clean look.
🌱 Why This Craft Is Great
- Teaches kids about reuse and recycling
- Uses materials you already have at home
- Can be customized for letters, cards, or gift money
- Great for Earth Day, school projects, or organizing documents
If you want, I can make:
📄 A printable envelope template
🎨 A themed version (Earth Day, birthday, Valentine’s Day)
📚 Classroom instructions for teachers
📦 A matching set: folder + bookmark + envelope using cereal boxes
Just tell me what you’d like!
5. Paper Sack Grass Crowns
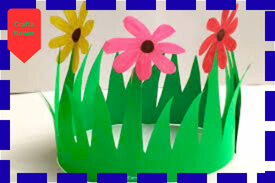
Surtout si vous avez des enfants en bas âge, les projets les plus simples sont souvent les meilleurs pour les impliquer lors d’une fête comme la Journée de la Terre. Utilisez des ciseaux pour couper les « lames » d’herbe et confectionner une couronne en papier de Delia Creates que les tout-petits pourront porter pour se réjouir.
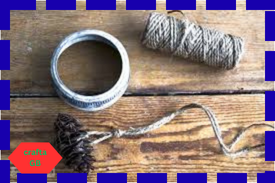
6. Recycled Bottle Cap Jewelry
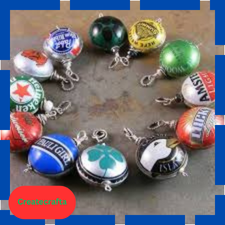
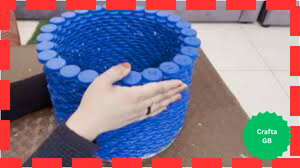
Here are fun, colorful, and kid-friendly ideas for making Recycled Bottle Cap Jewelry—perfect for Earth Day, classrooms, or creative upcycling projects!
💍♻️ Recycled Bottle Cap Jewelry Ideas
1. Bottle Cap Necklaces
Materials:
- Plastic or metal bottle caps
- String/cord/yarn
- Glue
- Stickers, beads, sequins, markers
- Hole punch or nail (adult help)
How to Make:
- Decorate the inside of the bottle cap using stickers, drawings, or glitter glue.
- Once dry, make a hole near the rim of the cap.
- Thread the cord through the hole and tie to create a necklace.
Tip: Add a small photo or initial inside for personalized pendants!
2. Bottle Cap Bracelets
Materials:
- 5–7 caps
- Elastic string or ribbon
- Paint/markers
How to Make:
- Decorate each cap.
- Using a hole punch or nail, add two holes on opposite sides of each cap.
- Thread the elastic string through the holes to form a flexible bracelet.
- Tie tightly at the ends.
Variation: Alternate caps with plastic beads for a cute pattern.
3. Bottle Cap Rings
Materials:
- Metal or plastic caps
- Adjustable ring bases (or pipe cleaners for kids)
- Glue
- Tiny decorations (gems, sequins, mini drawings)
How to Make:
- Decorate the bottle cap.
- Glue the cap onto a ring base or twist a pipe cleaner into a small ring.
- Let dry before wearing.
Super easy and great for party favors!
4. Bottle Cap Earrings
Materials:
- 2 lightweight caps
- Earring hooks
- Jump rings
- Nail/hole punch
- Paint or craft decorations
How to Make:
- Decorate both caps.
- Make a small hole at the top of each.
- Add a jump ring through the hole and attach the earring hook.
Kids version: Use clip-on earring bases instead of hooks.
5. Resin-Style Bottle Cap Charms (No Real Resin Needed)
Materials:
- Clear glue (school glue or Mod Podge)
- Glitter, tiny beads, paper circles
- Hole punch + cord
How to Make:
- Cut a small paper circle that fits inside the cap.
- Decorate it.
- Place it inside and cover with a thick layer of clear glue to mimic resin.
- Let dry completely.
- Add a hole and string for a necklace or charm.
🌈 Decoration Ideas
- Use acrylic paint, markers, or nail polish.
- Add recycled magazine cutouts.
- Glue mini flowers, buttons, or beads.
- For Earth Day: draw Earth, leaves, or recycling symbols.
🛠 Safety Tips
- Always have an adult help make holes in metal caps.
- Let glue/paint dry before wearing.
- Use lightweight caps for earrings or charms.
If you want, I can create:
✨ A printable instruction sheet
📸 Step-by-step photo layout (sketch style)
🌎 Earth Day–themed jewelry designs
🎁 A full “Recycled Jewelry Kit” idea for kids’ activities
What would you like next?
7. Cereal Box Desk Organizer
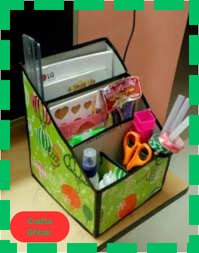
Grâce à ce tutoriel du blog Mod Podge Rocks, vous et vos enfants pouvez confectionner un astucieux organiseur de bureau en utilisant des boîtes de céréales vides et des rouleaux de papier toilette. Une autre façon de transformer ce projet en un artisanat recyclé est d’utiliser du papier cadeau restant pour habiller vos boîtes.
8. Stained Glass Planet Earth
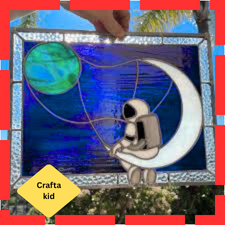
Here’s a beautiful and kid-friendly “Stained Glass Planet Earth” craft that creates a glowing Earth design perfect for windows, classrooms, and Earth Day displays!
🌍✨ Stained Glass Planet Earth (Paper Suncatcher Craft)
Materials
- Black construction paper or cardstock
- Blue and green tissue paper (various shades look best)
- Scissors
- Glue stick or clear-drying glue
- Pencil
- Optional: a plate or bowl to trace a circle
- Optional: clear contact paper (makes it easier for younger kids)
✂️ How to Make It
1. Create the Earth Frame
- Fold the black construction paper in half.
- Draw a half-circle along the fold (like cutting a big donut).
- Cut out the outer circle first.
- Then cut a smaller circle inside to create a ring frame.
- This becomes the outline of your Earth “stained glass.”
(If easier, trace a large bowl and a smaller bowl to guide the cutting.)
2. Add the Tissue “Glass”
Option A: Glue Method
- Lay the black circle frame flat.
- Cut or tear blue and green tissue paper into small shapes.
- Glue them to the back of the frame, overlapping pieces to mimic oceans and continents.
Option B: Contact Paper (Mess-free for kids)
- Place clear contact paper sticky side up.
- Lay the black frame onto the sticky surface.
- Add torn tissue pieces inside the frame.
- Seal with a second sheet of contact paper.
3. Trim Excess Paper
Once all tissue pieces are attached, trim away any overhanging bits so it’s a neat circle.
4. Hang in a Window
Tape it to a sunny window and watch the colors glow—just like stained glass!
The overlapping blues and greens give a beautiful Earth effect.
🌈 Optional Extras
- Add a black paper ring with text like: “Love Our Planet”, “Earth Day 2025”, or the child’s name.
- Add tissue white streaks for clouds.
- Layer different shades of blue/green for a more realistic Earth look.
- Make multiple planets for a solar system stained glass display!
If you want, I can make:
📄 A printable circle template
🎨 Step-by-step illustrated guide
📚 A classroom version for 20+ kids
🌍 An Earth Day bulletin board idea to match the craft
Just tell me!
9. Recycled Cardboard Sun
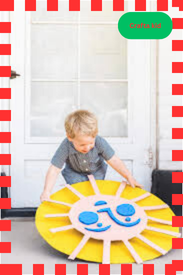
Ce projet d’artisanat en carton de The House That Lars built est une excellente façon de recycler les grandes boîtes que vous avez peut-être, comme celles provenant d’un nouveau réfrigérateur ou autre. Vous pouvez aussi utiliser tous ces colis Amazon que vous avez à disposition !