Createcrafta
Createccrafta
Creating recycling projects in your backyard can be both environmentally friendly and a fun way to engage with sustainability. Here are a few ideas to consider:
- Composting Bin: Set up a composting area where you can recycle kitchen scraps and yard waste into nutrient-rich compost for your garden. You can use old wooden pallets or build a simple bin using recycled materials like plastic containers.
- DIY Rain Barrel: Collect rainwater by repurposing large containers such as barrels or even old drums. Install a gutter system to direct rainwater into the barrel, which you can then use for watering plants, reducing your reliance on municipal water.
- Vertical Garden with Recycled Materials: Build a vertical garden using old pallets, gutters, or even PVC pipes. This allows you to grow herbs, vegetables, or flowers vertically, maximizing space and reusing materials that might otherwise be discarded.
- Upcycled Garden Art: Get creative with old items like tires, cans, or bottles by turning them into garden art. For example, paint and stack tires to create a colorful flower planter, or use bottles as decorative borders or hanging planters.
- Plastic Bottle Greenhouse: Construct a small greenhouse using plastic bottles filled with water. This passive solar heating technique helps regulate temperature fluctuations and provides a controlled environment for seedlings or tender plants.
- Recycled Pathways: Use broken concrete pieces (known as urbanite) or old bricks to create pathways in your garden. This not only recycles materials but also adds charm and functionality to your outdoor space.
- DIY Bird Feeders and Houses: Make bird feeders using recycled materials like old milk jugs or tin cans. You can also build birdhouses from scrap wood or unused pallets, providing shelter and food for local bird species.
- Tire Swing: Transform an old tire into a classic backyard swing for kids. Clean and paint the tire, attach it securely to a sturdy tree branch or swing set, and enjoy hours of outdoor fun.
- Recycled Herb Markers: Label your herb garden using recycled materials such as wooden popsicle sticks or old silverware. Paint or write the names of herbs on these items and place them next to corresponding plants.
- Worm Composting Bin: Create a vermicomposting bin using a large plastic container with ventilation holes. Add worms and food scraps to turn kitchen waste into nutrient-rich compost that enriches your garden soil.
These projects not only promote recycling and sustainability but also add a personal touch to your backyard space. They are great opportunities to involve family members or friends in eco-friendly activities and showcase how creative recycling can be.
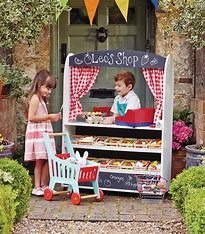
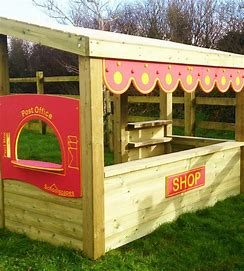
- Playtime shop fronts and furniture.
Createcrafta
Createcrafta
A child’s imaginative treasure is a cardboard box. They can transform boxes into a variety of objects, such as cars, cubby houses, and storefronts. Consider all the things you and your child could create with a large packing carton instead of throwing it away.
By cutting out the door and adding buttons, cardboard boxes can also be used to create pretend furniture, such as washing machines, refrigerators, and dryers. You can teach your child safe behaviour around white goods by recycling cardboard.
2. Repurpose old tyres.
Createcrafta
Createcrafta
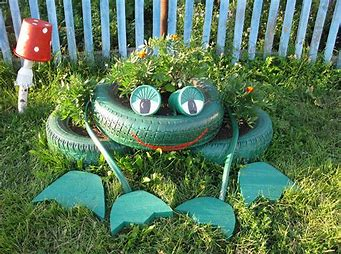
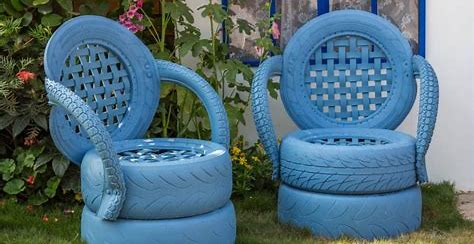
Repurposing old tires is a fantastic way to creatively recycle and contribute to sustainable practices in your backyard. Here are several ideas to consider:
- Tire Planters: Cut tires in half horizontally to create sturdy, circular planters. Paint them in vibrant colors and fill them with soil to grow flowers, herbs, or even small vegetables. These planters are durable and can withstand various weather conditions.
- Tire Swing: One of the classic uses of old tires is to transform them into a swing for children. Hang a tire securely from a sturdy tree branch or a swing set using strong ropes or chains. Ensure it is safe and stable for swinging.
- Tire Sandbox: Create a sandbox for kids by laying a tire flat on the ground and filling it with clean sand. It provides a contained area for children to play in and can be covered when not in use to keep the sand clean.
- Tire Garden Edging: Stack tires horizontally or vertically along garden beds to create a decorative and functional border. Fill the tires with soil and plant low-growing flowers or herbs in them for added visual appeal.
- Tire Ottoman or Coffee Table: Stack tires and secure them with adhesive or bolts to create a unique outdoor ottoman or coffee table. Cover them with weather-resistant fabric or paint them to match your outdoor decor.
- Tire Steps: Stack tires in a stair-like formation and secure them together to create sturdy steps or seating in your backyard. You can cover them with wood or concrete for a more finished look.
- Tire Pond: Dig a hole and partially bury a large tire to create a shallow pond or water feature. Line the inside with a pond liner, fill it with water, and add aquatic plants or even small fish for a mini-ecosystem.
- Tire Climbing Tower: Stack tires vertically and secure them together to create a climbing tower for children. You can add ropes, ladders, or handholds to enhance the climbing experience and ensure safety.
- Tire Roof Shelter: Stack tires in a circular pattern and build a roof structure over them to create a shaded shelter or gazebo. Cover the roof with tarpaulin or thatch for protection from the elements.
- Tire Art and Sculptures: Use tires as the base for sculptures or art installations in your backyard. Paint them, cut them into different shapes, and arrange them creatively to add an artistic touch to your outdoor space.
These ideas not only help reduce waste by repurposing old tires but also add unique elements to your backyard that can be both functional and aesthetically pleasing. Be sure to clean and prep the tires appropriately before use, especially if they have been exposed to chemicals or oils.
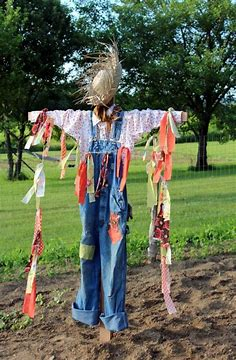
3. Build a scarecrow.
Createcrafta

Createcrafta
This preschool recycling project is sure to become a classic. Using items you no longer need around the house, construct a scarecrow. Choose what to use first, such as some worn-out clothes, a cap, and a pair of old boots. Next, decide how you’re going to fill it out and keep it intact.
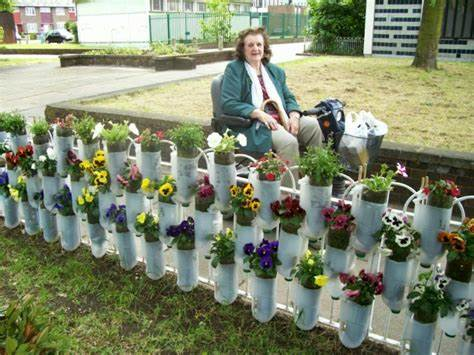
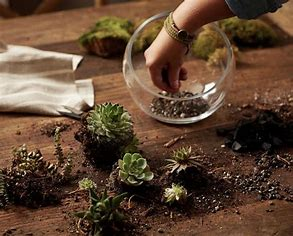
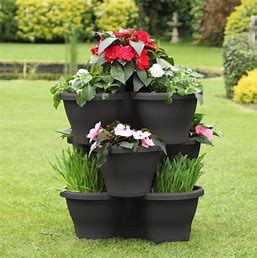
4. Make garden pots, vertical gardens and terrariums
Createcrafta
Createcrafta
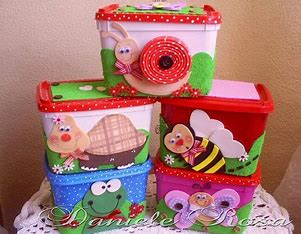
Repurposed materials such as plastic milk cartons, ice cream containers, and soft drink bottles can be used to make garden pots that can be hung or set on the ground. As an extra recycling project, let your youngster decorate the recyclables.
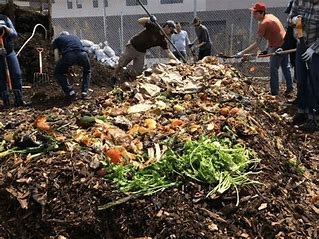
5. Turn food waste into compost.
Createcrafta

Createcrafta
Turning food waste into compost is a practical and environmentally friendly way to reduce landfill waste while creating nutrient-rich soil for your garden. Here’s how you can do it:
Steps to Turn Food Waste into Compost:
- Collecting Food Waste:
- Gather kitchen scraps such as fruit and vegetable peels, coffee grounds, tea bags, eggshells, and non-greasy food leftovers. Avoid adding meat, dairy, oily foods, and large quantities of citrus, as they can attract pests or slow down the composting process.
- Choosing a Composting Method:
- Backyard Compost Bin: Purchase or build a compost bin or pile in your backyard. Choose a location that’s convenient yet out of direct sunlight and has good drainage.
- Indoor Composting: If you don’t have outdoor space, consider using a small indoor compost bin or a vermicomposting (worm composting) setup, which can be kept under the sink or in a closet.
- Layering and Aerating:
- Start with a layer of coarse materials like twigs or straw at the bottom of your compost bin to aid drainage and aeration.
- Alternate layers of food scraps with brown materials such as dried leaves, shredded paper, or cardboard to balance moisture and provide carbon-rich matter.
- Occasionally turn or aerate the compost with a pitchfork or compost aerator to mix the materials and introduce oxygen, which speeds up decomposition.
- Maintaining the Compost:
- Keep the compost moist but not waterlogged. If it becomes too wet, add more dry brown materials. If it’s too dry, sprinkle with water.
- Cover the compost bin to retain moisture and heat, which helps in the decomposition process and prevents pests.
- Waiting and Harvesting:
- Depending on the method and conditions, composting can take several weeks to several months. The compost is ready when it turns dark, crumbly, and earthy-smelling.
- Use the finished compost to enrich garden soil by spreading it around plants, mixing it into potting mixes, or using it as a mulch.
Tips for Successful Composting:
- Balance: Aim for a balance of green (nitrogen-rich) and brown (carbon-rich) materials to maintain the right carbon-to-nitrogen ratio (C/N ratio).
- Size: Chop or shred larger food scraps to speed up decomposition.
- Avoid: Do not compost meat, dairy, fatty foods, or pet waste as they can attract pests and may not compost properly in home systems.
Composting food waste not only reduces landfill waste but also creates nutrient-dense soil amendments that improve soil structure and fertility in your garden. It’s a sustainable practice that benefits both your plants and the environment.
Craft ideas for kids with waste material
We can recycle waste items including plastic, rubber, glass, paper, cardboard, metal, and supplies for craft projects, art projects, and recycling projects around the house.
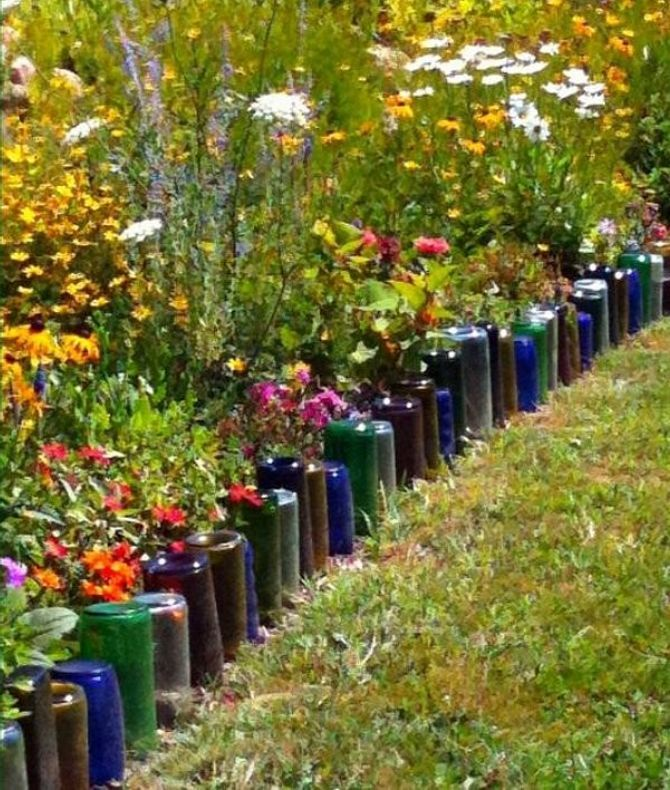
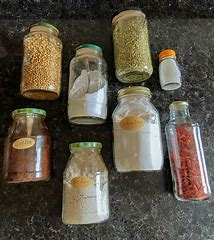
6. Reuse glass jars
Createcrafta
Createcrafta
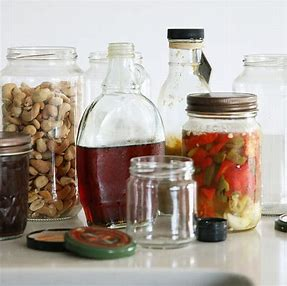
Reusing glass jars is a fantastic way to reduce waste and add functional and aesthetic elements to your home. Here are several creative ways to reuse glass jars:
- Food Storage: Use glass jars to store dry goods such as grains, pasta, beans, nuts, and seeds. They help keep food fresh and organized in your pantry.
- Bulk Shopping: Take glass jars to the grocery store or bulk food store to fill up on items like spices, herbs, cereals, or snacks, reducing the need for disposable packaging.
- Drinking Glasses: Clean and reuse jars as drinking glasses for water, juice, smoothies, or even cocktails. Add a reusable straw for convenience.
- Candle Holders: Place candles inside jars to create unique and decorative candle holders. Add pebbles, sand, or dried flowers at the bottom for a personalized touch.
- Vases: Use jars as vases for displaying fresh or dried flowers from your garden or store-bought bouquets. They can add a rustic or modern charm to any room.
- Organizers: Arrange jars on a shelf or countertop to store small items like paper clips, rubber bands, craft supplies, or office supplies. Label them for easy identification.
- DIY Gifts: Fill jars with homemade treats like cookies, granola, or layered ingredients for baking mixes. Decorate the jars with ribbons, labels, or fabric for thoughtful gifts.
- Herb Garden: Create a mini herb garden by planting herbs in jars filled with potting soil. Place them on a sunny windowsill for fresh herbs year-round.
- Craft Projects: Use jars for various DIY crafts such as creating terrariums, snow globes, or storage containers for buttons, beads, or small toys.
- Salad Dressing Shaker: Repurpose jars with tight-fitting lids as containers for mixing and storing homemade salad dressings or marinades. Shake well before each use.
Tips for Reusing Glass Jars:
- Clean Thoroughly: Remove labels and adhesive residue by soaking jars in warm, soapy water. Use a scrubbing sponge or a scraper for stubborn residue.
- Inspect for Safety: Check for cracks or chips in the glass before reuse, especially if using for food or beverages.
- Labeling: Use chalkboard labels, permanent markers, or masking tape to label jars for easy identification and organization.
Reusing glass jars not only reduces waste but also allows you to get creative and add a personal touch to everyday items and decorations in your home. Whether for storage, decoration, or gifts, jars are versatile and eco-friendly alternatives to disposable containers.
7. Craft with ice cream containers

Createcrafta
Createcrafta
Containers for ice cream are yet another valuable thing to recycle. You may cover them with felt and other materials to turn them into elaborate arts and crafts like these homemade Santa Claus heads, or you can combine them to create a paper trash can.
8. Build a robot from boxes.

Createcrafta
Createcrafta
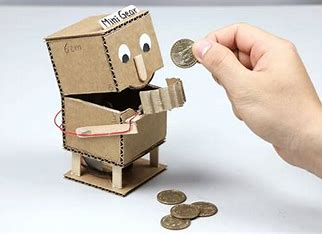
Construct a robot out of cardboard tubes, cereal boxes, and other little cardboard boxes, such as those used to package toothpaste. Ideas are as limitless as a child’s imagination when combined with glue and sticky tape. Apply paint to the finished piece as a finishing touch.
9. Create a diorama with a shoebox and loose things.
Createcrafta
Createcrafta
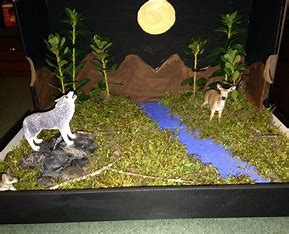
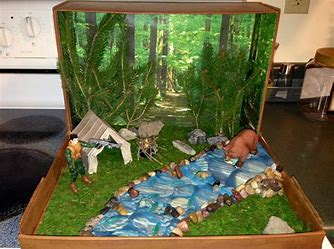
Creating a diorama with a shoebox and loose things is a fun and creative project that allows you to build a miniature scene or landscape. Here’s how you can do it:
Materials Needed:
- Shoebox (or any similar-sized cardboard box)
- Loose items such as small toys, figurines, rocks, twigs, artificial plants, fabric scraps, etc.
- Construction paper or cardstock (for background)
- Scissors
- Glue (white glue or hot glue gun)
- Paints, markers, or crayons (optional, for decorating)
Steps to Create the Diorama:
- Prepare the Shoebox:
- Start by deciding on the theme or scene you want to create. It could be a forest, underwater world, outer space, a historical setting, or even a fantasy realm.
- Background:
- Measure and cut a piece of construction paper or cardstock to fit inside the back of the shoebox. This will serve as the background for your diorama. You can paint or draw a scene on this background to set the mood (e.g., sky, mountains, ocean).
- Arrange Loose Items:
- Gather your loose items such as figurines, rocks, twigs, and other small objects that fit your chosen theme. These will be used to create the elements of your diorama. For example, use small pebbles as rocks, twigs as trees or branches, and fabric scraps as grass or water.
- Glue Items in Place:
- Begin placing and gluing the loose items onto the floor of the shoebox (the bottom part). Start with larger items like rocks or larger figurines and then add smaller items like plants or animals. Arrange them to create depth and perspective within the box.
- Foreground and Details:
- Use smaller items or materials to create foreground details. For instance, use cotton balls for clouds, or create a path with small pebbles and sand. Pay attention to the placement and scale of each item to maintain realism or desired artistic effect.
- Final Touches:
- Once all items are glued in place and the scene looks complete, you can add final touches such as painting additional details, like flowers on the grass, or adding small accents with markers or paints.
- Display:
- Allow the glue to dry completely. Once dry, your diorama is ready to be displayed! You can keep it as a decorative piece or use it for educational purposes, storytelling, or as a gift.
Tips for Creating a Diorama:
- Creativity: Don’t be afraid to mix materials and textures to achieve the desired look.
- Planning: Sketching out your design or layout before starting can help organize your ideas.
- Experiment: Try different arrangements and perspectives before gluing everything down permanently.
- Theme: Keep the theme consistent throughout the diorama to create a cohesive and visually appealing scene.
Creating a diorama with a shoebox and loose things is a great way to unleash your creativity and make use of everyday materials in a new and imaginative way. It’s a project that can be enjoyed by children and adults alike, allowing for endless possibilities in storytelling and artistic expression.