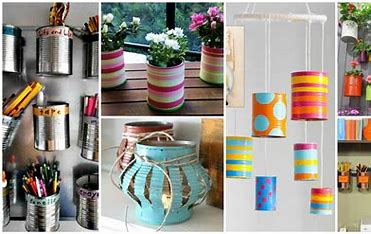
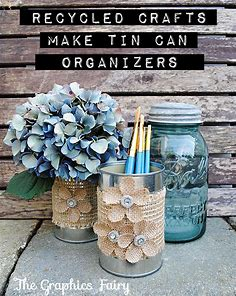
Your next go-to craft supply is going to be those innocuous tin cans that you would usually throw in the trash!
Imagine that you have a tonne of empty tin cans in your kitchen that you have decided to give a wonderful second life to rather than discard. There are several options available, ranging from stylish lights and pots to amusing storage options and outdoor décor. The finest aspect? What a wonderfully sustainable method of crafting!
We’ll look at a tonne of craft ideas with tin cans in this tutorial, which is sure to spark your imagination. There’s something here for everyone, regardless of skill level—perfect for a weekend project or an accomplished crafter. It’s a fantastic method to teach the kids about recycling and get them interested in crafts.
Now that you have your tin cans and crafting supplies gathered, let’s begin our environmentally responsible crafting adventure! I promise you, once you start, you’ll have a whole new perspective on tin cans. Happy creating!

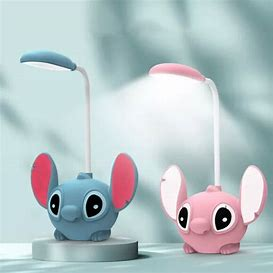
Sure! Here’s a step-by-step guide on how to make a DIY can desk lamp:
Materials You’ll Need:
- Empty an aluminum can (like a soda or beer can)
- Desk Lamp Kit (includes a light socket, cord, and switch; available at hardware stores or online)
- Light Bulb (appropriate wattage for your lamp kit)
- Can Opener
- Pliers
- Wire Cutters
- Drill with a Metal Drill Bit (or a screwdriver and hammer if you don’t have a drill)
- Hot Glue Gun and Glue Sticks (optional, for additional securing)
- Paint or Decorative Materials (optional for customizing your can)
- Safety Gear (gloves and eye protection)
Instructions:
- Prepare the can:
- Clean the Can: Wash out the can thoroughly and remove the label. Make sure it’s completely dry.
- Cut the Can: Use a can opener to remove the top of the can. Be careful of sharp edges.
- Smooth the Edges: Use pliers or a metal file to smooth out any sharp edges around the cut.
- Create the lamp’s base:
- Drill a Hole: Using a drill with a metal bit, carefully drill a hole in the bottom of the can. The hole should be just big enough to fit the lamp cord through. If you don’t have a drill, you can use a screwdriver and hammer to create a hole.
- Install the lamp kit:
- Prepare the cord: Thread the lamp cord through the hole you drilled in the can. Pull it through until the switch and plug are on the outside.
- Attach the socket: Follow the instructions provided with your lamp kit to attach the light socket to the cord. Generally, you’ll need to connect the wires to the socket. Be sure to follow the manufacturer’s wiring instructions to ensure safety.
- Secure the socket.
- Fix the socket: Depending on your lamp kit, you might need to secure the socket inside the can. You can use hot glue to hold it in place if it’s loose.
- Add the light bulb.
- Insert the Bulb: Screw the light bulb into the socket.
- Decorate the can (optional):
- Paint or Decorate: If desired, you can paint or otherwise decorate the outside of the can to give it a unique look. Just make sure any paint or materials used are safe and won’t affect the heat emitted by the lamp.
- Test the lamp:
- Plug It In: Plug the lamp into an electrical outlet and test it to make sure everything works correctly. Check for any signs of electrical issues or overheating.
Safety Tips:
- Use Proper Safety Gear: Wear gloves and eye protection while cutting or drilling.
- Check for Sharp Edges: Ensure all sharp edges on the can are smoothed out to avoid injury.
- Ensure Electrical Safety: Make sure all electrical connections are secure and properly insulated. If you’re unsure about any step involving electrical components, consult with a professional.
Your DIY can desk lamp is now ready to use! Enjoy your unique and customized lighting solution.
2. Repurposed Tin Can Ornament For Christmas
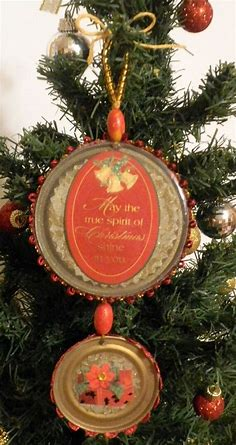
Creating repurposed tin can ornaments for Christmas is a fun and eco-friendly way to add a personal touch to your holiday decorations. Here’s a simple guide to making these charming ornaments:
Materials You’ll Need:
- Empty Tin Cans (e.g., soup cans or coffee cans)
- Can Opener
- Paint (acrylic or spray paint)
- Paintbrushes or Sponges
- Ribbons or Twine (for hanging)
- Hot Glue Gun and Glue Sticks
- Decorative Items (e.g., buttons, beads, glitter, or small ornaments)
- Drill or Hammer and Nail (to make a hole)
- Scissors
- Water (for removing labels)
- Sponge or Scrub Brush (for cleaning)
Instructions:
- Prepare the Tin Can:
- Remove the Label: Clean the can by removing the label and any adhesive residue. Soak the can in warm, soapy water if needed, and scrub off any remaining glue.
- Remove the lid: Use a can opener to remove the top of the can. Be careful to avoid sharp edges. You may also want to smooth any sharp edges with a metal file.
- Create the ornament base:
- Cut the Can: If the can is too tall, you can cut it to your desired height. Use scissors or a utility knife, and make sure to smooth any sharp edges afterward.
- Punch a Hole: Use a drill or a hammer and nail to create a small hole near the top edge of the can. This is where you’ll attach the ribbon or twine for hanging.
- Paint and decorate:
- Paint the Can: Apply a base coat of paint to the outside of the can. You might need a few coats, depending on the color and type of paint. Allow the paint to dry completely between coats.
- Add Decorations: Once the paint is dry, decorate your ornament as desired. You can use glitter, buttons, beads, or any other craft supplies you like. Use hot glue to securely attach these decorative elements.
- Attach the hanging mechanism.
- Thread the Ribbon or Twine: Cut a length of ribbon or twine, thread it through the hole you made, and tie a knot to create a loop for hanging.
- Final Touches:
- Add a Hook (Optional): If you want to add a hook for hanging on a tree, you can use a small ornament hook or create a hook shape with wire and attach it to the top of the can.
Tips:
- Custom Designs: Feel free to experiment with different designs, such as painting snowflakes, stars, or other holiday motifs.
- Safety First: Always handle sharp edges and tools with care to avoid injuries.
Enjoy creating your repurposed tin can ornaments and adding a touch of handmade charm to your Christmas decorations!
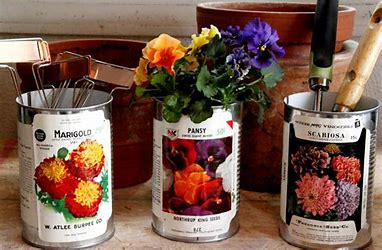
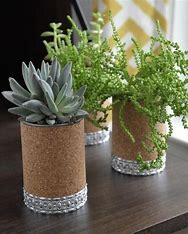
Use some decoupaged seed packs and tin cans to create rustic planters that have an ancient appearance. A lovely selection of old seed packs can be downloaded from the lesson.
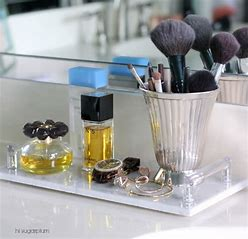
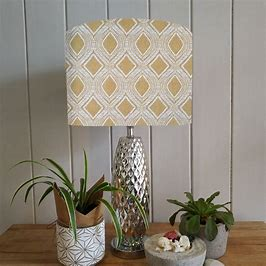
4. Marrimekko Wallpaper Desk Organizer

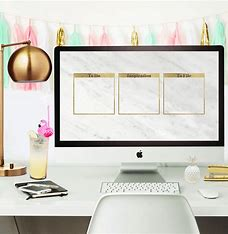
Creating a Marrimekko wallpaper desk organizer is a fantastic way to add a stylish, personalized touch to your workspace. Marrimekko is known for its bold, vibrant patterns, so using their wallpaper will make your desk organizer both functional and visually appealing. Here’s a step-by-step guide to help you make one:
Materials You’ll Need:
- Marrimekko Wallpaper (or any wallpaper with a pattern you like)
- Cardboard (or sturdy poster board)
- Ruler or Measuring Tape
- Craft knives or Scissors
- Glue (PVA glue or a strong adhesive)
- Tape (optional, for additional reinforcement)
- Pencil or Pen
- Paint (optional, for decorating the edges)
Instructions:
- Design Your Organizer:
- Decide on the Dimensions: Determine the size and shape of your desk organizer. Common components include pencil holders, paper trays, and small compartments for office supplies.
- Sketch Your Design: Make a rough sketch of your organizer, including dimensions and sections. This will guide you as you cut and assemble the pieces.
- Prepare the cardboard:
- Cut the Cardboard: Measure and cut the cardboard according to the dimensions of your design. You’ll need pieces for the base, sides, and any dividers or compartments.
- Reinforce If Needed: For added sturdiness, you can double up the cardboard layers or use additional pieces to reinforce corners and sides.
- Cover with wallpaper:
- Measure and Cut Wallpaper: Measure the pieces of wallpaper needed to cover each cardboard section. Cut the wallpaper slightly larger than the cardboard pieces to ensure complete coverage.
- Apply Glue: Apply glue to the cardboard, then carefully place the wallpaper on top, smoothing out any wrinkles or bubbles.
- Trim Excess: Once the glue is dry, trim any excess wallpaper from the edges of the cardboard pieces.
- Assemble the organizer.
- Glue the Pieces Together: Assemble your desk organizer by gluing the cardboard pieces together. Start with the base and sides, and then add any dividers or compartments.
- Reinforce with Tape: For extra strength, you can use tape on the inside joints or corners, especially if you anticipate heavy use.
- Add Final Touches:
- Paint Edges (Optional): If desired, paint the edges of the cardboard for a finished look, especially if any raw edges are visible.
- Let Dry Completely: Ensure all glue and paint are fully dry before using your organizer.
- Customize Further (Optional):
- Add Accessories: You can enhance your desk organizer with additional elements like decorative knobs, labels, or small containers inside the compartments.
Tips:
- Pattern Alignment: When applying wallpaper, pay attention to the pattern alignment to ensure a cohesive look.
- Protective Coating: Consider adding a clear protective coating to the wallpaper to make it more durable and resistant to wear.
Your Marrimekko wallpaper desk organizer is now ready to use, bringing both functionality and a touch of chic design to your workspace!
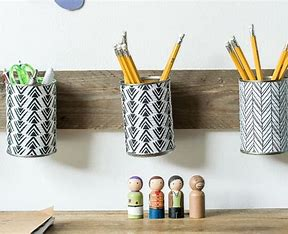
A tin can wall organizer is a practical and stylish way to keep your space tidy and add a touch of creativity to your walls. Here’s a step-by-step guide to help you make your own:
Materials You’ll Need:
- Empty Tin Cans (e.g., soup cans or coffee cans)
- Can Opener
- Paint (acrylic or spray paint)
- Paintbrushes or Sponges
- Hot Glue Gun and Glue Sticks
- Command Strips or Screws and Wall Anchors (for mounting)
- Ribbons or Twine (for decoration, optional)
- Drill or Hammer and Nail (for making holes if using screws)
- Sponge or Scrub Brush (for cleaning)
- Decorative Items (e.g., buttons, beads, or stickers)
Instructions:
- Prepare the Tin Cans:
- Clean the Cans: Remove the labels and any adhesive residue. Wash the cans thoroughly and dry them completely.
- Remove the Lids: Use a can opener to carefully remove the top of the cans. Smooth any sharp edges with pliers or a metal file.
- Optional: If you want to make the cans more visually appealing, you can remove the bottom of the cans as well.
- Paint and decorate the cans.
- Paint the Cans: Apply a coat of paint to the outside of the cans. You may need multiple coats for even coverage. Let the paint dry completely.
- Add Decorations: Once the paint is dry, you can decorate the cans with additional items like stickers, beads, or ribbons. You can also use stencils to add patterns or designs.
- Prepare for Mounting:
- Make Holes for Hanging: Depending on your mounting method, you may need to make holes in the cans for hanging. If using screws, drill two small holes near the top edge of each can. If using Command Strips, this step is not necessary.
- Assemble the organizer.
- Attach the cans together. Arrange the cans in the desired configuration (e.g., in a row or a grid) and glue them together with a hot glue gun. Ensure they are securely attached and aligned.
- Add Hooks (Optional): If you want to add hooks or other functional elements to the organizer, attach them to the cans using glue or screws.
- Mount the organizer on the wall.
- Using Command Strips: Attach Command Strips to the back of each can and press them firmly against the wall. Follow the instructions on the Command Strip packaging for the best results.
- Using Screws: If using screws, place wall anchors in the wall where you want to hang the organizer. Line up the cans with the anchors and screw them into place. Make sure the cans are level before tightening the screws.
- Fill and use:
- Organize Your Items: Place pens, pencils, craft supplies, or other small items into the cans. Your wall organizer is now ready to help keep your space organized.
Tips:
- Plan Your Layout: Before attaching the cans to the wall, arrange them on a flat surface to ensure you like the configuration.
- Protective Coating: For added durability, consider applying a clear acrylic sealer over the paint.
This DIY tin can wall organizer is not only functional but also a great way to recycle and upcycle materials into something beautiful and useful. Enjoy your new, custom-made wall organizer!
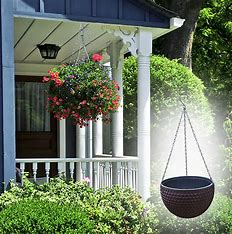
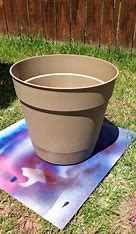
6. Trendy Upcycled Planters With Velvet
Nowadays, velvet is a highly popular choice for interior design. Furthermore, these glitzy repurposed tin can planters are totally in style. Velvet ribbon makes ombre effects simple to achieve.
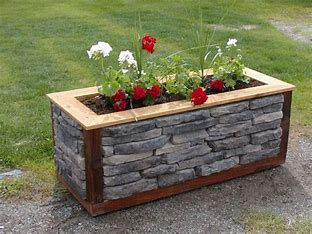
Creating an herb wall planter is a fantastic way to grow fresh herbs right in your kitchen or outdoor space, and it adds a touch of greenery to your decor. Here’s a step-by-step guide to making your own herb wall planter:
Materials You’ll Need:
- Wooden pallets or Wooden Planter Boxes (for the main structure)
- Pots or Containers (small pots or containers for the herbs)
- Potting Soil
- Herb Seeds or Seedlings (e.g., basil, thyme, rosemary, parsley)
- Drill (if using a wooden pallet or wooden boxes)
- Screws or Nails
- Wire or Strong Cord (for securing pots if needed)
- Paint or Wood Sealant (optional, for finishing)
- Hanging Hardware (e.g., wall hooks, brackets, or Command strips)
- Plant Labels (optional, for identifying herbs)
Instructions:
- Prepare the Planter:
- Select Your Base: Choose a wooden pallet, wooden planter boxes, or another suitable base. If using a wooden pallet, ensure it’s clean and sturdy.
- Finish the Wood (Optional): If you want to paint or seal the wood, do so now and let it dry completely.
- Install Containers:
- Drill Holes (If Needed): If you’re using a wooden pallet or boxes, drill holes for the containers. The size of the holes should match the diameter of the pots or containers.
- Secure Containers: Place the pots or containers into the holes and secure them. You can use screws or nails to fasten the pots, or you can use wire or cord to attach the pots to the wood. Ensure they are firmly in place.
- Prepare for planting:
- Add Potting Soil: Fill the pots or containers with potting soil, leaving a little space at the top.
- Plant the herbs: Sow herb seeds or plant seedlings into the soil. Follow the specific planting instructions for each herb, such as planting depth and spacing.
- Mount the Planter:
- Choose a location: Select a location for your herb wall planter, such as a sunny wall in your kitchen or garden.
- Install Hanging Hardware: If you’re using a wooden pallet, you may need wall hooks or brackets to hang it. If using wooden boxes, you might need brackets or mounting hardware to secure them to the wall.
- Hang the Planter: Secure the planter to the wall using the hanging hardware. Ensure it’s level and stable.
- Care for Your Herbs:
- Water Regularly: Keep the soil moist but not waterlogged. Herbs generally prefer well-drained soil.
- Provide Sunlight: Most herbs need at least 6 hours of sunlight per day. Ensure the planter is placed in a spot where it will receive adequate light.
- Fertilize as Needed: Depending on the herbs you’re growing, you may need to fertilize occasionally. Follow the guidelines for each herb type.
- Label the herbs (optional):
- Add Labels: Use plant labels to identify each herb, especially if you’re growing multiple types. This can help with care and harvesting.
Tips:
- Choose Herbs Wisely: Select herbs that will thrive in your specific growing conditions (light, temperature, etc.).
- Maintenance: Regularly trim and harvest your herbs to encourage growth and prevent them from becoming too leggy.
- Water Drainage: Ensure there’s adequate drainage in your containers to prevent root rot. If using pots without drainage holes, consider drilling some or adding gravel at the bottom.
Your herb wall planter will not only help keep your herbs fresh and within easy reach but also enhance the beauty of your space with a touch of greenery. Enjoy growing and harvesting your herbs!
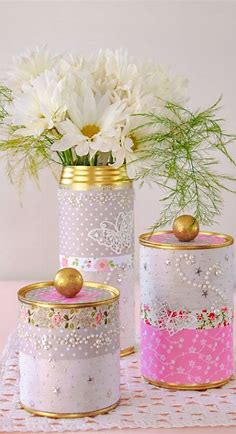
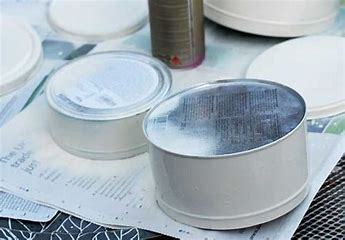
8. Upcycle Tins With A Faux Marble Effect
Repurpose outdated cans of coffee and biscuits to create opulent storage or gift containers. All you need to make this fantastic faux marble finish is some nail polish.
9. Gold Crushed Can DIY Planters
Creating gold crushed can DIY planters is a stylish and eco-friendly way to upcycle aluminum cans into eye-catching planters. Here’s a step-by-step guide on how to make these unique planters:
Materials You’ll Need:
- Empty Aluminum Cans (e.g., soda cans or beer cans)
- Can Opener
- Gold Spray Paint (or acrylic paint if you prefer)
- Paintbrushes (if using acrylic paint)
- Potting Soil
- Plants (small plants or seedlings)
- Drill or Screwdriver (for drainage holes)
- Pliers (for crushing the cans)
- Protective Gear (gloves and eye protection)
- Drop Cloth (to protect surfaces from paint)
Instructions:
- Prepare the Cans:
- Clean the Cans: Remove labels and clean the cans thoroughly. Ensure they are dry before proceeding.
- Remove the Tops: Use a can opener to remove the top of each can. Be careful of sharp edges.
- Crush the Cans:
- Crushing: Gently crush the cans to create a crumpled effect. You can use pliers or your hands. Aim for an uneven, textured look to mimic the appearance of crushed metal.
- Smooth Sharp Edges: Use pliers to smooth out any sharp edges around the rim of the cans to avoid injury.
- Add Drainage Holes:
- Drill Holes: Use a drill or a screwdriver to create small drainage holes in the bottom of each can. This will help prevent overwatering and root rot.
- Paint the Cans:
- Apply Gold Paint: If using spray paint, work in a well-ventilated area or outdoors, and cover surfaces with a drop cloth. Hold the spray can about 6-12 inches away from the can and spray evenly. Allow the paint to dry according to the manufacturer’s instructions.
- For Acrylic Paint: If using acrylic paint, apply a few coats with a paintbrush. Let each coat dry completely before applying the next.
- Prepare the planters:
- Add Soil: Fill each painted can with potting soil, leaving about an inch of space at the top.
- Plant Your Plants: Gently plant your chosen plants or seedlings into the soil. Press the soil around the roots to secure them.
- Finish and Display:
- Decorate: If desired, you can add additional decorations or labels to the cans for a personal touch.
- Display: Arrange your gold crushed can planters in a sunny spot where your plants will thrive.
Tips:
- Work Safely: Always wear gloves and eye protection when handling sharp edges and when spray painting.
- Ventilation: Ensure proper ventilation if using spray paint to avoid inhaling fumes.
- Creative Variations: Experiment with different colors or textures. You can use metallic paints for different effects or add patterns with stencils.
These gold crushed can planters will add a touch of glamour and creativity to your space while giving new life to discarded cans. Enjoy your stylish, eco-friendly planters!
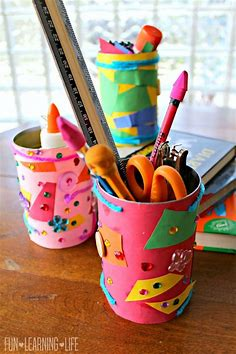
10. Upcycled Old Tin Organizer DIY

Upcycling old tins into a DIY organizer is a great way to repurpose materials and create a functional and stylish storage solution. Here’s a step-by-step guide to help you transform old tins into a handy organizer:
Materials You’ll Need:
- Old Tin Cans (e.g., soup cans, coffee cans, or tea tins)
- Paint (acrylic or spray paint)
- Paintbrushes (for acrylic paint) or Spray Paint (for even coverage)
- Hot Glue Gun and Glue Sticks (for assembling)
- Decorative Paper or Fabric (optional, for covering the cans)
- Scissors or Craft Knife (for cutting paper or fabric)
- Ruler and Pencil (for measuring and marking)
- Small Containers or Dividers (optional, for additional organization)
- Labels (optional, for identifying contents)
Instructions:
- Prepare the Tins:
- Clean the Tins: Remove any labels and clean the cans thoroughly. Make sure they are completely dry.
- Smooth Edges: Use pliers or a metal file to smooth out any sharp edges around the can openings.
- Paint the Tins:
- Base Coat: Apply a coat of primer if necessary, especially if the tins have a glossy finish. Let it dry completely.
- Paint: Apply your chosen paint color. You can use spray paint for a smooth, even finish or acrylic paint with a brush for more control and texture. Apply multiple coats if needed and let each coat dry thoroughly.
- Decorate (Optional):
- Covering with Paper or Fabric: If you prefer a different look, cover the tins with decorative paper or fabric. Measure and cut the paper or fabric to fit around the tin. Use glue to attach it securely, smoothing out any wrinkles. For fabric, you may need to use a fabric glue.
- Add Details: Consider adding embellishments like ribbon, stickers, or decorative labels to enhance the appearance of your organizer.
- Assemble the organizer.
- Arrange the Tins: Decide on the layout for your organizer. You can arrange the tins in a single row, stack them vertically, or create a grid pattern. Make sure the arrangement fits your intended use.
- Attach the Tins: Use a hot glue gun to glue the tins together. Apply glue around the edges where the tins touch and press them firmly together. Allow the glue to set and dry completely.
- Add Dividers or Containers (Optional):
- Create Compartments: If you need additional organization within the tins, use small containers or dividers to separate different items. Glue these in place if necessary.
- Label the Organizer (Optional):
- Add Labels: Label each tin to help identify the contents. You can use pre-made labels, make your own with a label maker, or create custom tags with paper and glue.
- Display and Use:
- Place Your Organizer: Find a suitable spot for your organizer, such as on a desk, shelf, or in a closet. Fill it with office supplies, craft materials, kitchen utensils, or whatever items you need to organize.
Tips:
- Customization: Feel free to customize the organizer based on your needs. You can paint or decorate the tins in various colors, patterns, and finishes.
- Size Variations: Use different sizes of tins to create a more dynamic and versatile organizer.
- Practicality: Ensure that the organizer is practical for its intended use and that the tins are securely attached and stable.
This upcycled tin organizer not only helps keep your space tidy but also adds a personal and creative touch to your home or office. Enjoy your DIY project!
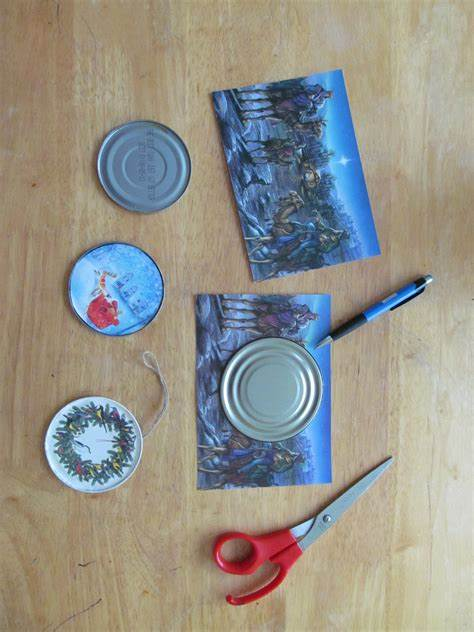
11. Road Map Tins

Creating road map tins is a fantastic way to repurpose old tins and turn them into unique, travel-themed storage containers. These can be great for organizing small items or simply as decorative pieces. Here’s a step-by-step guide on how to make your own road map tins:
Materials You’ll Need:
- Empty Tin Cans (e.g., soup cans, coffee cans)
- Road Maps (old maps or printouts of maps)
- Mod Podge or PVA Glue (for decoupage)
- Scissors (for cutting map pieces)
- Paintbrushes (for applying glue and sealing)
- Clear Sealer (optional, for extra protection)
- Can Opener (for removing lids if not already removed)
- Pliers (for smoothing sharp edges)
- Ruler and Pencil (for measuring and marking)
- Craft Knife (for precision cutting)
Instructions:
- Prepare the Tins:
- Clean the Tins: Wash the cans thoroughly to remove any labels and residue. Ensure they are completely dry.
- Smooth Edges: Use pliers or a metal file to smooth any sharp edges around the can openings.
- Cut the Road Maps:
- Measure and Cut: Measure the surface area of the tin and cut the road map into pieces that will fit. You can choose to cover the entire tin or just specific sections.
- Arrange the Pieces: Lay out the map pieces on the tin to plan the arrangement. You can create a collage effect or cover the tin in a more uniform pattern.
- Apply the Road Map:
- Apply Glue: Using a paintbrush, apply a layer of Mod Podge or PVA glue to the surface of the tin where you will place the map pieces.
- Attach Map Pieces: Carefully place the map pieces onto the glue-coated surface. Smooth out any wrinkles or bubbles with your fingers or a flat tool. Continue until the entire surface is covered or you achieve the desired design.
- Seal the Design:
- Apply a Top Coat: Once the map pieces are dry, apply a top coat of Mod Podge or clear sealer over the entire surface to protect the design and give it a finished look. Let it dry completely. You may need to apply multiple coats for added durability.
- Add Final Touches:
- Decorate (Optional): If desired, you can add additional decorations such as labels, stickers, or small embellishments to enhance the look.
- Attach Lids (If Applicable): If your tin has a removable lid, you can cover it with map pieces as well or paint it to match the design.
- Use and Display:
- Organize or Decorate: Use your road map tins to store small items like office supplies, craft materials, or snacks. Alternatively, display them as decorative pieces in your home.
Tips:
- Precision Cutting: For a neater appearance, use a craft knife to trim any excess map pieces around the edges of the tin.
- Creative Variations: Experiment with different map styles, such as city maps, vintage maps, or even maps from different countries to create a variety of looks.
- Protective Coating: Ensure the final coat of Mod Podge or sealer is thoroughly dry before handling the tins to avoid smudging or peeling.
These road map tins not only provide a functional storage solution but also serve as conversation pieces that celebrate your love for travel and exploration. Enjoy your creative project!
12. Boho Table Lamp
Make a bohemian table lamp by tying rope around two stacked soup cans. I believe it would be entertaining to create a vibrantly striped version of this lamp using the various colours of twine that are available for purchase.
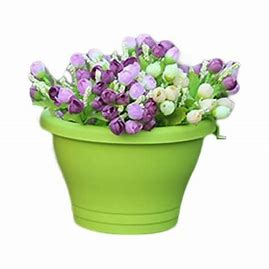
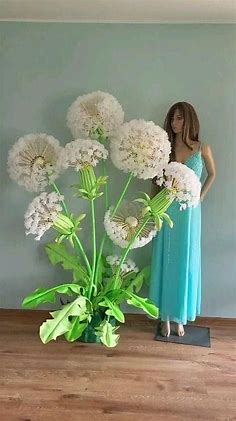
13. Fun and Unique Oriental Vase DIY flower pots
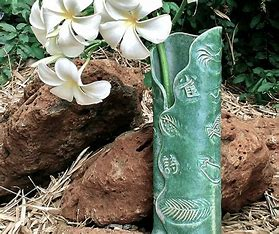
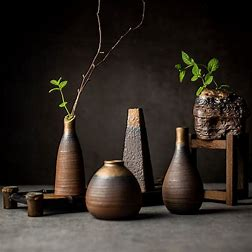
Creating fun and unique Oriental vase DIY flower pots is a wonderful way to add a touch of elegance and personality to your plant display. You can repurpose old vases or pots, giving them an Oriental-inspired makeover. Here’s a step-by-step guide to help you craft your own beautiful Oriental-themed flower pots:
Materials You’ll Need:
- Vases or Flower Pots (existing or new, ceramic, glass, or plastic)
- Oriental-Style Décor:
- Oriental Paper (e.g., rice paper, decorative paper with traditional patterns)
- Oriental Fabric (e.g., silk or brocade fabric)
- Paint (acrylic paint in colors like red, gold, blue, or black)
- Decoupage Glue or Mod Podge
- Gold Leaf or Gold Paint (for accents, optional)
- Paintbrushes (various sizes)
- Scissors or Craft Knife (for cutting paper or fabric)
- Sponge (for texturing, optional)
- Small Brush (for applying gold leaf or paint accents)
- Clear Sealer (optional, for protection)
- Ruler and Pencil (for measuring and marking)
- Plants (small plants or flowers for planting)
Instructions:
- Prepare the Vases or Pots:
- Clean the Surface: Ensure the vases or pots are clean and dry. Remove any labels or adhesive residue.
- Prime the Surface (Optional): If your vase or pot has a glossy finish, applying a primer can help the paint adhere better.
- Apply Base Paint:
- Choose a Base Color: For a classic Oriental look, use colors like deep red, navy blue, or black.
- Paint the Vase or Pot: Apply a coat of base paint to the entire surface. Allow it to dry completely. Apply additional coats if necessary for even coverage.
- Add Oriental Décor:
- Prepare Oriental Paper or Fabric: Cut the paper or fabric to fit the surface of your vase or pot. If using fabric, you might want to apply it in sections.
- Apply Découpage Glue: For paper, apply a layer of découpage glue or Mod Podge to the surface where you’ll place the paper. Smooth out the paper to avoid bubbles.
- Attach Paper or Fabric: Carefully place the paper or fabric onto the glued area, smoothing it out as you go. Overlap pieces slightly if needed to cover the entire surface.
- Seal with Glue: Once the paper or fabric is in place, apply a top coat of découpage glue or Mod Podge over the entire surface to seal and protect it. Let it dry completely.
- Add Accents:
- Apply Gold Leaf or Paint: For additional flair, apply gold leaf or gold paint to highlight details or edges. Use a small brush for precision and follow the product instructions for application.
- Create Patterns: If desired, use a sponge or stencil to create traditional Oriental patterns or motifs. You can add delicate floral designs or intricate geometric patterns.
- Seal and Finish:
- Apply Clear Sealer (Optional): For extra durability and shine, apply a clear sealer over the entire surface. Let it dry according to the manufacturer’s instructions.
- Plant Your Flowers or Plants:
- Prepare the Pot: Add potting soil to the vase or pot.
- Plant: Place your chosen plants or flowers into the soil. Water them as needed.
- Display Your Unique Flower Pots:
- Find a Spot: Display your Oriental-inspired flower pots in your home or garden. They can make stunning centerpieces or accents.
Tips:
- Experiment with Patterns: Oriental design features various motifs, including floral patterns, dragons, and geometric shapes. Choose designs that resonate with your personal style.
- Layering: For a more textured look, consider layering different materials or adding additional paint layers for depth.
- Protective Coating: Ensure that the final coat is dry before handling to prevent smudging or peeling.
By following these steps, you can create beautiful, unique Oriental vase flower pots that enhance your décor and showcase your creativity. Enjoy your DIY project!
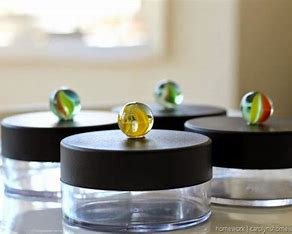
14. How to transform tin cans into candles
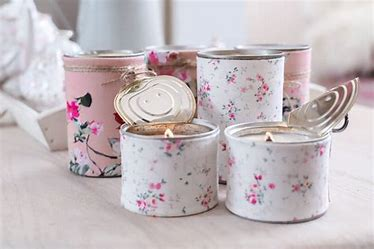
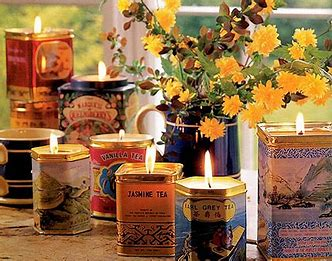
I adore that some of these candles still have their lids on. They add a whimsical touch to this lovely craft!
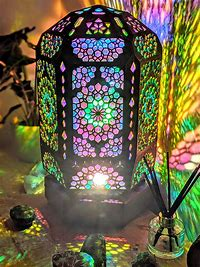
15. Tin Punched Votive Candles
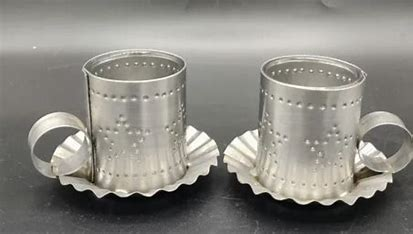
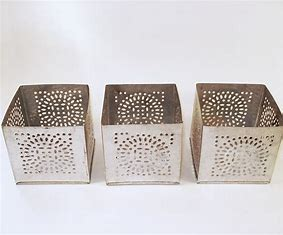
Discover a clever method for poking holes in tin cans without crushing them. Then turn this into some really nice candlestick holders. You can alter the wording according to the season, making it an enjoyable way to decorate for every holiday.
16. A fun DIY project with pegboard and soup cans
Combining a pegboard with repurposed soup cans is a creative and functional DIY project that allows you to organize and display items in a fun and practical way. Here’s a step-by-step guide to making a pegboard organizer with soup cans:
Materials You’ll Need:
- Pegboard (size of your choice, available at hardware stores)
- Soup Cans (cleaned and labels removed)
- Paint (optional, for decorating the cans and pegboard)
- Paintbrushes or Spray Paint (if painting)
- Hot Glue Gun and Glue Sticks (or other adhesive options)
- Drill (for mounting the pegboard, if needed)
- Pegboard Hooks or S-hooks (for hanging cans on the pegboard)
- Pliers (for smoothing edges)
- Scissors (for trimming any excess paper or fabric)
- Decorative Paper or Fabric (optional, for decorating the cans)
- Labels (optional, for identifying contents in the cans)
Instructions:
- Prepare the Soup Cans:
- Clean the Cans: Remove any labels and adhesive residue. Wash the cans thoroughly and let them dry completely.
- Remove Sharp Edges: Use pliers to smooth any sharp edges around the top of the cans.
- Paint and Decorate (Optional): If you want to paint or cover the cans with decorative paper or fabric, do so now. Apply paint or glue paper/fabric to the outside of the cans. Let it dry completely.
- Prepare the Pegboard:
- Paint or Decorate (Optional): If you want to add a background color or design to the pegboard, do so before mounting it. Use paint or decorative paper and let it dry.
- Mount the Pegboard: Choose a location for your pegboard and mount it securely on the wall using screws or wall anchors. Make sure it’s level and firmly attached.
- Attach Hooks or S-hooks:
- Install Hooks: Insert pegboard hooks or S-hooks into the pegboard. Arrange them based on where you want to hang the soup cans. Ensure the hooks are spaced appropriately for the size and number of cans you plan to use.
- Prepare the Cans for Hanging:
- Attach Hooks to Cans: Depending on the design of your pegboard hooks, you may need to attach small hooks or make modifications to the cans. If using S-hooks, simply place them around the top rim of the can.
- Hang the Soup Cans:
- Hang on Pegboard: Place the prepared cans onto the hooks or S-hooks on the pegboard. Ensure they are securely in place and adjust the positioning if needed.
- Organize and Display:
- Fill the Cans: Use the cans to organize small items like office supplies, craft materials, or kitchen utensils. You can also use them to hold plants or other decorative elements.
- Label the Cans (Optional): If you’re using the cans for storage, consider adding labels to identify their contents. You can use stickers, chalkboard labels, or printed tags.
Tips:
- Customization: Personalize the pegboard and cans with your favorite colors and patterns. Consider adding additional decorations or accessories like small shelves or baskets if needed.
- Versatility: This setup is versatile and can be used in various settings, including kitchens, craft rooms, garages, or home offices.
- Safety: Ensure that the cans are securely attached and that the pegboard is mounted properly to avoid any accidents.
This DIY project not only helps you organize your space but also adds a creative and personalized touch to your décor. Enjoy your functional and fun pegboard and soup can organizer!
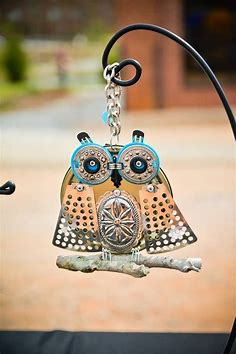
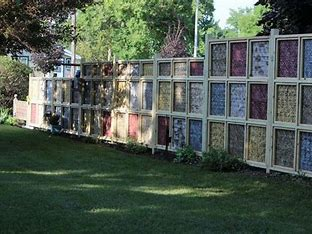
Create these adorable owls by combining cans with jar and bottle lids. Use them as interesting window sill planters or hang them in the garden for decoration.
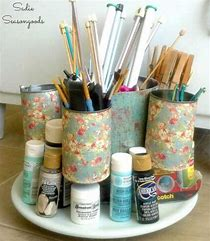
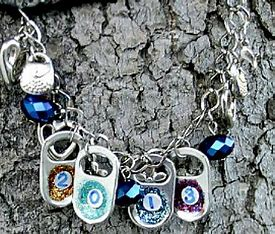
18. Tin Can Craft Ribbon Organize
Make a lovely arrangement for your ribbons by using these exquisitely embellished tin cans. To make it simple to reach the ribbons, punch holes into the cans’ sides. It would also be useful for storing cooking string and garden rope.
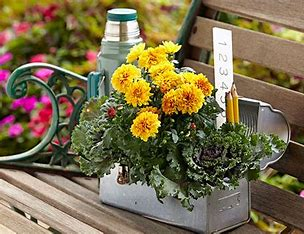
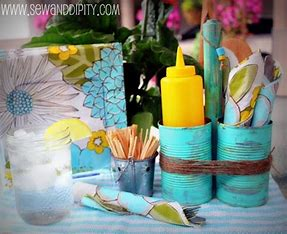
19. Outdoor Drink Holder Tutorial
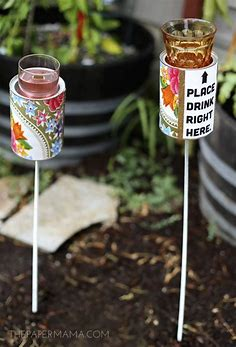
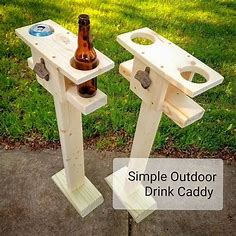
This is such a creative idea, perfect for backyard gatherings in the summer. Not to mention how gorgeous is the decoupaged decoration on the tin can.
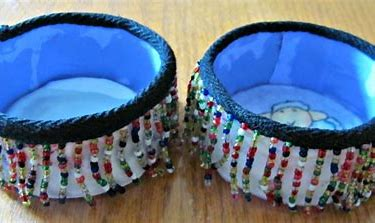
Creating a beaded tin can is a charming and creative DIY project that adds a touch of elegance and texture to an ordinary tin can. You can use it as a decorative vase, a pencil holder, or a storage container. Here’s how to make your own beaded tin can:
Materials You’ll Need:
- Empty Tin Can (e.g., soup can, coffee can)
- Beads (various sizes and colors, depending on your design)
- Hot Glue Gun and Glue Sticks (for attaching beads)
- Paint (optional, for base color)
- Paintbrush (if painting)
- Scissors (for cutting any excess materials)
- Ribbon or Trim (optional, for additional decoration)
- Protective Gear (gloves, to handle sharp edges)
Instructions:
- Prepare the Tin Can:
- Clean the Can: Remove any labels and adhesive residue from the tin can. Wash it thoroughly and let it dry completely.
- Smooth Edges: Use pliers or a metal file to smooth any sharp edges around the rim of the can.
- Paint the Can (Optional):
- Apply Base Paint: If you want a solid color background for your beads, apply a coat of paint to the entire can. Choose a color that complements your beads. Allow the paint to dry completely before proceeding.
- Prepare the Beads:
- Select Beads: Choose beads in colors and sizes that fit your design. You can mix and match beads for a vibrant look or use a single color for a more cohesive appearance.
- Arrange Beads: Before gluing, arrange the beads on the can to plan your design. This step helps visualize the final look and ensures you have enough beads.
- Attach the Beads:
- Heat Glue Gun: Plug in your hot glue gun and let it heat up.
- Start Gluing: Apply a small amount of hot glue to the back of a bead and press it onto the tin can. Hold it in place for a few seconds to ensure it sticks. Continue attaching beads in your desired pattern or design.
- Work in Sections: If you’re working on a larger design, consider working in sections to make sure the glue doesn’t dry out before you place the beads.
- Add Additional Decorations (Optional):
- Ribbon or Trim: Once the beads are attached and the glue is dry, you can add ribbon or trim around the top or bottom edge of the can for a finished look.
- Additional Embellishments: Consider adding other decorations such as small charms, sequins, or fabric to enhance the design.
- Final Touches:
- Inspect and Adjust: Check the can to make sure all beads are securely attached and adjust any that may have shifted during the process.
- Clean Up: Remove any excess glue strings and tidy up the area.
- Use and Display:
- Add Contents: Use your beaded tin can as a vase for flowers, a pencil holder, or a decorative container for small items.
- Display: Place your finished project in a prominent spot where its beauty can be admired.
Tips:
- Bead Types: Experiment with different types of beads, such as glass, wooden, or plastic, to achieve different textures and effects.
- Design Planning: Sketch out your design on paper before starting to get a clear idea of how you want your final product to look.
- Be Careful with Glue: Hot glue can be very hot and may burn if it comes into contact with skin. Handle with care and use tools if necessary.
This beaded tin can DIY project adds a personalized and decorative touch to everyday items, transforming them into unique pieces of art. Enjoy your creative endeavor!