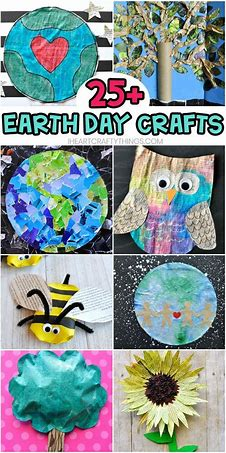


With Earth Day approaching, isn’t it about time you organised a do-it-yourself project to promote environmental preservation and increase public awareness of conservation? Why not tackle some eco-friendly crafts this year in observance of this unique day?
You just need a little imagination to create something amazing and useful if you already have a plethora of outdated technology lying around your home.
Continue reading for some easy-to-follow DIY electronics recycling projects that will help you get more use out of your outdated electronics.
- Old TV Into Storage

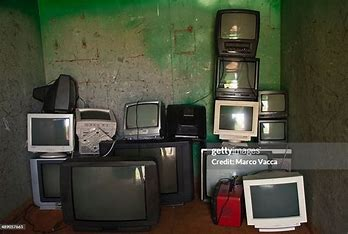
If you’re planning to store an old TV, here are some tips to do it safely:
- Clean It First: Dust and wipe down the TV to prevent any grime buildup during storage.
- Use Original Packaging: If you still have the original box and foam inserts, use them for the best protection.
- Wrap It Up: If the original packaging isn’t available, wrap the TV in bubble wrap or moving blankets to protect it from scratches.
- Store Upright: Always store the TV upright to avoid damaging the screen.
- Temperature Control: Keep it in a climate-controlled space to prevent damage from extreme heat or humidity.
- Avoid Stacking: Don’t place heavy items on top of the TV to avoid screen pressure.
- Disconnect Cables: Remove all cables and store them separately to avoid tangling or damage.
- Label Everything: If you’re storing multiple items, label your boxes for easier retrieval.
Are you looking to get rid of the TV, or just putting it away for now?
2. Old CDs Into Art
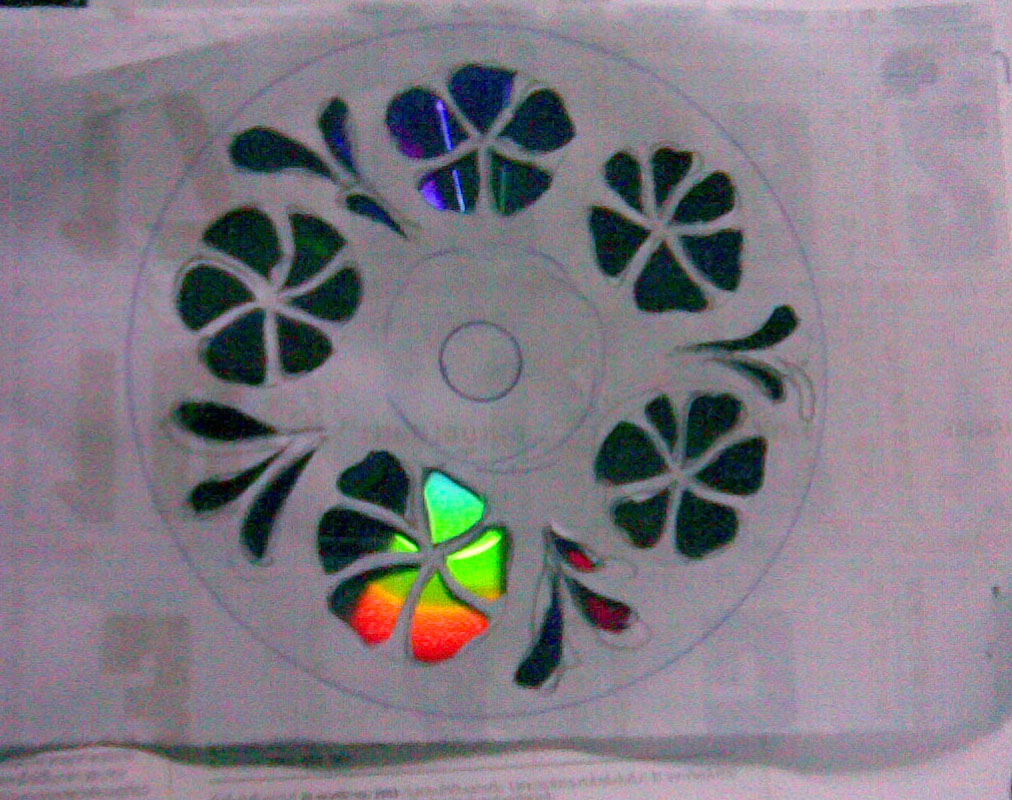

Do you still have some outdated CDs collecting dust in your room that you are unsure how to play? Here’s a fantastic method to transform them into visually striking artwork.
You can complete this easy project in a single day. Wall art, curtain decorations, and mirror frames are a few of the artistic creations you can make.
3. Old Phone Into a Security Camera

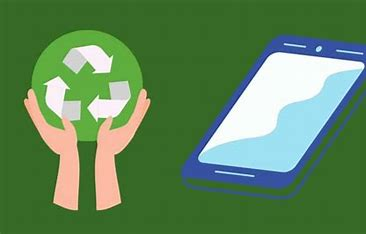
Transforming an old phone into a security camera is a great way to repurpose it! Here’s how to do it:
1. Choose the Right App
Several apps can turn your old phone into a security camera. Some popular options include:
- Alfred: User-friendly and offers cloud storage.
- Manything: Live streaming and recording features.
- IP Webcam (Android): Provides a lot of customization options.
- Presence: Good for monitoring and alerts.
2. Set Up the Phone
- Charge It: Ensure the phone is fully charged or keep it plugged in to avoid battery drain.
- Connect to Wi-Fi: Make sure the phone is connected to your home Wi-Fi network for reliable streaming.
3. Position the Phone
- Select a Location: Choose a spot with a good view of the area you want to monitor. Common places include doorways, living rooms, or driveways.
- Mount It Securely: Use a tripod, a phone holder, or simply place it on a shelf or table. Make sure it’s stable.
4. Adjust Settings
- Enable Motion Detection: Most security camera apps have this feature. It will send you alerts if movement is detected.
- Set Recording Options: Choose whether you want continuous recording, scheduled recording, or event-triggered recording.
5. Monitor Remotely
- Install the Companion App: Download the corresponding app on your primary phone or tablet to view the camera feed.
- Check Notifications: Ensure you receive alerts on your primary device for any detected motion.
6. Privacy Considerations
- Secure Your Wi-Fi: Make sure your home network is secure to prevent unauthorized access.
- Placement: Avoid placing the camera in private areas where privacy might be compromised.
That’s it! Your old phone is now a useful security camera. If you need more specific details on any of the steps, just let me know.
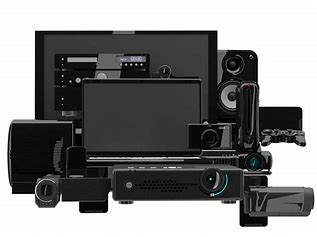
4. Old Webcam Into a Home Security System
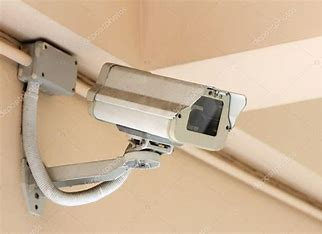
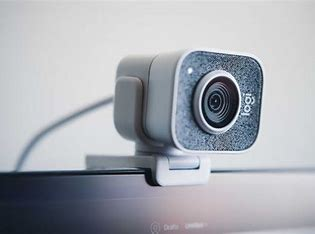
You may repurpose old cameras to add security to your home or place of business. Essentially, depending on your platform and price, cameras will accomplish that task when combined with the appropriate software.
Investing more money on software that allows you to email photographs when motion detection is detected is a wise decision. Yawcam, SecuritySpy, and iSpy are a few of the most popular, dependable, and useful programs.
5. Old iPod Into a Portable Drive
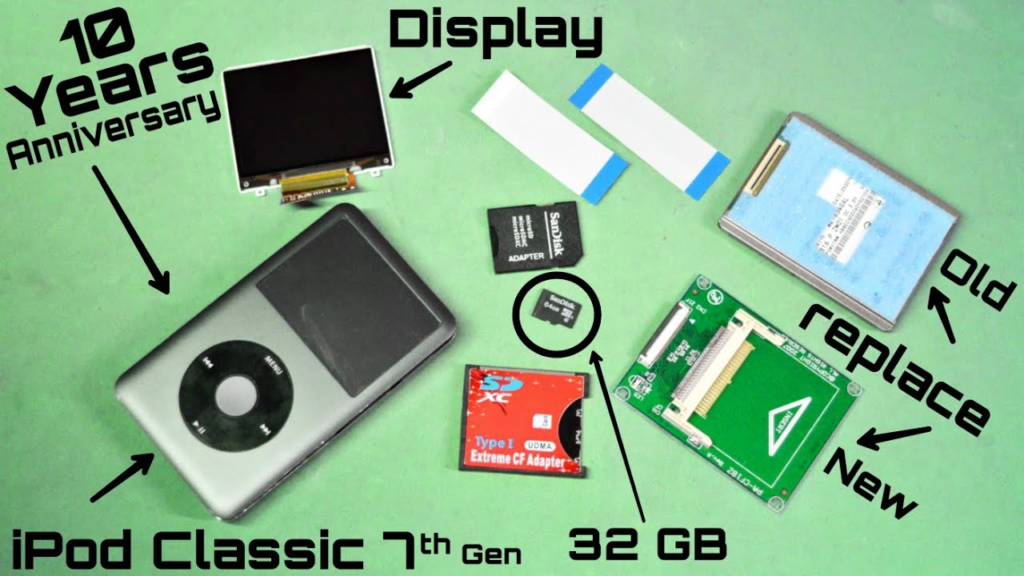
Turning an old iPod into a portable drive is a great way to repurpose it. Here’s how to do it:
1. Check Compatibility
Make sure your iPod supports disk mode. Most older iPods do, but newer models may not.
2. Reset Your iPod
If necessary, reset your iPod to clear out any existing data. Backup anything important first.
3. Enable Disk Mode
For older iPods:
- Connect the iPod to your computer.
- Open iTunes (or Finder on macOS Catalina and later).
- Select your iPod and navigate to the Summary tab.
- Check the box for “Enable disk use.”
4. Format the iPod
To use it as a portable drive, you may need to format it:
- On Windows:
- Open This PC and find your iPod.
- Right-click and select Format.
- Choose FAT32 as the file system for compatibility with both Windows and Mac.
- On Mac:
- Open Disk Utility.
- Select your iPod and choose Erase.
- Format it as MS-DOS (FAT).
5. Transfer Files
Once formatted, you can drag and drop files onto your iPod like a regular USB drive.
6. Eject Safely
Always eject your iPod safely from your computer before disconnecting it to prevent data corruption.
7. Using the iPod
You can now use your iPod as a portable storage device! Just connect it to any computer to access your files.
If you have any specific questions or need further assistance, feel free to ask.
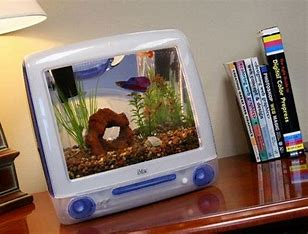
6. Old Computer Into a Pet Bed
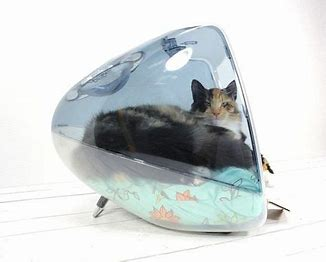

For your nostalgia, consider this: Do you recall the green, red, orange, and blue-colored iMac computers? Nevertheless, you can turn those famous PCs into stylish pet beds for tiny dogs and cats.
The computer’s inside parts and screen are swapped out for a detachable, machine-washable cushion that makes a cosy haven for tiny animals.
7. Old Computer Into a Jukebox
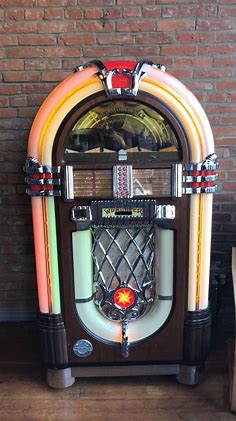
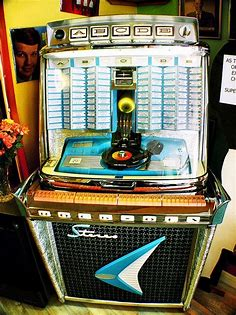
Transforming an old computer into a jukebox is a fun project! Here’s how to set it up:
1. Gather Your Materials
- Old Computer: Ensure it has enough storage and decent audio capabilities.
- Speakers: Good quality speakers will enhance sound quality.
- Software: Choose a music player or jukebox software (see below for options).
2. Choose Your Software
Here are some popular jukebox software options:
- Jukebox Software: Applications like Karaoke Jukebox or XMix provide a user-friendly interface.
- Media Players: Programs like VLC, Foobar2000, or Winamp can also be configured for jukebox use.
3. Organize Your Music Library
- Transfer Music: Copy your music files to the old computer.
- Organize: Create folders by genre, artist, or album for easier navigation.
4. Install and Configure Software
- Install Your Chosen Software: Follow the installation instructions for your selected jukebox software.
- Import Music: Add your music library to the software.
- Customize Settings: Adjust settings like playback options, equalizer settings, and display preferences.
5. Set Up the Interface
- Touchscreen Option: If you have a touchscreen monitor, it can enhance the jukebox experience.
- Remote Control: Consider using a smartphone app (like VLC Remote) to control playback from a distance.
6. Connect Speakers
- Audio Setup: Connect your computer to external speakers for better sound quality. You can use USB speakers or standard audio jacks.
7. Create a User-Friendly Playlist
- Make Playlists: Create playlists or queues of songs for easy access.
- Shuffle and Repeat: Enable shuffle and repeat options if desired.
8. Test Your Jukebox
- Play some songs to test the sound quality and functionality. Make any necessary adjustments.
9. Final Touches
- Decorate: Consider adding a decorative touch, like a themed skin for the software or some artwork around the computer setup.
- Remote Access: If desired, set up remote access to control the jukebox from other devices.
Now you’re ready to enjoy your new jukebox! If you need any specific recommendations or assistance, let me know.
8. Old Computer Into a Home Theater
Even though it might not be the greatest option for meeting your everyday demands right now, your old workhorse can make a great dedicated video hub. In addition to still running a web browser, your outdated computer might feature a DVD player and allow you to stream media from websites like Netflix, Hulu, and YouTube.
It is essential to test your old Mac or PC to make sure it can handle the type of video playback you have chosen before investing in additional equipment for this project. You should consider upgrading your outdated computer with a faster video card and more RAM.
9. Old Computer Into an Aquarium

Transforming an old computer into an aquarium is a creative and unique project! Here’s how to do it safely and effectively:
1. Gather Materials
- Old Computer Case: Ensure it’s clean and free of sharp edges.
- Aquarium Components:
- Glass or acrylic for the tank (if needed)
- Substrate (gravel, sand, etc.)
- Plants (real or artificial)
- Filter and heater (if necessary)
- Fish (if you plan to keep live fish)
2. Prepare the Computer Case
- Disassemble: Carefully remove all internal components (motherboard, power supply, etc.) from the computer case.
- Clean: Thoroughly clean the case to remove dust and any potentially harmful residues.
- Seal Any Holes: Use silicone sealant to cover any openings to prevent leaks and to keep water contained.
3. Design the Aquarium
- Layout: Decide how you want the interior to look. Plan where to place the substrate, plants, and any decorations.
- Install a Divider (optional): If you want to separate different areas (for example, a filter section), you can use acrylic sheets to create a divider.
4. Add Substrate and Decorations
- Layer Substrate: Add your chosen substrate at the bottom of the tank.
- Add Plants and Decorations: Place any plants, rocks, or decorations as desired.
5. Install Filtration and Heating
- Filter: If you’re keeping fish, install a small filter. You can hide it behind decorations.
- Heater: If you need to maintain a specific temperature, install a small aquarium heater.
6. Fill with Water
- Slowly fill the aquarium with water to avoid disturbing the substrate and decorations. Use a plate or bowl to diffuse the water flow.
7. Cycle the Tank
- Cycle: Allow the aquarium to cycle for several weeks to establish beneficial bacteria before adding any fish. You can use test kits to monitor water parameters.
8. Add Fish (if applicable)
- Once the tank is cycled, you can introduce fish gradually. Make sure to choose species that are compatible and appropriate for your tank size.
9. Maintenance
- Regularly check water quality and perform water changes as needed. Clean the filter and monitor the health of your fish and plants.
10. Enjoy Your Creation
- Decorate the exterior if desired, and enjoy your unique aquarium!
If you have any questions or need specific tips along the way, feel free to ask.
10. Recycled Materials Into a Robotic Arm
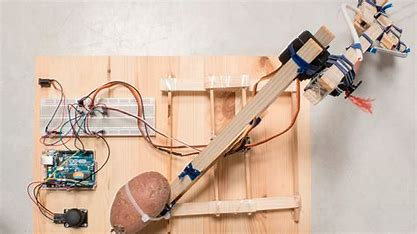
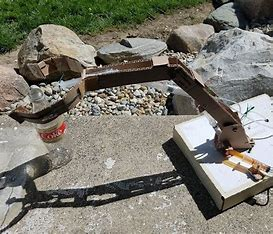
Everyone has moments of laziness. Isn’t it wonderful to possess a device or equipment that can simplify life?
Even if it can’t replace your personal butler in every way, this robotic arm will nonetheless simplify your life and be a lot of fun. Because recyclable materials like nuts, screws, strings, and wires may be used, it’s also reasonably priced.
A do-it-yourself air conditioner project will be worthwhile if you still have additional waste materials.