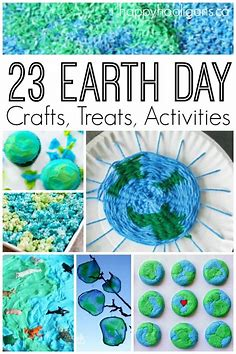
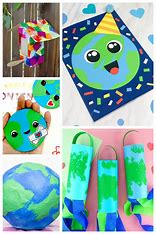
Here are some fun and creative Earth Day craft ideas for both kids and adults that celebrate our planet!
For Kids:
- Recycled Art Collage: Gather old magazines, newspapers, and cardboard. Let kids create a collage representing their vision of Earth using cut-out images and drawings.
- Nature Scavenger Hunt: After a nature walk, collect leaves, twigs, and flowers. Use these items to create nature-inspired art or a collage on paper.
- DIY Seed Bombs: Mix clay, compost, and native wildflower seeds. Form small balls and dry them. Kids can toss these in their garden or local areas to promote wildflower growth.
- Egg Carton Planters: Cut an egg carton into individual cups, fill them with soil, and plant seeds. Kids can decorate the carton with paints or markers.
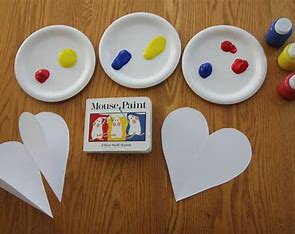
- Earth Day Masks: Use paper plates to create masks of animals or the Earth itself. Kids can paint and decorate them using various craft materials.
For Adults:
- Upcycled Planters: Transform old containers, like tin cans or glass jars, into stylish planters. Decorate them with paint or fabric, then plant herbs or flowers.
- Earth-Themed Wall Art: Create a large canvas or wooden board piece using mixed media (e.g., paints, fabric, natural elements) that represents Earth or an environmental message.
- Mason Jar Terrariums: Use mason jars to create mini ecosystems. Layer soil, stones, and plants, then decorate the jar to display in your home.
- Fabric Tote Bags: Upcycle old T-shirts into reusable shopping bags. Simply cut and tie the bottom to create a sturdy and eco-friendly tote.
- DIY Beeswax Wraps: Make your own food wraps using cotton fabric, beeswax, and jojoba oil. These are a great alternative to plastic wrap!
For Everyone:
- Community Clean-Up Signs: Get together with family or friends to create colorful signs for a community clean-up. Use recycled materials and decorate them with fun messages about caring for the Earth.
- Eco-Friendly Journals: Use old paper and cardboard to create a journal. Decorate the cover with eco-themed designs and use it to jot down thoughts on sustainability.
- Nature Mandalas: Collect natural items like leaves, stones, and flowers to create beautiful mandalas on the ground. This can be a calming and meditative activity for all ages.
- Earth Day Banners: Make a banner with positive messages about Earth and the environment. Use fabric, paint, and string to hang it in a visible area.
- Plant a Tree Together: Organize a group activity to plant trees in your community. Create decorations for the tree with biodegradable materials to celebrate its growth.
These crafts can help foster a love for the environment and promote sustainability while being creative and fun!
- DIY Safari Binoculars

You can simply make these incredibly unusual binoculars at home. You can adorn the binoculars with some adorable animal design paper. You can utilise any leftover material to patch and link them together.
2. Happy Earth Sewing Crafta
Here are some delightful sewing craft ideas for celebrating Earth Day that are perfect for all skill levels!
1. Recycled Fabric Banners
- Materials: Old clothes, fabric scraps, string, and fabric glue.
- Instructions: Cut fabric into shapes like leaves, flowers, or the Earth. Attach them to a long string to create a colorful banner to hang up for Earth Day.
2. Eco-Friendly Tote Bags
- Materials: Old T-shirts or fabric remnants.
- Instructions: Cut the sleeves off an old T-shirt, turn it inside out, and sew or tie the bottom shut. Decorate with fabric markers or patches.
3. Nature-Themed Patches
- Materials: Fabric, embroidery thread, and a sewing needle.
- Instructions: Create small patches featuring nature designs (like trees, flowers, or animals). Sew them onto bags, jackets, or hats to show your love for the Earth.
4. Fabric Scrap Bookmarks
- Materials: Fabric scraps, felt, and a sewing machine or needle.
- Instructions: Cut fabric into rectangles, layer them with felt, and sew around the edges. These eco-friendly bookmarks make great gifts!
5. Earth Pillows
- Materials: Blue and green fabric, stuffing.
- Instructions: Cut circles from blue and green fabric to represent Earth. Sew them together, leaving a small opening to stuff with filling, then sew shut.
6. Reusable Snack Bags
- Materials: Cotton fabric and a sewing machine.
- Instructions: Cut fabric into squares, sew three sides together, and use a snap or Velcro for closure. These are great for packing snacks and reducing plastic waste.
7. Flower Pot Covers
- Materials: Old fabric or burlap.
- Instructions: Sew a simple cover for flower pots, adding pockets for tools or seeds. Decorate with stencils or embroidery to give them a personal touch.
8. Earth Day Quilt Squares
- Materials: Fabric scraps in Earth colors.
- Instructions: Create quilt squares with different Earth-themed designs. These can be sewn together to make a quilt that celebrates our planet.
These sewing crafts are not only fun and creative but also help promote sustainability and awareness for Earth Day! Enjoy crafting!
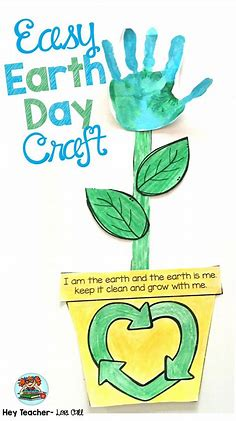
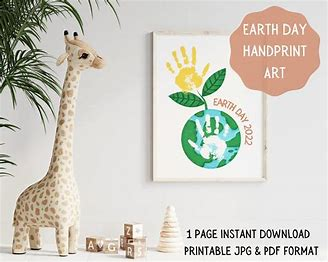
3. Earth Day Handprint Flower Crafta
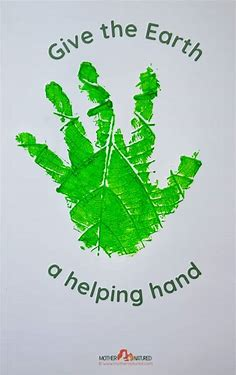
You may increase the effectiveness of your Earth Day celebrations by creating this adorable handprint flower activity. Printouts of trees and flowers can be removed and painted.
4. Pointillism Earth Day Crafta for Kids
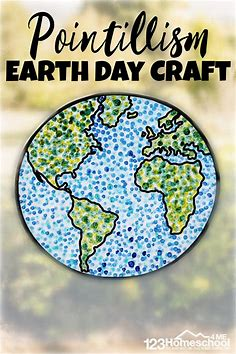
Here’s a fun and engaging pointillism craft idea for kids to celebrate Earth Day!
Pointillism Earth Day Art
Materials Needed:
- White cardstock or heavy paper
- Washable markers or watercolor paints
- Cotton swabs or small paintbrushes
- A pencil (for sketching)
- A cup of water (if using paints)
- Paper towels (for cleanup)
Instructions:
- Choose a Design:
- Start by deciding what you want to create. Ideas include a globe, trees, flowers, or animals that represent Earth.
- Sketch Your Design:
- Lightly sketch your chosen design on the cardstock using a pencil. Keep it simple, as this will be enhanced with pointillism.
- Prepare for Pointillism:
- Explain the pointillism technique: using small dots to create an image. This is a great way to teach kids about the art movement and how colors can blend visually.
- Create Your Artwork:
- With Markers: Use the cotton swabs to apply dots of color to fill in the design. Encourage kids to mix colors by layering dots (e.g., yellow and blue to create green).
- With Paints: If using watercolor, dip the cotton swab or small paintbrush in the paint and apply dots. Make sure to use enough water to create a vibrant color.
- Let It Dry:
- If you used paint, allow the artwork to dry completely. If using markers, they can continue right away.
- Display the Art:
- Once dry, encourage kids to display their artwork at home or create a gallery wall with their Earth-themed pointillism pieces.
Additional Tips:
- Discuss the importance of Earth Day while crafting, and talk about ways to protect the planet.
- Encourage creativity by suggesting they add fun details like animals or plants surrounding their main design.
This craft combines art with an environmental theme, making it a perfect activity for Earth Day! Enjoy!
5. Earth Day Necklace with Salt Dough
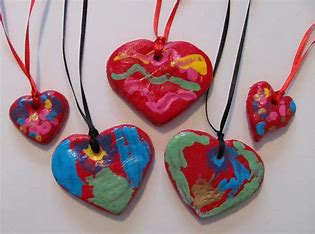
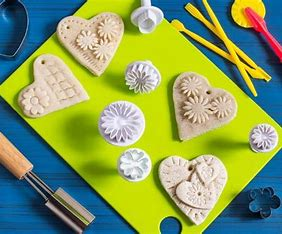
This is an additional salt dough project, focused on making artistic necklaces. These lovely necklaces are quick to make and will give the youngsters a different kind of adornment. You’ll need warm water, bleached flour, and salt for this.
6. DIY Cardboard Sunflower
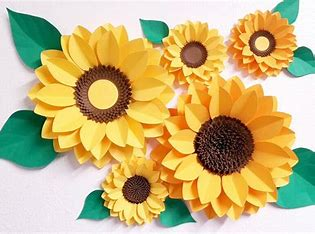
Creating a DIY cardboard sunflower is a fun and simple craft project that’s perfect for all ages! Here’s how you can make one:
DIY Cardboard Sunflower
Materials Needed:
- Cardboard (from boxes or old packaging)
- Yellow paint or yellow construction paper
- Green paint or green construction paper
- Scissors
- Glue or a glue stick
- A pencil
- Optional: brown paint or a brown pom-pom (for the center)
- Optional: a straw or stick (for the stem)
Instructions:
- Prepare the Cardboard:
- Gather your cardboard and cut out a large circle for the sunflower’s center. This can be about 4-6 inches in diameter.
- Create the Petals:
- Cut out several petal shapes from cardboard. Each petal can be about 3-4 inches long and 1-2 inches wide. Aim for around 10-15 petals, depending on how full you want your sunflower to look.
- Paint the Petals:
- If using paint, paint all the petals yellow and set them aside to dry. If using construction paper, trace the petal shapes on yellow paper, cut them out, and skip to the next step.
- Make the Center:
- Paint the large cardboard circle brown, or glue a brown pom-pom in the center of the circle. This will represent the sunflower’s seeds.
- Assemble the Sunflower:
- Once the paint is dry, glue the petals around the edge of the brown circle. Overlap them slightly to create a full look. Allow the glue to dry.
- Create the Stem:
- Cut a long strip of green cardboard (or use a green straw or stick) for the stem. If you’re using cardboard, paint it green or cover it with green construction paper.
- Attach the Stem:
- Glue the stem to the back of the sunflower. If using a stick or straw, you can push it through the center for extra support.
- Add Leaves (Optional):
- Cut out leaf shapes from green cardboard or paper. Paint or color them green and glue them to the stem to add some extra detail.
- Display Your Sunflower:
- Once everything is dry, find a spot to display your beautiful cardboard sunflower! You can make a bouquet by creating several sunflowers.
Tips:
- Encourage kids to personalize their sunflowers with different colors or patterns.
- This craft can also be a great opportunity to discuss how sunflowers grow and their importance in nature.
Enjoy your crafting! 🌻
7. Earth Day Handprint & Photo Keepsake
Using salt dough, you can create hand prints that you can save for display purposes in the future. You may make this with air-drying clay in blue and green for a lighter version.
8. Earth Day Craft with Writing Prompt
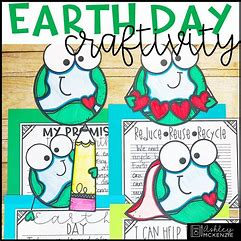
Here’s a fun Earth Day craft that combines creativity with reflection through a writing prompt!
Earth Day Craft: “Our Planet, Our Voice”
Materials Needed:
- Colored construction paper or cardstock
- Markers, crayons, or colored pencils
- Scissors
- Glue
- Optional: stickers or decorative items (like glitter)
Instructions:
- Create a “Earth” Shape:
- Cut a large circle from blue construction paper to represent the Earth. You can also make a globe by adding landmasses with green paper.
- Decorate the Earth:
- Use markers, crayons, or colored pencils to decorate the Earth. Kids can draw oceans, continents, animals, and plants. Encourage them to think about the beauty of our planet!
- Write the Prompt:
- On a separate piece of construction paper, write the prompt: “One thing I love about our Earth is…”
- Have the kids complete the sentence, sharing what they love most about the planet.
- Add More Thoughts:
- Encourage them to write a few more sentences about why that aspect is important and how they can help protect it. This could include actions like recycling, planting trees, or reducing waste.
- Attach Writing to the Earth:
- Once they’re done writing, cut out their sentences and glue them onto the Earth shape. This can be done around the edges or in a cloud shape above the Earth.
- Display the Craft:
- Find a place to hang their creations. This could be a wall, bulletin board, or even in a window to celebrate Earth Day!
Optional Additions:
- Collaborative Mural: If in a classroom setting, create a larger mural where every student adds their Earth with writing. This fosters a sense of community and shared responsibility.
- Reflection: After completing the craft, have a discussion about everyone’s thoughts and commitments to taking care of the Earth.
This craft not only encourages artistic expression but also fosters a deeper appreciation for our planet and promotes awareness of environmental stewardship. Enjoy crafting!
9. Wine Cork Succulent Planter Magnet
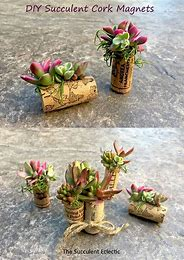
Here’s another lovely Earth Day DIY project to inspire you. These wine cork succulent planter magnets are easy to construct. All you need is adhesive, dirt, succulent plants, paint, brushes, drill, wrench, and wine corks.
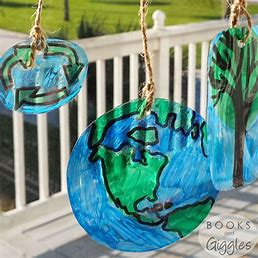
10. Paper Mache Light-Up Globes
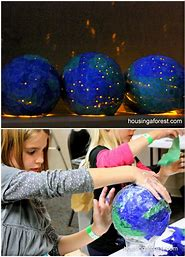
Creating paper mache light-up globes is a fun and engaging project that combines art with a bit of science! Here’s how to make them step by step:
Paper Mache Light-Up Globes
Materials Needed:
- Balloons (1 per globe)
- Newspaper (torn into strips)
- Flour or glue (for the paper mache paste)
- Water
- A bowl for mixing paste
- Paint (blue, green, brown, etc.)
- LED tea lights (battery-operated)
- Paintbrushes
- Clear varnish (optional for sealing)
- Scissors
- Optional: string for hanging
Instructions:
Step 1: Prepare the Paper Mache Paste
- Mix the Paste: If using flour, mix 1 part flour with 2 parts water in a bowl until smooth. If using glue, dilute it with a little water to make it easier to spread.
Step 2: Inflate the Balloon
- Inflate the Balloon: Blow up a balloon to the size you want for your globe. Tie it securely and place it in a bowl or cup to keep it steady while you work.
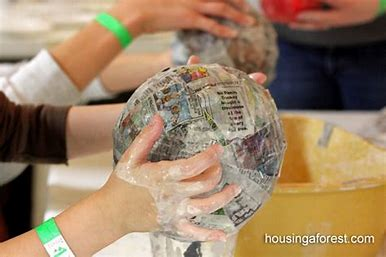
Step 3: Apply Paper Mache
- Dip Newspaper Strips: Take your newspaper strips, dip them into the paste, and remove excess paste by running them between your fingers.
- Cover the Balloon: Start applying the strips to the balloon, overlapping them slightly. Cover the entire surface, leaving the tied end open. Aim for at least 3-4 layers for durability.
- Dry: Let the paper mache dry completely. This may take several hours or overnight.
Step 4: Decorate the Globe
- Pop the Balloon: Once dry, carefully pop the balloon and remove it from the hardened paper mache shell.
- Paint the Globe: Use blue paint for the oceans and green and brown for the continents. You can use a map as a reference or get creative with your designs!
- Seal (Optional): If desired, apply a layer of clear varnish to seal the paint and give it a shiny finish.
Step 5: Add the Light
- Create an Opening: Cut a small opening at the bottom of the globe (if you didn’t leave an opening) to insert the LED tea light.
- Insert the Light: Place the LED tea light inside the globe. You can use a small piece of tape to secure it in place if needed.
Step 6: Display Your Globe
- Hang or Place: You can hang your globe using string or place it on a shelf or table. Turn on the LED tea light to illuminate your creation!
Additional Tips:
- Theme Variations: Consider making globes that represent different ecosystems (e.g., forests, deserts) or historical maps.
- Group Activity: This can be a fun classroom project where each student makes their own globe, and you can discuss geography or environmental topics.
Enjoy your crafting and the beautiful light-up globes that celebrate our planet!
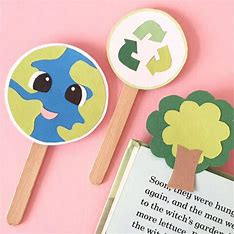
11. Garden Markers
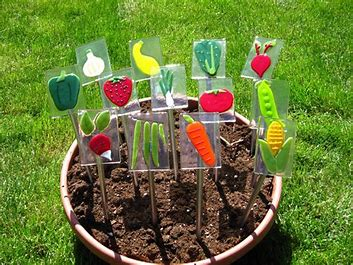
This garden creator is an original Earth Day concept. As an artistic and vibrant addition to your landscape, you may use it as a wall hanging. You will need a clear stamp box, paintbrush, paper or plastic plate, pliers, drill bit, silver jewellery wire, and can lids.
12. Earth Day Bookmark Corner Design
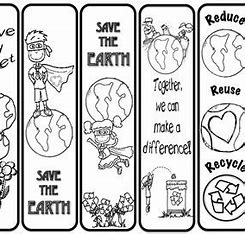
Creating an Earth Day corner bookmark is a fun and easy craft that encourages reading while promoting environmental awareness! Here’s a simple guide to making your own Earth-themed corner bookmark.
Earth Day Corner Bookmark
Materials Needed:
- Colored paper or cardstock (blue, green, and brown)
- Scissors
- Glue or a glue stick
- Markers or colored pencils
- Ruler (optional)
- Pencil (optional)
Instructions:
Step 1: Cut the Paper
- Cut a Square: Start by cutting a square from the colored paper. A good size is 5×5 inches, but you can adjust based on your preference.
Step 2: Fold the Bookmark
- Fold the Square:
- Fold the square in half diagonally to form a triangle. Crease well, then unfold it.
- Fold the top corners of the triangle down to the center crease line, creating a smaller triangle.
Step 3: Create the Bookmark Shape
- Form the Corner:
- Flip the paper over, and fold the bottom point of the triangle up to the top of the smaller triangle. This will form your corner bookmark.
- Tuck the bottom point into the flap created by the top folds to secure it.
Step 4: Decorate the Bookmark
- Add Earth Designs:
- Use blue paper for oceans, green for land, and brown for continents. You can cut out shapes of the Earth, trees, animals, or anything that represents nature.
- Glue these shapes onto the bookmark as you like. Alternatively, you can draw designs with markers or colored pencils.
Step 5: Add a Message (Optional)
- Write an Earth Day Message: On the back of the bookmark, write a positive message about caring for the Earth, such as “Protect Our Planet” or “Every Day is Earth Day.”
Step 6: Finish and Use
- Let it Dry: If you used glue, allow it to dry completely.
- Use Your Bookmark: Slide it onto the corner of your book to keep your place while celebrating Earth Day!
Tips:
- Group Activity: This can be a fun classroom or family activity where everyone makes their own bookmarks and shares what they love about the Earth.
- Personalize: Encourage creativity! Kids can add glitter, stickers, or any additional decorations to make their bookmarks unique.
Enjoy crafting your Earth Day corner bookmark and happy reading!
13. Earth Crayons and Play Dough
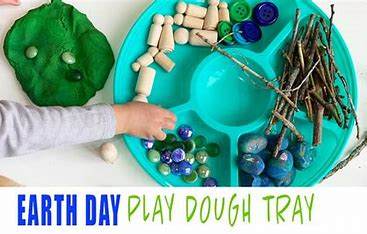
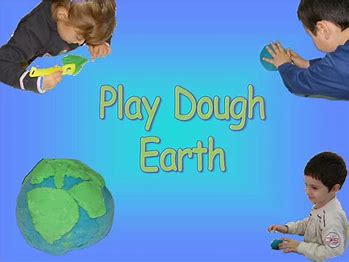
The innovative and unique way to celebrate Earth Day is with this craft. Melted crayons and gunny bags to contain the melted crayons are required for this project.
14. Simple Earth Suncatcher
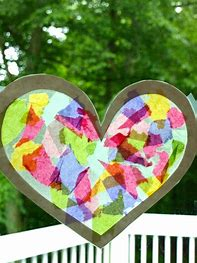
Creating a simple Earth suncatcher is a wonderful craft that adds a touch of color to your window while celebrating our planet. Here’s how to make one!
Simple Earth Suncatcher
Materials Needed:
- Clear contact paper or wax paper
- Blue and green tissue paper (or colored cellophane)
- Scissors
- A black marker or pen
- Optional: a hole punch and string (for hanging)
Instructions:
Step 1: Prepare the Base
- Cut the Contact Paper: If using clear contact paper, cut a piece about 10×10 inches. If using wax paper, you will need two pieces of equal size.
Step 2: Create the Earth Design
- Draw the Earth: Use a black marker to draw a simple outline of the Earth on one side of the contact or wax paper. Include shapes for continents—keep it simple!
Step 3: Cut the Tissue Paper
- Prepare Tissue Paper: Tear or cut the blue and green tissue paper into small squares or shapes. Blue represents the oceans, and green represents the land.
Step 4: Assemble the Suncatcher
- Apply Tissue Paper:
- If using contact paper, peel off the backing and stick the tissue paper pieces onto the sticky side, filling in the drawn areas of the Earth.
- If using wax paper, place the tissue paper pieces on one piece of wax paper, then cover them with the second piece.
Step 5: Seal the Suncatcher
- Seal It: If you used wax paper, you can use a glue stick around the edges to seal them together or use tape.
Step 6: Trim the Edges
- Cut Out the Earth: Trim around the edges of your design, leaving a small border if using wax paper.
Step 7: Hang Your Suncatcher
- Optional Hanging: If desired, use a hole punch to make a hole at the top and thread a piece of string through it for hanging.
Tips:
- Display: Hang your suncatcher in a sunny window to see the colors glow!
- Personalize: Encourage kids to add additional decorations, like glitter or other colors of tissue paper.
- Themes: You can also create different designs representing various ecosystems or climate themes.
Enjoy making your Earth suncatcher, and let it remind you to care for our beautiful planet!
15. Button Globe
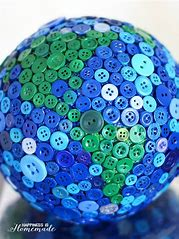
You will need a lot of buttons for this craft because you will be covering a whole sphere with them. The buttons don’t have to be the same size and style. After adhering them, you can paint them appropriately.
16. DIY Earth Day Recycled Crayons
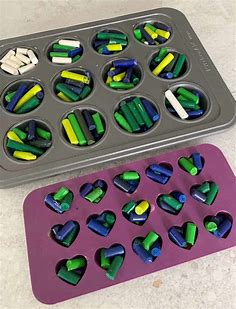
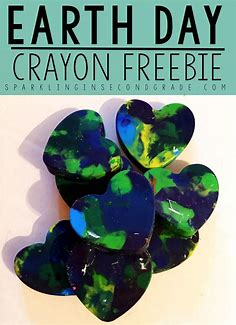
Making DIY recycled crayons is a fun and eco-friendly project perfect for Earth Day! Here’s how to create your own colorful crayons from old bits and pieces.
DIY Earth Day Recycled Crayons
Materials Needed:
- Old crayons (any colors)
- An oven-safe mold (silicone molds work best)
- Aluminum foil (optional)
- Baking sheet
Instructions:
Step 1: Prepare the Crayons
- Gather Crayons: Collect old, broken, or unused crayons. Remove any paper wrappers. You can also mix colors for a fun surprise!
Step 2: Preheat the Oven
- Preheat the Oven: Set your oven to 250°F (120°C).
Step 3: Break the Crayons
- Break Into Pieces: Break the crayons into smaller pieces, about 1 inch long. This helps them melt evenly.
Step 4: Fill the Mold
- Arrange in the Mold: Place the crayon pieces in the silicone mold. You can create patterns by mixing colors or keeping them in sections.
Step 5: Bake the Crayons
- Bake: Place the filled mold on a baking sheet and put it in the oven. Bake for about 10-15 minutes, or until the crayons are completely melted. Keep an eye on them to prevent burning.
Step 6: Cool and Remove
- Cool Down: Once melted, remove the mold from the oven and let it cool completely. This may take about 30 minutes. If you used aluminum foil, you can gently tap the mold to help the crayons pop out.
Step 7: Enjoy Your Crayons
- Remove from Mold: Once cool, gently remove the crayons from the mold. They are now ready to use!
Tips:
- Shapes: You can find molds in various shapes, like hearts, stars, or even Earth shapes for a special Earth Day theme.
- Safety First: Make sure to supervise children while handling the oven and hot materials.
- Color Mixing: Experiment with different combinations for unique colors!
This craft is a great way to recycle and encourage creativity. Enjoy your new crayons and have fun coloring!
17. Recycled Plastic Squid Crafta
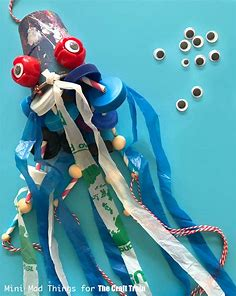
You won’t find a more environmentally friendly Earth Day project craft than this one. This craft of a plastic squid is built from recycled materials. Paper cups, string, paint, googly eyes, wooden beads, paper straws, and plastic bottle caps are required.
18. Pop Up Book
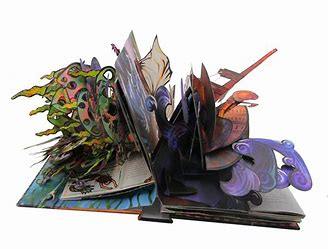
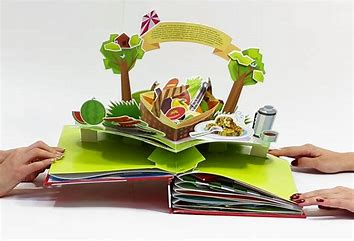
Creating a pop-up book is a fun and imaginative craft that allows you to tell stories in a unique way. Here’s a simple guide to help you make your own pop-up book!
DIY Pop-Up Book
Materials Needed:
- Cardstock or thick paper (for the pages)
- Colored paper or construction paper
- Scissors
- Glue stick or liquid glue
- Markers, colored pencils, or crayons
- Ruler
- Pencil
- Optional: decorative items (stickers, washi tape)
Instructions:
Step 1: Create the Book Pages
- Cut the Pages: Cut several sheets of cardstock into equal-sized rectangles. A common size is 8.5 x 5.5 inches (half of standard letter size). You can use 4-6 pages for your book.
Step 2: Make the Pop-Up Mechanism
- Prepare the Pop-Up Base:
- For each pop-up element, cut a piece of cardstock into a strip about 1 inch wide and 6 inches long.
- Fold the strip in half to create a “V” shape. This will act as the support for your pop-up.
Step 3: Design Your Pages
- Plan Your Story: Decide on the theme or story of your pop-up book. Sketch out what you want on each page.
- For example, you might have animals, plants, or characters popping up.
- Draw the Background: On each page, draw or decorate the background using markers, colored pencils, or cut-out shapes from colored paper. Leave space in the center for the pop-up element.
Step 4: Attach the Pop-Up Elements
- Create the Pop-Up:
- Cut out shapes or images for the pop-up element (like a tree, animal, or character).
- Glue the bottom of the “V” shaped strip to the base of your pop-up image.
- Fold the other end of the strip flat against the page where you want it to pop up.
- Secure the Pop-Up: While the glue is drying, gently press the page down to ensure the pop-up stands up when the page is opened.
Step 5: Assemble the Book
- Bind the Pages: Once all pages are decorated and the pop-ups are attached, stack them in order. You can use a hole punch and string to bind them together or simply staple along the left edge.
Step 6: Final Touches
- Decorate the Cover: Create a colorful cover for your pop-up book. You can add a title and illustrations to make it eye-catching.
- Personalize: Add any additional decorative elements, like stickers or washi tape, to enhance the book’s visual appeal.
Tips:
- Experiment: Try different types of pop-up mechanisms for various effects (like rotating or sliding elements).
- Collaborate: This can be a great group activity where each person creates a page for a collaborative book.
- Storytime: Once your book is finished, read it aloud to friends or family!
Enjoy crafting your pop-up book, and let your imagination shine.
19. Turn an Empty K Cup
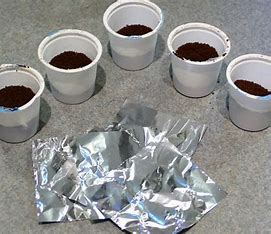
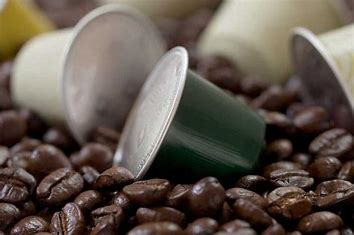
This inventive K Cup may be made fast for Earth Day using very little material. All you need is an empty K-cup, paintbrushes, and acrylic colours in red, green, and blue.
20. Earth Day Daisy
Creating an Earth Day daisy craft is a delightful way to celebrate the beauty of nature while promoting environmental awareness. Here’s a simple guide to making your own Earth Day daisy!
Earth Day Daisy Craft
Materials Needed:
- White paper or cardstock (for petals)
- Green paper or cardstock (for the stem and leaves)
- Yellow paper or cardstock (for the center)
- Scissors
- Glue or a glue stick
- Markers or colored pencils
- Optional: glitter or stickers for decoration
Instructions:
Step 1: Cut Out Petals
- Create Petal Shapes:
- Cut out several petal shapes from the white paper. You can make them oval or teardrop-shaped. Aim for about 6-8 petals.
Step 2: Cut the Center
- Make the Daisy Center:
- Cut a circle from the yellow paper for the center of the daisy. This can be about 2-3 inches in diameter.
Step 3: Prepare the Stem and Leaves
- Cut the Stem:
- Cut a long rectangle from the green paper for the stem. Make it about 1 inch wide and 8-10 inches long.
- Create Leaves:
- Cut out two leaf shapes from the green paper. These can be oval or pointed to resemble leaves.
Step 4: Assemble the Daisy
- Glue the Center:
- Start by gluing the yellow circle in the center of the white petals, overlapping them slightly to create a flower shape.
- Attach the Stem:
- Glue the stem to the bottom of the daisy.
- Add Leaves:
- Glue the leaves to the sides of the stem, positioning them wherever you like.
Step 5: Decorate
- Personalize Your Daisy:
- Use markers or colored pencils to add details to your flower, like lines on the leaves or patterns on the petals. You can also add glitter or stickers for extra flair.
Step 6: Display Your Earth Day Daisy
- Show Off Your Creation:
- Find a special place to display your Earth Day daisy. You can also create a bouquet by making several daisies in different colors!
Tips:
- Group Activity: This is a great craft for classrooms or groups, allowing everyone to create their own daisy to decorate a communal space.
- Environmental Message: Consider writing a message about caring for the Earth on the stem or back of the flower.
Enjoy making your Earth Day daisy, and let it serve as a reminder to appreciate and protect our planet!
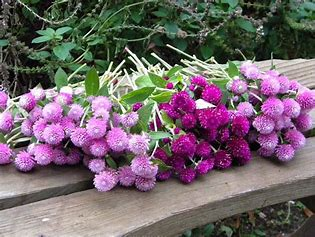
21. Earth Pom Pom
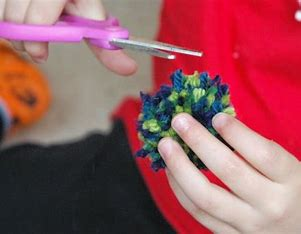
This idea can be used to create adorable and small pom pom Earths. A pompom maker, some scissors, and some blue and green wool are required. You will have a lot of fun creating these.
22. 3D Earth Day Crafta
Here’s a fun and engaging 3D Earth Day craft that allows you to create a three-dimensional representation of our planet!
3D Earth Day Craft: Paper Mache Globe
Materials Needed:
- Balloon (1 per globe)
- Newspaper (torn into strips)
- Flour or glue (for the paper mache paste)
- Water
- A bowl for mixing paste
- Blue and green paint
- Paintbrushes
- Scissors
- Optional: clear varnish (for sealing)
- A sturdy base (like a cardboard circle) to hold the globe
Instructions:
Step 1: Prepare the Paper Mache Paste
- Mix the Paste: If using flour, combine 1 part flour with 2 parts water in a bowl until smooth. If using glue, dilute it with a little water.
Step 2: Inflate the Balloon
- Inflate the Balloon: Blow up a balloon to the desired size for your globe. Tie it securely and place it in a bowl or cup to keep it steady while you work.
Step 3: Apply Paper Mache
- Dip Newspaper Strips: Take your newspaper strips, dip them into the paste, and remove excess paste by running them between your fingers.
- Cover the Balloon: Start applying the strips to the balloon, overlapping them slightly. Cover the entire surface, leaving the tied end open. Aim for at least 3-4 layers for durability.
- Dry: Let the paper mache dry completely, which may take several hours or overnight.
Step 4: Decorate the Globe
- Pop the Balloon: Once dry, carefully pop the balloon and remove it from the hardened paper mache shell.
- Paint the Globe: Use blue paint for the oceans and green for the continents. You can also add brown for landmasses. Use a map as a reference for more detail.
- Seal (Optional): Apply a layer of clear varnish to protect the paint and give it a shiny finish.
Step 5: Create a Stand
- Make a Base: Cut a circle from cardboard or use a small flower pot to create a sturdy base for your globe.
- Attach the Globe: Securely glue the bottom of the globe to the base to hold it upright.
Additional Ideas:
- Add Details: Use markers or stickers to label oceans, continents, or even draw animals and plants on the globe.
- Interactive Learning: Use this globe to discuss different ecosystems, countries, or environmental issues related to Earth Day.
Tips:
- Collaborative Project: This craft can be a fun group activity where each participant contributes to a large globe, or you can make mini globes for each person.
- Safety: Always supervise younger children while handling scissors and glue.
Enjoy creating your 3D Earth globe, and let it remind you of the beauty of our planet!
23. Stripped Slime
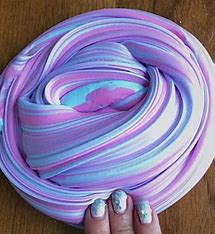
You can experiment with any type of slime when making this recipe. Here, the colours blue and green are utilised to represent Earth. Instead of using colours, markers, or food colouring for their slime, they used Elmer’s Washable Colour Glue.