Although purchasing craft supplies can be expensive, you don’t have to break the bank to create a tonne of amazing things with your children. In fact, we’ve compiled a list of over 20 kid-friendly recycled material projects that you can do using things you already own. Toilet paper rolls, cardboard boxes, plastic bottles, bottle caps, and much more can be reused in a variety of entertaining ways.
from the website darcyandbrian: Do you have childhood memories of playing with kaleidoscopes? You can now create them with your own kids. To create this vibrant craft, you’ll need aluminium foil, paper towel tubes, and beads.
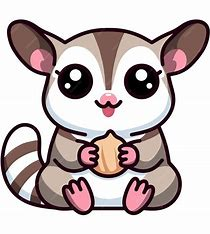
Making a Sugar Glider craft from an egg carton is a super fun and creative activity—perfect for animal lovers and kids! Here’s how to do it:
🐾 Egg Carton Sugar Glider Crafta
✂️ Materials Needed:
- 1 cardboard egg carton
- Scissors
- Acrylic paint (gray, white, black, pink)
- Paintbrushes
- Googly eyes or black marker
- Craft glue or hot glue (with adult supervision)
- Pipe cleaners (gray or brown)
- Felt or construction paper (gray/white for wings & ears)
- Cotton ball (optional for belly fluff or tail)
- Black marker or pen
🛠️ Instructions:
1. Cut Out the Body
- Cut out two egg cups from the carton — one for the head and one for the body.
- Trim them neatly and glue them together end to end (rounded sides out).
2. Paint the Sugar Glider
- Paint the body gray.
- Add a white patch on the belly and face.
- Paint a black stripe down the center of the face.
- Let dry completely.
3. Add the Face
- Glue on googly eyes or draw eyes with a black marker.
- Paint or draw a small pink nose.
- Add ears using small triangles of gray felt or paper—glue to the sides of the head.
4. Make the Tail
- Use a gray or black pipe cleaner curled into a fluffy tail shape.
- Glue it to the back of the body.
5. Attach Wings
- Cut two wing shapes from gray felt, paper, or foam.
- Glue them to the sides of the body so they look like gliding membranes between the front and back legs.
6. Optional: Fluffy Belly or Tail
- Glue a small cotton ball to the belly or end of the tail for extra cuteness.
🎨 Decorating Ideas:
- Add a tree branch base with cardboard or sticks.
- Hang with string to make a flying sugar glider mobile!
- Use glow-in-the-dark paint for a fun twist.
Would you like a printable template or to turn this into a classroom-friendly group crafta?

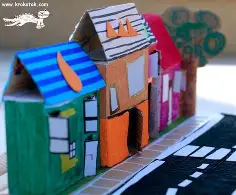
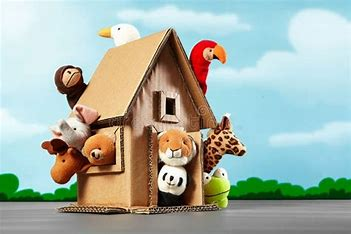
from boxofideas.uk: Use boxes, milk cartons, and cardboard tubes to create dollhouses, toy houses, or a whole city with houses, structures, and more. Even though it takes some effort at first, youngsters will play with these for hours on end, and they will also last for a long time.

Making Recycled Paper Seed Cards is a wonderful eco-friendly craft—perfect for gifts, parties, or classroom activities! You’ll create handmade paper embedded with seeds that can later be planted to grow flowers or herbs. 🌱💌
♻️ DIY Recycled Paper Seed Cards
🌼 Materials Needed:
- Used paper (newspapers, printer paper, scrap paper—no glossy pages)
- Warm water
- Blender or food processor
- Large bowl
- Fine mesh strainer or screen (or an old window screen/cheesecloth)
- Towels or sponge
- Rolling pin or bottle
- Wildflower or herb seeds (small seeds work best)
- Cookie cutters or scissors (for shaping)
- Optional: food coloring or natural dyes
🛠️ Instructions:
1. Tear & Soak Paper
- Tear the used paper into small pieces (about 1 inch).
- Soak in warm water for at least 30 minutes (or overnight for best results).
2. Blend into Pulp
- Blend the soaked paper and water mixture into a smooth pulp.
- Optional: Add a few drops of food coloring or natural dye at this stage.
3. Strain and Mix in Seeds
- Pour the pulp into a fine strainer or screen.
- Gently press out extra water using a sponge or towel.
- Transfer the pulp to a bowl and gently mix in the seeds by hand (don’t blend again—you don’t want to damage the seeds).
4. Shape Your Paper
- Spread the pulp onto a screen or towel, shaping it into flat card shapes or use cookie cutters to make hearts, circles, etc.
- Use a rolling pin to flatten and squeeze out more water.
5. Dry
- Let the shapes air dry for 24–48 hours depending on thickness and humidity.
- Flip occasionally for even drying.
💌 To Use:
- Write on your seed card with a marker or attach a small tag.
- When ready to plant, place the card under a thin layer of soil, water gently, and watch it grow!
🎨 Tips:
- Use flower seeds like zinnia, daisy, marigold, or wildflowers.
- Add petals or shredded herbs to the pulp for extra beauty.
- Punch a hole and add twine to turn into gift tags.
Would you like a classroom version or printable care tags to attach to the cards?
5. Pouch Cap Threading Activity
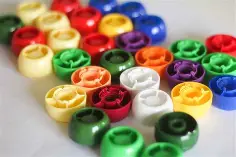
according to normallifemom.com: You probably go through a lot of baby food or fruit pouches if you have a baby or toddler. Crafting is the perfect use for those plastic caps that screw off the top. Make them into a garland to adorn the playroom or a vibrant bracelet or necklace for the child.
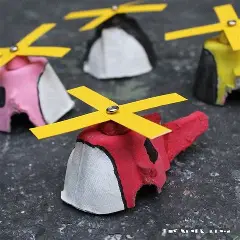
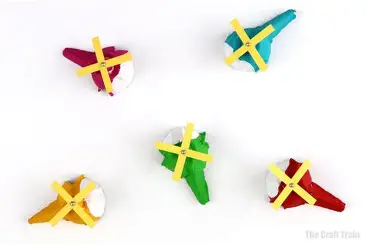
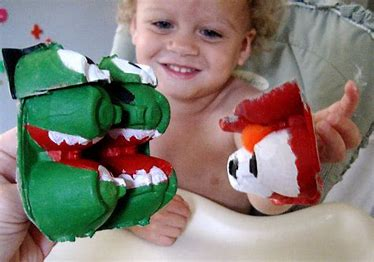
Making Egg Carton Helicopters is a fantastic and creative way to recycle and have fun! This craft is perfect for kids and can be made with materials you probably already have at home.
🚁 DIY Egg Carton Helicopters
✂️ Materials Needed:
- Cardboard egg carton (not styrofoam)
- Scissors
- Paint and paintbrushes (optional)
- Craft glue or hot glue (with adult supervision)
- Toothpicks or craft sticks
- Construction paper or cardstock
- Markers or stickers (optional for decorating)
- Pipe cleaners or straws (optional for landing skids)
🛠️ Instructions:
1. Cut the Helicopter Body
- Cut out one egg cup from the carton. This will be the main body of the helicopter.
- Trim the edges to make it smooth and even.
2. Paint the Egg Cup
- Paint the egg cup your favorite color.
- Let it dry completely before moving on.
3. Make the Rotor Blades
- Cut a thin strip of cardstock or construction paper, about 3–4 inches long and ½ inch wide.
- Or use a toothpick or craft stick.
- Paint or color it if desired.
- Glue the rotor to the top of the egg cup (this is your helicopter blade!).
4. Add a Tail Rotor (Optional)
- Cut a small strip of paper and glue it to the back side of the egg cup.
- You can make a small rotor out of a second toothpick or paper cross.
5. Landing Skids (Optional)
- Bend a pipe cleaner into two “U” shapes and glue them under the egg cup like skids.
- Or cut a straw into two short pieces and glue them horizontally underneath.
6. Decorate
- Add windows, doors, or numbers with marker or stickers.
- You can also make a small pilot face and glue it inside!
✨ Craft Tips:
- Use different colors to make a whole fleet of helicopters.
- Turn it into a mobile by attaching string and hanging from a hanger or stick.
- Great for STEM discussions about flight and rotor movement!
Would you like printable instructions or a simple template for classroom use?
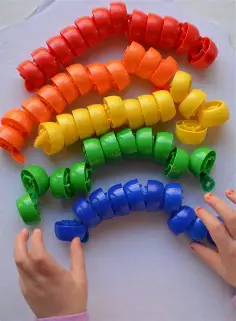
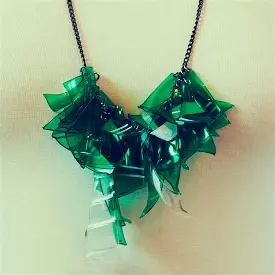
7. Recycled Water Bottle Suncatchers
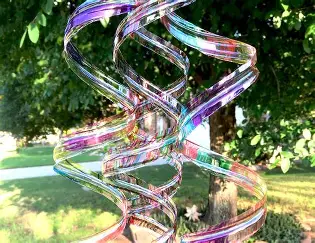
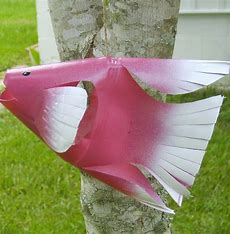
according to ourfamilycode.com: To make crafts like these curly water bottle suncatchers, save plastic water bottles. They will appear stunning as they twirl in the breeze.
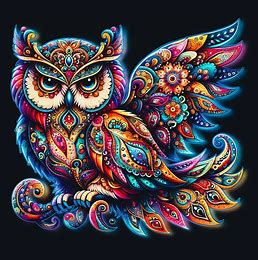
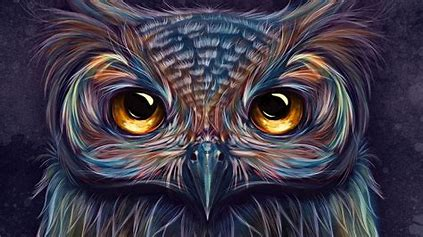
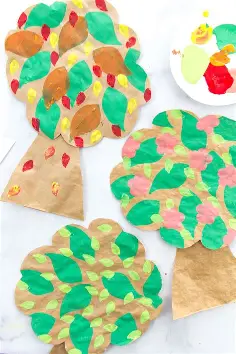
Making Colorful Newspaper Owls is a fun and eco-friendly craft that turns old newspapers into adorable, vibrant owls! 🦉✨ This activity is great for kids and encourages creativity while recycling materials.
🗞️🎨 Colorful Newspaper Owls Craft
✂️ Materials Needed:
- Old newspaper pages
- Watercolor paints or markers
- Construction paper or cardstock (for backing)
- Scissors
- Glue stick or craft glue
- Googly eyes (or white paper to make your own)
- Black marker
- Optional: buttons, feathers, sequins for decoration
🛠️ Instructions:
1. Paint the Newspaper
- Lay out newspaper pages and paint over them with watercolor paints or watered-down acrylics.
- Use bright, fun colors! Let dry completely.
- This creates a beautiful patterned base with the newspaper print showing through.
2. Cut Out Owl Shapes
- Cut a large oval or teardrop shape from the painted newspaper for the owl’s body.
- Cut out two wings, a beak (triangle), and feet (three-toed shapes) from either painted or plain paper.
3. Assemble Your Owl
- Glue the owl body onto a piece of construction paper for support.
- Add the wings to each side.
- Glue on the beak, then feet at the bottom.
4. Add Eyes
- Use googly eyes or cut out two large white circles and two smaller black circles from paper to make your own.
- Glue them near the top center of the body.
5. Decorate!
- Use extra scraps to add eyebrows, a belly patch, or fun feathers.
- Add details with a black marker or glitter glue if desired.
🎨 Ideas & Variations:
- Try different owl expressions by changing eye shapes or beak angles.
- Use real feathers or cut some from scrap paper.
- Display a parliament of owls on a classroom wall or bulletin board!
Would you like a printable owl template or ideas for turning this into a greeting card or wall hanging?
9. Egg Carton Jellyfish Puppets
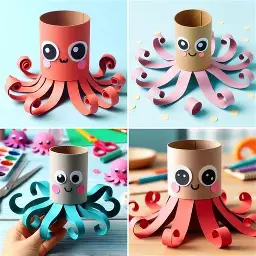
according to theartkitblog.com: What a sweet idea to recycle yarn scraps and egg cartons! To add a variety of colours, hang them in a window or in a room corner. For a unit on ocean animals, this is a wonderful crafta.
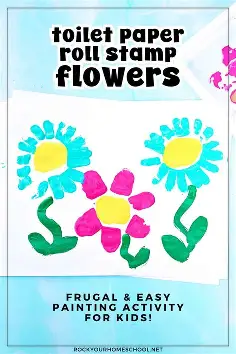
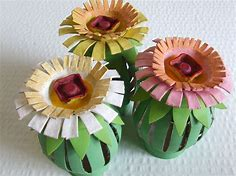
Making Toilet Roll Stamp Flowers is a super easy, colorful, and low-mess craft that’s perfect for kids of all ages! You’ll turn empty toilet paper rolls into homemade stamps and create beautiful flower art. 🌸🎨
🌼 Toilet Roll Stamp Flowers
✂️ Materials Needed:
- Empty toilet paper rolls
- Acrylic paint or washable paint
- Paper plate or tray (for paint)
- White or colored paper (for printing)
- Scissors
- Markers, crayons, or colored pencils (optional)
- Glue (optional if adding embellishments)
- Optional: buttons, pom-poms, or sequins (for flower centers)
🛠️ Instructions:
1. Shape Your Stamp
- Take a toilet paper roll and flatten one end into a point, forming a petal shape.
- You can also cut small slits around one end and bend the flaps outward to make more petal-like shapes.
- Make multiple rolls with different petal styles if you want variety.
2. Add Paint
- Pour paint onto a paper plate in different colors.
- Dip the shaped end of the toilet roll into the paint.
3. Stamp Your Flowers
- Press the paint-covered roll onto your paper to stamp flower shapes.
- You can stamp multiple times in a circle to make fuller flowers or layer colors.
- Let dry.
4. Add Flower Centers
- Use your finger, a cork, or a round sponge to stamp a center in a contrasting color.
- Optional: glue on buttons, pom-poms, or sequins for 3D centers!
5. Draw Stems and Leaves
- Use markers, crayons, or paint to add stems, leaves, or even a sunny background.
🌈 Fun Variations:
- Cut the roll into thin strips for daisy-like petals.
- Dip into glitter paint or metallic colors for sparkle.
- Use multiple rolls for stamping different petal sizes or styles.
Would you like a printable instruction sheet or ideas to turn this craft into a greeting card or wall art?
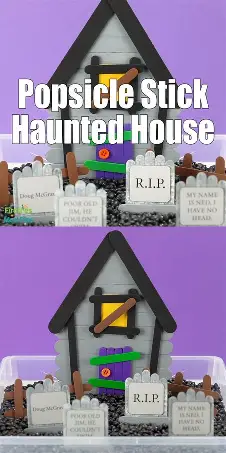
from the website activelittles: A box and some popsicle sticks can be reused with this easy project. Of course, if you don’t want to consume a lot of sugary popsicles, you may also use craft sticks. For toddlers and preschoolers, it’s an enjoyable method to practise letter recognition.
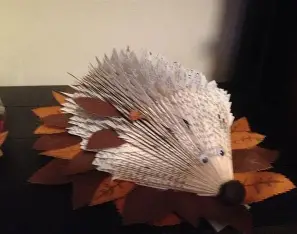
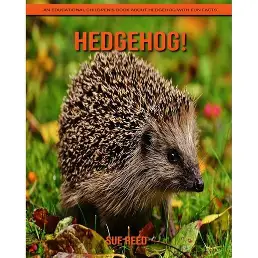
Making a Paperback Book Hedgehog is a fun upcycled craft that turns an old, unwanted paperback into a cute little critter! 🦔📚 It’s a great project for book lovers, teachers, and anyone who enjoys paper crafts.
📖🦔 Paperback Book Hedgehog Craft
✂️ Materials Needed:
- 1 old paperback book (about 100–150 pages works well)
- Googly eyes or black buttons
- Black pom-pom, felt, or small bead (for the nose)
- Glue (craft glue or hot glue)
- Optional: markers, ribbons, or felt for extra decorations
🛠️ Instructions:
1. Choose Your Book
- Pick a paperback book with glue binding (not stitched).
- The cover can be removed before or after folding.
2. Start Folding the Pages
- Fold each page as follows:
- Top corner down to the spine to form a triangle.
- Bottom edge up to the spine, aligning with the first fold (this makes a tight point).
- Crease firmly.
- Repeat with every page. The more pages you fold, the rounder and fluffier your hedgehog will look!
3. Create the Face
- When you’re done folding, the flat side of the book will form the face.
- Glue on googly eyes near the top edge.
- Glue a pom-pom or button to the tip as the nose.
4. Optional Decorations
- Add small felt ears, a bow, or even paint or glitter.
- Use a ribbon to make a scarf or bowtie!
🎨 Creative Ideas:
- Paint the edges of the pages for a colorful effect.
- Turn it into a holiday hedgehog with seasonal accessories (Santa hat, flower crown, etc.).
- Use it as a name card holder or desk decor!
Would you like a printable version of these instructions or a classroom-friendly guide with visuals?
13. Recycled Newspaper Earth Day Garland
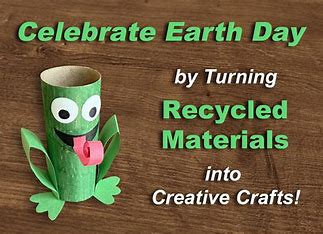
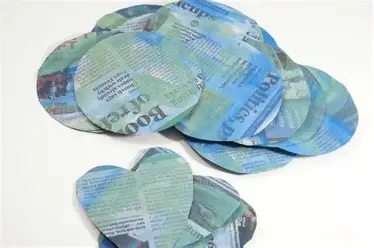
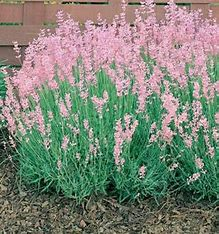
from the website kitchencounterchronicle: Made from newspaper and thread, this garland is a great project for Earth Day. To make the circles and hearts resemble the earth, they are painted green and blue. However, you don’t need to wait for Earth Day to happen. Teaching children to be environmentally conscious can be done at any moment.
14. Phonics Boards
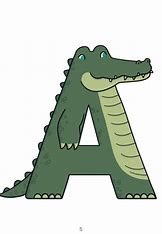
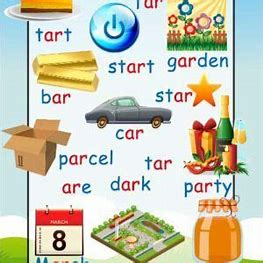
Creating Phonics Boards is a fantastic hands-on way to help children learn and practice letter sounds, blending, and word formation. These boards can be customized for different reading levels and are great for home, classrooms, or tutoring.
🔤 DIY Phonics Boards
🧠 Purpose:
Phonics boards help children:
- Recognize letter sounds
- Blend sounds into words
- Practice spelling
- Develop reading fluency
✂️ Materials Needed:
- Poster board, cardboard, or laminated paper
- Marker or printed letter tiles/cards
- Velcro dots or magnetic tape (optional)
- Scissors
- Envelopes or pockets for storage
- Dry-erase markers (if laminated)
- Optional: images for word-picture matching
🛠️ 3 Easy Types of Phonics Boards
1. CVC Word Builder Board (Consonant-Vowel-Consonant)
How to Make:
- Draw three boxes (C-V-C) on the board.
- Use letter cards or tiles to place in each box.
- The child builds words like cat, dog, fun, etc.
Ideas:
- Use magnetic letters on a baking tray.
- Add a picture next to the word for matching practice.
2. Word Family Board
How to Make:
- Create columns or a wheel of word endings (e.g.,
-at,-in,-op). - Provide beginning consonant cards to blend with the endings.
Example:
| Word Ending | Add Beginning | New Word |
|---|---|---|
| -at | b | bat |
| -at | s | sat |
3. Beginning/Middle/Ending Sound Boards
How to Make:
- Divide board into three sections: Beginning / Middle / End.
- Provide pictures or words, and children must fill in the missing sound(s).
Example Activity:
- Picture of a hat: show
_ a t, and child picks the missing “h”.
🎨 Creative Enhancements:
- Use colored paper for vowels vs consonants.
- Add stickers or small rewards for completed words.
- Make it reusable: laminate the board and use dry-erase markers.
🧩 Extensions:
- Blends/Digraphs Board: Add blends like
ch,sh,tr, etc. - Silent E Board: Show how adding “e” changes a word (cap → cape).
- Rhyming Word Match: Match word pairs that rhyme.
Would you like a printable template or digital version you can use interactively?

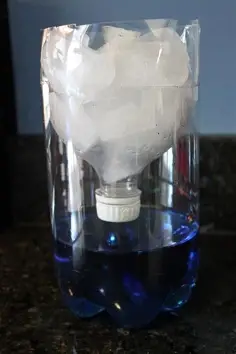
according to funwithmama.com: Discover the water cycle firsthand. Do this entertaining weather experiment with your preschooler by recycling a glass bottle.
16. Rainstick Musical Sensory Bottle
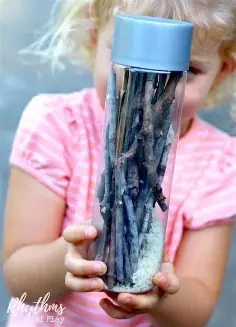
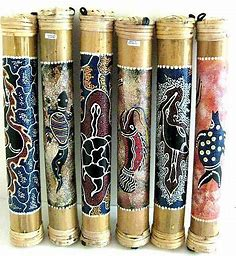
Making a Rainstick Musical Sensory Bottle is a calming, fun, and engaging craft—great for sensory play, music exploration, or even as a DIY soothing tool. It mimics the gentle sound of rain and is perfect for young children or sensory-sensitive individuals. 🌧️🎶
🍼 Rainstick Musical Sensory Bottle
🌈 What It Is:
A sealed bottle filled with small items and obstacles that create a rain-like sound when flipped or shaken—like a mini rainstick!
✂️ Materials Needed:
- Clear plastic bottle (Voss bottles work great)
- Filler items: dry rice, quinoa, lentils, or small beads
- Obstacle items: toothpicks, straws, pipe cleaners, or twisted paper clips
- Hot glue or strong tape (to seal the lid)
- Optional: glitter, sequins, colored rice, or water beads (for visual appeal)
- Optional: funnel or paper cone for pouring
🛠️ Instructions:
1. Clean and Dry the Bottle
- Remove labels and wash out your bottle thoroughly.
- Let it dry completely to prevent mold.
2. Add Obstacles
- Insert small items like cut straws, toothpicks, or pipe cleaners to act as barriers inside the bottle.
- These slow down the movement of the filler, creating that soft “rainfall” sound.
3. Add Filler
- Use a funnel to pour in a small amount of rice, lentils, or beads.
- Start with 1–3 inches of filler and test the sound. Add more or less as desired.
4. Customize (Optional)
- Add glitter, sequins, or colored rice for extra visual stimulation.
- You can also drop in a few tiny plastic animals or beads to make it fun and exploratory.
5. Seal the Bottle
- Apply hot glue or superglue around the inside of the lid before closing it.
- You can also wrap the lid in duct tape for extra safety (especially with small children).
6. Shake or Flip and Enjoy!
- Turn the bottle slowly to hear the gentle rain sound.
- Shake it lightly for a musical effect, or roll it back and forth for a calming experience.
🧠 Sensory Benefits:
- Calming for kids with anxiety or sensory processing needs
- Engages auditory, visual, and tactile senses
- Fun tool for circle time or music play!
Would you like a printable instruction sheet or ideas for turning this into a classroom science/music project?
17. Upcycled Necklace from Plastic Lids
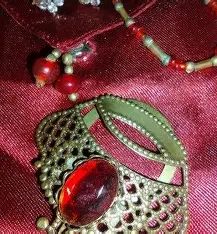
According to projectswithkids.com, Save the plastic lids from milk, orange juice, and other jugs; they can be used to create vibrant and entertaining pendants for necklaces. They can be painted, coloured with markers, embellished with stickers or sequins—the options are unlimited!
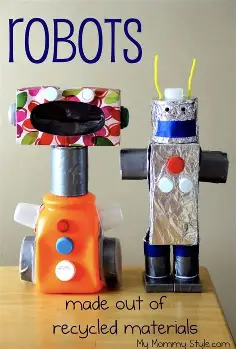
18. Junk Model Astronaut Helmet
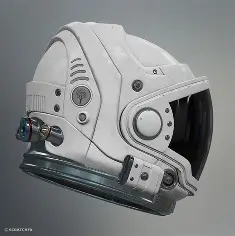
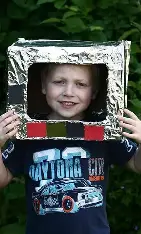
Making a Junk Model Astronaut Helmet is a fun, imaginative craft project that encourages creativity and recycling! Perfect for space-themed activities, dress-up, or a school STEAM challenge. 🧑🚀🌌
🚀 Junk Model Astronaut Helmet Craft
♻️ What’s a Junk Model?
A junk model is a 3D creation made from clean recycled materials—like boxes, bottles, and cardboard. This helmet is a creative way to reuse “trash” and turn it into treasure!
✂️ Materials You Can Use:
(Use what you have—no need to buy anything!)
- Large paper bag or balloon (for shaping the head area)
- Cereal box, cardboard, or old packaging
- Aluminum foil (for a shiny look)
- Clear plastic (from salad lids or food containers—for the visor)
- Tape (masking or duct tape works great)
- Glue
- Scissors
- Paint or markers
- Bottle caps, buttons, pipe cleaners (for controls or decorations)
- Old yogurt pots or lids (for ear covers or helmet details)
🛠️ Instructions:
1. Create the Helmet Shape
Choose one of these methods:
- Paper Bag Method: Use a large paper grocery bag to form the helmet. Cut to fit over the head and trim a face opening.
- Balloon & Papier-Mâché: Inflate a balloon and cover it in layers of newspaper + glue (or flour paste). Let it dry, pop the balloon, then cut out a face hole.
- Cereal Box/Poster Board Method: Cut and tape cardboard panels to form a rounded or square helmet shape.
2. Add the Visor
- Cut a large oval hole in front for the face area.
- Tape a piece of clear plastic (e.g., from packaging or a plastic folder) over the opening for a see-through visor.
3. Decorate Your Helmet
- Cover with aluminum foil or paint it white or silver.
- Add:
- Bottle caps or buttons as “oxygen controls”
- Yogurt pot halves as earphones
- NASA or custom mission logos with markers or printed paper
- A name tag (“Commander Alex” 👨🚀)
4. Finishing Touches
- Add a strip of cardboard or foil for the neck ring.
- Make a matching backpack or oxygen tank with two plastic bottles taped together and attached with string.
🪐 Extra Ideas:
- Add blinking LEDs (with adult help) for a high-tech look!
- Pair the helmet with a DIY space suit using white clothing and foil accessories.
- Use it for imaginative play, storytelling, or classroom presentations.
Would you like a printable project sheet, or ideas for turning this into a classroom group project or space week activity?
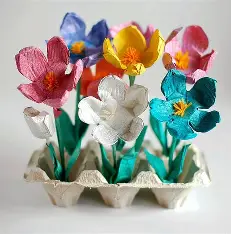

from artsycraftsymom.com: Create lovely flowers for Mother’s Day or spring by combining egg carton pieces with cupcake liners, buttons, and paper straws.
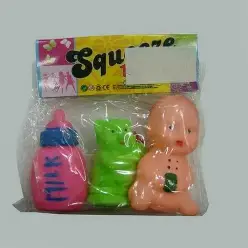
Creating a Bottle Top Toddler Toy is a simple, safe, and budget-friendly way to entertain and engage little ones while promoting fine motor skills, color recognition, and hand-eye coordination. Plus, it’s a great way to recycle! 🍼🧠
🧸 DIY Bottle Top Toddler Toy
✅ Why It’s Great:
- Helps develop fine motor skills and grasping
- Encourages problem-solving and sensory exploration
- Safe, low-cost, and customizable
✂️ Materials Needed:
- Clean plastic bottle tops in various sizes and colors (milk caps, juice lids, etc.)
- Empty wipe container, oatmeal canister, or small box with a lid
- Craft knife (for adult use)
- Glue or tape (optional)
- Stickers or colored paper (optional for decoration)
🛠️ Instructions:
1. Prep the Container
- Take a wipe container or small box with a lid (like a tissue box or oatmeal canister).
- Cut one or more holes in the top or sides—just big enough for a bottle cap to fit through.
- Make different-sized holes for added challenge as they grow.
2. Collect Bottle Tops
- Gather clean, colorful plastic caps.
- You can even label them with letters, numbers, or shapes for added learning later on.
3. Decorate (Optional)
- Decorate the box with bright colors, patterns, or stickers.
- You can label it “Drop Box” or “Cap Game.”
4. Play Time!
- Show your toddler how to push the caps through the holes.
- Let them explore different sizes and colors.
- Add sounds: shake the box to hear the caps rattle inside!
🧠 Learning Extensions:
- Color sorting: Use colored circles around each hole to match cap colors.
- Counting: Count how many caps they’ve dropped in.
- Cause & effect: Watch how actions lead to sound and visual results.
🛡️ Safety Tips:
- Use large caps only (no small lids from water bottles, which can be choking hazards).
- Always supervise toddlers during play.
- Secure the container lid so it doesn’t pop off easily.
Would you like printable labels or ideas for making this a travel-friendly or themed version (like animals or vehicles)?
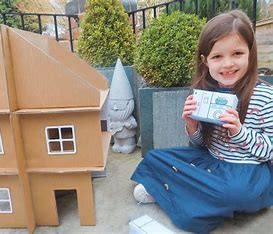
from redtedart.com: Big boxes have a lot of potential, don’t they? Make a personalised playhouse out of one for the kids to play with. Use beautiful paper or paint to adorn each space.