Here’s a list of unique DIY crafts you can make and sell — they’re trendy, creative, and customizable to stand out in the market:
🕯️ Home & Decor Crafts
- Hand-Poured Scented Candles – Use soy or beeswax with unique scents and decorative jars.
- Pressed Flower Resin Coasters – Encapsulate dried flowers or leaves in clear resin molds.
- Macramé Wall Hangings or Plant Hangers – Stylish and perfect for boho décor lovers.
- Concrete Planters – Mold small planters from quick-set concrete for succulents or herbs.
- Personalized Wooden Signs – Engrave or paint inspiring quotes or names.
💎 Jewelry & Accessories
- Polymer Clay Earrings – Lightweight, colorful, and easy to customize.
- Resin Pendant Necklaces – Embed tiny flowers, glitter, or charms in resin.
- Fabric or Leather Keychains – Add monograms or creative patterns.
- Beaded Friendship Bracelets – Trendy with personalized initials or charms.
- Upcycled Denim Tote Bags – Fashionable and eco-friendly.
🖌️ Art & Stationery
- Hand-Painted Plant Pots – Fun and affordable for plant lovers.
- Customized Journals or Notebooks – Decorate with hand-painted covers or stamps.
- DIY Greeting Cards – Pop-up or 3D designs for special occasions.
- Printable Art or Quotes – Create digital downloads for customers to print.
- Handmade Stickers – Use your own art or digital designs.
🧵 Fabric & Sewing Crafts
- Reusable Fabric Bowl Covers – An eco-friendly alternative to plastic wrap.
- Hand-Sewn Scrunchies or Headbands – Use trendy fabrics and patterns.
- Quilted Mug Rugs – Mini coasters perfect for gifts.
- Patchwork Aprons – Fun, colorful, and practical for kitchens.
🧸 Kid-Friendly or Fun Crafts
- DIY Slime Kits – Package colorful, glittery slime with add-ins.
- Felt Plush Toys – Small, cute characters or animals.
- Paint-Your-Own Craft Kits – Provide unfinished wooden shapes with paints for kids.
- Story Stones – Hand-painted pebbles for storytelling games.
🪴 Eco-Friendly Crafts
- Seed Paper Cards – Cards that can be planted to grow flowers or herbs.
- Upcycled Glass Jar Lanterns – Decorate mason jars with twine, paint, or stained-glass effects.
- Recycled Tin Can Planters – Hand-paint cans for rustic décor.
- Beeswax Food Wraps – A sustainable alternative to plastic wrap.
Would you like me to make you a list of the best-selling DIY crafts right now (based on Etsy and Instagram trends)? That could help you focus on what’s most profitable.
1. Jewelry Organizers
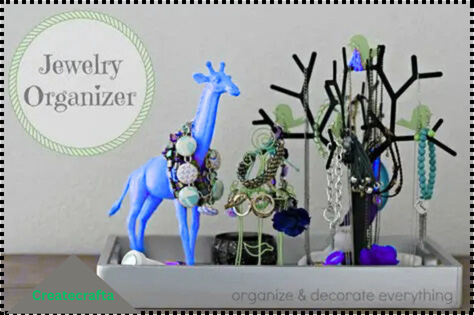
Use fun painted wood to create jewellery organisers that include knobs to hang bracelets and necklaces. These could also be designed to go with jewellery that is handcrafted.
2. DIY Bath Bombs
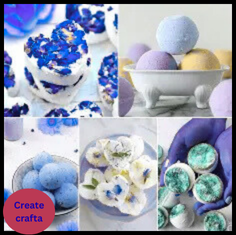
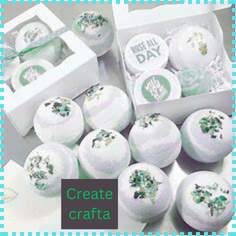
Here’s a simple, beginner-friendly DIY bath bomb recipe you can try at home:
🫧 Ingredients
- 1 cup baking soda (sodium bicarbonate)
- ½ cup citric acid
- ½ cup cornstarch
- ½ cup Epsom salt (optional, for soothing muscles)
- 2½ tablespoons coconut oil, almond oil, or olive oil
- ¾ tablespoon water (or witch hazel)
- 10–15 drops essential oil (lavender, peppermint, eucalyptus, etc.)
- A few drops of food coloring or mica powder (optional)
- Silicone molds or bath bomb molds
📝 Instructions
- Mix Dry Ingredients
In a large bowl, combine baking soda, citric acid, cornstarch, and Epsom salt. Whisk until smooth and lump-free. - Combine Wet Ingredients
In a small bowl, mix coconut oil, water (or witch hazel), essential oil, and coloring. - Slowly Combine Wet & Dry
Gradually drizzle the wet mixture into the dry mixture, whisking continuously. (If it fizzes, you’re adding too fast—slow down.) - Check Consistency
When squeezed in your hand, the mixture should hold its shape like damp sand. If it’s too crumbly, spritz lightly with water. - Mold the Bath Bombs
Pack the mixture firmly into your molds. Overfill slightly, then press the halves together tightly if using round molds. - Let Them Dry
Allow the bath bombs to harden for 24 hours at room temperature before removing from molds. Store in an airtight container.
🌸 Customization Ideas
- Add dried flower petals (lavender, rose, chamomile) for a spa-like feel.
- Use different essential oils for aromatherapy benefits.
- Layer two colors for a “galaxy” or “ombre” bath bomb look.
Would you like me to give you a recipe for bath bombs you can sell (with cost-friendly ingredients and packaging tips)?
3. Repurpose Furniture
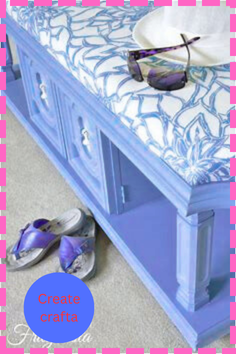
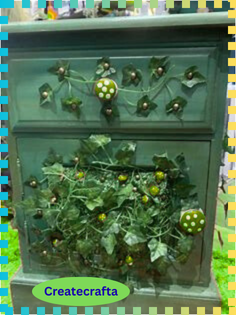
Find used furniture and repurpose it for a profit if you enjoy painting furniture.
The ideal places to sell this would be neighbourhood stores, online marketplaces like Facebook Marketplace, or your own Facebook page.
4. Farmhouse Tables
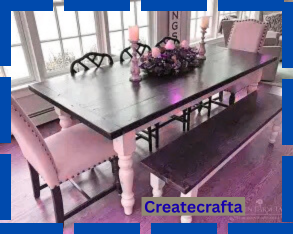
Here’s a simple guide to Farmhouse Tables written in clear English:
🪵 What is a Farmhouse Table?
A farmhouse table is a sturdy, rustic-style dining table inspired by traditional farmhouses. It usually features solid wood construction, a large rectangular top, and thick legs or a trestle base. These tables are designed for family-style meals and a cozy, welcoming atmosphere.
✨ Key Features of Farmhouse Tables
- Rustic Look – Made of natural wood with visible grain or distressed finishes.
- Sturdy & Practical – Built to last and hold heavy dishes or décor.
- Neutral Colors – Often in whites, grays, browns, or natural wood tones.
- Versatile Style – Matches rustic, country, modern farmhouse, or even industrial décor.
🛠️ DIY Farmhouse Table Idea
Materials:
- Solid wood planks (pine, oak, or reclaimed wood)
- 4 thick legs or a trestle frame
- Screws, wood glue, and clamps
- Sandpaper and stain or paint
Steps:
- Build the Tabletop
Lay your wood planks side by side. Glue and clamp them together. Secure with screws underneath. - Attach the Base
Screw the legs or trestle frame securely to the tabletop. - Sand Smooth
Sand the entire table until smooth, rounding edges if desired. - Stain or Paint
Apply wood stain for a natural look or white/gray paint for a modern farmhouse style. Seal with a clear coat for durability. - Let It Cure
Allow the finish to dry completely before using.
🌿 Styling a Farmhouse Table
- Add a linen or burlap runner for a rustic feel.
- Use wooden or ceramic serving dishes.
- Decorate with mason jar vases, candles, or greenery.
Would you like me to give you a step-by-step plan with exact measurements for building a farmhouse table (like a DIY blueprint)?
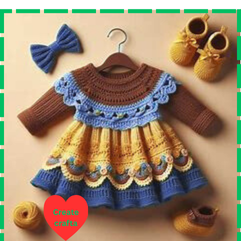
5. Baby Clothes
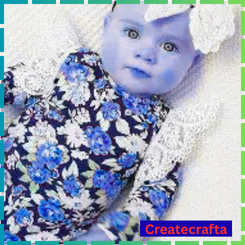
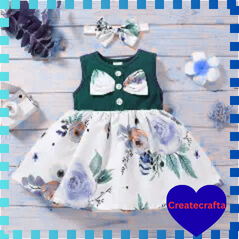
Make your booth a lively location for youngsters to linger out while parents shop, and design a distinctive range of clothing for baby boys or girls.
Permit customisation or monogramming for an extra cost.
6. Crochet Hats

Here’s a clear and simple guide about Crochet Hats in English:
🧶 What is a Crochet Hat?
A crochet hat is a handmade hat created by looping yarn with a crochet hook. These hats can be cozy, stylish, or functional, and they’re great for all ages.
✨ Why Make Crochet Hats?
- They’re quick and beginner-friendly projects.
- You can customize colors, textures, and patterns.
- They make perfect gifts or items to sell.
📝 Basic Crochet Hat Pattern (Beginner-Friendly)
Materials:
- Worsted-weight yarn (medium thickness)
- Crochet hook (size H/5.0mm or recommended on yarn label)
- Scissors
- Yarn needle (for weaving in ends)
Steps:
- Make a Magic Ring
Start with a magic ring or chain 4 and join to form a circle. - Round 1
Chain 2 (counts as first stitch), then make 11 double crochets into the ring. Join with slip stitch (12 stitches total). - Round 2
Chain 2, double crochet twice into each stitch around (24 stitches). - Round 3
Increase Round: Double crochet once in first stitch, twice in next stitch. Repeat around. - Round 4–6
Continue increasing rounds until the hat’s crown is the size you want (use head-size chart for guidance). - Work Evenly
When the crown is wide enough, crochet evenly (one stitch in each) for several rows to form the sides of the hat. - Finish
Fasten off, weave in ends. Add a pom-pom or leave plain.
🌸 Crochet Hat Variations
- Beanie Style – Classic snug hat.
- Slouchy Hat – Add extra rows for a relaxed look.
- Earflap Hat – Add earflaps and ties for warmth.
- Textured Hat – Use stitches like bobbles or puff stitches.
Would you like me to give you a printable crochet hat pattern with sizing charts (infant, child, adult)?
7. Knitted Scarves
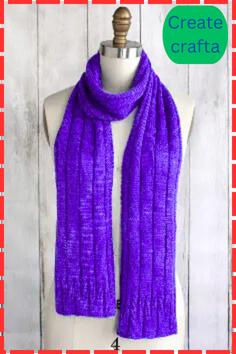
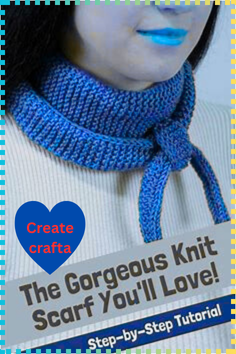
Make knitted scarves in lovely colours. To make them stand out, add buttons or something like. Use tissue paper and lovely gift bags to adorn your craft stand and demonstrate how they make excellent presents.
8. Nursery Décor
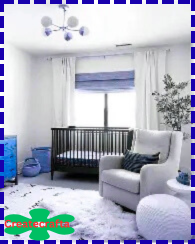
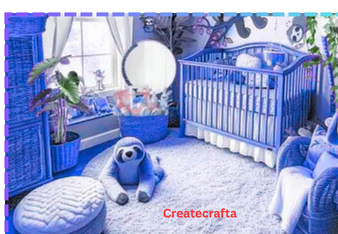
Here’s a simple guide about Nursery Décor written in clear English:
🌿 What is Nursery Décor?
Nursery décor refers to the furniture, colors, and decorations you use to create a cozy, safe, and welcoming space for a baby or young child.
✨ Key Elements of Nursery Décor
- Color Scheme – Soft, calming colors like pastels, neutrals, or earthy tones.
- Furniture – Crib, changing table, rocking chair, and storage.
- Wall Décor – Murals, decals, framed art, or wallpaper with gentle patterns.
- Textiles – Cozy rugs, curtains, and bedding in baby-friendly fabrics.
- Lighting – Soft lamps or nightlights for a warm, soothing glow.
🛠️ Easy Nursery Décor Ideas
- Wall Art: Hang animal prints, alphabet posters, or custom name signs.
- Themed Corners: Create a reading nook with a small bookshelf and cushions.
- Soft Rugs & Play Mats: Add a plush rug or foam play mat for tummy time.
- Storage Baskets: Use woven baskets for toys, blankets, or diapers.
- Mobiles: Hang a handmade mobile above the crib for visual stimulation.
🌸 Popular Nursery Themes
- Nature-Inspired (plants, animals, and earthy tones)
- Minimalist Modern (clean lines and neutral colors)
- Storybook/Whimsical (characters or fairytale touches)
- Gender-Neutral (yellows, greens, greys, and whites)
💡 Tips for Nursery Décor
- Choose non-toxic paints and finishes.
- Make sure furniture is sturdy and safe.
- Leave enough open space for play.
- Personalize with baby’s name or initials.
Would you like me to give you a list of creative DIY nursery décor projects (like handmade mobiles, wall hangings, or name signs)?
9. Menu Boards
Create weekly menu boards so that individuals may plan their meals and hang them in their kitchens.
Another option is to sell digital goods online, such as weekly meal plans with grocery lists or menu planners. Additionally, think about serving your local friends and family home-cooked meals.
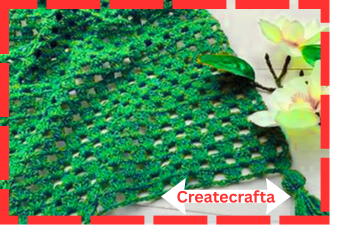
10. Crochet Boot Cuffs
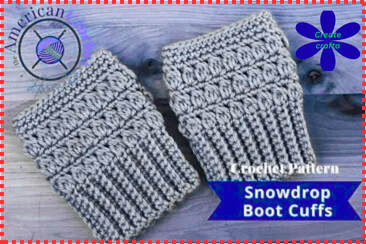
Here’s a clear and simple guide about Crochet Boot Cuffs written in English:
🧶 What Are Crochet Boot Cuffs?
Crochet boot cuffs are short, decorative bands of crochet that you wear around your calves, just above your boots. They peek out at the top of your boots to add style and extra warmth without the bulk of full leg warmers.
✨ Why Make Crochet Boot Cuffs?
- They’re quick and easy to make — perfect for beginners.
- Great way to use up leftover yarn.
- You can customize the color, pattern, and texture.
- They make wonderful gifts or items to sell at craft fairs.
📝 Basic Crochet Boot Cuff Pattern (Beginner-Friendly)
Materials:
- Worsted-weight yarn (medium thickness)
- Crochet hook size H/5.0 mm (or size recommended on yarn label)
- Scissors
- Yarn needle
Steps:
- Foundation Chain
Chain enough stitches to fit around your calf (usually 28–36 stitches for adults). - Form a Circle
Join the last chain to the first with a slip stitch to create a ring. - Work in Rounds
Chain 2. Work 1 double crochet in each stitch around. Join with a slip stitch at the end of each round. - Add Height
Continue crocheting in rounds until the cuff is the desired height (about 4–6 inches). - Add Ribbing (Optional)
For a ribbed top or bottom, switch to front post/back post double crochet stitches for a few rows. - Finish
Fasten off, weave in ends. Add buttons, bows, or lace for extra style.
🌸 Crochet Boot Cuff Variations
- Ribbed Cuffs – Use only front post/back post stitches for a stretchy, knitted look.
- Textured Cuffs – Add bobble, puff, or shell stitches.
- Lacy Cuffs – Use openwork stitches for a feminine touch.
- Decorative Add-Ons – Buttons, pom-poms, faux fur trim, or small crochet flowers.
Would you like me to make you a printable crochet boot cuff pattern with different sizes (teen, women’s, men’s)?
11. Crochet or Knitted Blankets
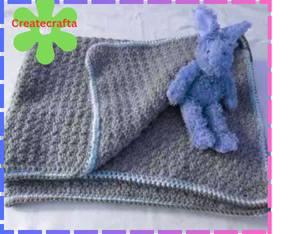
Make big cozy blankets, and wrap them up with pretty ribbon for gifts. If you set up at a craft show, drape one along the front table or hang a few from a blanket ladder so shoppers can see how they look laid out.
12. Dog Bowl Holders
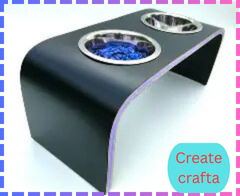
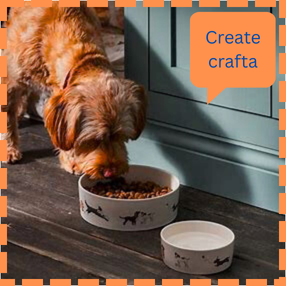
Here’s a simple guide about Dog Bowl Holders written in clear English:
🐾 What is a Dog Bowl Holder?
A dog bowl holder is a stand or frame that keeps your dog’s food and water bowls elevated or secured in one place. It makes eating more comfortable for your dog and helps keep your feeding area tidy.
✨ Benefits of Dog Bowl Holders
- Better Posture – Raised bowls help dogs eat and drink at a more natural angle.
- Less Mess – Bowls stay in place instead of sliding around.
- Healthier Eating – Reduces strain on the neck and joints, especially for large or senior dogs.
- Stylish Look – Adds a neat, coordinated touch to your home décor.
🛠️ DIY Dog Bowl Holder Idea
Materials:
- Wooden crate or plank
- Two stainless steel dog bowls
- Jigsaw or hole saw (to cut bowl holes)
- Sandpaper
- Wood stain or paint (optional)
Steps:
- Measure Bowls
Trace the diameter of your dog’s bowls onto the top of the wooden plank or crate. - Cut the Holes
Use a jigsaw or hole saw to cut out the circles so the bowls can sit snugly in place. - Sand the Wood
Smooth the edges to prevent splinters. - Finish the Holder
Stain or paint the wood to match your décor. Let it dry completely. - Insert Bowls
Drop the bowls into the holes. You now have an elevated, custom dog bowl stand.
🌸 Styling and Customization Ideas
- Add your dog’s name with stencils or decals.
- Use reclaimed wood for a rustic farmhouse style.
- Add a shelf or storage drawer for treats and leashes.
- Adjust the height based on your dog’s size.
Would you like me to give you a step-by-step woodworking plan with measurements for a DIY elevated dog bowl holder?
13. Decorative Placemats
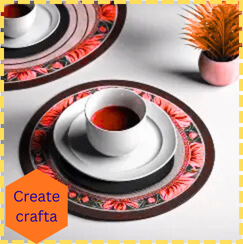
Get creative and use a variety of materials to create placemats! To showcase your creations at a show, set up a dining table with place settings.
14. Handmade Calendars or Planners
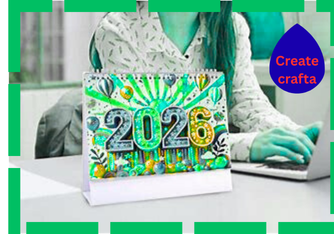
Here’s a clear guide about Handmade Calendars or Planners written in English:
📅 What Are Handmade Calendars or Planners?
Handmade calendars or planners are customized organizers you create yourself. They can be as simple as a wall calendar or as detailed as a full planner with monthly, weekly, and daily pages. These are perfect for gifts, personal use, or selling at craft fairs.
✨ Why Make Handmade Calendars or Planners?
- Personalization – Choose your own colors, designs, and layouts.
- Creative Expression – Add hand lettering, doodles, or art.
- Eco-Friendly – Use recycled or upcycled paper and materials.
- Great Gifts – Thoughtful, one-of-a-kind presents.
🛠️ DIY Handmade Calendar Ideas
Wall Calendar
- Use cardstock or watercolor paper for each month.
- Print or handwrite the dates.
- Decorate with photos, artwork, or pressed flowers.
- Bind with twine or a metal ring at the top for hanging.
Desk Calendar
- Create small cards for each month.
- Display on a wooden stand, easel, or clip frame.
- Add motivational quotes or daily reminders.
Planner/Organizer
- Make a custom cover from fabric, leather, or scrapbook paper.
- Use blank or lined pages for notes.
- Hand-draw or print monthly, weekly, and daily spreads.
- Add pockets for receipts, stickers, or notes.
🌸 Customization Ideas
- Add inspirational quotes or affirmations.
- Include stickers, washi tape, or hand-painted designs.
- Personalize with the recipient’s name or favorite theme.
- Use bullet journal layouts for flexibility.
💡 Tips
- Use a hole punch and binder rings for easy page-turning.
- Laminate covers to make them more durable.
- Mix different paper textures for a unique look.
Would you like me to give you templates for printable monthly or weekly planner pages you can decorate by hand?
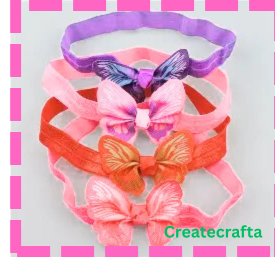
15. Hair Bows, Headbands, and Hair Ties
Make sets of lovely headbands or hair bows. Selling a handcrafted organiser to properly store headbands or hair bows is another option.