4 Recycled Craft Activities for Babies and Toddlers
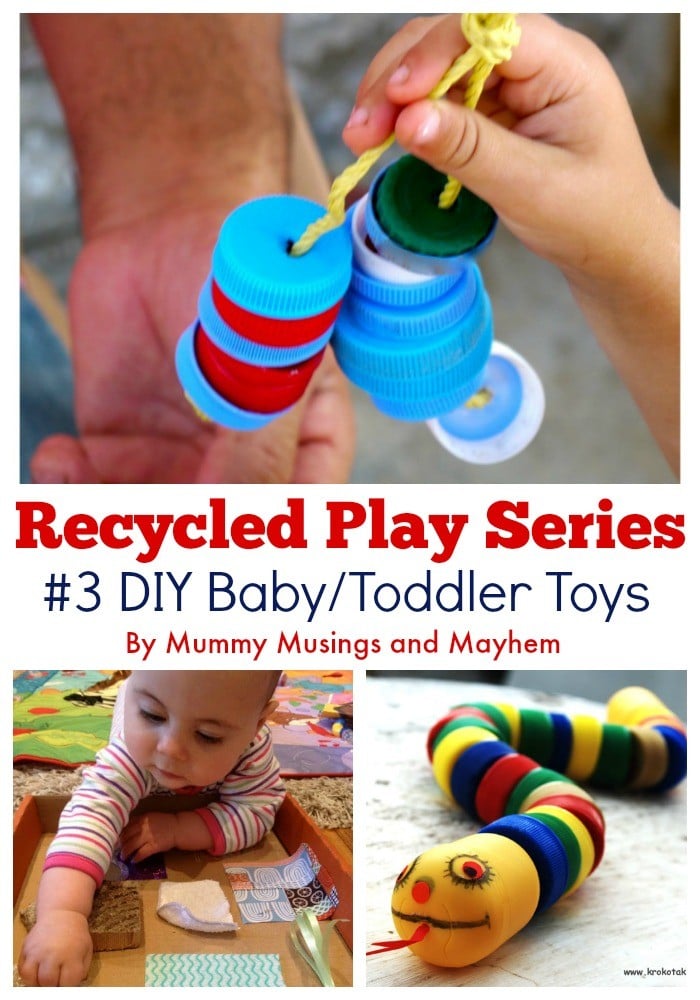
Engaging in recycled craft activities with babies and toddlers can be both fun and educational. These activities not only encourage creativity but also promote an early understanding of the importance of recycling and reusing materials. Here are some recycled craft ideas suitable for babies and toddlers:
1. Sensory Bottles: Fill clean, empty plastic bottles with various materials like colorful beads, rice, or small pom-poms. Seal the bottles securely and let your child shake, roll, and explore the different sounds and textures.
2. Cardboard Box Play: Large cardboard boxes can become endless sources of creative play. Cut windows, doors, and let your child decorate with non-toxic paints, markers, or crayons. You can also make a simple cardboard tunnel for them to crawl through.
3. Egg Carton Art: Empty egg cartons can be transformed into caterpillars, ladybugs, or even boats. Paint the sections and add googly eyes, pipe cleaner legs, or sails made from paper.
4. Toilet Paper Roll Stamps: Flatten and shape the ends of toilet paper rolls into various shapes (hearts, stars, flowers). Dip them in paint and let your child stamp on paper to create art.
5. Tin Can Drums: Clean out empty tin cans and let your child decorate them with paint, stickers, or colored tape. Once they dry, use wooden spoons as drumsticks for a noisy music session.
6. Magazine Collages: Give your toddler old magazines and let them tear out pictures and glue them onto paper to create their own collages. This activity encourages fine motor skills and creativity.
7. Fabric Scrap Sensory Bags: Fill a small, clear ziplock bag with fabric scraps of different textures and colors. Seal it tightly and let your child squish and explore the sensory bag.
8. Nature Collage: Take a walk with your toddler and collect fallen leaves, sticks, and flowers. Use clear contact paper to make a sticky collage with the nature items.
9. Bottle Cap Art: Save bottle caps from your household recycling, and let your child use them to create art. They can make mosaics, sort them by color, or even practice counting.
10. Cereal Box Puzzles: Cut up cereal boxes into puzzle pieces and have your toddler put them back together. You can also let them decorate the puzzle pieces first.
11. Paper Plate Masks: Use old paper plates to create masks. Cut out eye holes and let your child paint, color, or glue on various decorations to make their own unique mask.
Remember to always supervise your child during these activities and ensure that any small items (like bottle caps) are not a choking hazard. Additionally, using non-toxic, child-safe materials for decorating and crafting is essential for your child’s safety. These activities can provide hours of entertainment and valuable learning experiences for both you and your little one while promoting environmental awareness through recycling.
Also Like:- 5 Genius Upcycling Projects
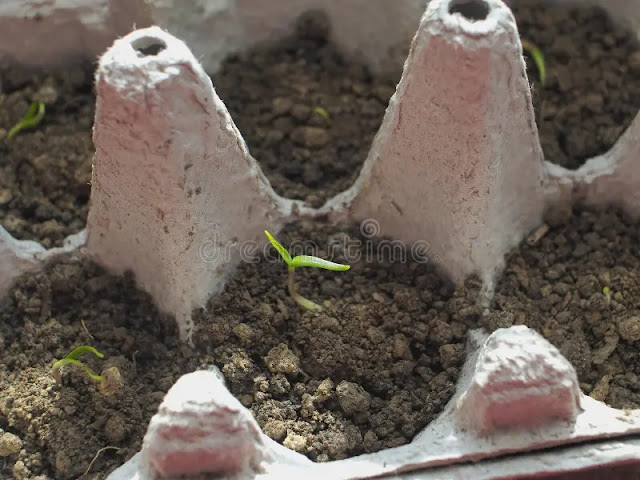
1. Grow Seedlings in an Egg Carton

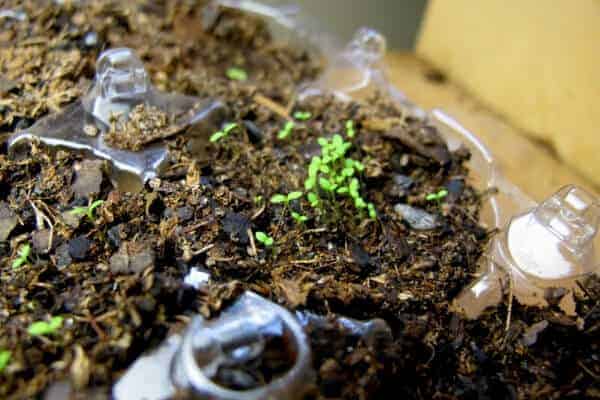
Growing seedlings in an egg carton is a great way to start your garden plants from seeds. It’s a simple and cost-effective method that repurposes materials you might already have at home. Here’s how you can do it:
Materials you’ll need:
Empty egg carton (cardboard or paper-based is preferable)
Potting soil or seed-starting mix
Seeds of your choice
Water
Plastic wrap (optional)
Steps:
Prepare the Egg Carton: Start by collecting an empty egg carton. Ensure it’s clean and dry. If you have a cardboard or paper-based carton, it will work best because it will eventually decompose when planted in the ground.
Cut the Carton: Carefully cut the lid off the egg carton. You will be using the bottom part, which has the individual egg cups.
Fill with Soil: Fill each egg cup with potting soil or a seed-starting mix. Make sure the soil is evenly distributed and lightly press it down to remove any air pockets.
Plant Seeds: Plant one or more seeds in each egg cup, following the recommended planting depth and spacing for the specific type of seeds you’re growing. You can use a pencil or your finger to create small holes in the soil for the seeds.
Label Your Seedlings: To keep track of your seedlings, label each egg cup with the name of the plant or type of seed you’ve planted. This will help you identify your seedlings as they grow.
Water: Gently water the soil in each egg cup. Use a spray bottle or a watering can with a fine spray to avoid disturbing the seeds. The soil should be moist but not soaking wet.
Cover (Optional): You can cover the egg carton with plastic wrap to create a mini greenhouse effect, which helps retain moisture and heat. This is especially helpful for seeds that require higher humidity to germinate.
Place in a Sunny Spot: Put the egg carton in a location with good sunlight, such as a windowsill or under a grow light. Most seedlings need at least 6-8 hours of sunlight per day.
Monitor and Water: Check your seedlings regularly to ensure the soil remains consistently moist but not waterlogged. Water from the bottom by placing the egg carton in a tray of water if needed.
Transplant Seedlings: Once your seedlings have developed a couple of true leaves and are large enough to handle, you can transplant them into larger pots or directly into your garden.
By using an egg carton to start your seedlings, you’re giving them a head start in a controlled environment. This method is not only eco-friendly but also allows for easy transplanting when the time is right, promoting successful growth in your garden.
2. Recycled Plastic Bird Feeder
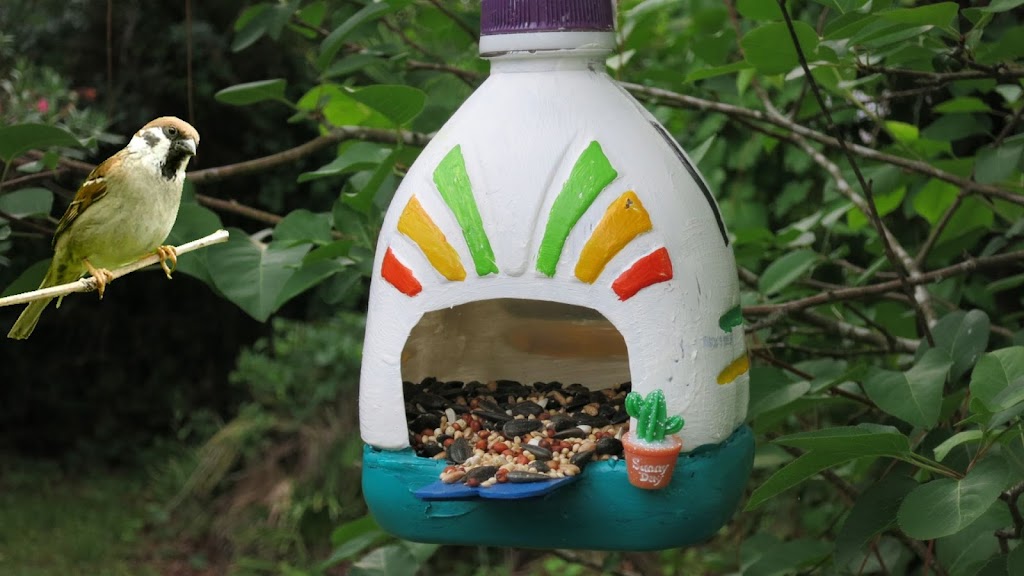
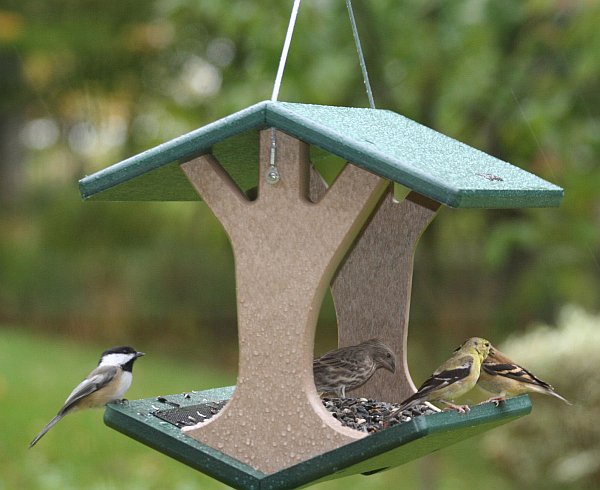
A recycled plastic bird feeder is an eco-friendly and sustainable way to attract and nourish local bird populations while reducing plastic waste. Here’s how you can create one:
Materials Needed:
Recycled Plastic Container: Find a clean plastic container with a lid. This could be an old milk jug, a soda bottle, or any other container with an opening that birds can access.
Utility Knife or Scissors: You’ll need these to cut and shape the container.
Wooden Dowel or Stick: This will serve as a perch for the birds.
String or Wire: You’ll use this to hang the bird feeder.
Drill and Drill Bit: If needed for making holes in the container.
Bird Seed: Choose a birdseed mix appropriate for the types of birds in your area.
Instructions:
Clean the Container: Make sure the plastic container is thoroughly cleaned and free of any residues or labels. Rinse it out and allow it to dry.
Cut an Opening: Using a utility knife or scissors, carefully cut an opening near the bottom of the container. The opening should be large enough for birds to access the seeds but not so large that they can easily get inside.
Add Perch: Insert a wooden dowel or stick through the container just below the opening. This will provide a perch for birds to land on while they feed.
Drainage Holes (Optional): If your container doesn’t have any drainage holes, you may want to drill a few small holes in the bottom to prevent water from collecting inside.
Fill with Birdseed: Fill the container with your choice of birdseed. Make sure not to overfill it, as it might become too heavy or spill over.
Secure the Lid: Place the lid back onto the container. This will help protect the birdseed from rain and squirrels.
Hang the Feeder: Use a piece of string or wire to create a hanger for the bird feeder. Attach it securely to the top of the container.
Find the Right Location: Hang your bird feeder in a safe and convenient location, where birds can easily access it and where you can enjoy watching them.
Regular Maintenance: Keep an eye on the feeder to ensure it remains clean and filled with birdseed. Refill it as needed, and clean it periodically to prevent mold or bacterial growth.
By repurposing a plastic container into a bird feeder, you not only provide food for local birds but also help reduce plastic waste. It’s a simple and sustainable way to enjoy the beauty of nature in your own backyard.
3. Paper Roll Binoculars
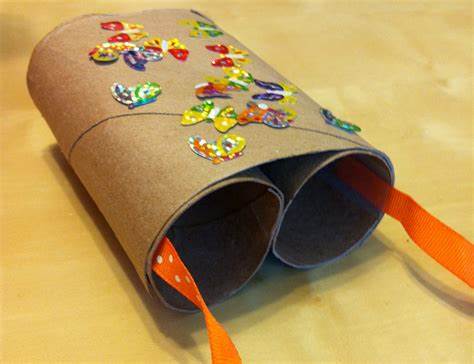
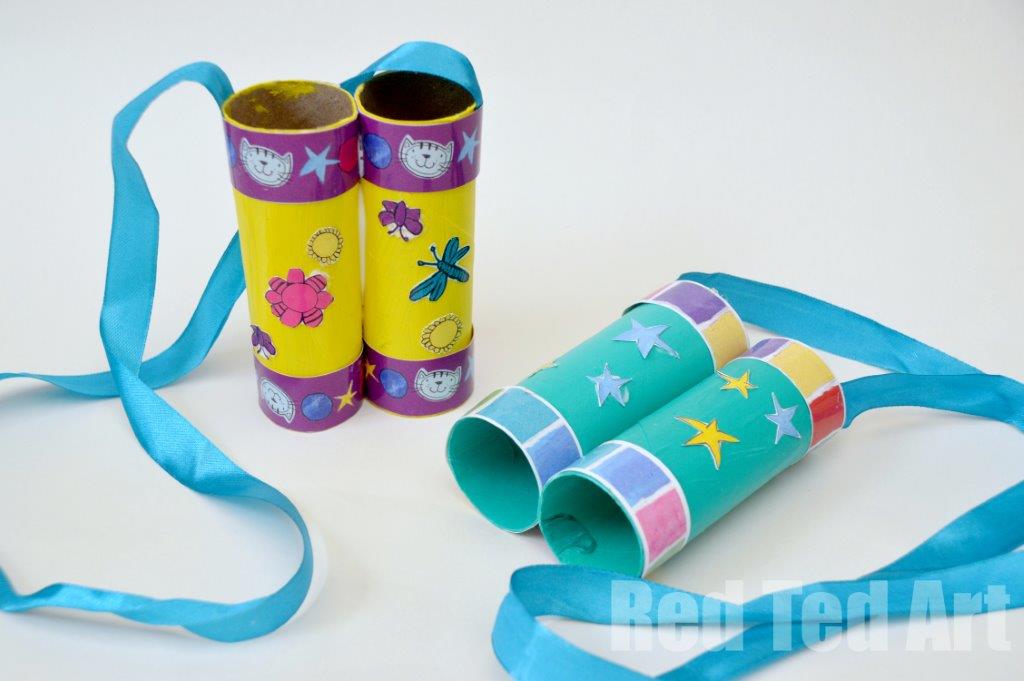
Paper Roll Binoculars
Paper roll binoculars are a fun and simple craft project that you can easily make at home. They are a great DIY project for kids and can provide hours of imaginative play. Here’s how to make your own paper roll binoculars:
Materials you’ll need:
Two empty paper rolls (toilet paper rolls or paper towel rolls)
Decorative paper or wrapping paper
Glue or double-sided tape
Scissors
String or ribbon
Markers, stickers, or other decorative items (optional)
Instructions:
Start by decorating the paper rolls. You can use markers to color them or wrap them in decorative paper or wrapping paper. Get creative and make them as colorful as you like.
Once your paper rolls are decorated, let them dry if necessary.
When the rolls are dry, take one roll and apply glue or double-sided tape to one end.
Press the glued end of the first roll onto the second paper roll to join them together. Make sure they are aligned perfectly and allow the glue to dry and bond them securely.
Once the rolls are securely attached, you can add some extra decorations if you like. Use stickers, markers, or any other embellishments to make your binoculars unique.
Now, your binoculars need a strap to hang around your neck. Take a piece of string or ribbon and measure it to your desired length. Make sure it’s long enough to comfortably hang the binoculars around your neck.
Attach one end of the string to one side of the binoculars using glue or tape. Repeat the process on the other side.
Let the glue dry and ensure that the string is securely attached.
Your paper roll binoculars are now ready to use. Hang them around your neck and use them for bird-watching, exploring nature, or simply for imaginative play. Have fun exploring the world with your homemade binoculars!
4. Wipe lid photo board
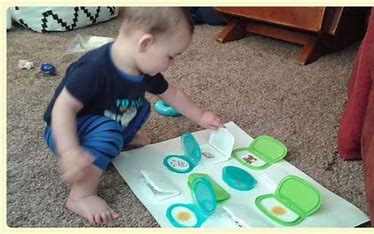
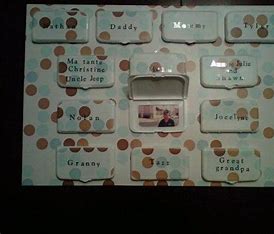
It seems like you’d like a brief explanation or instructions for wiping a lid or photo board. Here’s a simple instruction in English:
To wipe a lid or photo board, you’ll need a clean cloth or paper towel. Gently dampen it with water or a mild cleaning solution if necessary. Then, carefully wipe the surface of the lid or photo board to remove any dust, dirt, or smudges. Make sure to dry it thoroughly with a dry cloth or towel to prevent streaks or water spots. This should leave the lid or photo board clean and ready for use.