7 Easy, Fun and Useful Crafts for Adults | Skillshare Blog
Of course! I can provide you with some easy, fun, and useful craft ideas for adults. These crafts can be both enjoyable and practical.
Hand-painted Plant Pots:
Purchase some plain terracotta pots and acrylic paint.
Let your creativity shine by painting them in your own unique designs.
Once dry, these pots can be used to grow herbs or small plants, adding a touch of green to your home.
DIY Coasters:
Gather cork coasters or square tiles.
Decorate them with colorful paper, fabric, or your own designs.
Seal with Mod Podge or resin for a durable finish.
Customized Tote Bags:
Buy a plain canvas tote bag.
Use fabric paints, stencils, or iron-on transfers to create your personalized design.
These can be both a fashion statement and a handy accessory.
Candle Making:
Experiment with different scents and colors to create your own custom candles.
Making candles can be a soothing and creative process, and the end result is both decorative and functional.
Handmade Greeting Cards:
Use your artistic skills to craft personalized greeting cards for special occasions.
Incorporate techniques like watercolor, calligraphy, or paper quilling for a unique touch.
Upcycled Furniture:
Give new life to old furniture by sanding, repainting, or decoupaging.
This not only revives your space but also gives you a sense of accomplishment.
Jewelry Making:
Create your own unique jewelry pieces with beads, wire, and other crafting supplies.
You can make necklaces, bracelets, and earrings to match your style.
Homemade Bath Bombs:
Craft your own bath bombs with Epsom salt, baking soda, essential oils, and natural colorants.
They make for relaxing, spa-like experiences in your own bathroom.
Knitting or Crocheting:
Learn to knit or crochet and create scarves, hats, or blankets.
These crafts can be both relaxing and practical for keeping warm.
Decoupage Home Decor:
Decorate items like photo frames, trays, or vases with cut-out images and adhesive.
It’s a simple way to personalize your home decor.
Remember, the key to enjoying these crafts is to let your creativity flow and have fun while doing them. Plus, you’ll end up with unique and functional items that you can use or give as thoughtful gifts to others. Enjoy your crafting!
Also Like ;-9 upcycling ideas
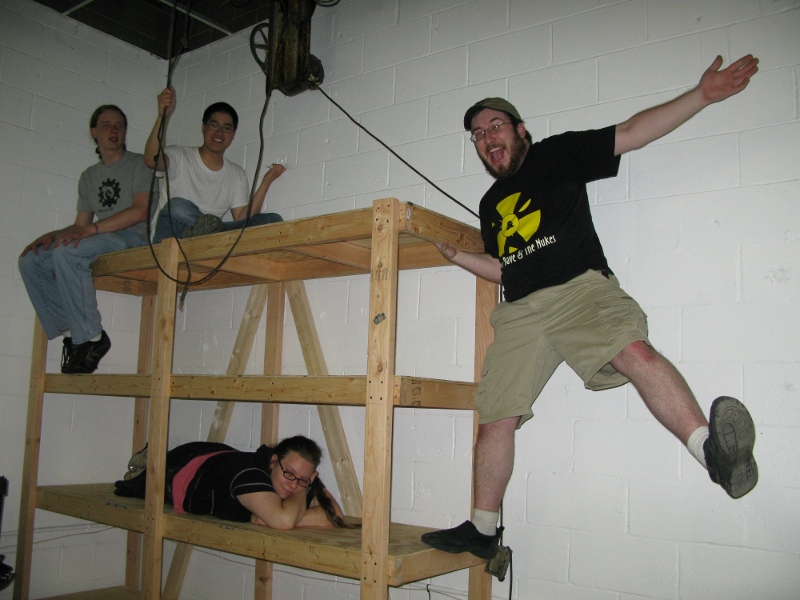
1. Shelf Making
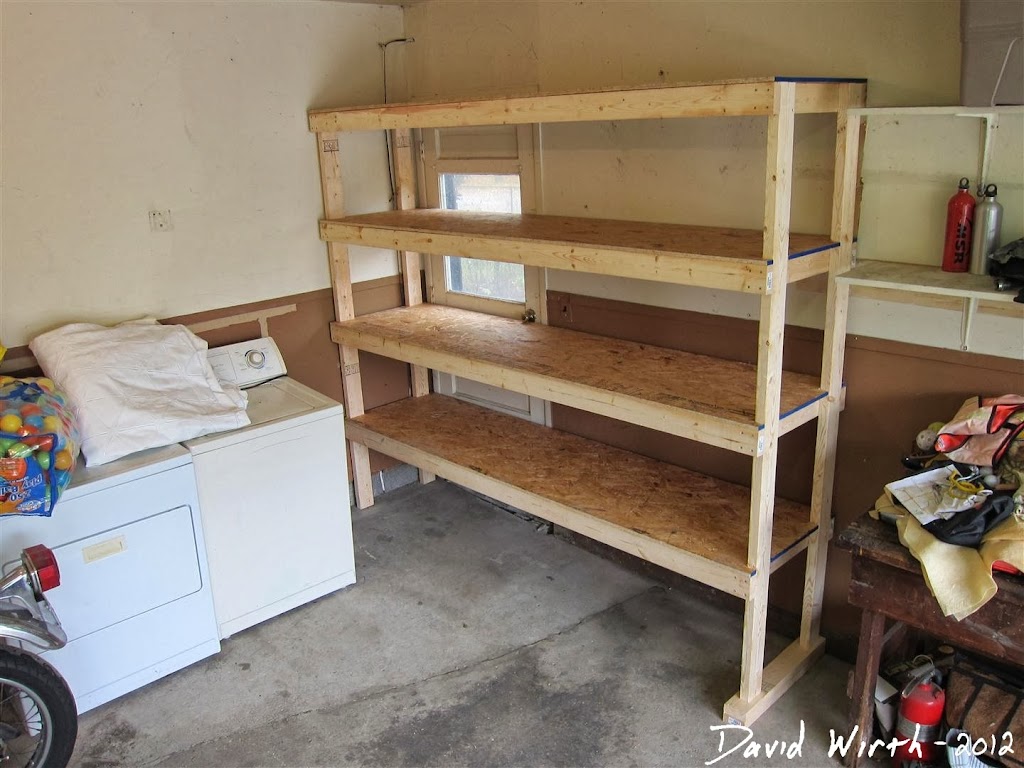
Certainly! Making shelves can be a rewarding and practical DIY project. Here’s a basic guide on how to make your own shelves:
Materials You’ll Need:
Wooden Boards: Choose the type and size of wood that suits your design and needs. Common options include pine, plywood, or reclaimed wood.
Support Brackets or Braces: These can be L-shaped metal brackets or wooden braces, depending on the style you prefer.
Screws: Make sure they are appropriate for the thickness of your wood.
Drill and Screwdriver: Essential for securing the brackets and assembling the shelf.
Level: To ensure your shelf is straight.
Measuring Tape and Pencil: For accurate measurements and markings.
Saw: If your wooden boards need to be cut to the desired size.
Sandpaper and Finish (optional): For smoothing the wood and applying a finish like varnish or paint for protection and aesthetics.
Steps to Make Shelves:
Design Your Shelves:
Decide on the dimensions and style of your shelves. Consider factors like the room’s decor and what you plan to display or store on the shelves.
Measure and Cut:
Measure and mark the dimensions on your wooden boards. Use a saw to cut the boards to the desired size.
Sand and Finish (Optional):
Smooth the edges and surfaces of the wooden boards with sandpaper. Apply a finish like varnish or paint if desired. Let it dry completely.
Position the Brackets:
Determine where you want to mount the brackets on the wall. Use a level to ensure they’re straight and mark the wall with a pencil.
Attach Brackets:
Drill pilot holes for the screws, then attach the brackets to the wall. Use wall anchors if necessary to provide extra support. Make sure the brackets are securely fastened.
Attach Shelves:
Place your wooden boards on top of the brackets. Secure them to the brackets by screwing through the bottom of the boards into the brackets.
Final Checks:
Use the level to ensure your shelves are straight. Make any necessary adjustments.
Decorate and Organize:
Once your shelves are securely in place, you can decorate and organize them with your items, whether it’s books, decorations, or storage bins.
Remember to consider the weight capacity of your shelves, especially if you plan to store heavy items. Building shelves allows you to create customized storage solutions that match your style and needs, making it a great DIY project for any room in your home.
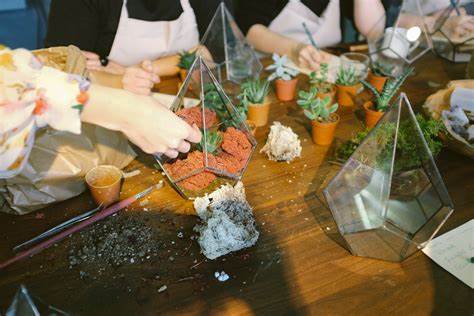
2. Pottery
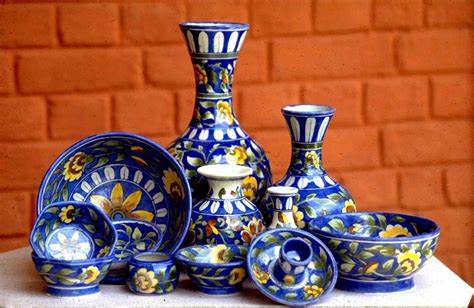
Of course, I can provide information and answer questions about pottery in the English language. Pottery is the art and craft of making objects from clay by shaping and then firing them in a kiln to harden the material. Here are some key points about pottery:
Clay: Pottery begins with clay, which is a natural material composed of fine particles. There are various types of clay, including earthenware, stoneware, and porcelain, each with different properties and characteristics.
Hand Building and Wheel Throwing: Pottery can be created using two main techniques – hand building and wheel throwing. Hand building involves forming the clay by hand, while wheel throwing involves using a pottery wheel to shape the clay into various forms.
Coiling and Pinching: Hand building techniques include coiling, where long ropes of clay are stacked and smoothed together, and pinching, where the clay is formed by pinching and shaping it with the fingers.
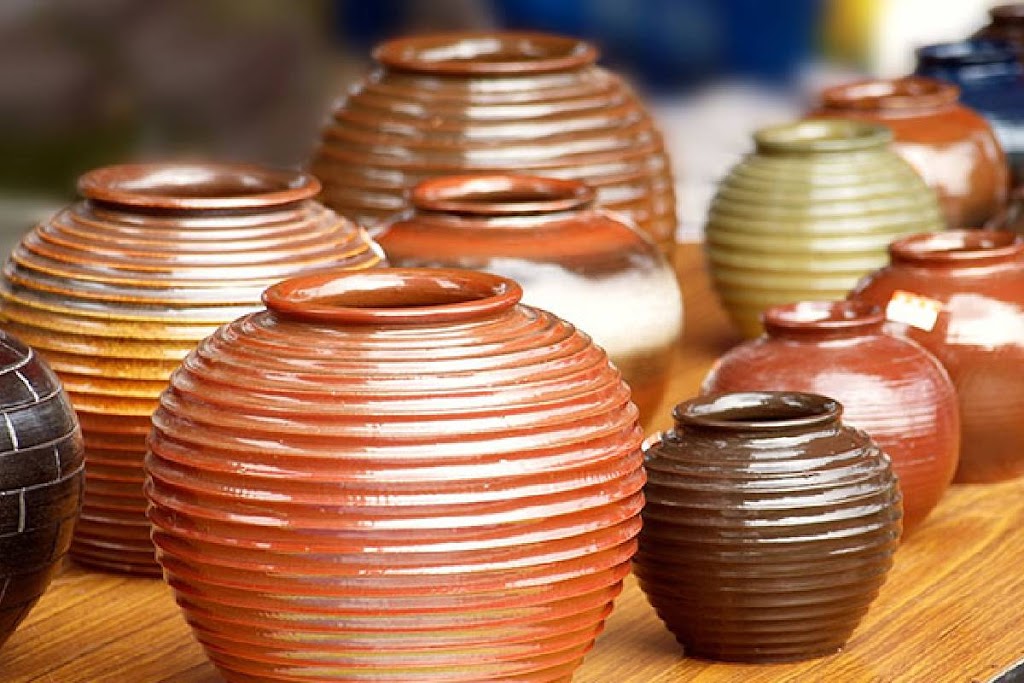
Glazing: Once a pottery piece is shaped and dried, it is often glazed. Glaze is a liquid glass-like substance that, when fired in the kiln, adds color and a protective finish to the pottery.
Firing: After shaping and glazing, the pottery is fired in a kiln at high temperatures. This process hardens the clay and transforms it into a durable, long-lasting material.
Types of Pottery: There are many types of pottery, including functional pottery like plates, bowls, and mugs, as well as decorative pottery, such as vases and sculptures. Pottery can be both utilitarian and artistic.
Ceramic History: Pottery has a long history that dates back thousands of years. It has been used for both practical and artistic purposes in various cultures around the world.
Contemporary Pottery: In addition to traditional pottery, there is a thriving contemporary pottery scene with artists creating innovative and unique pieces.
Pottery as a Hobby: Many people enjoy pottery as a hobby. It can be a relaxing and creative activity, allowing individuals to express themselves artistically and create functional items.
Pottery Workshops and Classes: If you’re interested in learning pottery, you can often find workshops and classes at local studios and community centers. These provide hands-on experience and instruction in the art of pottery.
Pottery is a diverse and creative field, and it has a rich history and cultural significance. Whether you’re interested in creating your own pottery or simply appreciate the beauty of ceramic art, there’s a lot to explore within the world of pottery. If you have specific questions or need more information, feel free to ask!
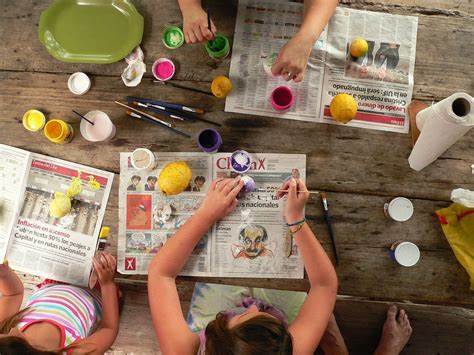
3. Scrapbooking

Certainly, I can provide information and tips on scrapbooking in English.
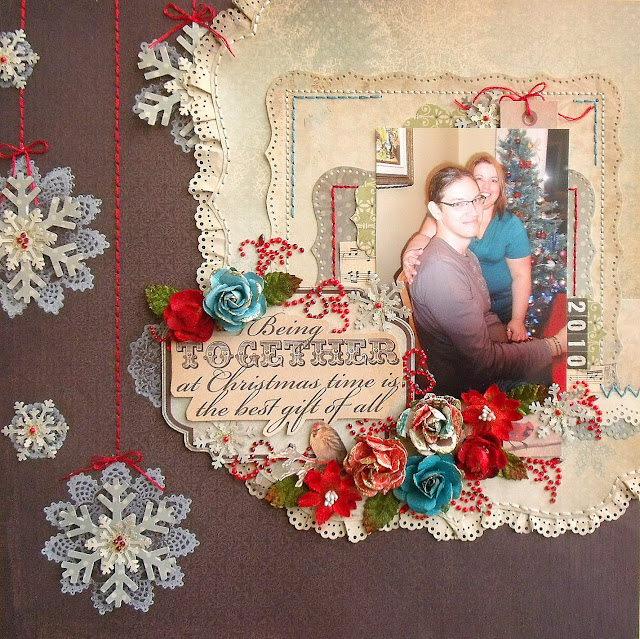
Scrapbooking is a creative and enjoyable hobby that allows you to preserve and display your memories and moments in a visually appealing way. It involves assembling photos, memorabilia, decorative paper, and various embellishments in a scrapbook to create a personalized and meaningful keepsake. Here are some key elements and tips for successful scrapbooking:
Gather Your Supplies:
Start by collecting your materials, including a scrapbook album, patterned and solid-colored papers, adhesive (such as glue, tape, or photo corners), scissors, and various embellishments like stickers, ribbons, and buttons.
Choose a Theme:
Decide on a theme or concept for your scrapbook. It could be a vacation, a special event, a specific time period, or even an everyday life theme.
Select and Arrange Photos:
Choose the photos you want to include in your scrapbook. Consider the story you want to tell and arrange them in a visually appealing way. You can crop photos to focus on specific subjects and moments.
Layer and Decorate:
Use decorative papers to create backgrounds for your pages. Layering different papers and textures can add depth and visual interest to your layouts.
Add Journaling:
Include journaling to provide context and information about the photos and the memories associated with them. You can write by hand or use printed labels or digital fonts.
Embellish Creatively:
Enhance your pages with embellishments like stickers, die-cuts, washi tape, and more. These add character and personality to your scrapbook.
Create Borders and Frames:
Use borders and frames to draw attention to specific photos or elements on the page. This can make your scrapbook more visually appealing.
Tell a Story:
Arrange your pages in a way that tells a coherent story. You can use page titles, captions, and journaling to guide the viewer through your scrapbook.
Preserve Memories:
Make sure your scrapbook materials are acid-free and archival quality to ensure the longevity of your creations.
Experiment and Have Fun:
Scrapbooking is a highly creative and personal activity. There are no strict rules, so feel free to experiment, try new techniques, and express yourself through your designs.
Organize Your Supplies:
Keep your scrapbooking supplies well-organized, so you can easily find what you need when working on your projects.
Share Your Work:
Share your scrapbook with friends and family or even consider entering it into competitions or online communities to get feedback and inspiration.
Scrapbooking is a wonderful way to document your life’s special moments and express your creativity. It’s a labor of love that can be enjoyed by people of all ages and skill levels.
4. Soap Making
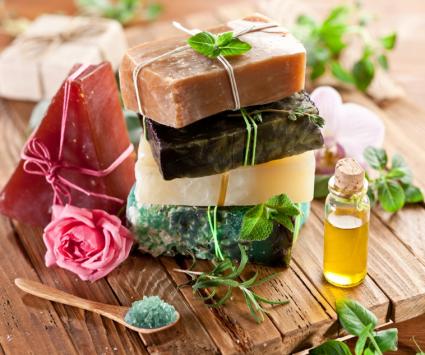
Of course! I’d be happy to provide information on soap making in English. Soap making is a creative and rewarding craft that allows you to create your own personalized soap for personal use or as gifts. Here’s a basic overview of the soap-making process:
Ingredients:
Base Oils: You’ll need oils or fats as the main ingredient. Common options include olive oil, coconut oil, palm oil, and more.
Lye (Sodium Hydroxide): This is a caustic substance used to saponify the oils and turn them into soap. It’s essential to handle lye with care and follow safety precautions.
Water: Used to dissolve the lye.
Fragrance: Essential oils, fragrance oils, or herbs can be added for scent.
Colorants: Natural colorants like clays, spices, or synthetic colorants can be used to add color to your soap.
Additives: You can add ingredients like exfoliants (e.g., oatmeal), moisturizers (e.g., shea butter), or other specialty ingredients for different purposes.
Equipment:
Safety Gear: Goggles, gloves, and protective clothing for working with lye.
Heat-Resistant Containers: For mixing lye with water.
Measuring Tools: Kitchen scales, thermometers, and measuring cups/spoons.
Stirring Tools: Stainless steel or silicone spatulas and mixing bowls.
Molds: You can use various molds to shape your soap, such as silicone molds, loaf molds, or even simple cardboard boxes.
The Soap-Making Process:
Safety First: Wear appropriate safety gear when handling lye. Always add lye to water and not the other way around to avoid splashes. Work in a well-ventilated area.
Measure and Mix: Weigh out the oils and lye according to your chosen recipe. Mix lye into water slowly, stirring carefully. This mixture will get hot and emit fumes, so be cautious.
Combine Oils and Lye: When both the lye solution and oils have cooled to an appropriate temperature, combine them and start stirring.
Trace: Continue stirring the mixture until it reaches “trace,” a stage where it thickens to the consistency of pudding.
Add Fragrance and Color: Incorporate your chosen fragrance and colorants into the soap mixture.
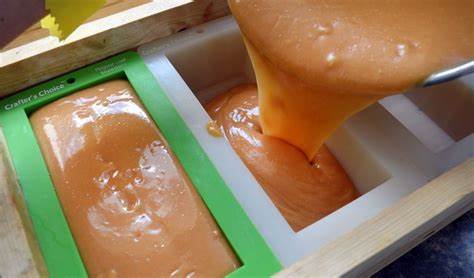
Pour into Molds: Pour the soap mixture into your chosen molds. Tap the molds to release air bubbles.
Curing: Allow the soap to sit in the molds for 24-48 hours, or until it hardens. Afterward, unmold and cut it into bars if needed.
Curing Period: Place the soap bars on a rack to cure for several weeks, allowing them to harden and become milder. This improves the quality of the soap.
Enjoy: Once the curing period is over, your soap is ready to use or share with others.
Remember, soap making requires attention to detail and safety precautions, especially when working with lye. It’s a versatile craft with many possibilities for customization, so feel free to experiment with different ingredients, scents, and designs to create unique, handmade soaps.
5. Glass Etching
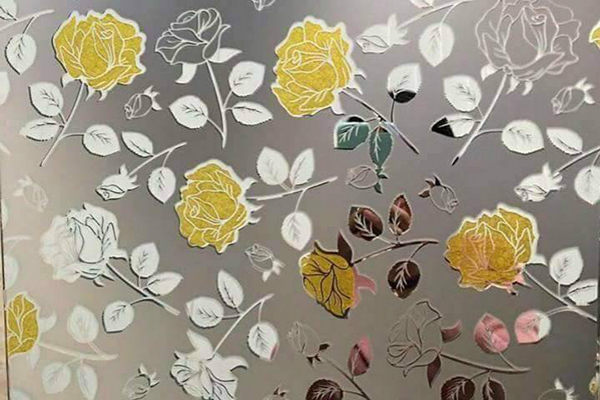

Glass etching is a creative and artistic process that involves the removal of a small amount of glass material to create decorative designs, patterns, or text on the surface of glass objects. It is commonly used for various purposes, including creating personalized glassware, decorative mirrors, glass doors, and more. Here’s a brief overview of the glass etching process:
Materials and Tools:
Glass Object: You’ll need a glass item to etch, such as a glass mug, mirror, vase, or window.
Etching Cream: This is a chemical solution that will remove a thin layer of glass when applied.
Stencils: Stencils can be made of vinyl, contact paper, or other materials, and they are used to create the design you want to etch.
Protective Gear: Safety goggles, gloves, and protective clothing are essential to protect yourself from the etching cream.
Brush or Applicator: This is used to apply the etching cream to the glass.
Steps for Glass Etching:
Prepare Your Workspace: Start by setting up a clean and well-ventilated workspace. Make sure to protect surfaces from etching cream, and wear safety gear.
Design Your Stencil: Create or obtain the stencil for your design. You can cut it out from vinyl or contact paper using a craft knife or a cutting machine.
Apply the Stencil: Carefully stick the stencil to the glass surface. Make sure it’s firmly adhered and that there are no gaps where the etching cream could seep through.
Apply the Etching Cream: Using a brush or applicator, apply a generous layer of etching cream over the stencil. Be sure to cover the design area completely.
Wait for the Etching: The etching cream will need some time to work, typically around 5-10 minutes. Follow the instructions on the product for precise timing.
Rinse Off the Cream: Once the etching time is up, rinse the glass object under running water. This will remove the etching cream and reveal your design.
Remove the Stencil: Gently peel off the stencil to reveal the etched design.
Clean and Dry: Wash the glass item thoroughly to remove any remaining etching cream. Dry it off to see the finished result.
Tips and Safety Precautions:
Work in a well-ventilated area or wear a mask to avoid inhaling fumes from the etching cream.
Read and follow the instructions provided with the etching cream carefully.
Practice on a scrap piece of glass before working on your final project to get a feel for the process.
Be patient and take your time when applying the etching cream and rinsing it off. Rushing can lead to uneven results.
Always use appropriate safety gear, including gloves and eye protection.
Glass etching is a versatile and creative way to add a personal touch to glass items, whether for decorative or functional purposes. With the right materials and a steady hand, you can create beautiful, custom designs on glass surfaces.
6. Candle Making
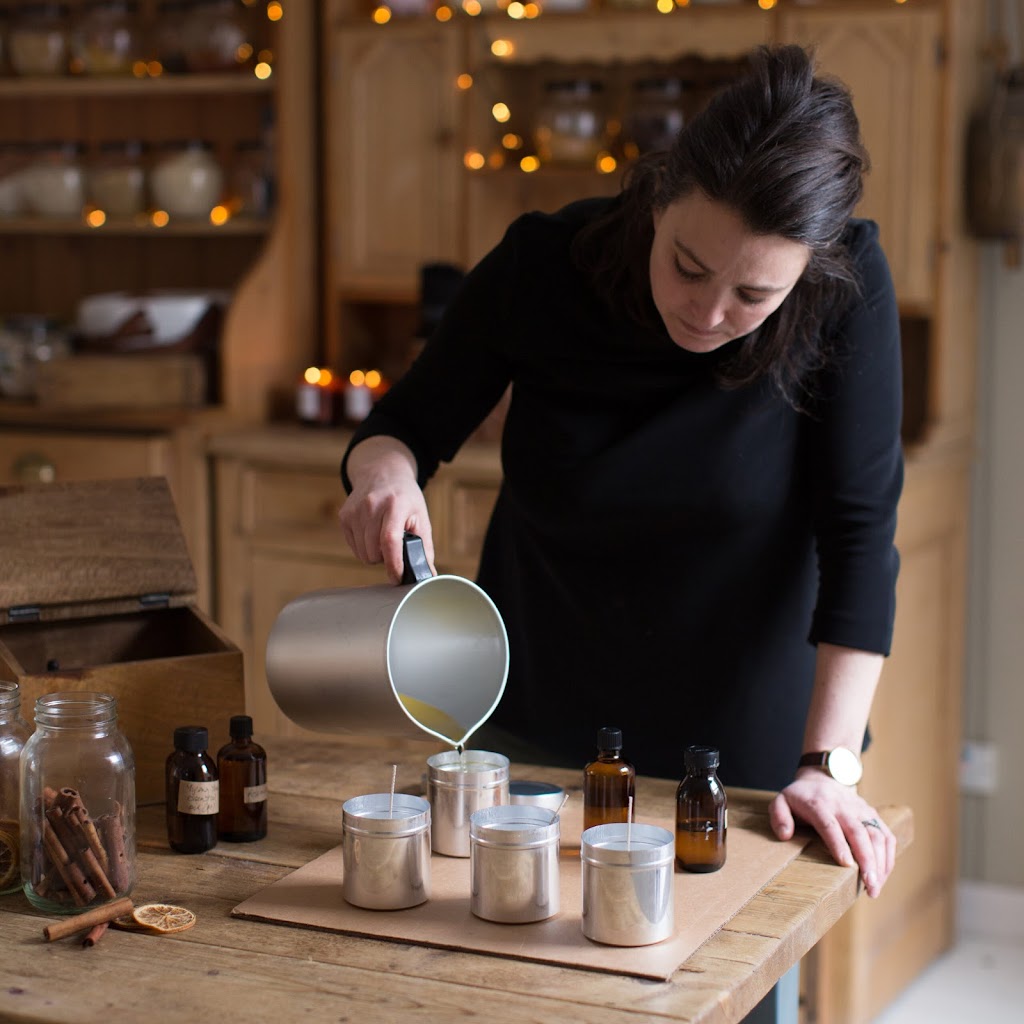

Candle making is a creative and rewarding craft that allows you to create beautiful and functional candles in various shapes, sizes, and scents. Whether you’re a beginner or an experienced candle maker, here’s a step-by-step guide to help you get started or improve your candle-making skills.
Materials and Equipment:
Wax: You can choose from different types of wax, such as paraffin, soy, beeswax, or palm wax. Select the one that suits your preferences and project.
Wick: Wicks come in various sizes and materials, including cotton, wood, and zinc. Choose a wick that matches your candle size and type of wax.
Fragrance (optional): You can add fragrance oils or essential oils to your candles for a pleasant aroma.
Dye (optional): If you want colored candles, you’ll need candle dye or color chips.
Double Boiler: A dedicated candle-making pitcher or a double boiler setup for melting wax.
Thermometer: To monitor the wax temperature and ensure it doesn’t overheat.
Container or Mold: Choose the vessel or mold for your candles. This can be a glass jar, tin, silicone mold, or any other heat-resistant container.
Stirring Tools: Use a spoon or a stirring rod for mixing in fragrance and dye.
Scale: For precise measurements.
Safety Gear: Wear heat-resistant gloves and safety glasses to protect yourself.
Step-by-Step Guide:
Prepare Your Workspace: Cover your work surface with newspaper or wax paper to make cleanup easier. Ensure good ventilation in your workspace.
Measure Your Wax: Weigh the wax to determine the amount needed for your candles. Keep in mind that different waxes have different melting points and densities, so follow the manufacturer’s instructions for your specific type of wax.
Melt the Wax: Use a double boiler or a microwave to melt the wax. Slowly heat the wax to the recommended temperature, usually between 160°F to 180°F (71°C to 82°C), while stirring occasionally.
Prepare the Wick: While the wax is melting, prepare your wick. Cut it to the desired length, leaving a little extra to secure it to the container or mold. Use a wick holder or adhesive to keep it centered.
Add Fragrance and Dye (Optional): If you want scented and colored candles, add fragrance and dye to the melted wax at the recommended temperature. Stir thoroughly to ensure even distribution.
Pour the Wax: Carefully pour the melted wax into your chosen container or mold. Leave some space at the top (about half an inch) to prevent overflow.
Let it Cool: Allow the candle to cool and solidify. This can take several hours, depending on the size of the candle.
Trim the Wick: Trim the wick to the desired length, usually about 1/4 inch (0.6 cm) above the surface of the candle.
Enjoy Your Candle: Your candle is now ready to use or give as a gift. Light it, relax, and enjoy the ambiance it creates.
Candle making is an art, and with practice, you can experiment with different waxes, scents, and colors to create unique and personalized candles. Be sure to follow safety guidelines, as working with hot wax can be hazardous. Once you’ve mastered the basics, you can explore more advanced techniques like layered candles, decorative designs, and even making your own unique molds.
7. Quilling
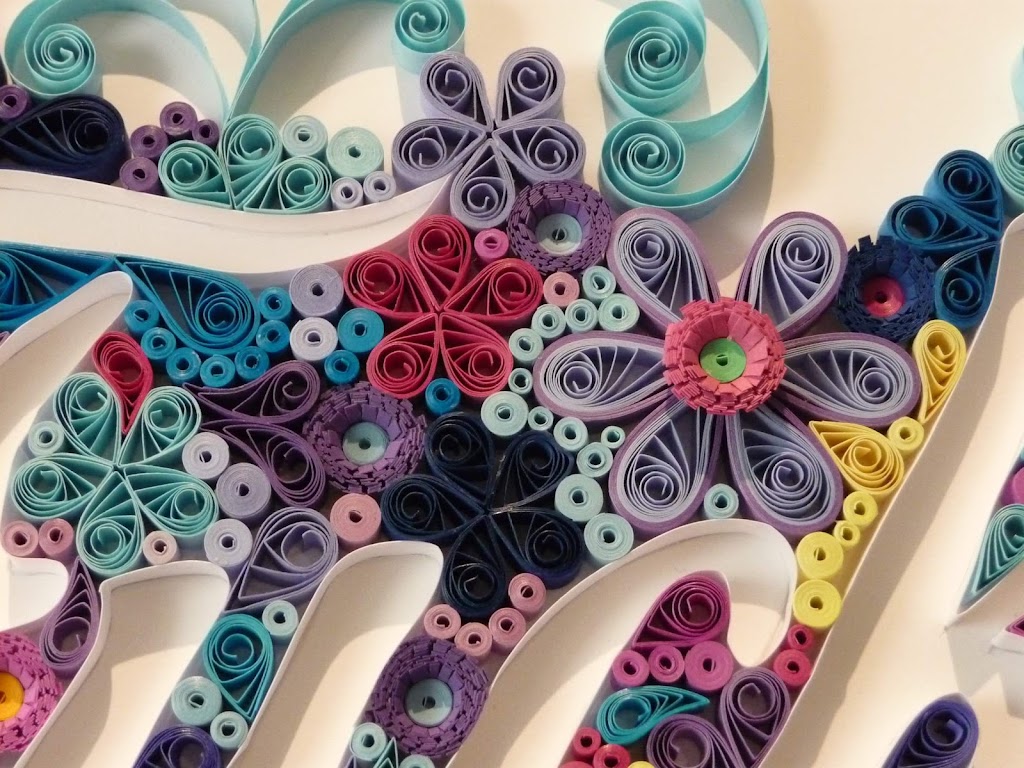
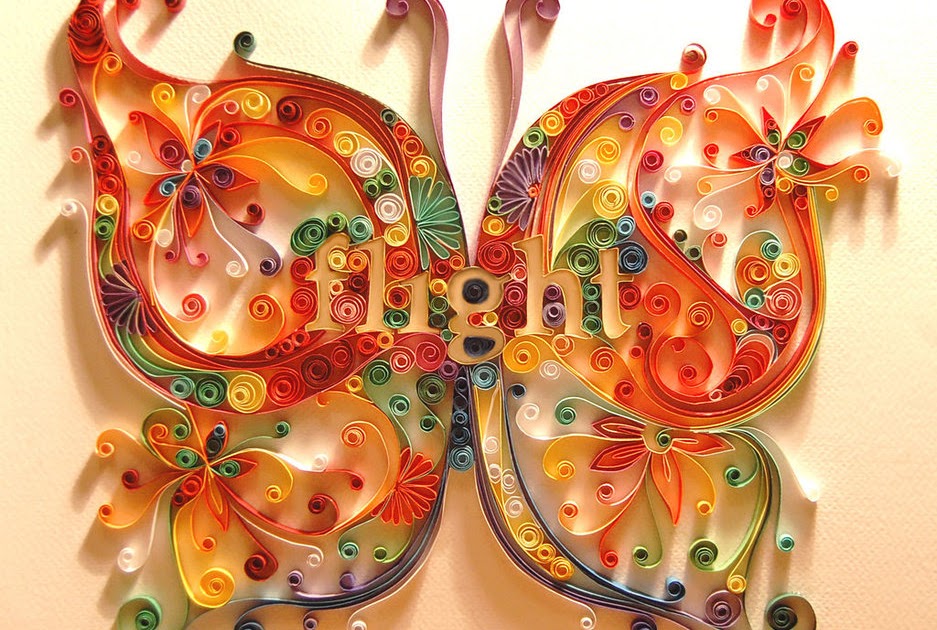
Certainly! Quilling is a decorative art form that involves rolling and shaping thin strips of paper to create intricate designs and patterns. This paper crafting technique is also known as paper filigree. Here’s a brief overview of quilling:
Materials: Quilling primarily requires a few basic materials, including strips of paper, a quilling tool (which can be a simple needle or a specialized quilling tool), adhesive (usually glue), and a surface to work on.
Technique: To create quilled designs, you start by rolling the paper strips tightly or loosely, depending on the desired effect. These coiled paper shapes are then manipulated into various forms, such as circles, teardrops, or scrolls. The quilled shapes are glued together to construct intricate patterns, designs, and 3D objects.
Designs: Quilling can be used to create a wide range of designs, from simple flowers and animals to more complex and elaborate decorative pieces. Quillers often use various colors of paper to add depth and visual interest to their creations.
History: Quilling has a long history and can be traced back to the Renaissance period in Europe. It was initially used to decorate religious objects and documents. Over the centuries, quilling evolved and gained popularity as a decorative craft.
Today, quilling is a popular hobby and art form, and quillers create a variety of items, including greeting cards, framed art, jewelry, and home decor. It’s a creative and relaxing way to work with paper, allowing artists to explore their artistic expression through intricate paper designs.