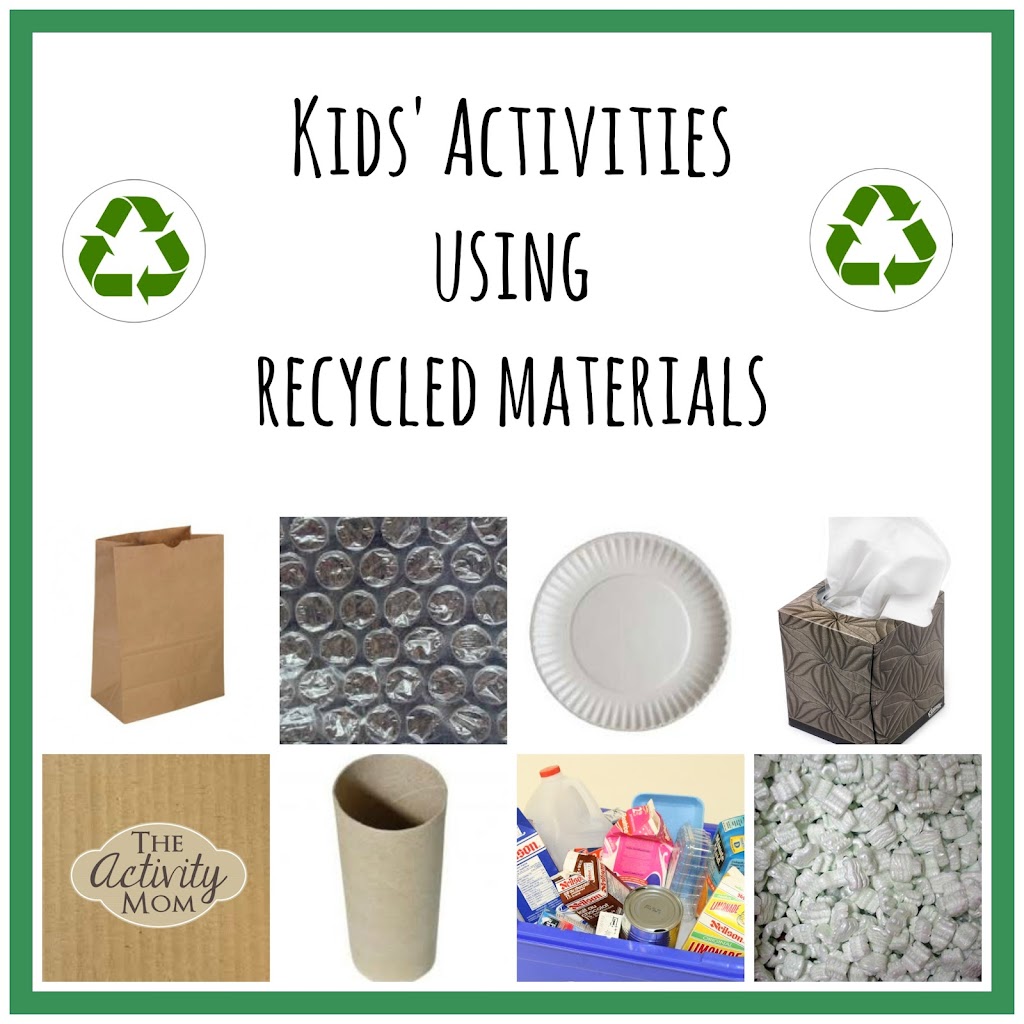
10 Engaging Recycling Activities For Preschoolers
Teaching preschoolers about recycling is a great way to instill eco-friendly habits from a young age. Here are some engaging recycling activities for preschoolers that can help them learn about the importance of recycling and how to do it:
Sorting Game: Create a simple recycling sorting game with pictures of recyclable items like paper, plastic bottles, and cans. Have the children sort these items into the appropriate bins. You can use real recycling bins or make your own with cardboard boxes.
Recycling Song: Teach the children a recycling song that highlights the importance of recycling and what items can be recycled. Singing can make learning fun and memorable.
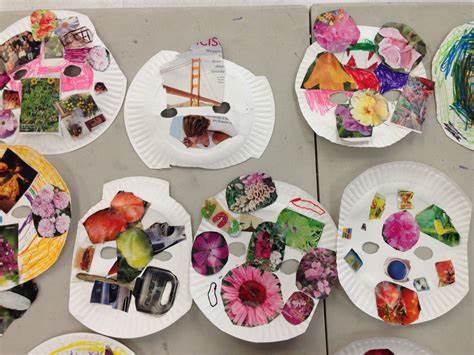
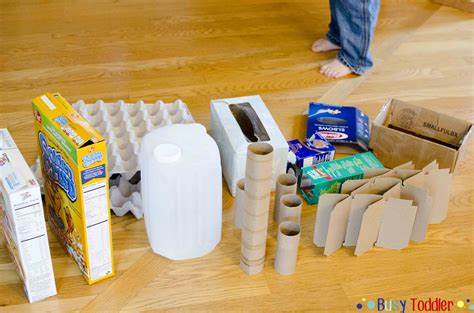
Recycled Art: Provide various recyclable materials like empty cereal boxes, egg cartons, plastic bottles, and newspapers. Encourage the kids to use these items to create art projects like making robots, animals, or sculptures.
Recycling Relay Race: Set up a relay race where children must sort recyclables into the correct bins as quickly as possible. This can be a fun and active way to teach recycling.
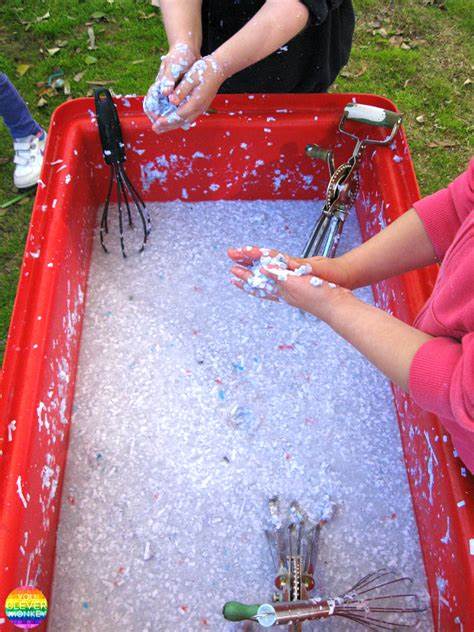
Recycled Paper Making: Show the kids how to make recycled paper. You can shred used paper, blend it with water, and then use a screen or mesh to create new sheets of paper. This hands-on activity helps them see the recycling process in action.
Recycled Fashion Show: Have a recycled fashion show where kids can create their own outfits using recycled materials. This encourages creativity and reinforces the idea that items can have a second life.
Storytime: Read children’s books or stories that emphasize the importance of recycling and taking care of the environment. Discuss the stories and their lessons afterward.
Recycling Bin Labels: Help the kids make labels for the recycling bins in your classroom or at home. This can include drawings or pictures of the items that belong in each bin. It reinforces the idea of categorization and recycling.
Nature Walk and Cleanup: Take the children on a nature walk in your local park or neighborhood. Bring along gloves and bags for a mini cleanup, and explain how picking up trash helps the environment.
Recycled Planting: Teach the children about composting and how food scraps can be recycled into nutrient-rich soil. You can also have them plant seeds in recycled containers like yogurt cups or egg cartons.
Recycling Show and Tell: Encourage each child to bring something from home that can be recycled and have them explain how it should be recycled. This can help reinforce the idea of recycling in their daily lives.
Recycling Pledge: Have the children create a recycling pledge or poster, which they can sign or decorate. Hang it up in your classroom or home as a reminder to recycle.
Remember that young children learn best through hands-on experiences and play, so keep the activities interactive and age-appropriate. By making recycling fun and engaging, you can help instill lifelong eco-friendly habits in preschoolers.
1. Creating Cereal Box Puzzles
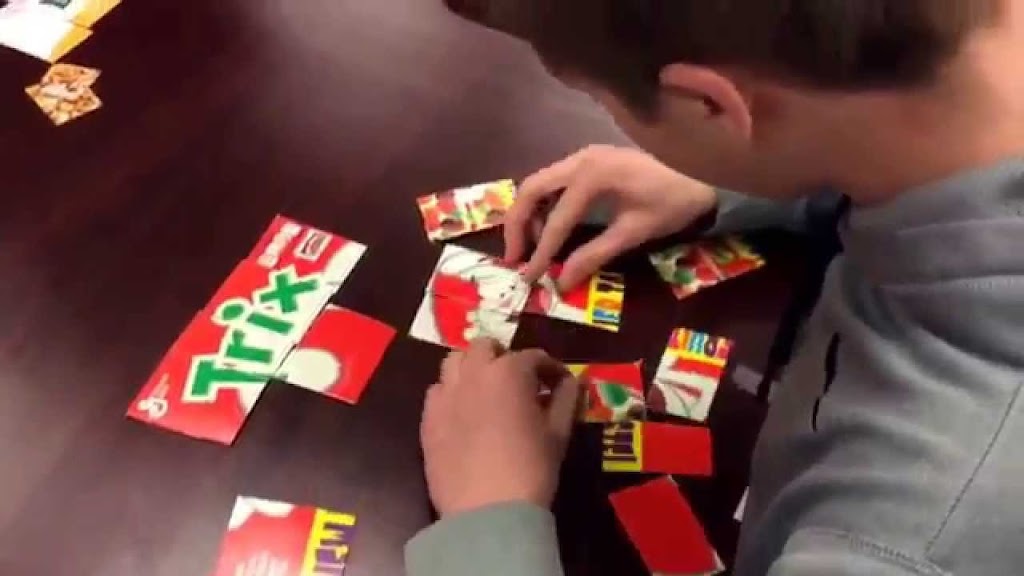
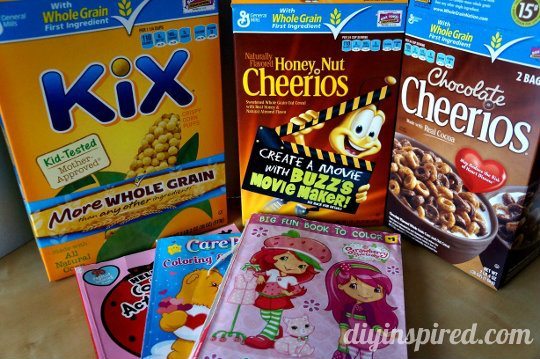
Creating cereal box puzzles can be a fun and creative project. These puzzles are often designed for kids and can provide entertainment and engagement during breakfast. Here are some steps to help you create your own cereal box puzzles:
Choose a Puzzle Type:
Decide on the type of puzzle you want to create. Some common options include mazes, crossword puzzles, word searches, spot-the-difference, and picture puzzles. Choose a puzzle type that suits the age group and interests of your target audience.
Materials and Tools:
You’ll need some basic materials and tools for creating the puzzle. These may include blank paper, markers, colored pencils, or crayons, a ruler, and scissors. You can also use a computer and graphic design software if you want to create more complex puzzles.
Design Your Puzzle:
Sketch out your puzzle on a piece of paper or create a digital design. Make sure the puzzle is engaging and challenging but not too difficult for your target audience. If you’re creating a maze, for example, draw the paths and dead ends. For a crossword puzzle, create a grid with clues and answers.
Add Graphics and Artwork:
Make your puzzle visually appealing by adding graphics or artwork related to the cereal or the target audience’s interests. Use bright colors and clear illustrations to make the puzzle stand out.
Layout and Sizing:
Consider the dimensions of a cereal box and design your puzzle to fit within those constraints. The puzzle should not cover important nutritional information or branding. Ensure it’s the right size and shape to be easily cut out by children.
Test Your Puzzle:
Before finalizing the design, test the puzzle yourself or with a few individuals to make sure it’s solvable and enjoyable. Adjust as needed based on the feedback you receive.
Print or Draw the Puzzle:
If you have designed the puzzle digitally, print it out on paper. If you’re drawing it by hand, make sure your lines and shapes are clear and well-drawn.
Cut and Assemble:
Carefully cut out the puzzle from the sheet, following the lines you’ve drawn. Ensure the edges are neat and straight. If you have multiple pieces (e.g., for a jigsaw puzzle), make sure they fit together properly.
Place on Cereal Box:
Attach your puzzle to the back or side of a cereal box. You can use glue, double-sided tape, or other adhesive methods. Make sure it’s secure and won’t easily fall off during handling.
Test Packaging:
Before mass-producing your cereal boxes with puzzles, test the packaging to make sure the puzzle stays in place and doesn’t interfere with the cereal inside.
Promote the Puzzle:
Use the puzzle as a marketing tool to attract customers. Mention the puzzle on the front of the box to grab attention and encourage purchases.
Safety and Age Appropriateness:
Ensure that the puzzle and any small pieces are safe for the intended age group. Clearly indicate the recommended age range and any necessary safety precautions on the packaging.
Creating cereal box puzzles can be a creative and fun way to engage your target audience while promoting your product. Be sure to consider the interests and abilities of the children who will be solving the puzzles and adjust the difficulty and design accordingly.
2. Create a Mask
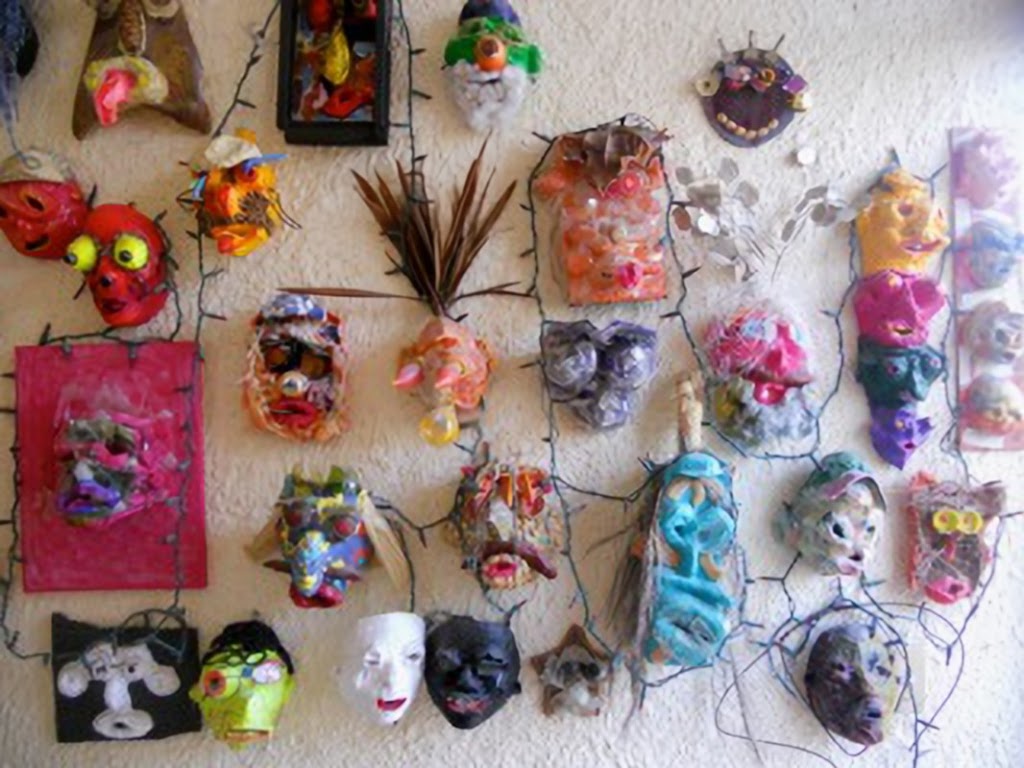
I can provide information on how to create a basic cloth face mask. Keep in mind that a mask should be used in accordance with guidelines from health authorities, and it’s important to ensure it effectively covers your nose and mouth. Here’s a simple method to create a cloth face mask:
Materials you’ll need:
Two layers of tightly woven cotton fabric (10×6 inches each).
Two 6-inch elastic bands or strings.
Needle and thread or a sewing machine.
Scissors.
Pins.
Instructions:
Wash your hands thoroughly before handling any materials.
Cut two pieces of tightly woven cotton fabric to approximately 10×6 inches. You can use different colors or patterns for each side if you like.
Place the two fabric pieces on top of each other with the good sides facing each other.
Sew a straight stitch along the long sides, leaving the shorter sides open. Use a 1/4-inch seam allowance and remember to backstitch at the beginning and end to secure the seams.
Turn the mask right side out through one of the open ends. Use a pencil or stick to gently push out the corners to make them more square.
Fold the short ends of the mask (about 1/2 inch) towards the inside and pin them in place. This will create a casing for the elastic bands.
Sew the short ends, making sure to leave a small opening on each side of the mask’s edges. This will allow you to thread the elastic through.
Cut two 6-inch elastic bands or strings and attach a safety pin to one end of each.
Thread each elastic band through the casing on one side of the mask, starting from the opening, and secure the ends with a knot. Repeat this on the other side.
Adjust the elastic bands so that the mask fits snugly over your nose and under your chin. Tie knots in the elastic to achieve the desired fit, then trim any excess elastic.
Finally, tuck the knots and elastic ends into the casings and sew the casings closed to keep them in place.
Give your mask a final press with an iron to flatten it and remove any wrinkles. Your homemade cloth face mask is ready to use.
Remember to wash your mask regularly, ideally after each use, to maintain its cleanliness and effectiveness. This basic mask is not a substitute for medical-grade masks, but it can help reduce the spread of respiratory droplets when used in conjunction with other preventive measures, such as proper hand hygiene and social distancing.
3. Paper Bag Painting

Painting on a paper bag can be a fun and creative way to create art, especially if you want to work with unconventional surfaces. Here are some basic steps to get you started with paper bag painting:
Materials you will need:
Paper bags: You can use plain brown paper bags or any other type of paper bags you have on hand.
Paint: Acrylic paints work well for this project, but you can also use watercolors or other types of paint depending on your preference.
Paintbrushes: Different brush sizes and types will allow you to create various textures and details in your painting.
Water or a palette for mixing colors if you’re using acrylic paint.
Pencils, erasers, and other drawing materials if you want to sketch your design first.
Optional: Markers, colored pencils, or other embellishments for added details.
Steps to paint on a paper bag:
Prepare your work area: Lay down some newspaper or an old tablecloth to protect your work surface from any potential paint spills.
Plan your design: Decide what you want to paint on the paper bag. You can sketch your design on the bag using a pencil if you want to have a rough guideline.
Paint your background: Start by painting the background of your design. This could be a solid color or a gradient. Let it dry completely before moving on to the next step.
Add details and layers: Use your paintbrush to add details, shapes, and colors to your design. Remember to let each layer dry before adding more to prevent smudging or mixing of colors.
Experiment with textures: Paper bags can have a unique texture that can add depth to your painting. You can use various brush techniques to create texture, such as stippling, dry brushing, or impasto.
Allow for creativity: Don’t be afraid to experiment and have fun. You can create abstract art, landscapes, portraits, or any other subject matter that inspires you.
Let it dry: Once you’re satisfied with your painting, let it dry completely before handling or displaying it. This may take a few hours or longer, depending on the thickness of your paint layers.
Optional finishing touches: You can further embellish your paper bag painting with markers, colored pencils, or any other materials you like.
Display or use your artwork: Once your painting is dry and complete, you can frame it or use it for various purposes, such as gift wrapping, creating personalized gift bags, or even as decorative art in your home.
Paper bag painting is a creative and eco-friendly way to explore your artistic talents, and it’s a great project for all ages. Plus, it’s a fantastic way to upcycle and repurpose materials that would otherwise be discarded.
4. Easy to Make Gift Boxes for Preschoolers
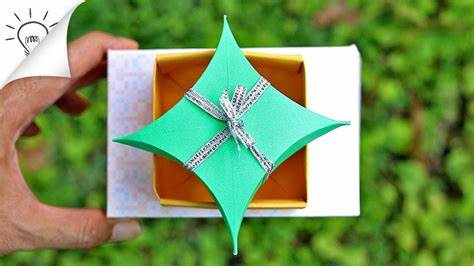
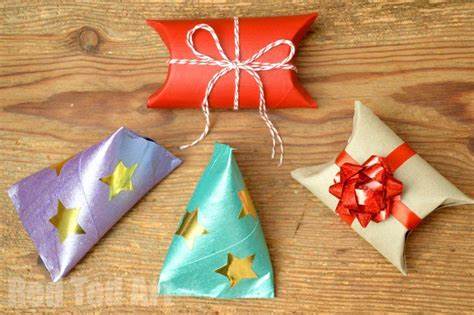
Creating easy-to-make gift boxes for preschoolers can be a fun and creative project. Here’s a simple way to make gift boxes that are suitable for young children:
Materials you’ll need:
Colored or patterned cardstock or heavy construction paper.
Scissors.
Ruler.
Pencil.
Markers, crayons, or stickers for decorating.
Glue stick.
Clear tape (optional).
Steps to make a simple gift box for preschoolers:
Choose the paper: Pick a colorful and sturdy paper for the gift box. You can use solid-colored cardstock or paper with fun patterns that preschoolers will love.
Measure and cut: Start by measuring and cutting a square or rectangle from the paper. The size of the paper will determine the size of the gift box. A 6×6-inch square is a good starting point.
Decorate: Allow the preschooler to decorate the paper using markers, crayons, or stickers. They can personalize the gift box with drawings, their name, or fun designs.
Fold the paper: Place the decorated side of the paper face down. Fold the paper in half diagonally to create a triangle, then unfold it.
Fold the corners: Fold each corner of the paper to the center point, creating four smaller triangles. Unfold them.
Cut along the folds: Using scissors, make a small snip along each of the folded lines on one side. This will make it easier to fold and assemble the box.
Fold the sides: Fold the two opposite triangles up, then fold the other two opposite triangles down. This will form the basic shape of your box.
Glue the flaps: Apply glue to the flaps that are now on the outside of the box. Press them together to secure the sides of the box.
Let it dry: Allow the glue to dry completely.
Optional: You can reinforce the corners and edges with clear tape if you want extra stability.
Fill with small gifts: Once the box is dry, fill it with small treats or gifts suitable for preschoolers. It could be stickers, small toys, or even a special note.
Close the box: To close the box, simply fold the flaps down and secure with a small piece of tape or glue. You can also use a sticker or a small ribbon for added decoration.
These easy-to-make gift boxes are a great way to involve preschoolers in crafting and gifting. They can enjoy the process of decorating the boxes and then giving them as gifts to friends and family. Plus, it’s a simple and budget-friendly way to make personalized gift packaging.
5. Build Your Robot

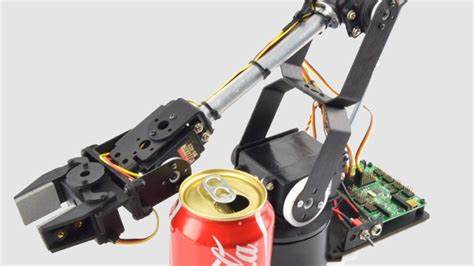
Building a robot can be a complex and customized project, and the specific steps and components you’ll need depend on your goals and requirements. However, I can provide you with a general overview of how to build a simple robot. Keep in mind that you may need to tailor this information to your specific needs and budget.
Materials and Components:
Microcontroller: Choose a microcontroller or single-board computer to act as the brain of your robot. Popular options include the Raspberry Pi, Arduino, or other specialized microcontrollers.
Motorized Wheels: Depending on your robot’s mobility requirements, select appropriate motorized wheels or tracks. Two-wheeled, four-wheeled, or even more complex configurations are possible.
Chassis: Design or purchase a chassis to provide structural support for your robot. You can use materials like plastic, metal, or even 3D-printed components.
Power Supply: You’ll need a power source for your robot. Depending on your power requirements, you can use batteries (e.g., rechargeable lithium-ion or alkaline batteries) or a power supply unit.
Sensors: Choose sensors based on your robot’s intended functionality. Common sensors include ultrasonic sensors for obstacle avoidance, infrared sensors for line following, and cameras for vision.
Motor Drivers: To control the motors, you’ll need motor driver boards or modules. These can be integrated into your chosen microcontroller or purchased separately.
Connectors and Wiring: Ensure you have the necessary connectors, wires, and soldering equipment to connect all components.
Controllers: Depending on your project, you may need a physical remote control, a smartphone app, or a computer interface to control your robot.
Programming Environment: Use a suitable programming environment to code your robot. Arduino IDE, Python, or other programming languages can be used, depending on your microcontroller.
Assembly Steps:
Design your robot: Decide on the size, shape, and features of your robot. Sketch out a design if needed.
Assemble the chassis: Put together the structural components of your robot, ensuring that there is enough space for all the components you plan to add.
Install the motors and wheels: Attach the motorized wheels to your robot. Make sure they are securely mounted and can move freely.
Mount sensors and other hardware: Attach sensors and other components like cameras, LEDs, and actuators to your robot. Ensure they are properly positioned and connected.
Connect the electronics: Wire up all the electronic components, including the microcontroller, motor drivers, and sensors. Follow the wiring diagrams and guidelines for your specific hardware.
Program your robot: Write the code that will control your robot’s behavior. Implement algorithms for navigation, obstacle avoidance, or any other functions you want your robot to perform.
Power your robot: Connect the power supply to your robot and make sure it’s providing the necessary voltage and current. Take precautions to prevent electrical issues.
Test your robot: Gradually test each function and sensor to ensure they work as expected. Debug and refine your code as needed.
Control and interact: Depending on your project, set up the control interface for your robot, such as a remote control, a smartphone app, or a computer program.
Fine-tune and improve: Continuously refine and improve your robot’s performance based on testing and real-world use.
Remember, building a robot can be a challenging but rewarding project. You can start with a simple design and then expand your robot’s capabilities as you gain experience. Additionally, consider safety measures, especially if your robot has moving parts or is intended for interaction with people or pets.
6. Easy to Create Bird Feeders
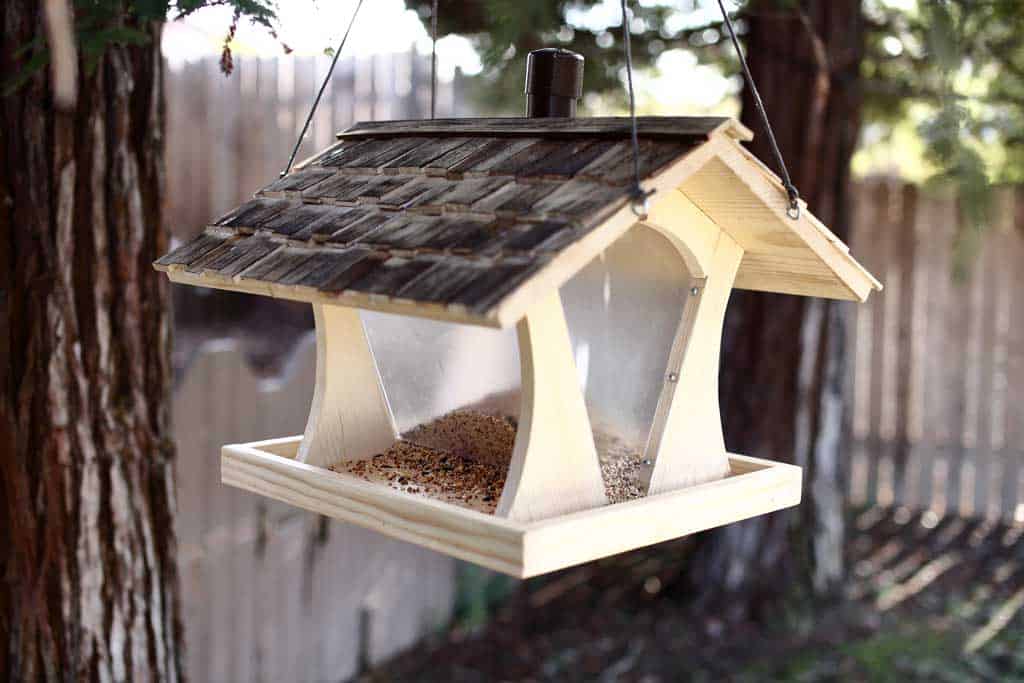
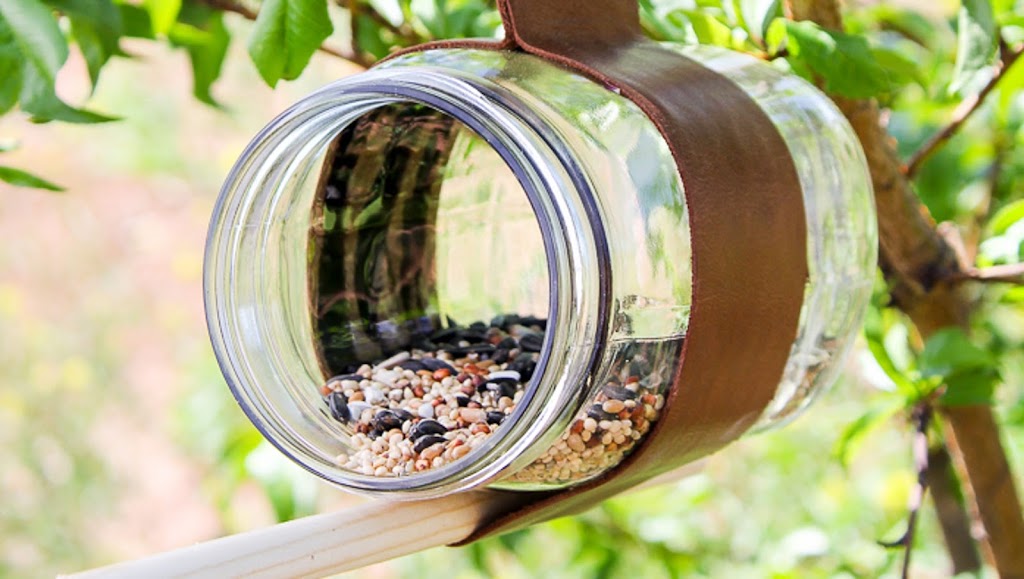
Creating a simple bird feeder is a fun and rewarding DIY project that can attract birds to your garden or outdoor space. Here are a few easy-to-create bird feeder ideas using common materials:
1. Pinecone Bird Feeder:
Materials:
Pinecone
String or twine
Peanut butter or vegetable shortening
Birdseed
Steps:
Tie a piece of string or twine around the top of the pinecone to create a hanger.
Spread a layer of peanut butter or vegetable shortening over the pinecone.
Roll the peanut butter-covered pinecone in birdseed until it’s well coated.
Hang the pinecone bird feeder from a tree branch or hook.
2. Milk Jug Bird Feeder:
Materials:
Empty and clean plastic milk jug
Craft knife or scissors
Wooden dowel or stick
Birdseed
String or wire
Steps:
Cut an opening in the side of the milk jug, about halfway up the container. Make sure the opening is large enough for birds to access the seeds.
Create small drainage holes in the bottom of the jug.
Push a wooden dowel or stick through the top of the milk jug to create a perch for the birds.
Fill the jug with birdseed.
Hang the milk jug bird feeder from a tree branch or hook using string or wire.
3. Toilet Paper Roll Bird Feeder:
Materials:
Empty toilet paper roll
Peanut butter
Birdseed
String or twine
Steps:
Spread a layer of peanut butter over the toilet paper roll.
Roll the peanut butter-covered roll in birdseed until it’s coated.
Thread a string or twine through the hole in the toilet paper roll and tie it into a loop for hanging.
Hang the toilet paper roll bird feeder from a tree branch or hook.
4. Orange Halves Bird Feeder:
Materials:
Orange halves (after eating the fruit)
String or twine
Birdseed
Steps:
Cut an orange in half and scoop out the flesh to create two halves.
Make a small hole on either side of each orange half.
Thread a string or twine through the holes to create a hanger.
Fill the orange halves with birdseed.
Hang the orange halves bird feeder from a tree branch or hook.
These simple bird feeders are a great way to attract and provide food for birds while recycling common household items. They’re also a fun and educational project to do with kids, and you can experiment with different designs and materials to see which birds visit your feeders.
7. Cardboard Tube Marble Run

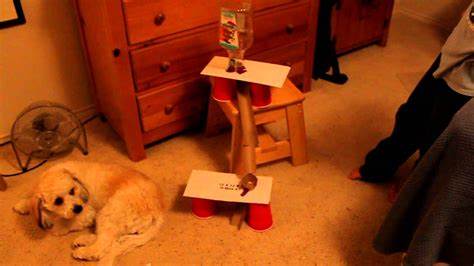
A cardboard tube marble run is a fun and creative DIY project that allows you to build a track or maze for marbles using cardboard tubes. It’s a great activity for kids and adults alike, and it can be as simple or complex as you want. Here’s a basic guide to get you started:
Materials you’ll need:
Cardboard tubes: Gather various lengths and sizes of cardboard tubes. You can use empty paper towel rolls, toilet paper rolls, or larger shipping tubes.
Marbles: You’ll need marbles to roll through your marble run.
Scissors or a utility knife: You’ll use these to cut and shape the cardboard tubes.
Tape: Clear or masking tape works well for securing the tubes together.
Glue: You can use glue to reinforce the connections if needed.
Decorative materials: You can use markers, paint, or stickers to decorate your marble run.
Steps to create a cardboard tube marble run:
Gather your cardboard tubes and other materials.
Plan your marble run: Think about the design of your marble run. Consider how the marbles will travel through the tubes, what obstacles you want to create, and where you want the marbles to end up.
Cut and shape the tubes: Use scissors or a utility knife to cut the tubes into various shapes and lengths. You can make ramps, turns, and tunnels by cutting and bending the cardboard.
Assemble the track: Start building your marble run by connecting the cardboard tubes. Use tape to secure them together. You can create a freestanding structure or attach it to a wall or another surface.
Test the track: Drop marbles into the starting point and observe how they travel through the track. Make adjustments as needed to ensure the marbles move smoothly and follow your intended path.
Add decorative touches: Once you’re satisfied with the functionality of your marble run, you can decorate it with markers, paint, or stickers to make it visually appealing.
Play and experiment: Have fun testing your marble run and trying to get the marbles to follow different paths and complete various challenges.
A cardboard tube marble run can be as simple or elaborate as you like, and it’s a great way to foster creativity and problem-solving skills. You can also involve your friends and family in designing and building the marble run for added fun and collaboration.
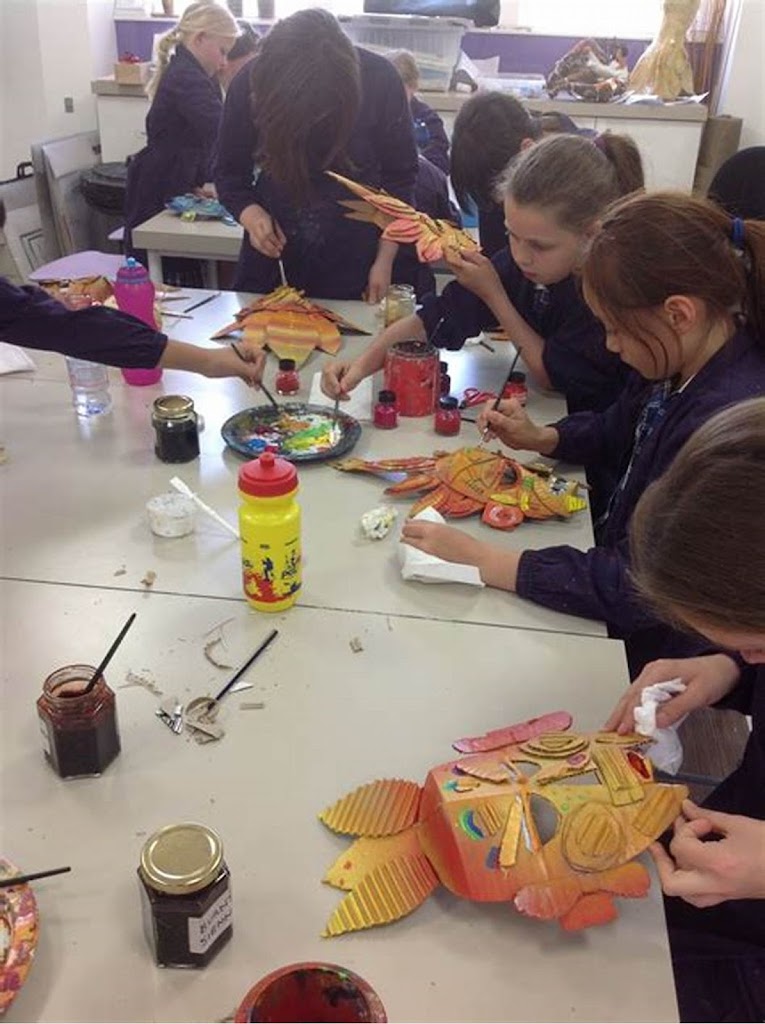
8. Recycled Earth Day Craft
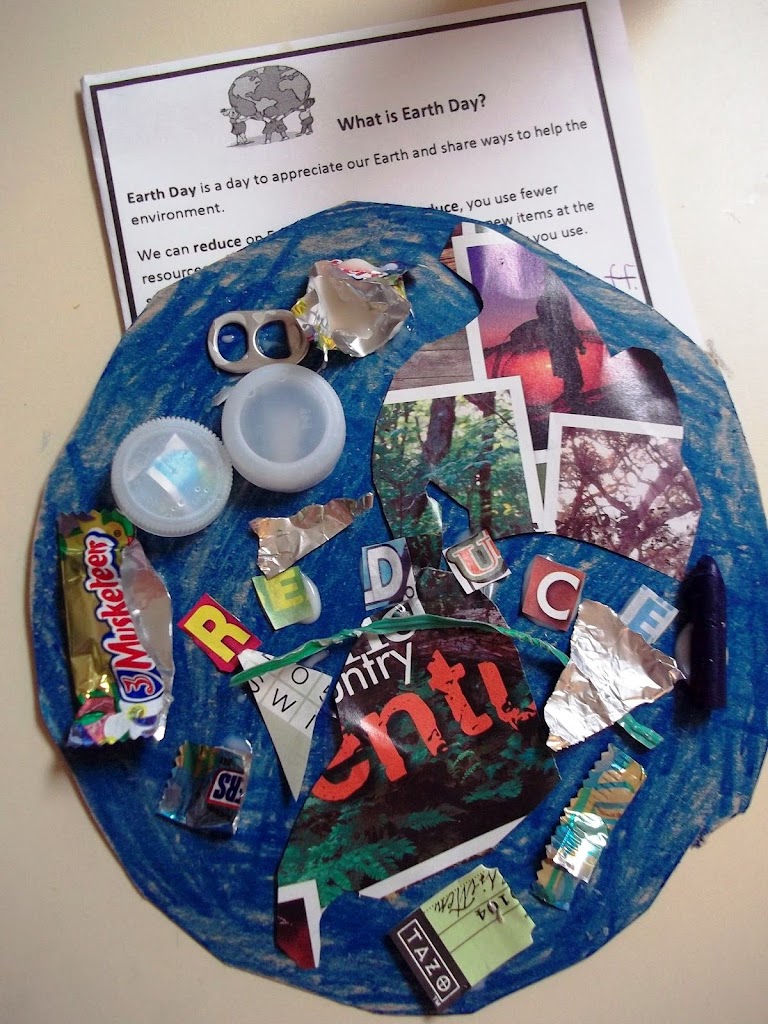
Earth Day is a great opportunity to teach kids about the importance of recycling and taking care of our planet. You can engage in a fun and educational craft activity that involves recycling materials. Here’s a simple and creative Earth Day craft idea using recycled materials:
Recycled Bottle Planters:
Materials you’ll need:
Empty plastic bottles (soda bottles, water bottles, or any other similar container)
Acrylic paint or markers
Potting soil
Seeds or small plants
Scissors
Decorative materials (optional)
Steps:
Collect Recycled Bottles: Gather empty plastic bottles of different sizes. Rinse them out thoroughly and remove any labels.
Design Your Planters: Let your creativity shine by decorating the bottles with acrylic paint or markers. You can paint them with Earth-themed designs, flowers, animals, or any other eco-friendly art. This is a great opportunity to discuss Earth Day themes and environmental conservation with your kids.
Cut and Prepare the Bottles: With adult supervision, use scissors to carefully cut the top part of each bottle. You can make straight or wavy cuts, depending on your preference. The bottom part will serve as the planter.
Add Soil: Fill the bottom part of the bottle (the planter) with potting soil. Leave about an inch or two of space at the top for planting your seeds or small plants.
Plant Seeds or Small Plants: Plant seeds or small plants in the soil. You can choose to grow flowers, herbs, or any other plants your kids are interested in. Be sure to follow the planting instructions for the specific plants you choose.
Water and Care for Your Plants: Water your newly planted seeds or small plants according to their specific needs. Place the bottle planters in a sunny spot and watch them grow.
Decorate Further (Optional): If desired, you can further decorate the bottle planters with ribbons, stickers, or other recycled materials. This is a great way to make them even more unique.
Educational Opportunity: While working on this craft, discuss the importance of recycling, reducing waste, and taking care of the Earth. Talk about how plants help clean the air and improve our environment.
This recycled Earth Day craft not only allows kids to create something beautiful but also educates them about sustainability and environmental responsibility. It’s a fun way to celebrate Earth Day while promoting recycling and nature appreciation.
9. Recycled Building Activity
Recycled building activities involve creating structures or projects using materials that have been repurposed or recycled from existing items. These activities promote environmental sustainability, creativity, and resourcefulness. Here are some recycled building activity ideas:
Cardboard Box Creations:
Gather used cardboard boxes, packaging materials, and other recyclables like paper towel rolls. Let participants build forts, castles, or imaginative structures using these materials. You can provide glue, tape, and markers for decoration.
Bottle Cap Mosaics:
Collect bottle caps from various sources, such as soda bottles or milk jugs. Participants can arrange them into colorful mosaics on boards or canvas, creating unique artworks.
Tin Can Planters:
Save and clean empty tin cans. With some paint or decorative paper, participants can turn these cans into charming plant pots. Fill them with soil and add small plants or succulents.
Recycled Plastic Sculptures:
Gather plastic containers like empty detergent bottles, yogurt cups, and milk jugs. Cut and shape these items to create sculptures or unique art pieces. Paint or decorate them as desired.
Junk Model Cars or Robots:
Collect old or broken toys, electronic components, and small recyclables to build model cars or robots. Participants can assemble and customize their creations.
Newspaper Towers:
Use old newspapers and masking tape to construct tall towers. Challenge participants to build the tallest, most stable tower using only these materials.
Popsicle Stick Bridges:
Save and clean popsicle sticks or craft sticks. Participants can design and build bridges using these sticks and glue, testing their strength and functionality.
Recycled Paper Beads:
Roll paper from old magazines or newspapers into colorful beads. These beads can be used to make jewelry, like necklaces or bracelets.
Egg Carton Art:
Egg cartons can be transformed into various art projects, from flower displays to caterpillar sculptures. Paint them and add additional decorations.
Plastic Bottle Greenhouses:
Cut plastic bottles in half and use them to create miniature greenhouses for seedlings or small plants. This activity teaches the principles of recycling and gardening.
Recycled Materials Bird Feeders:
Craft bird feeders from items like empty milk cartons, toilet paper rolls, or plastic bottles. Fill them with birdseed and hang them in your yard to attract feathered friends.
These activities are not only fun and creative but also serve as excellent educational tools to teach participants about recycling and upcycling while fostering an appreciation for the environment. It’s a great way to promote sustainability and resourcefulness in a hands-on, engaging manner.
10. Make Seed Paper
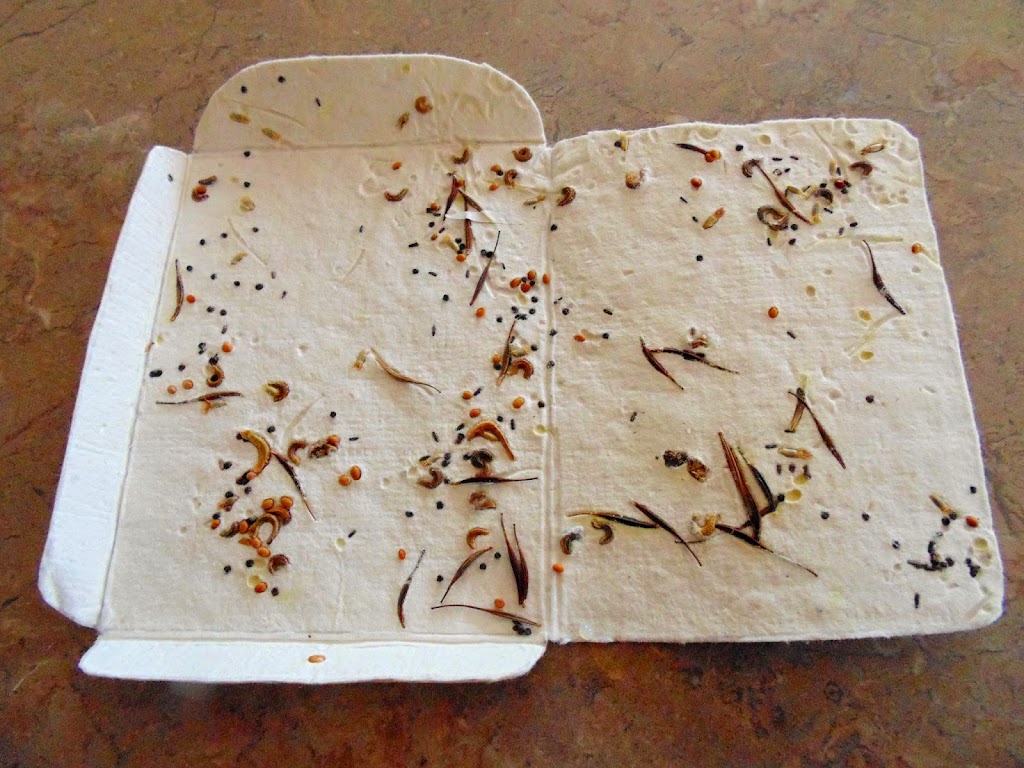
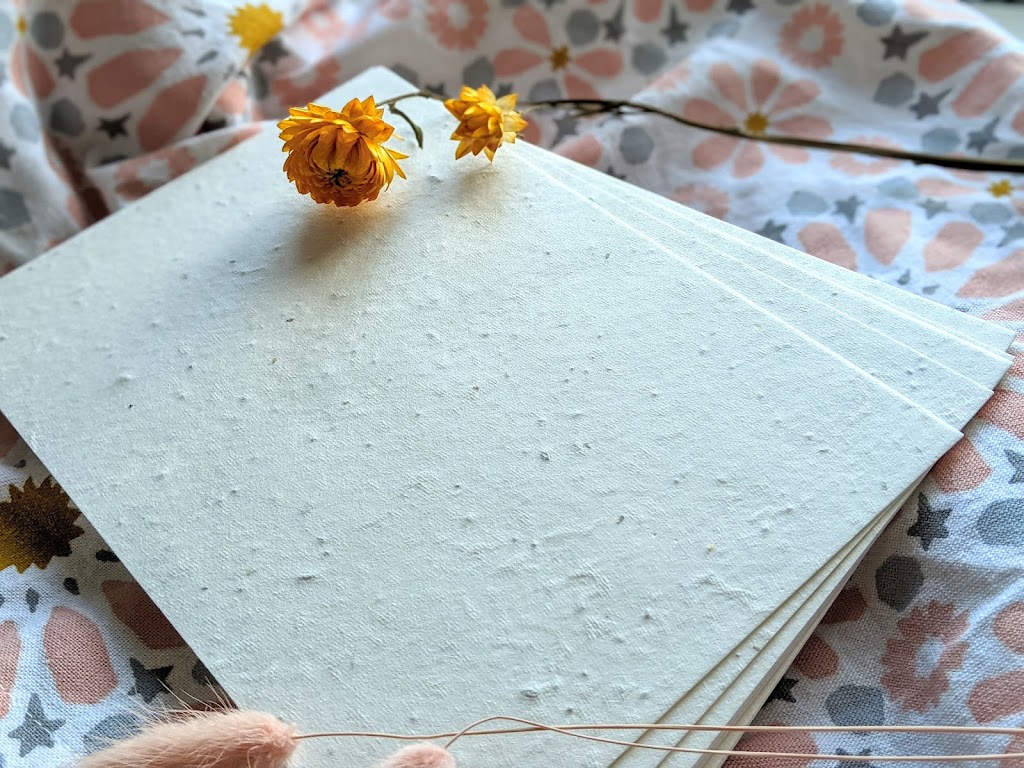
Making seed paper is a fun and eco-friendly DIY project that allows you to create paper embedded with seeds. Once the paper is planted, it will sprout and grow into various plants, flowers, or herbs. Here’s a basic guide on how to make your own seed paper:
Materials You’ll Need:
Recycled paper scraps (newspapers, office paper, cardboard, etc.)
A blender or food processor
Flower or herb seeds (choose seeds suitable for your region and the paper size)
Warm water
A large bowl
A fine mesh sieve or window screen
A wooden frame or picture frame with a fine mesh or nylon stocking stretched over it
A sponge
Towels or paper towels
A rolling pin or something similar
Plastic wrap or a plastic bag
Steps:
Collect and Prepare Paper: Start by tearing the recycled paper into small pieces. Avoid using glossy or heavily inked paper as it may not break down well during the recycling process.
Soak Paper: Place the torn paper in a large bowl and cover it with warm water. Let it soak for several hours or overnight to soften the paper.
Blend Paper: After soaking, blend the paper and water mixture in a blender or food processor until it becomes a pulp. You may need to do this in batches.
Prepare Seeds: In a separate container, mix the flower or herb seeds with a small amount of water to form a slurry. This will help evenly distribute the seeds in the paper pulp.
Combine Pulp and Seeds: Pour the paper pulp into a bowl and add the seed slurry. Gently mix everything together, making sure the seeds are evenly distributed in the pulp.
Create a Mold: Place the wooden frame with the mesh or nylon stocking stretched over it on a flat surface. This will be your mold to shape the seed paper.
Form Seed Paper: Pour the pulp and seed mixture onto the frame and spread it out evenly with a sponge.
Press and Remove Excess Water: Place a towel or paper towel on top of the paper mixture and press down with a rolling pin or another flat, heavy object. This helps remove excess water.
Dry the Seed Paper: Carefully lift the frame, and the paper should be left on the mesh or nylon stocking. Allow the seed paper to air dry for a day or two, or you can speed up the drying process by placing it in a sunny spot. Make sure it’s completely dry before proceeding.
Peel Paper from Frame: Once the seed paper is dry, gently peel it from the mesh or nylon stocking.
Cut and Store: You can cut the seed paper into various shapes and sizes for gifting or planting. Store the seed paper in a cool, dry place until you’re ready to use it.
To plant the seed paper, simply bury it in soil, water it, and watch your seeds sprout and grow into beautiful plants. Keep in mind that germination may vary depending on the type of seeds and environmental conditions.