
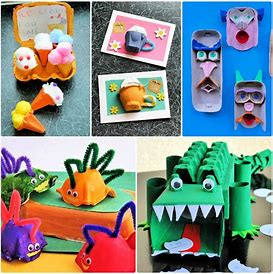
Use these 25 simple and entertaining egg carton crafts and kids’ art projects to inspire imaginative play in your children! This assortment of creative kid-friendly egg carton crafts makes it simple to turn egg cartons into unique pieces of art. You can make egg carton crafts that will please even the pickiest children, featuring creative designs of automobiles, robots, insects, and animals. Every project comes with detailed directions and graphics to make it simple for you to work together to create a masterpiece. Take a chance on some egg carton crafts and activities now to discover what incredible works of art your family can produce.
- How to Make an Egg Carton Bee
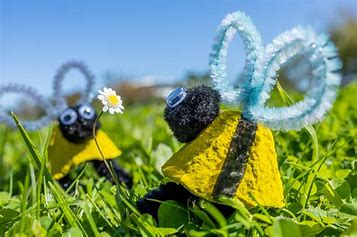
Making an egg carton bee is a fun and easy craft project! Here’s a simple step-by-step guide:
Materials Needed:
- Empty egg carton (the kind with individual cups)
- Yellow and black paint (or markers)
- Googly eyes (optional)
- Scissors
- Glue (or a hot glue gun)
- Pipe cleaners (black and/or yellow)
- Paper (for wings)
- Pencil
- Paintbrushes
Instructions:
- Prepare the Egg Carton:
- Take an empty egg carton and cut out one or two cups from it. You can use one cup for a single bee or two for a pair.
- Paint the Bee:
- Use yellow paint to cover the outside of the egg carton cup(s). Let it dry.
- Once dry, paint black stripes across the yellow to create the bee’s body. You can add a few stripes to the top and bottom.
- Add Eyes:
- If you have googly eyes, glue them onto the front of the bee. If not, you can paint or draw eyes with a black marker.
- Make Antennae:
- Cut two short pieces of pipe cleaner and bend them into antennae shapes. Glue them to the top of the bee’s head.
- Create Wings:
- Cut out a pair of wing shapes from paper. You can make them any shape you like! Color them in or decorate them with patterns.
- Attach the wings to the back of the egg carton bee using glue.
- Finishing Touches:
- Once everything is dry, you can add any extra decorations, like glitter or additional colors.
- Display Your Bee:
- Find a fun place to display your egg carton bee, or make a whole swarm!
Tips:
- Get creative! You can customize your bee with different colors and patterns.
- You can also make flowers from construction paper to create a lovely bee garden display.
Enjoy your crafting!
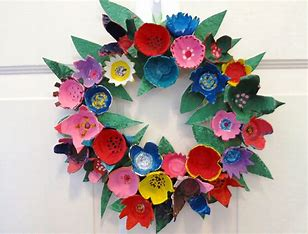
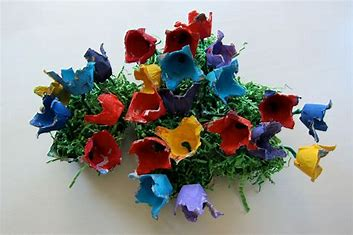
2. Recycled Egg Carton Flower Wreath
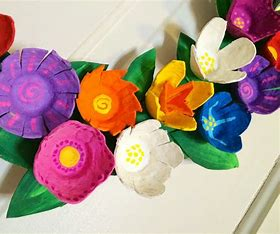
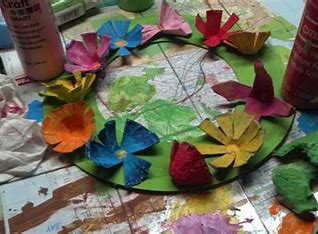
Embrace spring with a vibrant DIY floral wreath made from recycled egg cartons! This craft, which is ideal for the whole family, only needs egg cartons, acrylic paint, a hot glue gun, and a wire wreath base. Take simple measures to create gorgeous entryway décor right now. Take pleasure in your charming flower arrangement and warm up your front entrance!
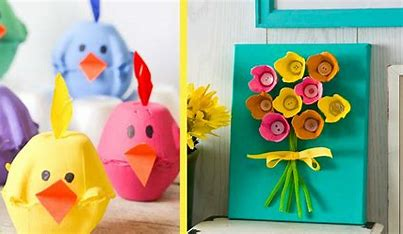
3. Simple DIY Egg Carton Faces
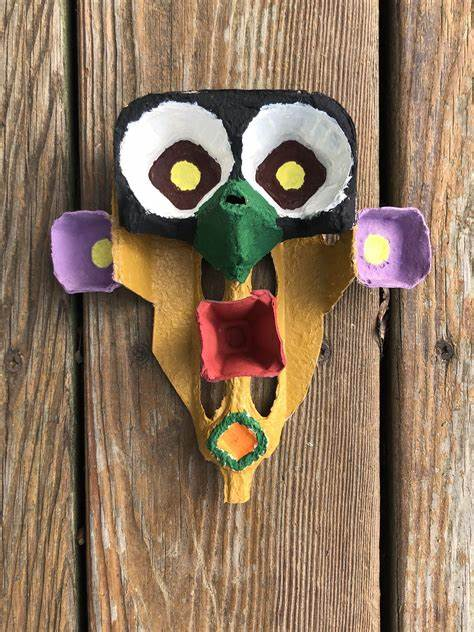
Creating simple DIY egg carton faces is a fun and easy craft! Here’s how you can make them:
Materials Needed:
- Empty egg carton
- Scissors
- Paint or markers
- Googly eyes (optional)
- Glue
- Craft paper or felt (for hair, hats, etc.)
- Pencil
- Decorations (like stickers, sequins, or fabric scraps)
Instructions:
- Prepare the Egg Carton:
- Cut the egg carton into individual cups. You can use one cup for a face.
- Paint the Face:
- Use paint or markers to create a face on the outside of the cup. You can make happy, sad, silly, or any expression you like! Let it dry.
- Add Eyes:
- Glue googly eyes onto the face. If you don’t have googly eyes, you can draw or paint eyes instead.
- Create Hair:
- Cut pieces of craft paper or felt to make hair. You can glue them to the top of the cup. Alternatively, use yarn for a fun, textured look.
- Add Accessories:
- Get creative with hats, glasses, or any other accessories! You can make these from paper or use items you have at home.
- Decorate:
- Use stickers, sequins, or any other decorations to add personality to your face.
- Display Your Faces:
- Once everything is dry, display your egg carton faces on a shelf or use them for imaginative play!
Tips:
- Make a whole family of faces with different expressions.
- Use different colors for skin tones, hair, and accessories to create diversity.
- Have fun experimenting with different styles and materials!
Enjoy your crafta!
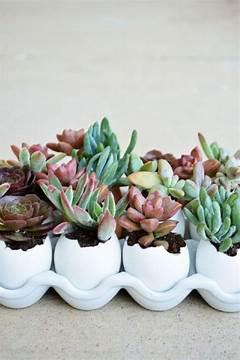
4. Upcycled Egg Carton Succulent
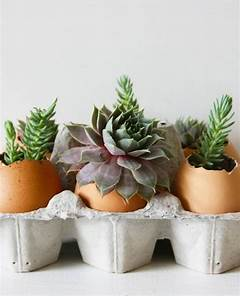
Creating an upcycled egg carton succulent is a fun and eco-friendly craft! Here’s a simple guide to making your own:
Materials Needed:
- Empty egg carton
- Scissors
- Paint (green, brown, or any color you like)
- Paintbrush
- Small rocks or pebbles (for decoration)
- Pot (optional) or a small container
- Glue (optional)
- Craft paper (optional, for added decoration)
Instructions:
- Prepare the Egg Carton:
- Cut the egg carton into individual cups. Each cup will be a succulent “leaf.”
- Shape the Leaves:
- Trim the edges of the cups to create a more succulent-like shape. You can cut the cups into points or smooth edges, depending on the type of succulent you want to mimic.
- Paint the Leaves:
- Use green paint to color the outside of the cups. You can add different shades of green or even other colors to create a more vibrant look. Let them dry completely.
- Create Texture:
- For added texture, you can use a darker shade of paint to add shading or patterns on the leaves.
- Assemble the Succulent:
- Once the leaves are dry, you can glue them together in a cluster to resemble a succulent. Start with one piece in the center and add others around it, layering them as you go.
- Add Details:
- If desired, you can glue small rocks or pebbles at the base for a natural look. You can also place your succulent in a small pot or container.
- Optional Decorations:
- Use craft paper to create a decorative pot or add embellishments like ribbon or string around the base.
- Display Your Creation:
- Find a nice spot to display your upcycled succulent. They make great decorations for desks, windowsills, or as gifts!
Tips:
- Experiment with different colors and shapes to create a variety of succulents.
- Consider adding other materials like fabric or felt for unique textures.
- If you want a more realistic look, you can also spray the finished succulent with a sealant.
Enjoy your crafting!
5. Adorable Five Little Ducks Crafta
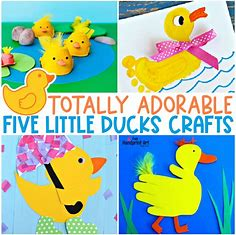
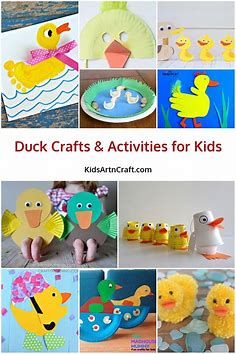
This easy-to-make activity of five small ducks is ideal for a fun-filled afternoon spent in the nursery. Just a few materials are needed for this quick and simple project, including an egg carton, blue paint, green foam, brown felt, foam numbers, and adhesive.
When done correctly, your five adorable baby chick dips can look amazing. Simply snap each egg cup off the egg carton. After painting them a base colour of blue, add vivid dots of brown felt and green foam feathers to their backs.
For a traditional “five little ducks” appearance, add 1–5 foam numbers to the base as a finishing touch. Your child will adore the adorable result of this creative do-it-yourself creation! tinymonster
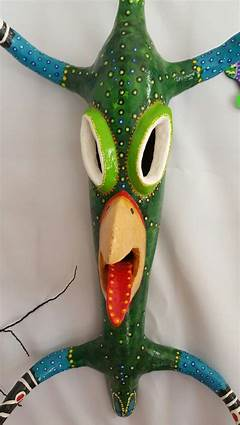
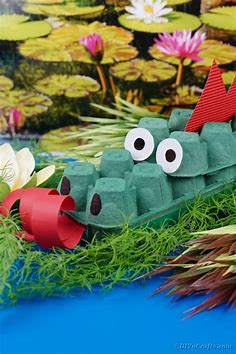
6. DIY Alligator Affirmation Box
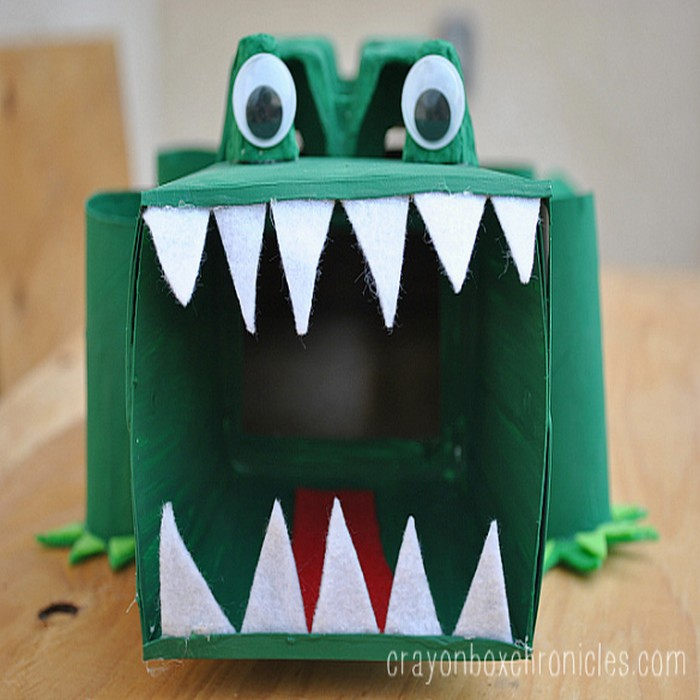
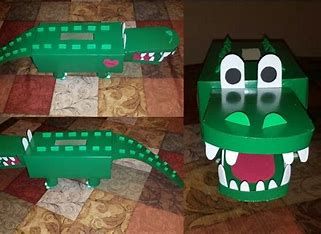
Creating a DIY Alligator Affirmation Box is a fun and creative project that combines crafting with positive affirmations! Here’s how you can make one:
Materials Needed:
- Small cardboard box (like a shoebox)
- Green paint (or markers)
- Construction paper (green, yellow, or other colors)
- Scissors
- Glue
- Googly eyes (optional)
- Craft foam (optional, for added texture)
- Affirmation slips of paper (you can create these)
Instructions:
- Prepare the Box:
- Start with a small cardboard box. This will be the base of your alligator affirmation box.
- Paint the Box:
- Paint the entire box green and let it dry. This will be the alligator’s body. If you don’t have green paint, you can use green markers or construction paper.
- Create the Alligator’s Face:
- Cut out a triangle or a rounded shape from the green construction paper for the head. Attach it to one end of the box using glue.
- Add googly eyes on top of the head or draw them with a marker.
- Make the Teeth:
- Cut out small triangles from white or yellow construction paper to create teeth. Glue them along the edge of the head to make your alligator look fierce!
- Add Details:
- Use additional construction paper to create scales, nostrils, or other facial features. You can also cut out small feet and attach them to the bottom of the box if you want to give your alligator more character.
- Create Affirmation Slips:
- Cut small pieces of paper to write positive affirmations on. Examples include “I am strong,” “I can achieve my dreams,” or “I am loved.” Decorate these slips with fun designs or colors.
- Fill the Box:
- Place the affirmation slips inside the box. You can encourage family or friends to write their own affirmations to add to it.
- Display Your Affirmation Box:
- Find a special spot for your alligator affirmation box where you can see it daily. You can take a slip out each day for a boost of positivity!
Tips:
- Get creative with colors and designs! Each alligator can look unique.
- Use different materials like fabric or felt for added texture.
- Consider making a whole family of alligator affirmation boxes!
Enjoy your crafting and spreading positivity!
7. Caterpillar Egg Carton Crafts for Toddlers
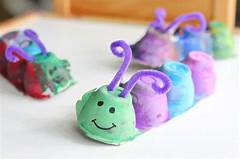

This easy and entertaining activity made from egg cartons is a great way to spark your kids’ imaginations! Just a few simple things are needed for this entertaining craft: an egg carton, scissors, paints and paintbrushes, pipe cleaner, and googly eyes.
With this easy-to-follow tutorial for making an egg carton caterpillar, you can add some fun to your crafts and take pleasure in your kids’ adorable finished products. With just a few simple components, this do-it-yourself craft will quickly become a favourite! bored toddler
8. Jawsome Egg Carton Shark Activities
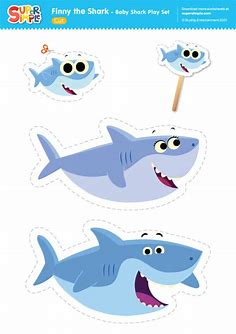
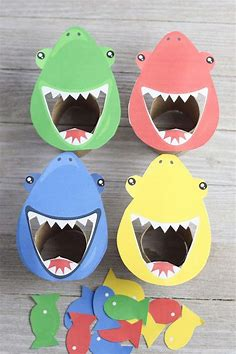
Here are some fun “jawsome” activities you can do with egg carton sharks!
1. Egg Carton Shark Craft
Materials Needed:
- Empty egg carton
- Scissors
- Blue and gray paint (or markers)
- Googly eyes (optional)
- Glue
- Construction paper (for fins)
Instructions:
- Cut the egg carton to create individual shark bodies (one cup per shark).
- Paint the outside of the shark cup blue or gray.
- Cut out fins and a tail from construction paper and glue them to the shark.
- Add googly eyes or draw them on with a marker.
- Display your sharks or use them for imaginative play!
2. Shark Puppet Show
Materials Needed:
- Egg carton sharks (from the craft above)
- Popsicle sticks (optional)
- A small stage (a table or a cardboard box)
Instructions:
- Attach popsicle sticks to the bottom of your egg carton sharks to make puppets.
- Create a simple backdrop using a large piece of cardboard or fabric.
- Put on a puppet show featuring your sharks! You can create a storyline about ocean adventures.
3. Shark Facts Learning Activity
Materials Needed:
- Egg carton sharks
- Markers or colored pencils
- Paper
Instructions:
- Have kids research fun facts about sharks (e.g., types of sharks, their habitats).
- Write or draw these facts on pieces of paper.
- Attach the fact papers to the base of each egg carton shark.
- Share your shark facts with friends or family!
4. Shark Coloring Activity
Materials Needed:
- Printed shark coloring pages
- Crayons or colored pencils
- Your egg carton sharks (for decoration)
Instructions:
- Print out various shark coloring pages.
- Color them in and decorate your space with them.
- Use the egg carton sharks as decoration to create a fun ocean theme.
5. Shark-Themed Sensory Bin
Materials Needed:
- Egg carton sharks
- Blue gel or water beads (to mimic water)
- Small ocean-themed toys (like fish or seaweed)
- A large container
Instructions:
- Fill a large container with blue gel or water beads.
- Add the egg carton sharks and other ocean toys.
- Let kids explore the sensory bin, encouraging imaginative play as they interact with their shark creations.
Tips:
- Combine these activities for a “Shark Week” theme.
- Encourage creativity by allowing kids to customize their sharks with unique designs or colors.
- Use these activities to teach about marine life and conservation.
Enjoy your jawsome shark activities!
9. Bunny Craft Ideas With Egg Cartons
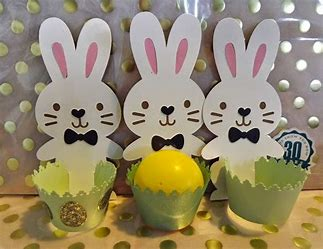
This DIY egg carton rabbit will definitely put a unique spin on the classic Easter project. This unusual rabbit is certain to be a hit because it’s easy and enjoyable to construct with the kids! An egg carton, scissors, glue, googly eyes, and acrylic paint in the colours pink, yellow, and baby blue are all you need to decorate.
You can use black marker for the bunny’s whiskers, small white foam pom poms for its tail, and masking tape to help cut the egg carton.
You can make a homemade egg carton rabbit that will make your friends and family very happy by following this step-by-step tutorial. This Easter, give a carton of eggs life! ideas for children
10. Whale Egg Carton Crafts for Kids
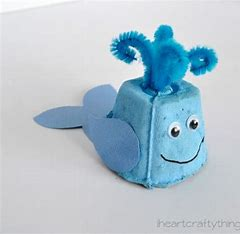

This summer, give your kids a unique and entertaining DIY egg carton whale craft! Egg cartons, light blue paint, googly eyes, and other simple materials are all you’ll need to create this quick and easy recyclable craft. You’ll also receive a template and step-by-step tutorial to help you expedite the crafting process. When your children proudly display their own whale creation, it will make them very happy! crafty items.
11. DIY Egg Carton Tea Cup Cards
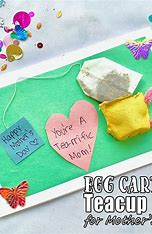
Creating DIY Egg Carton Tea Cup Cards is a delightful and creative craft! Here’s how you can make them:
Materials Needed:
- Empty egg carton
- Scissors
- Paint or markers
- Construction paper or card stock (for the card base)
- Glue
- Googly eyes (optional)
- Decorative items (like sequins, stickers, or ribbons)
Instructions:
- Prepare the Egg Carton:
- Cut the egg carton into individual cups. Each cup will be your tea cup.
- Paint the Tea Cups:
- Paint the outside of the egg carton cups in your favorite colors. You can use patterns or designs to make them more decorative. Let them dry completely.
- Create the Card Base:
- Cut a piece of construction paper or card stock to your desired card size (e.g., 5×7 inches).
- Fold it in half to create a card.
- Attach the Tea Cups:
- Once the paint on the tea cups is dry, glue them to the front of the card. Position them creatively—either stacked or side by side.
- Add Details:
- Use markers or paint to add designs on the cups, such as flowers or polka dots.
- If you want, glue on googly eyes for a fun, whimsical touch!
- Write a Message:
- Inside the card, write a warm message or an affirmation. You could say something like “You’re tea-riffic!” or “Hope your day is as lovely as a cup of tea!”
- Decorate Further:
- Add any extra decorations to the card, such as ribbons, stickers, or sequins to enhance the design.
- Finish Up:
- Let everything dry, and your DIY Egg Carton Tea Cup Cards are ready to be gifted or used for special occasions!
Tips:
- Make a set of cards for different occasions, like birthdays or thank you cards.
- Use different colors and styles for the tea cups to make each card unique.
- Get creative with the decorations—let kids add their personal touch!
Enjoy crafting your charming tea cup cards!
12. Egg Carton Treasure Box Arts and Crafts
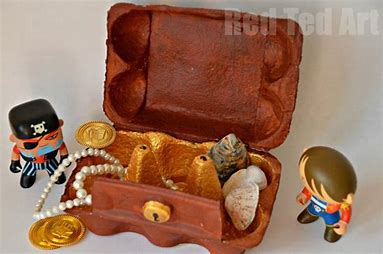

A great craft for the holidays that will keep kids occupied on Pirate Day is a homemade treasure box made from egg cartons. In addition to being gorgeous, it can be given as a present and used to contain tiny hair clips, bands, or other objects.
All you’ll need is an egg carton, some washi tape, decoupage paper, PVA glue, brown and gold acrylic paint for embellishment, and a jewel to finish the ensemble. Making this do-it-yourself project is simple, satisfying, and enjoyable when you have a comprehensive step-by-step tutorial! REDTEDART.
13. How to Make an Egg Carton Dragon
Making an egg carton dragon is a fun and creative craft! Here’s a simple step-by-step guide to help you create your own:
Materials Needed:
- Empty egg carton
- Scissors
- Paint (green, red, or any colors you like)
- Paintbrushes
- Googly eyes (optional)
- Glue
- Construction paper (for wings and details)
- Pipe cleaners (optional, for added features)
Instructions:
- Prepare the Egg Carton:
- Cut the egg carton into individual cups. You can use one cup for the dragon’s head and additional cups for the body if you like.
- Create the Dragon’s Head:
- Take one cup and cut it in half. Use one half for the dragon’s head.
- You can also cut small notches along the edge to create a mouth.
- Paint the Dragon:
- Paint the entire cup (or cups) in your chosen colors. Green is a classic dragon color, but feel free to get creative! Let it dry completely.
- Add Features:
- Once dry, glue on googly eyes or paint eyes on the dragon’s head.
- Cut small triangles from construction paper to make the dragon’s ears and glue them to the top of the head.
- Create the Wings:
- Cut out wing shapes from construction paper. You can make them any size or shape you like!
- Paint or decorate the wings, then glue them to the back of the dragon.
- Add Texture:
- Use pipe cleaners to create spikes along the back or to make the dragon’s tail. Twist them together and attach them with glue.
- Finish Up:
- Let everything dry. Once it’s complete, you can add any final details, like scales or patterns.
- Display Your Dragon:
- Find a special place to display your egg carton dragon or use it in imaginative play!
Tips:
- Encourage kids to use different colors and materials for a unique dragon.
- You can make a whole dragon family by using multiple egg cartons.
- Consider making a background scene for your dragon with construction paper or other materials.
Enjoy your crafting adventure!
14. Homemade Egg Box Ice Cream Cones
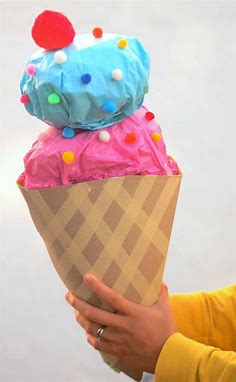
Using egg cartons, create delicious handmade ice cream cones! Both youngsters and adults will enjoy making this enjoyable project. Acquire six large egg box cones, one mini egg box tray, balls of cotton wool, and giant pompoms in a variety of colours. Using a glue gun and smaller pompoms, add extra cuteness. Your kids will adore these delicious ice cream cones that you make with our easy-to-follow instructions! within the playroom.
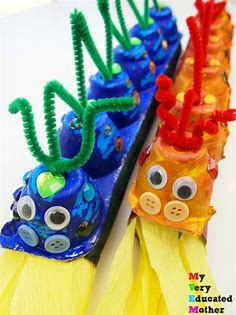
15. Egg Carton Goldfish Art Projects
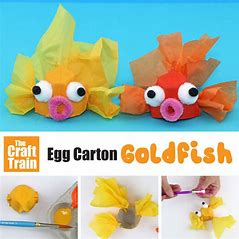
With this adorable and environmentally friendly egg carton goldfish craft, doing DIY crafts with the kids is a breeze. It’s simple to make, instructive, and loved by people of all ages. For an at-home or classroom project, gather supplies like pipe cleaners, glue, paint, tissue paper, pompoms, and an egg carton. Then, follow this step-by-step tutorial! The majority will find it easy to construct this incredible work of art! the craft train.
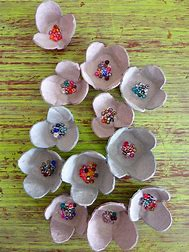
16. Egg Carton Flowers for Adults
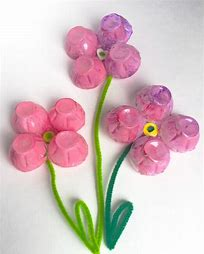
Creating egg carton flowers is a fantastic and eco-friendly craft that can add a touch of creativity to your home decor. Here’s a step-by-step guide tailored for adults:
Materials Needed:
- Empty egg carton
- Scissors
- Paint (acrylic or spray paint works well)
- Paintbrushes
- Wire (floral wire or any sturdy wire)
- Floral tape or green tape
- Hot glue gun or craft glue
- Optional: beads, buttons, or decorative materials for the center
Instructions:
- Prepare the Egg Carton:
- Cut the egg carton into individual cups. Each cup will serve as a flower petal.
- Shape the Flowers:
- Trim the edges of the cups to create petal shapes. You can cut the cups into a more rounded or pointed shape, depending on the flower style you want.
- Paint the Petals:
- Paint the outside of the cups in your desired colors. You can mix colors for a gradient effect or use multiple colors for a more vibrant look. Let them dry completely.
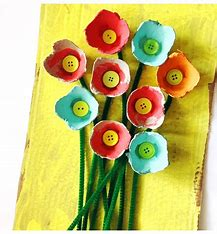
- Create Flower Centers:
- For the center of each flower, you can use beads, buttons, or even crumpled paper. Glue these into the center of each painted cup.
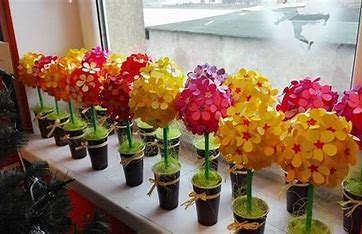
- Assemble the Flowers:
- Use wire to create stems. Cut the wire to your desired length and secure it to the base of the flower cup using hot glue.
- If you want to create a more natural look, wrap the wire with floral tape.
- Add Leaves (Optional):
- Cut leaf shapes from green construction paper or cardstock. Attach these leaves to the stems with glue or tape.
- Display Your Flowers:
- Arrange your egg carton flowers in a vase, or group them together as a bouquet. You can also create a wall hanging or use them as a decorative centerpiece.
Tips:
- Experiment with different colors and styles to create a variety of flowers.
- Use a mix of sizes by combining different egg carton cups to make larger flowers.
- Consider adding embellishments like glitter or rhinestones for added sparkle.
Enjoy your crafting and the beauty of your handmade egg carton flowers!