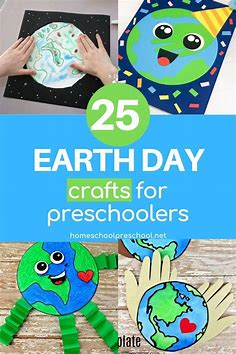
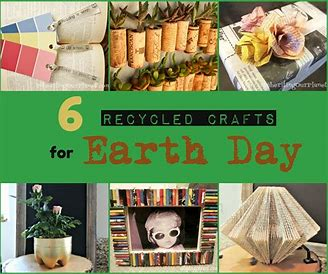
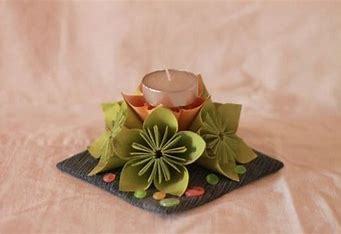
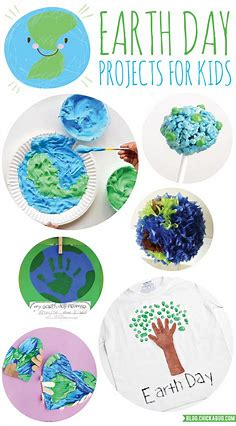
You’re not the only one who is excited about spring. Easter and Mother’s Day are not the only holidays you should mark on your calendar. This year, Earth Day falls on April 22, and with the status of environmental issues right now, it is definitely something that everyone should be aware of. Because of this, we’ve compiled a variety of Earth Day crafts that will engage and delight children of all ages and teach the next generation the importance of The world we live on is really important. After reading this, get ready to get out your craft tools and spend some quality time creating. (Side note: Save that egg carton! We would like to recommend using as many recyclable and sustainable materials as you can for the following crafts, given that it is Earth Day.
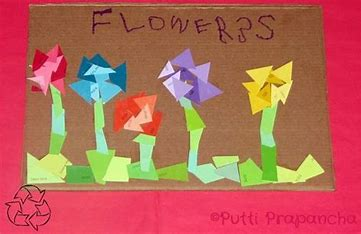
Creating a torn paper art collage for Earth Day is a fantastic way to celebrate the planet! Here’s a step-by-step guide to help you get started:
Materials Needed:
- Various colored papers (magazines, construction paper, tissue paper)
- Scissors (if needed for shaping)
- Glue or a glue stick
- A canvas or heavy cardstock as your base
- Optional: markers or paint for additional details
Steps:
- Choose a Theme: Decide what aspect of Earth Day you want to focus on—like nature, recycling, or animals.
- Gather Papers: Collect various shades of greens, blues, browns, and any other colors that represent your theme. Look for textures and patterns in magazines for added interest.
- Tear the Paper: Instead of cutting, tear the paper into different shapes and sizes. This gives a more organic and textured look to your collage.
- Plan Your Composition: Lightly sketch the layout on your base. Consider incorporating elements like:
- The Earth itself
- Trees, plants, or flowers
- Animals
- Recycled symbols
- Start Gluing: Begin with the background elements. Apply glue to the base, then layer the torn paper pieces. Overlap them for depth and dimension.
- Add Details: Once the main elements are in place, add smaller details. You can use markers or paint to enhance certain areas or create outlines.
- Final Touches: After everything is glued down, step back and assess your collage. Add any additional layers or textures as desired.
- Display Your Art: Once dry, find a spot to showcase your collage, or consider giving it as a gift to raise awareness for Earth Day!
Tips:
- Use a variety of paper textures to add interest.
- Experiment with color blending by overlapping torn pieces.
- Get creative with shapes—think abstract or symbolic representations of your chosen theme.
Enjoy the process and have fun creating your Earth Day collage!
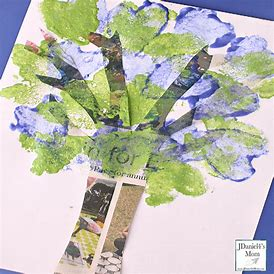
2. Tree Cork and Utensil Painting
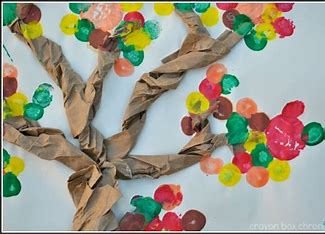
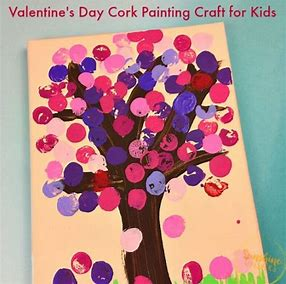
Pour yourself a glass of wine (natural, of course) in honour of the environment, and then give your child the cork and some other recycled materials so they may make a masterpiece out of paint and butcher paper that honours trees. (After all, they do provide us with oxygen to breathe and colour our world.)
Creating a craft using paint chips for Earth Day is a fun and eco-friendly project! Here’s how to make a simple and creative Earth Day craft using paint chips.
Materials Needed:
- Paint chips (various shades of green, blue, brown, etc.)
- Scissors
- Glue stick or craft glue
- Cardstock or heavy paper (for the base)
- Markers or pens (optional for additional details)
- Pencil (for sketching outlines, optional)
Steps:
- Gather Your Paint Chips: Collect paint chips from a hardware store. Choose colors that represent the Earth, like greens for land, blues for water, and browns for mountains.
- Choose a Design: Decide on what you want to create. Ideas include:
- A landscape (mountains, trees, water)
- A globe or Earth
- Animals or plants
- A collage representing Earth Day themes (recycling, nature, etc.)
- Cut Shapes: Use scissors to cut the paint chips into various shapes. For example:
- For trees, cut out triangles or rectangles for trunks.
- For water, cut out wavy shapes.
- For animals, cut out simple silhouettes.
- Arrange Your Design: Before gluing, lay out the cut pieces on your cardstock to see how they fit together. Adjust as needed.
- Glue Down the Pieces: Once you’re happy with the arrangement, start gluing the pieces onto the cardstock. Begin with larger pieces and layer smaller ones on top.
- Add Details: Use markers or pens to add details to your craft. You can write Earth Day messages, draw additional elements like clouds or flowers, or outline your shapes.
- Finish and Display: Allow your craft to dry completely. You can hang it up, display it on a table, or give it as a gift to raise awareness about Earth Day.
Tips:
- Get creative with how you arrange colors—create gradients or patterns.
- Consider making multiple smaller pieces to create a larger mural or display.
- Use the back of the paint chips for extra texture or color variety.
Enjoy your Earth Day paint chip craft! It’s a great way to recycle materials and celebrate our planet.
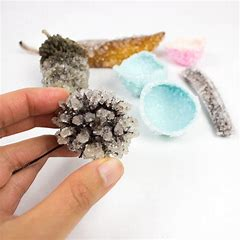
4. Borax Crystal Nature Crafta
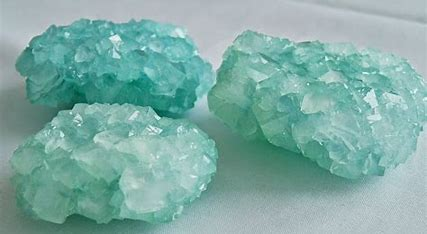

Making Borax crystals is a fun and educational nature craft that allows you to explore the beauty of crystals while learning about science! Here’s a simple guide to create your own Borax crystal nature craft.
Materials Needed:
- Borax (available at most grocery stores)
- Boiling water
- A glass jar (mason jar works well)
- A spoon for stirring
- A piece of string or pipe cleaner (shaped into a desired form, like a leaf or flower)
- A pencil or stick (to suspend the string)
- Optional: food coloring for colored crystals
Steps:
- Prepare the String or Pipe Cleaner:
- If using a pipe cleaner, shape it into a fun nature-inspired form, like a leaf or a flower.
- Tie a string to the shape if using a separate string.
- Create the Borax Solution:
- Boil about 2 cups of water.
- Carefully pour the boiling water into a glass jar.
- Add about 3 tablespoons of Borax to the hot water, stirring until it completely dissolves. You can add more Borax if needed until no more dissolves (this means the solution is saturated).
- Add Color (Optional):
- If you want colored crystals, add a few drops of food coloring to the solution and stir.
- Suspend Your Shape:
- Tie the other end of the string to a pencil or stick, and rest it across the top of the jar, letting the shaped end dangle into the solution. Make sure it doesn’t touch the bottom of the jar.
- Let It Sit:
- Place the jar in a location where it won’t be disturbed and let it sit for several hours or overnight. As the solution cools, crystals will start to form on the shape.
- Observe and Remove:
- After the desired time, carefully remove the string or pipe cleaner from the jar. You should see beautiful Borax crystals formed!
- Display Your Crystals:
- Let the crystals dry for a little while, then display them as a beautiful piece of nature art!
Tips:
- Experiment with different shapes and sizes for varied results.
- For larger crystals, use more water and Borax and let it sit longer.
- Try adding other items, like rocks or twigs, into the solution for unique crystal formations.
This craft not only creates beautiful decorations but also teaches about crystallization and nature’s wonders. Enjoy your crystal-making adventure!
5. Earth Day-Inspired Tree Crafta
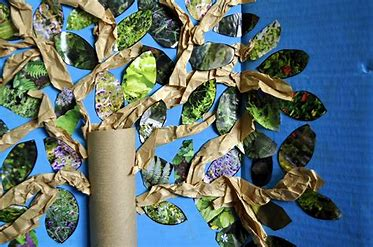
While toilet paper tubes are a common material for recycled crafts, this one truly stands out as a kid-friendly art project that you will want to preserve. What’s even better is that both toddlers and teens can complete it, albeit to differing degrees of aesthetic appeal. Give a child of any age this one to help ensure that Earth Day is a successful celebration of trees.
6. Recycled Plastic Bottle Wind Spinner
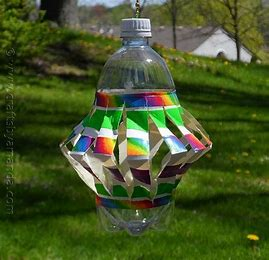
Making a wind spinner from recycled plastic bottles is a fun and eco-friendly project! Here’s a simple guide to create your own:
Materials Needed:
- 1 or 2 plastic bottles (2-liter soda bottles work well)
- Scissors or a craft knife
- Paint or permanent markers (optional for decoration)
- String or fishing line
- A wooden dowel or sturdy stick (for hanging)
- Drill or hole punch (optional)
- Paintbrush (if using paint)
Instructions:
- Prepare the Bottles:
- Clean the bottles thoroughly and remove the labels.
- If you’re using two bottles, you can cut one to create a more intricate design.
- Cut the Bottles:
- Carefully cut the bottom off each bottle. If you want to create a spiral effect, make vertical cuts from the top down towards the bottom, leaving a small uncut section at the top.
- For a more classic look, you can cut slits around the bottle, creating flaps.
- Shape the Spinner:
- If you made slits, gently pull the flaps outward to create a flower-like shape.
- You can also twist the flaps to give them more dimension.
- Decorate (optional):
- Use paint or markers to add colors and designs to your wind spinner. Let it dry completely.
- Attach the Spinner:
- If you want to attach multiple spinners, use a drill or hole punch to make a hole at the top of each bottle.
- Thread a piece of string or fishing line through the hole and tie a knot to secure it.
- Hang the Spinner:
- Tie the other end of the string to a wooden dowel or stick, then find a suitable place to hang your wind spinner. You can also hang it directly from a tree branch or hook.
- Enjoy the Motion:
- Watch your wind spinner catch the breeze and add some colorful movement to your outdoor space!
Tips:
- Experiment with different bottle shapes and sizes for varied designs.
- Consider using clear bottles for a translucent effect or colored ones for a vibrant look.
- If you’re using multiple bottles, try arranging them in a pattern or stagger them for visual interest.
This project is not only a great way to recycle but also adds a touch of whimsy to your garden or patio! Enjoy your crafting!
7. Earth Day Tissue Paper Candle Holder
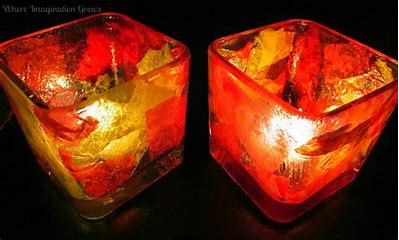
It turns out that clear glue and some colourful tissue paper are all you need to upcycle a cute glass candle holder. You can create a gorgeous Earth-inspired luminary as a centrepiece if you stick to a colour scheme of blue, white, and green. It’s so simple even a kid could do it.
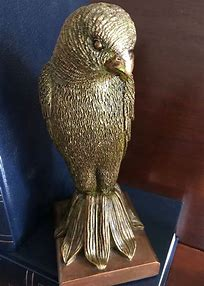
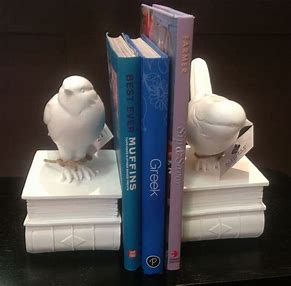
Creating bird-themed bookends is a fun and creative project that can add a charming touch to your bookshelf. Here’s how to make your own:
Materials Needed:
- Two sturdy blocks (wood, concrete, or heavy stones work well)
- Bird figurines or cutouts (wooden, ceramic, or crafted from paper)
- Paint or wood stain (optional for decoration)
- Paintbrush (if using paint)
- Strong adhesive (like epoxy or hot glue)
- Sandpaper (if using wood)
- Sealer (optional for protection)
Instructions:
- Prepare the Base:
- If you’re using wood blocks, sand the edges to smooth them out. For concrete or stone, ensure they are clean.
- Paint or Stain (optional):
- If you’d like to customize the color of your bookends, paint or stain the blocks. Let them dry completely.
- Attach the Bird Figurines:
- Position your bird figurines or cutouts on each block. You can place them standing, perched, or in a playful pose.
- Use strong adhesive to secure the figurines to the blocks. Press firmly and let them dry according to the adhesive instructions.
- Finishing Touches:
- If desired, apply a clear sealer over the paint or the entire project to protect it and enhance durability.
- Display Your Bookends:
- Once everything is dry, place the bookends at each end of your book collection, and enjoy your new decorative piece!
Tips:
- Get creative with the birds! You can use different species or styles to match your decor.
- Consider adding small decorative elements like flowers, leaves, or other nature-themed items around the birds.
- If you want to make it more functional, you could paint the blocks with chalkboard paint for a customizable message area.
This project is not only practical but also a beautiful way to showcase your love for birds. Enjoy your crafting!
9. Earth Day Discovery Bottles
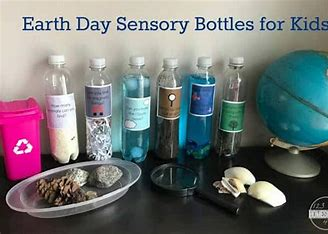
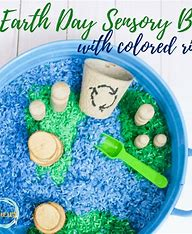
Although this is more of a science project than a craft, it nevertheless works since even small children may assist with the setup of these amazing and instructive discovery bottles. What follows is an extensive sensory investigation that is ideal for discussions about nature and ocean science.
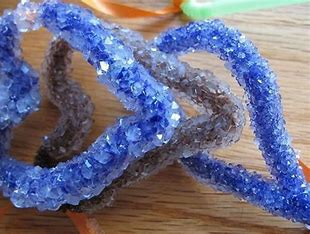
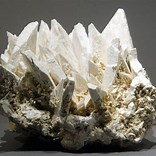
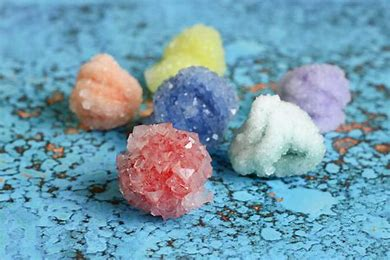
Making borax crystals is a fun and educational activity perfect for Earth Day! It’s a great way to explore the beauty of nature and science. Here’s how to create your own borax crystal formations.
Materials Needed:
- 1 cup of borax (available in the laundry aisle)
- 3 cups of boiling water
- A heat-resistant container (like a glass jar)
- A spoon for stirring
- A piece of string or pipe cleaner (optional for shape)
- A pencil or stick to suspend the string/pipe cleaner in the solution
- Food coloring (optional for colored crystals)
Instructions:
- Prepare the Solution:
- In a heat-resistant container, carefully mix 3 cups of boiling water with 1 cup of borax. Stir the mixture until the borax is completely dissolved. You should have a saturated solution, meaning no more borax will dissolve in the water.
- Shape Your Crystals:
- If using a pipe cleaner, shape it into a fun design, like a star or a heart. Tie a string to the shape if needed.
- If you’re using string, you can tie a weight (like a small piece of metal) to the end to help it sink.
- Suspend Your Shape:
- Use a pencil or stick to suspend the shaped pipe cleaner or string in the borax solution, ensuring it doesn’t touch the bottom of the container. This allows the crystals to grow evenly.
- Add Color (optional):
- If you want colored crystals, add a few drops of food coloring to the solution and stir.
- Let It Sit:
- Allow the container to sit undisturbed for several hours or overnight. The longer it sits, the larger the crystals will grow.
- Remove and Dry:
- After 24 hours, carefully remove the crystals from the solution. Rinse them gently under cold water to remove any excess borax. Place them on a paper towel to dry.
- Display Your Crystals:
- Once dry, your beautiful borax crystals are ready to be displayed! You can use them as decorations or gifts.
Tips:
- Experiment with different shapes and sizes of pipe cleaners for unique crystal designs.
- Try making multiple batches with different colors to create a vibrant display.
- Discuss the science behind crystallization and how these beautiful formations occur as a great educational addition!
This Earth Day project is a wonderful way to appreciate the beauty of nature while engaging in a hands-on science experiment. Enjoy your crystal-making!
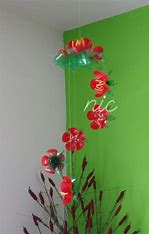
11. Recycled Water Bottle Flower Crafta


This charming flower arrangement is made of recycled plastic water bottles, pipe cleaners, paint, and pom poms. It is designed to last. While younger children will enjoy the painting step and the opportunity to practise using scissors by cutting the paper leaves, slightly older kids can safely complete this craft from start to finish because it only requires a low temperature when using a hot glue gun.
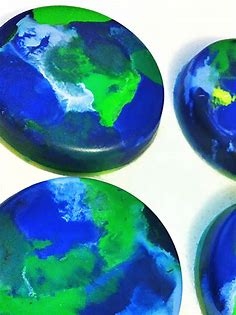
Making DIY Earth Day crayons is a fun and eco-friendly project that helps recycle old crayons while creating something new! Here’s how to do it:
Materials Needed:
- Old crayons (broken or unused)
- Oven-safe silicone mold (fun shapes like hearts, stars, or animal figures)
- Baking sheet
- Optional: essential oils (for fragrance)
Instructions:
- Preheat the Oven:
- Preheat your oven to 250°F (120°C).
- Prepare the Crayons:
- Remove the wrappers from the old crayons. You can use a knife or your fingers to peel them off.
- Break the crayons into small pieces (about 1-inch sections) to help them melt evenly.
- Arrange the Mold:
- Place the broken crayon pieces into the silicone mold. Feel free to mix colors for a tie-dye effect or keep them separate for solid colors.
- Melt the Crayons:
- Place the filled mold on a baking sheet to catch any spills. Bake in the oven for about 10-15 minutes or until the crayons are completely melted.
- Add Fragrance (optional):
- If you’d like to add a pleasant scent, mix a few drops of essential oil into the melted crayon mixture before it cools.
- Cool and Remove:
- Carefully remove the mold from the oven and let it cool at room temperature. Once cool, place the mold in the freezer for about 10-15 minutes to help the crayons harden.
- Gently pop the crayons out of the mold.
- Enjoy Your Crayons:
- Your DIY Earth Day crayons are now ready to use! These unique shapes and colors can add fun to any art project.
Tips:
- Get creative with your molds! You can use various shapes, like letters or seasonal themes.
- This is a great activity for kids—let them help sort the crayons and choose color combinations.
- Consider labeling the crayons with the colors or scents if you made different varieties.
This project not only recycles old materials but also promotes creativity, making it a perfect Earth Day activity. Enjoy crafting your new crayons!

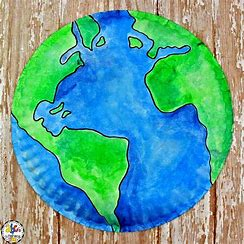
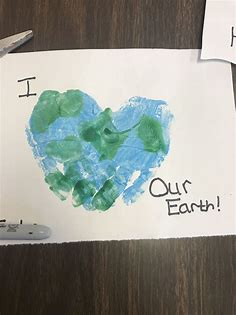
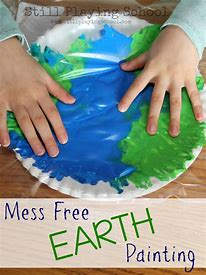
This simple craft project is suitable even for a toddler, as it uses the exuberant pleasure your child gets from tearing paper to pieces to create something that honours the planet and is definitely worthy of being displayed on the refrigerator.
14. DIY Cardboard Cactus Crafta
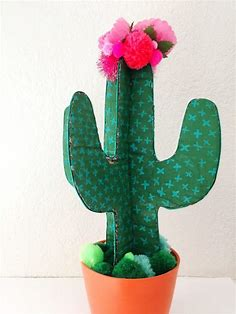
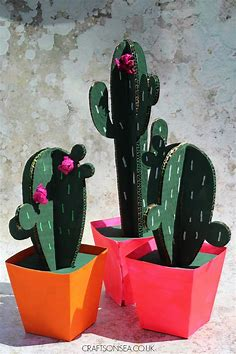
Creating a DIY cardboard cactus is a fun and easy craft project that can brighten up your space without needing any watering! Here’s how to make your own:
Materials Needed:
- Cardboard (old boxes work great)
- Green paint (acrylic or spray paint)
- Scissors or a craft knife
- Hot glue gun or craft glue
- Pot (small flower pot or any container)
- Sand, pebbles, or soil (for decoration)
- Optional: additional decorations (like flowers, googly eyes, or markers)
Instructions:
- Cut Out Cactus Shapes:
- Start by cutting the cardboard into various cactus shapes. You can make simple tall shapes or more intricate designs like arms for a saguaro cactus. Aim for different sizes for added interest.
- Paint the Cardboard:
- Paint the cactus shapes with green paint. Let them dry completely. You can use different shades of green for a more realistic look.
- Create Texture (optional):
- Once the green paint is dry, you can add texture by painting small white or yellow dots to represent cactus spines. Use a toothpick or the end of a paintbrush to create small dots.
- Assemble the Cactus:
- If your cactus has multiple pieces (like arms), use a hot glue gun or craft glue to attach them together. Hold them in place until the glue sets.
- Prepare the Pot:
- Fill your pot with sand, pebbles, or soil to create a stable base for your cactus. This will also add a nice decorative touch.
- Insert the Cactus:
- If your cactus is sturdy enough, you can stick it directly into the sand/soil. If it’s top-heavy, consider gluing it to a small piece of cardboard and then placing that in the pot for stability.
- Add Final Touches:
- Decorate your cactus further with flowers, googly eyes, or other embellishments. Let your creativity shine!
Tips:
- Experiment with different shapes and sizes to create a mini cactus garden.
- You can also create a variety of other succulents using the same method!
- This craft is perfect for kids—let them get creative with the decorations!
Enjoy your crafting, and have fun displaying your cute cardboard cac
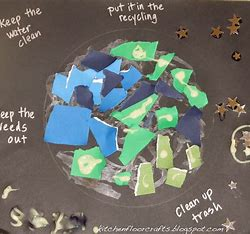
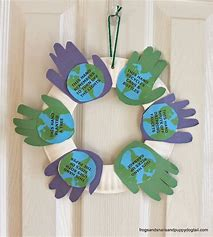
15. Mosaic Handprint Earth Day Crafta
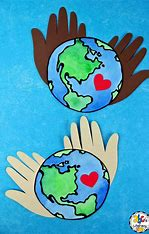
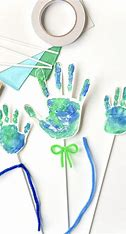
The supplies needed to make this adorable mosaic activity are quite adaptable.Anything can be recycled as long as it’s cardboard, cereal boxes, used paper plates, old artwork, magazines, or whatever else (you know, to remain on theme). Your child will be rewarded with an interesting craft that fosters creativity and improves fine motor skills if you just use whatever you have on hand.
16. Chia Egg Heads
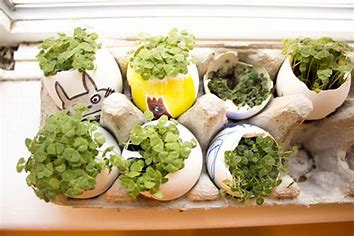
Making Chia Egg Heads is a fun and easy craft that combines art with a little gardening! These charming creations can sprout green “hair” and add a playful touch to your home. Here’s how to make your own Chia Egg Heads:
Materials Needed:
- Empty eggshells (you can use real eggshells or plastic eggs)
- Chia seeds (or other small seeds, like alfalfa)
- Potting soil or cotton balls
- Water
- Markers or paint (to decorate the eggshells)
- Small saucer or plate (to hold the egg heads)
Instructions:
- Prepare the Eggshells:
- If using real eggshells, carefully crack the tops off and rinse the shells. Leave the bottom half intact to hold the seeds. If using plastic eggs, just cut them in half if necessary.
- Decorate the Eggshells:
- Use markers or paint to decorate the outside of the eggshells. You can create funny faces, animals, or any design you like!
- Add Soil or Cotton:
- Fill the bottom of each eggshell with a layer of potting soil or cotton balls. If using soil, leave a little space at the top for the seeds.
- Sprinkle Chia Seeds:
- Sprinkle a thin layer of chia seeds (or other seeds) on top of the soil or cotton. Make sure the seeds are evenly spread.
- Water the Seeds:
- Lightly mist the seeds with water using a spray bottle. If using cotton, make sure it’s damp but not soaked.
- Set Up for Growth:
- Place your decorated egg heads on a small saucer or plate to catch any water. Put them in a bright spot but out of direct sunlight.
- Keep Moist:
- Mist the seeds with water daily to keep them moist. Within a few days, you should start to see them sprouting!
- Watch Them Grow:
- As the seeds grow, they will create a fun “hair” effect on your egg heads. You can trim the sprouts with scissors as they grow for a neat appearance.
Tips:
- Experiment with different types of seeds for various textures and colors.
- This is a great project for kids—let them personalize their egg heads!
- After the seeds have grown, you can even use them in salads or as garnish!
Enjoy your Chia Egg Heads and have fun watching them sprout.
17. Plastic Lid Ladybug Magnets
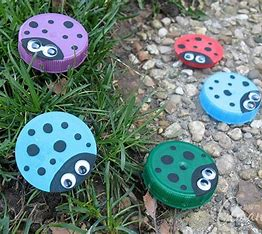
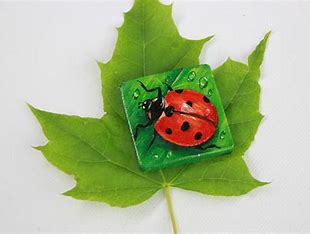
This recycled craft, which includes painting plastic bottle caps and has spring written all over it, doesn’t require any costly supplies to complete. (You are welcome to modify the project to honour other pollinators, such as butterflies and bees.)
18. Milk Carton Birdhouse Crafta
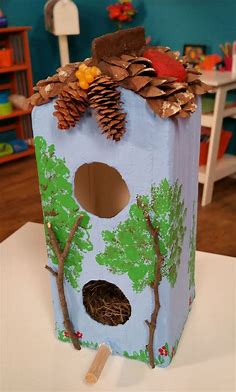
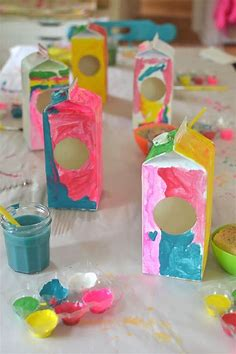
Creating a milk carton birdhouse is a fantastic and eco-friendly craft project that can attract feathered friends to your garden! Here’s how to make your own milk carton birdhouse:
Materials Needed:
- Empty milk carton (1-gallon or half-gallon)
- Scissors or a craft knife
- Paint or permanent markers (for decoration)
- Paintbrush (if using paint)
- String or twine (for hanging)
- Small nails or a hole punch (optional for drainage)
- Glue (optional for decorations)
- Small stick or dowel (for a perch, optional)
Instructions:
- Clean the Carton:
- Rinse the milk carton thoroughly to remove any residue and let it dry completely.
- Cut the Opening:
- Use scissors or a craft knife to carefully cut a hole in the front of the carton. This will be the entrance for the birds. A good size is about 1.5 inches in diameter, but you can adjust based on the types of birds you want to attract.
- Create Ventilation and Drainage Holes:
- Use a hole punch or small nails to make a few holes near the top for ventilation and a few small holes at the bottom for drainage.
- Decorate the Birdhouse:
- Get creative! Paint the outside of the carton in bright colors or use permanent markers to draw designs. You can also glue on natural elements like twigs, leaves, or flower petals for a rustic look.
- Add a Perch (optional):
- If you want, you can attach a small stick or dowel below the entrance hole for a perch. Use a little glue or poke holes through the carton and secure it with a small piece of tape.
- Create a Hanging Mechanism:
- Punch a small hole in the top of the carton. Thread a piece of string or twine through the hole and tie a knot to create a loop for hanging.
- Hang Your Birdhouse:
- Find a suitable spot in your yard or garden to hang your birdhouse, preferably in a sheltered area away from harsh winds and direct sunlight.
- Watch for Birds:
- Enjoy watching the birds visit your new birdhouse! You can even keep a journal of the different species that come by.
Tips:
- Consider using non-toxic paint and materials to keep the birds safe.
- You can create multiple birdhouses with different designs to attract various birds.
- If you have children, let them help with the decorating process to spark their creativity.
This milk carton birdhouse is a wonderful way to recycle materials while creating a cozy home for birds in your neighborhood. Enjoy your crafting!
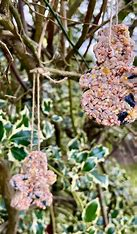
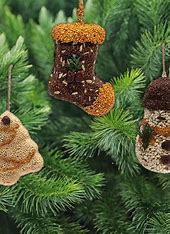
Repurposed cereal boxes can be used to create an Audubon Society-approved bird seed project, which will provide an extra environmentally friendly treat for the local bird population. It’s also a great way to commemorate Earth Day, which happens in the spring and is marked by a significant avian migration in search of roosting and breeding areas.
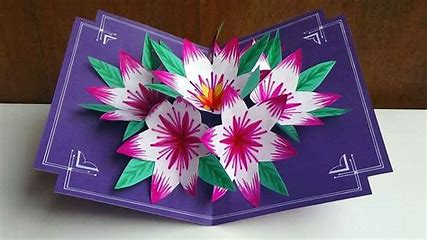
Creating a flower pop-up card is a delightful way to surprise someone with a special message! Here’s a simple guide to making your own:
Materials Needed:
- Colored cardstock or construction paper
- Scissors
- Glue stick or craft glue
- Ruler
- Pencil
- Decorative items (stickers, markers, washi tape, etc.)
- Optional: patterned paper for added flair
Instructions:
- Prepare the Card Base:
- Cut a piece of cardstock to your desired card size (e.g., 5×7 inches). Fold it in half to create the card base.
- Create the Pop-up Mechanism:
- Cut a strip of cardstock (about 1 inch wide and 6 inches long) for the pop-up flower.
- On this strip, measure and mark a line about 2 inches from one end. Fold the strip at this mark to create a “V” shape.
- Cut Flower Shapes:
- Cut flower shapes from colored paper. You can make simple flower designs, like circles with petals or more intricate ones if you prefer.
- You’ll need two or three flower shapes for a nice effect.
- Attach the Flowers:
- Glue the flower shapes to the top of the V-shaped strip. Make sure they are secure and allow enough space for them to pop up when the card is opened.
- Attach the Pop-up Mechanism:
- Open the card and apply glue to the folded end of the V strip. Position it in the center of the card base, making sure the flowers face up when the card is opened.
- Press down firmly and let it dry.
- Decorate the Card:
- Use decorative items like stickers, markers, or patterned paper to add designs to the inside and outside of the card.
- Write a special message on the inside, around the pop-up flowers.
- Finish Up:
- Allow everything to dry completely before closing the card.
Tips:
- Experiment with different flower designs and colors for a unique look.
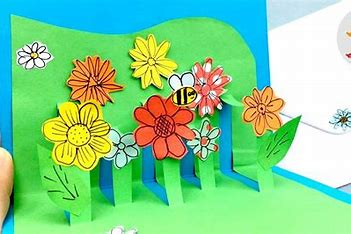
- You can add a background scene with cut-out grass, clouds, or a sun to enhance the pop-up effect.
- This card is perfect for birthdays, anniversaries, or just to say “I care!”
Enjoy creating your flower pop-up card—it’s sure to bring a smile to someone’s face!