Long sunny days, time spent in the water, outdoor activities, and a plethora of creative opportunities make summer a unique season!
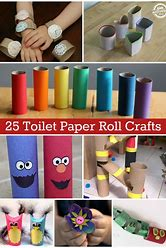
We’ve put up a fantastic selection of summer toilet paper roll activities to keep your kids occupied on days when it’s too hot to go outside or when the summer rains are coming down.
These eco-friendly and incredibly entertaining activities are an excellent way to teach children about recycling and upcycling. They are straightforward, utilising common household objects and modest craft supplies.
Start working on one of these projects or look at other summer crafts for kids that are ideal for summer camp, a rainy day, or a “crafternoon.”
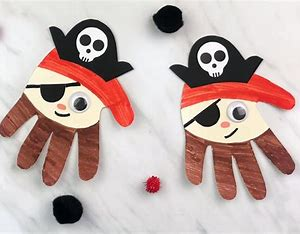
That sounds like a fun craft idea! Here’s how you can create a simple cardboard tube pirate and parrot set using materials you likely already have around the house:
Materials:
- 2 toilet paper rolls (or 1 paper towel roll cut in half)
- Colorful paper (construction paper works great)
- Markers, crayons, or paint
- Glue
- Scissors
- Googly eyes (optional)
- Craft feathers (or you can use colorful paper strips)
- Ribbon or string (for pirate’s “sash” or parrot’s tail)
- Black marker (for details like the pirate’s mustache or parrot’s beak)
- Small fabric or felt for the pirate’s hat
Steps for the Pirate:
- Create the Pirate’s Hat:
- Cut a strip of black paper and glue it around the top of one of the toilet rolls to make a hat. You can also cut a triangle shape from black paper for the front of the hat, creating a point in the center.
- Decorate with a skull and crossbones, if you’d like, by drawing with a white marker or using a sticker.
- Add the Pirate’s Face:
- Use a black marker to draw a mustache, scar, and any other details you’d like.
- Glue on a googly eye (or simply draw it) and add a small circle of paper for an eye patch.
- Decorate the Body:
- Cut a strip of red or blue paper and wrap it around the bottom of the toilet roll to give the pirate a shirt.
- You can add a “belt” by drawing or gluing a strip of paper around the middle of the roll.
- Add the Pirate’s Accessories:
- If you have any small fabric or felt, cut it into a square and glue it to the bottom of the pirate to make a “skirt” or “pants” to cover the rest of the roll.
- For the sword, cut a small strip of silver paper and fold it into the shape of a sword, then glue it in the pirate’s hand.
Steps for the Parrot:
- Create the Parrot’s Body:
- For the parrot, cover the other toilet roll with colorful paper (green or red works well).
- Add the Parrot’s Wings:
- Cut out two wing shapes from colorful paper or craft feathers, and glue them to either side of the roll.
- Make the Parrot’s Beak:
- Cut a small triangle out of orange or yellow paper for the beak and glue it at the top of the roll.
- You can also cut out two smaller triangles from black paper to make the eyes, then glue them on.
- Create the Tail:
- Cut several strips of paper (or use feathers) and glue them to the bottom of the roll to create a tail.
- Optional:
- You can glue a small piece of ribbon or string to the parrot’s head as a “topknot” or a decorative feather.
Finishing Touches:
- Once the glue has dried, you can use a marker to add small details like buttons, stitching, or even a treasure map design on the pirate.
- For extra fun, you can even make a pirate ship with another cardboard box or paper and attach the pirate and parrot to it for display.
How’s that sound? You can always customize with additional details like beads, sequins, or even glitter for some extra pirate flair!
2. Toilet Paper Roll Popsicles Craft
Popsicles are the epitome of summer. Making this artsy version is a lot of fun; customise your popsicle to resemble your preferred flavour. After slightly flattening the cardboard tube, you will insert your popsicle stick, decorate it, and tuck in one end. Adorable
The Toilet Roll Glasses Craft is a fun and easy project to make a pair of pretend glasses or even a fun costume accessory! Here’s how to make them:
Materials:
- 2 toilet paper rolls (or 1 paper towel roll, cut in half)
- Scissors
- Glue or tape
- Markers, paint, or colorful paper
- String or elastic (optional, for glasses to stay on your face)
- Decorative items like stickers, beads, or sequins (optional)
Steps:
1. Prepare the Frames:
- Start by cutting each toilet paper roll in half (if you’re using a full paper towel roll).
- You now have two shorter pieces of cardboard for the lenses of the glasses.
2. Shape the Lenses:
- If you want circular lenses, you can leave the rolls as they are and just decorate them.
- For square or more unique-shaped lenses, you can cut the cardboard into the shape you want. You can use scissors to make slight adjustments to the shape until you’re happy with the lens size.
3. Connect the Lenses:
- Take the two rolls and hold them next to each other. Use glue or tape to attach them at the edges to form the bridge of the glasses (where they rest on your nose).
- Let it dry for a few minutes if using glue.
4. Decorate the Frames:
- Now it’s time to get creative! You can color the frames with markers, paint them, or cover them with colorful paper for a more vibrant look.
- You can also add stickers, glitter, or other embellishments for extra flair.
5. Add the Arms:
- Cut two strips from a toilet paper roll or a piece of cardboard to serve as the arms of the glasses.
- Attach one end of each strip to the sides of the frames using glue or tape. These strips should be long enough to wrap around the sides of your head (but not too long, so they don’t slide off).
6. Add Elastic or String (Optional):
- If you want the glasses to stay on your face, you can attach a piece of string or elastic between the ends of the arms.
- Measure the string to fit around your head and glue or tape it to the sides of the glasses. Make sure it’s secure but comfortable to wear.
7. Final Touches:
- Once everything is dry, try on your glasses! You can always add more decorations or make adjustments to the fit.
Additional Ideas:
- Themed Glasses: You could make themed glasses like sunglasses, heart-shaped glasses, or even glasses for a character (like nerdy or funny glasses).
- Party Glasses: You can make a whole set of different colored glasses for a party or a costume.
This is a super customizable craft, so you can go all out with decorations or keep it simple. Perfect for kids and adults alike!
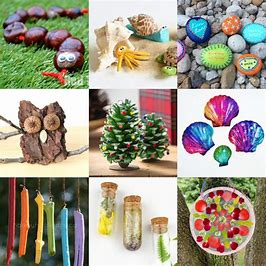
After cutting toilet paper rolls into many bracelets and covering them with packing tape or reversible tape, go outside and gather twigs, tiny leaves, and flowers.
Create stunning, wearable nature art by affixing your findings to the cuffs. This craft is a great method to improve fine motor skills and promote an appreciation of nature.
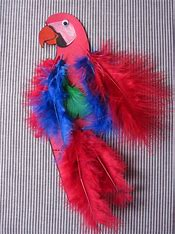
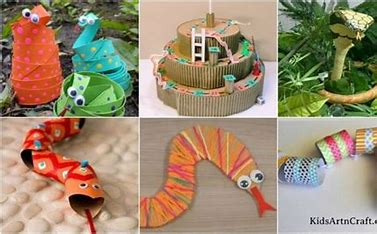
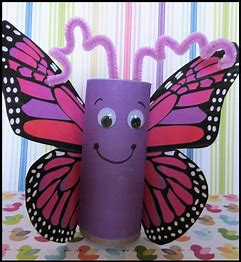
5. Cardboard Tube Parrot Craft

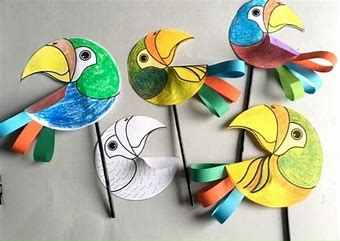
A Cardboard Tube Parrot Craft is a fun and easy DIY project that uses a cardboard tube, such as a toilet paper roll, as the base to create a colorful parrot. Here’s a simple guide on how to make one:
Materials:
- Cardboard tube (toilet paper roll or paper towel roll)
- Colored paper (red, yellow, green, and blue work well)
- Scissors
- Glue or tape
- Markers or crayons (optional for extra details)
- Googly eyes (optional)
Instructions:
- Prepare the Cardboard Tube:
- If you’re using a paper towel roll, cut it down to the size of a toilet paper roll.
- Create the Parrot’s Body:
- Start by covering the cardboard tube with colored paper. You can wrap the entire tube with one color (e.g., red) or use multiple colors to create a colorful body. Glue or tape the paper around the tube to secure it in place.
- Make the Wings:
- Cut out two wing shapes from colored paper (like yellow or blue). The shape should be slightly larger than the sides of the tube so they stand out.
- Attach the wings to the sides of the tube using glue or tape.
- Shape the Tail Feathers:
- Cut out several long, triangular tail feathers from colorful paper (green, yellow, blue, etc.).
- Fold the bottom of the cardboard tube to form a small crease for the tail feathers to be attached to.
- Glue the tail feathers to the bottom of the tube, overlapping them for a layered effect.
- Make the Parrot’s Beak:
- Cut out a small triangle of orange or yellow paper for the beak.
- Attach the beak to the top of the cardboard tube, making sure it sticks out from the tube like a parrot’s beak.
- Add Eyes:
- You can draw the eyes on with a marker or attach googly eyes for a fun, playful look.
- Final Details:
- Add extra details like feathers on the wings or a fun little pattern on the parrot’s body with markers or crayons. You can even make feet by cutting out small shapes from paper and gluing them to the bottom.
- Enjoy Your Parrot:
- Once everything is dry, your parrot craft is ready to show off! You can even make a few to create a flock.
This craft is perfect for kids or anyone who enjoys a simple, creative project. Plus, it’s a great way to recycle those cardboard tubes

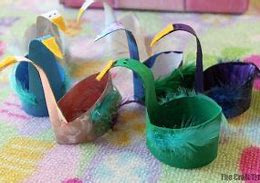
This easy project perfectly conveys the graceful nature of a swan. All you need to make the bird is a cardboard tube, glue, scissors, paint, and a marker.
Cut out the swan’s wings and form as directed, then bend the cardboard over to create the head and beak. Brilliant!
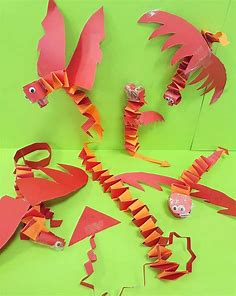
7. Cardboard Tube Coiled Snakes Craft
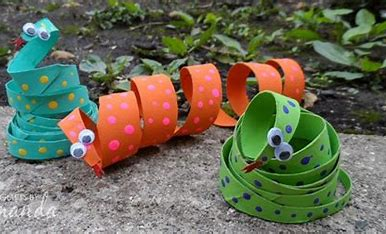
A Cardboard Tube Coiled Snake Craft is a fun, creative way to turn a simple cardboard tube into a colorful, coiled snake. This craft is easy to make and perfect for kids or anyone looking for a quick, imaginative DIY project. Here’s how you can make it:
Materials:
- Cardboard tube (toilet paper roll or paper towel roll)
- Markers, crayons, or paint (for decorating)
- Scissors
- Glue or tape
- Construction paper (green, red, yellow, or any color for patterns)
- Googly eyes (optional)
- Pipe cleaners or ribbon (optional for a tongue)
Instructions:
- Prepare the Cardboard Tube:
- If you’re using a paper towel roll, cut it down to the size of a toilet paper roll.
- Cut the Tube into Strips:
- Use scissors to cut the cardboard tube into long, even strips. The strips should be about 1-1.5 inches wide. You’ll need several strips, depending on how long you want your snake to be.
- Coil the Strips:
- Take one strip of the cardboard and begin coiling it into a spiral shape. Start at one end of the strip and slowly curl it around in a tight spiral. The coil should look like a snake’s body.
- As you coil the strip, make sure the edges of the strip are slightly curved so they sit naturally on top of each other.
- Continue with additional strips, gluing or taping them together as needed to create a longer snake.
- Decorate the Snake’s Body:
- Once you have the coil of cardboard strips ready, decorate the snake’s body with markers, crayons, or paint. You can color it to look like a specific type of snake (green with patterns, red and yellow, etc.) or go wild with different colors and designs.
- For a more realistic touch, you can cut out little scales from construction paper and glue them to the body.
- Add a Head and Tail:
- To create the snake’s head, cut a small piece from the end of the coil and flatten it out to form a triangular shape. This will be the snake’s head. Decorate it with eyes, and you can add a tongue using a red pipe cleaner or a strip of red construction paper.
- For the tail, you can leave it as a small coil or elongate it for a more dramatic effect.
- Attach the Eyes:
- Glue googly eyes onto the snake’s head for an extra fun detail. If you don’t have googly eyes, you can draw the eyes with a marker or cut out small circles from paper.
- Add a Tongue (Optional):
- Cut a small piece of red construction paper or use a pipe cleaner to create a forked tongue. Attach it to the front of the snake’s head.
- Final Touches:
- Once the glue is dry and everything is attached, you can adjust the coiled shape of your snake. Make sure the coils are tight enough to stay in place but loose enough to give it that winding, snake-like look.
Tips:
- You can use different colors of paper or paint to create patterns like stripes or spots on the snake.
- Try making several snakes in different colors and sizes to create a snake “family” or “snake pit.”
This Cardboard Tube Coiled Snake Craft is a great way to recycle old cardboard tubes and make something creative at the same time. It’s also a great craft for kids to learn about snakes in a fun, hands-on way!
8. Mermaid Toilet Paper Roll Craft

Go on an undersea adventure with this beautiful mermaid craft. Cover a toilet paper roll in blue paper, then use the printable template to make the mermaid.
It’s so easy to personalize her by swapping out the skin color, hair color, etc. Your child will have so much fun making and playing with it!
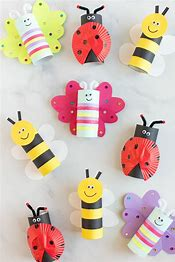
9. Honeycomb Toilet Paper Roll Crafta

A Honeycomb Toilet Paper Roll Craft is a fun and simple DIY project where you can create a textured, honeycomb-like pattern using toilet paper rolls. It’s a great craft for kids and can be used for decorations, learning about bees, or just as a creative way to recycle cardboard tubes. Here’s how to make it:
Materials:
- 1 or 2 Toilet paper rolls (or 1 paper towel roll, cut in half)
- Scissors
- Glue or a hot glue gun
- Yellow or golden paint (or colored markers/crayons)
- Pencil or pen (optional for marking)
- Construction paper or patterned paper (optional)
Instructions:
- Prepare the Toilet Paper Rolls:
- Start by cutting the toilet paper roll into small rings. Each ring should be about 1 inch (2.5 cm) thick. If you’re using a paper towel roll, cut it into smaller pieces that are similar in size.
- Flatten the Rings:
- Gently flatten each ring with your fingers. This should give them a slight oval shape, which is key to creating the honeycomb effect.
- Shape the Rings:
- After flattening the rings, carefully fold them into a “V” shape (like an accordion fold). This creates the textured, honeycomb appearance. The “V” shape should be gentle so that it keeps a nice curve.
- Glue the Pieces Together:
- Begin gluing the “V” shapes together to form a honeycomb pattern. To create the honeycomb effect, arrange them in a hexagonal (six-sided) pattern. You can attach them by gluing the edges of the “V” shapes together, ensuring that they form a small hexagon or “cell.”
- Repeat this process until you’ve made enough hexagonal cells to create a larger honeycomb shape.
- Paint the Honeycomb:
- Once your honeycomb structure is glued together and dry, paint it using yellow or golden paint to mimic the color of a real honeycomb. You can also use yellow markers or crayons if you prefer.
- For a more textured look, you can apply a thin layer of yellow tissue paper or construction paper and glue it on top.
- Add Decorative Details (Optional):
- You can add fun details like little bees (made from paper or felt) to stick around your honeycomb. Alternatively, you can use a black marker to outline the edges of the honeycomb cells for extra contrast.
- Display Your Craft:
- Once everything is dry, you can hang your honeycomb creation on the wall, use it as a centerpiece for a bee-themed party, or simply enjoy it as a fun, recycled craft project.
Tips:
- If you want to make a larger honeycomb, just keep adding more hexagonal cells and gluing them together.
- You can also create a honeycomb garland by stringing multiple honeycomb pieces together.
- For added texture, try using different shades of yellow or even adding a little bit of glitter to the edges for a shimmer effect!
This Honeycomb Toilet Paper Roll Craft is a fantastic way to recycle materials and make something beautiful at the same time. It’s also a great craft to do with kids, as it encourages creativity and fine motor skills.

One of the wonders of summer is the presence of fireflies. It is very breathtaking to see them illuminate the night sky.
Create your own firefly to save those enjoyable summertime memories! Although it doesn’t light up, you can make it shine by cutting a hole in the front of the firefly’s body and placing a tealight that runs on batteries underneath. An alternative to using construction paper is to use paint that glows in the dark.
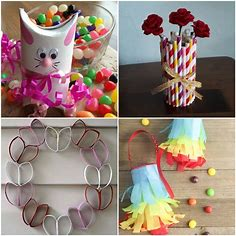
11. Toilet Paper Roll Bird Feeder Crafta
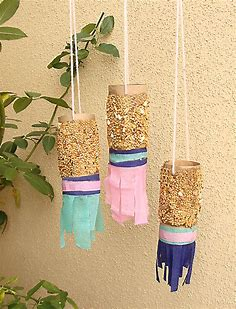

A Toilet Paper Roll Bird Feeder Craft is a fun, easy, and eco-friendly way to create a simple bird feeder using materials you likely already have at home. It’s a great activity for kids and adults alike, and it helps support local wildlife by attracting birds to your yard. Here’s how you can make one:
Materials:
- 1 Toilet paper roll
- Peanut butter (smooth or chunky)
- Bird seed (you can buy it at most stores, or make your own mix)
- String (optional, for hanging)
- Knife or spoon (for spreading peanut butter)
- A plate or tray (for rolling the feeder in birdseed)
Instructions:
- Prepare the Toilet Paper Roll:
- Start with a clean toilet paper roll. If you like, you can cut it into smaller pieces to make multiple feeders, but one roll is enough for a simple project.
- Spread Peanut Butter:
- Use a knife or spoon to spread a generous layer of peanut butter all over the toilet paper roll. Make sure to cover the entire surface, both inside and outside, with a thick coating. The peanut butter acts as the sticky base to hold the bird seed.
- Roll in Bird Seed:
- Pour some bird seed onto a plate or shallow tray. Then, roll the peanut-butter-covered toilet paper roll in the bird seed, pressing gently to ensure that the seeds stick to the peanut butter. You can roll the whole roll in the seeds or focus on covering the outside.
- If you want to make the feeder even more attractive to different kinds of birds, you can mix in sunflower seeds, millet, and other types of bird seed.
- Add String for Hanging (Optional):
- If you want to hang your bird feeder, thread a piece of string or yarn through the hole in the center of the toilet paper roll. Tie a knot to make a loop, and you’ll be able to hang the feeder from a tree branch or hook.
- Hang the Feeder:
- Find a good spot outside, preferably near a tree branch or fence, where you can hang your bird feeder. Birds like to feed in sheltered spots that offer some cover, but also with a clear view of their surroundings.
- Watch the Birds!
- Once you’ve hung your bird feeder, sit back and wait for the birds to find it. It might take a little while, but soon you’ll have birds visiting your yard to snack on the peanut butter and seeds.
Tips:
- If you have allergies or prefer not to use peanut butter, you can substitute with lard or Crisco shortening, which also holds the bird seed well.
- You can decorate the toilet paper roll with colorful paper or glitter for extra fun, but make sure to use bird-safe materials.
- To avoid attracting pests like squirrels, hang the feeder in a spot that’s difficult for them to reach, such as a high tree branch or a dedicated bird feeder pole.
Why This Craft is Great:
- Eco-friendly: It’s a perfect way to recycle toilet paper rolls.
- Affordable: The materials are simple and inexpensive.
- Educational: It’s a great way to teach kids about wildlife and encourage outdoor activity.
- Simple: You don’t need any complicated tools, and the craft can be done in under 30 minutes.
This Toilet Paper Roll Bird Feeder is an excellent way to help feed local birds, support the environment, and enjoy watching nature up close!
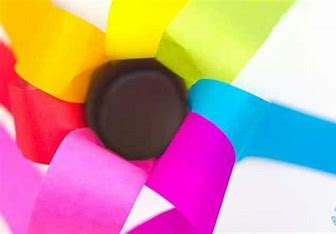
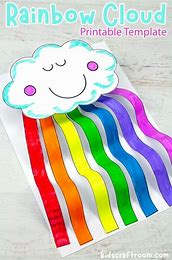
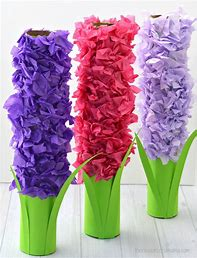
With these entertaining rainbow blowers, you can always appreciate the wonders of a summertime rainbow. When you blow through the toilet paper roll, colourful streamers connected at one end flutter, and the roll itself is adorned with blue paper and white clouds.
It’s a straightforward, enjoyable exercise that’s excellent for teaching weather and rainbow science.
13. Toilet Paper Roll Watermelon And Pineapple Crafta
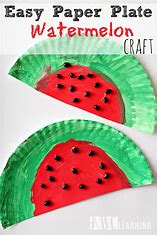
A Toilet Paper Roll Watermelon and Pineapple Craft is a fun and colorful DIY project that kids and adults can enjoy. You can make realistic fruit shapes using simple materials like toilet paper rolls, paint, and construction paper. This craft is great for summer-themed activities or just to brighten up your space!
Materials:
- 2 Toilet paper rolls (or 1 paper towel roll cut in half)
- Green, yellow, and red paint or markers (for colors)
- Green and brown construction paper (for leaves and seeds)
- Scissors
- Glue
- Black marker or small beads (for watermelon seeds)
- Optional: Glitter (for added fun!)
Instructions:
Watermelon Craft:
- Prepare the Toilet Paper Roll:
- Start with one toilet paper roll. If you want a larger watermelon, you can use a paper towel roll cut in half to make two bigger watermelon slices.
- Paint the Watermelon Slice:
- Paint the toilet paper roll with a red or pink color to create the flesh of the watermelon. You may need a couple of coats to cover it completely. Let the paint dry.
- Add Green on the Edge:
- Once the red paint is dry, paint the top and bottom edges of the roll green. This will represent the rind of the watermelon. Let the paint dry.
- Add Watermelon Seeds:
- Use a black marker to draw small watermelon seeds or glue on small black beads along the inside of the red part of the roll. These seeds should be scattered randomly across the watermelon slice.
- Make the Leaves:
- Cut out small leaves from green construction paper. You can glue them onto the top edge of the roll or make them stick out of the sides to give the illusion of a watermelon plant.
Pineapple Craft:
- Prepare the Toilet Paper Roll:
- Take another toilet paper roll (or use the other half of the paper towel roll if you want a bigger pineapple).
- Paint the Pineapple Body:
- Paint the entire toilet paper roll with yellow paint to create the body of the pineapple. Let the paint dry.
- Create the Pineapple’s Texture:
- After the yellow paint is dry, use a brown marker or paint to draw crisscross lines all around the toilet paper roll. This will mimic the textured skin of a pineapple.
- Make the Pineapple Leaves:
- Cut out long, spiky leaves from green construction paper. You can make the leaves look more realistic by cutting them into a pointed shape. Glue the leaves to the top of the toilet paper roll. Arrange them so they fan out like the crown of a pineapple.
- Add Details (Optional):
- For extra decoration, you can add small brown spots or dots to the pineapple’s body to give it a more textured look.
Final Touches:
- Once both the watermelon and pineapple crafts are complete, you can display them as fun summer decorations, hang them as ornaments, or even use them for a themed party!
- If you’re making multiple fruit pieces, you could even make a whole fruit salad display on a table or bulletin board.
Tips:
- You can use construction paper instead of paint for a quicker version of this craft.
- If you’re making a whole fruit-themed craft set, create multiple watermelon and pineapple rolls to hang together, or add other fruits like strawberries, oranges, or grapes to the collection.
- For an extra touch of fun, add glitter to the edges of the leaves or paint the seeds with a shiny finish.
This Toilet Paper Roll Watermelon and Pineapple Craft is a colorful and playful project that’s perfect for any season but especially fun for summer! It’s a great way to recycle toilet paper rolls and add some creative flair to your decorations.
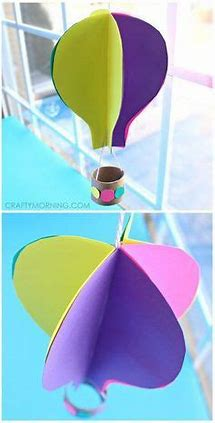
14. Easy Paper Roll Rocket Crafta
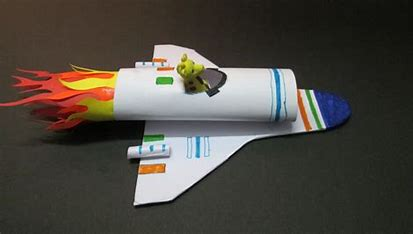
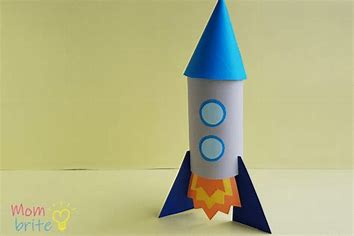
Making this cardboard rocket will be a lot of fun for aspiring astronauts. Wrap the empty toilet paper tubes in construction paper and decorate them with stickers or forms to make them any colour you want. This vibrant and colourful variation is our favourite.
15. Mushroom Fairy Garden House Crafta
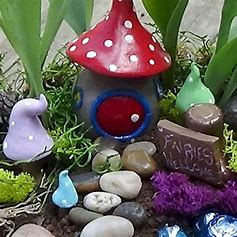
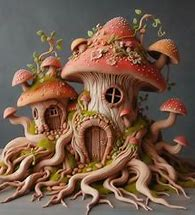
A Mushroom Fairy Garden House Craft is a whimsical and creative DIY project where you can make a cute little fairy house in the shape of a mushroom using simple materials like cardboard, paint, and natural elements. This craft is perfect for kids or anyone who enjoys crafting something magical for their fairy garden or backyard. Here’s how to create your own Mushroom Fairy Garden House:
Materials:
- 1 Toilet paper roll (or paper towel roll, cut in half)
- Red, white, and brown paint or markers
- Hot glue gun or regular glue
- Scissors
- Green construction paper (for the base)
- Small pebbles, twigs, or leaves (optional for decoration)
- Small faux flowers, moss, or glitter (optional for extra decoration)
Instructions:
Step 1: Create the Mushroom Cap
- Prepare the Toilet Paper Roll:
- Start by using a toilet paper roll (or cut a paper towel roll in half for a larger mushroom). This will be the stem of the mushroom house.
- Make the Mushroom Cap:
- To create the mushroom cap, you’ll need to cut a piece of cardboard or thick paper that’s larger than the toilet paper roll. The cardboard should be round, like a mushroom top.
- Cut the cardboard into a circle that’s about 4-5 inches wide (depending on how big you want the mushroom cap). Then, fold the edge slightly so it can sit on top of the toilet paper roll.
- Glue the Cap to the Stem:
- Once you have the mushroom cap, glue the edge of the cardboard circle to the top of the toilet paper roll. Make sure the cap sits securely on top, creating a mushroom shape.
Step 2: Paint the Mushroom
- Paint the Cap Red:
- Paint the mushroom cap with a bright red color. You may need a couple of coats to get a nice, even color. Let it dry completely.
- Add White Dots:
- Once the red paint is dry, use white paint or a white marker to add small white spots on the mushroom cap. These spots are typical of a classic mushroom and make it look more whimsical!
- Paint the Stem Brown:
- While the cap is drying, paint the toilet paper roll (the stem) with brown paint to make it look like the base of the mushroom. You can add a bit of texture or shading to make the stem look more realistic. Let it dry completely.
Step 3: Decorate the Fairy Garden House
- Create the Base:
- Cut out a circular piece of green construction paper that’s about the same size as the bottom of the toilet paper roll. This will act as the ground or base for your mushroom house. Glue it to the bottom of the roll.
- Add Decorative Elements:
- You can use small pebbles, twigs, and leaves to decorate around the base, making it look like the mushroom house is sitting in a magical garden.
- For a fairy-tale look, add small faux flowers, moss, or even some glitter around the base or on the mushroom cap to make it sparkle.
- Optional Door and Windows:
- If you want to make your mushroom house more realistic, you can cut out tiny windows and a door in the side of the toilet paper roll. You can use a black marker or brown paint to outline these, or glue small pieces of paper to create a little door.
- Add Fairy Details (Optional):
- If you have miniature fairy accessories, you can place them around your mushroom house, such as tiny furniture or figurines. You can also glue a little fairy sitting near the door or inside the house (if it’s hollow).
Step 4: Display Your Mushroom Fairy House
- Final Touches:
- Once all the glue and paint are dry, your mushroom fairy garden house is ready for display! You can put it in your backyard fairy garden, on a shelf, or use it as part of a magical scene in your home.
- You can also create multiple mushroom houses in different sizes and colors for a full fairy village!
Tips:
- Nature Walk: Go on a nature walk to collect additional items like pinecones, small flowers, or moss to use for decorating your fairy house.
- Personalization: Customize your mushroom house by painting it in different colors, like pink, purple, or blue, and adding creative details like glitter or patterns.
- Fairy Garden: Create an entire fairy garden by making several of these mushroom houses, along with fairy figurines, small trees, and accessories.
This Mushroom Fairy Garden House Craft is a fun way to bring a bit of magic into your space. It’s great for kids to make and can also be a lovely DIY project for a fairy-themed party or garden decoration!