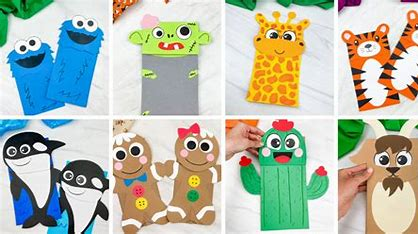
If you’re looking for fun and creative dog-themed crafts for kids, here are some delightful ideas that are easy to make and perfect for sparking imagination:
🐶 1. Paper Plate Dog Faces
Transform a simple paper plate into a cute dog face using paints, construction paper, and googly eyes. This craft is great for younger children and can be customized to resemble their favourite dog breeds. artycraftykids.com+6thesprucecrafts.com+6craftythinking.com+6
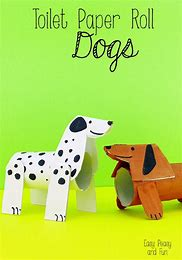
🐾 2. Toilet Paper Roll Dogs
Recycle toilet paper rolls to create adorable dog figures. Decorate with paint, googly eyes, and construction paper for ears and tails. This is an excellent project for teaching kids about reusing materials. simpleeverydaymom.com+3diycandy.com+3craftythinking.com+3thesprucecrafts.com
🐕 3. Popsicle Stick Puppies
Use popsicle sticks to assemble a cute puppy figure. Add paper ears, googly eyes, and a painted nose to complete the look. This craft is both fun and functional, as it can also serve as a pencil holder. craftythinking.com
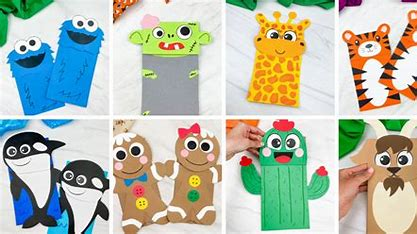
🐩 4. Paper Bag Dog Puppets
Turn a brown paper bag into a playful dog puppet. Cut out ears, eyes, and a nose from construction paper, and glue them onto the bag. Kids can then use the puppet for storytelling and imaginative play. simpleeverydaymom.com+8craftythinking.com+8thesprucecrafts.com+8
🐶 5. Origami Dogs
Introduce children to the art of origami by folding paper into simple dog shapes. This activity enhances fine motor skills and creativity. craftythinking.com
🐾 6. Pom-Pom Dogs
Create fluffy dog figures using pom-poms. Add googly eyes and felt ears to bring these soft pups to life. This craft is especially fun for younger children. craftsyhacks.com
🐕 7. Slinky Dog Craft
Inspired by the Toy Story character, make a slinky dog using foam craft sheets. This craft is perfect for fans of the movie and adds a playful touch to any room. seasonalmemories.com+2craftsyhacks.com+2diycandy.com+2
🐩 8. Dog Collar Craft
Craft a paper dog collar by rolling a strip of construction paper and decorating it with your pet’s name and designs. This is a great way to personalize your child’s stuffed animals. craftythinking.com
These crafts are not only enjoyable but also offer opportunities to teach kids about creativity, recycling, and caring for pets. Happy crafting!
Sure! Here’s a simple and fun Popsicle Stick Puppy Dog craft that kids will love:
🐶 Popsicle Stick Puppy Dog Craft
🎨 Supplies Needed:
- 4–6 popsicle sticks
- Brown, tan, or black paint (or any dog color!)
- Construction paper (for ears, nose, tongue)
- Googly eyes
- Glue
- Scissors
- Black marker (for details)
✂️ Instructions:
- Create the Dog’s Head:
- Line up 4 popsicle sticks side by side.
- Glue another two sticks horizontally across the back to hold them together.
- Let it dry.
- Paint the Face:
- Paint the front of the sticks to your desired dog color.
- Allow it to dry completely.
- Add Ears and Features:
- Cut out two floppy ears from construction paper and glue them to the top corners.
- Glue on the googly eyes.
- Cut a small oval or circle for the nose and a little tongue shape and glue them in place.
- Use a black marker to draw a mouth and add details like freckles or eyebrows.
- Optional Extras:
- Add a mini bow, collar, or tag made from ribbon or paper.
- Stick a magnet on the back to make a fridge decoration!
🐾 Tips:
- Let kids choose their favorite dog breed and colors.
- Use glitter glue or stickers for some extra flair.
- Encourage storytelling—ask kids to name their dog and make up a little story!
This craft is easy, low-mess, and a great way to engage children’s creativity while building fine motor skills. Perfect for a rainy day or classroom activity!
Of course! Here’s a fun and creative Painted Puppy Rock Pet craft that kids will enjoy:
🐾 Painted Puppy Rock Pet
🎨 Supplies Needed:
- Smooth, flat rock (about the size of your palm)
- Acrylic paint (brown, black, white, tan, etc.)
- Paintbrushes (various sizes)
- Permanent markers (black and white)
- Googly eyes (optional)
- Clear sealant (optional, for shine and protection)
✂️ Instructions:
- Choose Your Rock:
- Pick a smooth rock that feels comfortable to hold—oval or round shapes work great.
- Wash and dry it thoroughly before painting.
- Base Coat:
- Paint the rock with your chosen base color (like light brown or gray).
- Let it dry completely.
- Paint the Puppy Features:
- Use paint or permanent markers to add:
- A nose at the tip of the rock
- A smiling mouth
- Ears on the sides (flat on the rock or painted on)
- Spots or patches (optional, for a dalmatian or beagle look)
- Use paint or permanent markers to add:
- Add the Eyes:
- Paint or draw big puppy eyes with a sparkle in them.
- Or glue on googly eyes for a cute, wiggly effect.
- Add Details:
- Use a thin brush or marker to add whiskers, fur lines, or a collar with a tag.
- Seal the Rock (Optional):
- Once the paint is dry, apply a clear acrylic sealant spray to make it shiny and protect it from chipping.
🐶 Fun Ideas:
- Name your puppy and make a name tag for it.
- Create a whole litter with different breeds and colors!
- Use them as paperweights or garden decorations.
This Painted Puppy Rock Pet craft is a great mix of creativity and tactile fun—perfect for kids of all ages and a great keepsake or gift idea!
Absolutely! Here’s a creative and eco-friendly craft idea:
📰🐶 Playful Pup Newspaper Art
🎨 Supplies Needed:
- Old newspaper or newsprint
- Construction paper (for background)
- Scissors
- Glue stick
- Black marker or pen
- Googly eyes (optional)
- Crayons or colored pencils (optional)
✂️ Instructions:
- Tear or Cut Newspaper Shapes:
- Cut or tear out basic shapes from the newspaper to form your puppy:
- Circle or oval for the head
- Oval for the body
- Small ovals or triangles for ears
- Tiny circle for the nose
- Long oval for the tail
- Four small rectangles for legs
- Cut or tear out basic shapes from the newspaper to form your puppy:
- Arrange the Shapes:
- On a piece of construction paper, arrange the newspaper pieces to form a puppy.
- Move them around until it looks just right!
- Glue the Pieces Down:
- Use a glue stick to carefully attach each piece in place on the background paper.
- Add Details:
- Use a black marker to draw eyes, mouth, paws, or fur lines.
- Or glue on googly eyes to give your puppy extra personality!
- Decorate the Background:
- Add grass, sky, a doghouse, or even a bone using crayons or colored pencils.
🐾 Creative Tips:
- Tear some of the paper pieces by hand for a textured, “fur-like” look.
- Use colored newsprint (like the comics page) for a playful twist.
- Let kids create different dog breeds or even a whole pack of pups!
This Playful Pup Newspaper Art project is a great way to recycle while encouraging imagination and storytelling. It’s perfect for classrooms, rainy days, or eco-friendly crafting fun!
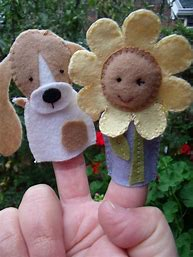
5. Tongue Out Puppy Paper Bag Puppet
Your child can create a different look for their paper bag puppets with the help of this cute paper bag pup-pet. For the whole effect, add spots, a floppy tongue, and some waggly ears to the bag.
You can do more with this activity than just using construction paper, which is always an excellent medium for crafts! To add a bit of realism, grab some slightly fluffy faux fur sheets (found here) to use for the ears.
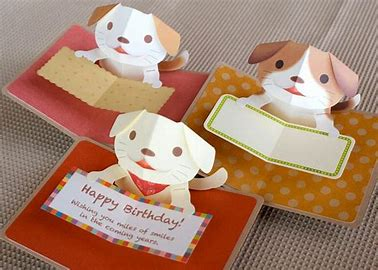

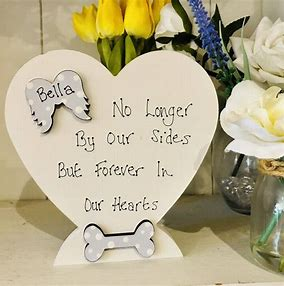
When it’s time to celebrate, you can make this card with your child. The card easily fits any event, and the ears are the ideal spot to put anything from “Love You!” to “Hello There!”
The mechanism for the pull-up ears gives the card a very unique touch. Additionally, these are simple to build, allowing your youngster to use all the components to show their creativity.
Sure! Here’s a fun and easy craft for kids:
🐶 Doggy Toilet Tube Puppet
🎨 Supplies Needed:
- Empty toilet paper roll
- Construction paper (brown, black, tan, white, or any color)
- Googly eyes
- Glue stick or school glue
- Scissors
- Black marker or crayon
- Small pom-pom or paper circle for the nose (optional)
- Yarn or felt for ears and tail (optional)
✂️ Instructions:
- Wrap the Tube:
- Cover the toilet paper roll with construction paper. Use glue to secure it. This will be your dog’s body and face.
- Add the Face:
- Glue on two googly eyes near the top of the roll.
- Use a small pom-pom or paper circle for the nose.
- Draw on a smile or tongue with a marker.
- Make the Ears:
- Cut out two floppy ears from construction paper, felt, or even fabric.
- Glue them to the sides of the roll, near the top.
- Create the Tail:
- Cut a small strip of paper or a piece of yarn and glue it to the back as a tail.
- Decorate the Body:
- Use a marker or stickers to add spots, a collar, or a name tag.
- Play with Your Puppet:
- Hold the bottom of the tube and move your puppet around. You can make it bark, dance, or play with other toilet tube pets!
🐾 Fun Ideas:
- Make different dog breeds by changing the color and shape of the ears.
- Use a larger paper towel roll for a “parent” dog and the smaller toilet rolls for “puppies.”
- Create a puppet show with your doggy and other animal friends!
This Doggy Toilet Tube Puppet is a perfect mix of recycling and creativity—great for storytelling, pretend play, and fun learning activities!
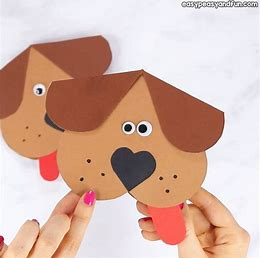
Absolutely! Here’s a sweet and creative craft idea for kids:
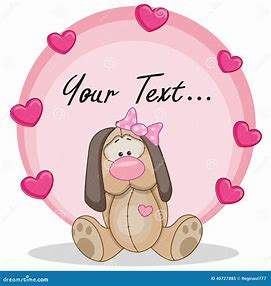
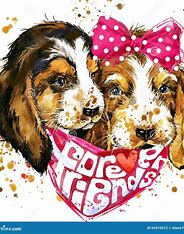
❤️🐶 Heart Dog Celebration Card
🎨 Supplies Needed:
- Construction paper (red, pink, white, brown, black, etc.)
- Glue stick
- Scissors
- Markers or crayons
- Googly eyes (optional)
✂️ Instructions:
- Fold the Card:
- Fold a piece of construction paper in half to create your card base. Red or pink works great for a celebration or Valentine’s theme!
- Make the Dog from Hearts:
- Cut out various sizes of hearts from construction paper:
- 1 large heart for the dog’s face
- 2 medium hearts for ears
- 1 small heart for the nose
- 1 tiny heart for the tongue (optional)
- 2 small circles or hearts for eyes
- Cut out various sizes of hearts from construction paper:
- Assemble the Dog:
- Glue the large heart upside down onto the front of the card (point at the top) – this is the dog’s head.
- Glue the medium hearts on each side of the top point for floppy ears.
- Add the eyes and the small heart as a nose.
- Draw a smile or glue on a tiny heart as a tongue peeking out.
- Optional: Add a collar or spots using markers or extra paper.
- Decorate the Card:
- Write a fun message like:
- “Paws-itively the best!”
- “I woof you!”
- “Happy Bark-day!”
- “You’re paw-some!”
- Write a fun message like:
- Add Extra Details:
- Use markers or stickers to add hearts, bones, paw prints, or balloons.
🐾 Creative Tips:
- Make the card 3D by folding the ears or tongue outward.
- Use patterned paper for a stylish pup.
- Let kids write their own personalized messages inside.
This Heart Dog Celebration Card is perfect for birthdays, Valentine’s Day, thank-yous, or just to say “I love you” with a wagging tail!
9. Rolly and Bingo Paper Plate Crafta

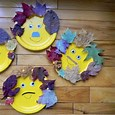
Almost nothing from your craft cabinet is needed for this Rolly and Bingo paper plate craft, which is as simple as a fun Friday morning activity with the kids. They’re still a tonne of fun to make and play with, though!
You have two options when it comes to painting the plates: use regular paintbrushes or buy some paint markers like these. They are equally enjoyable, considerably cleaner, and much easier to use.
10. Dog Finger Puppet Party Favours
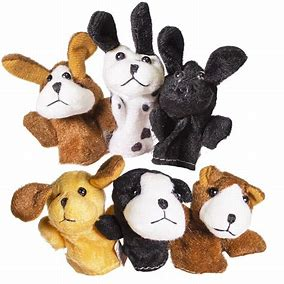
These canine finger puppets are ideal for a number of scenarios. Dog finger puppets are the perfect option for any teacher seeking for a simple activity or parent planning a birthday celebration.
Making these puppets is easy, and playing with them is a lot of fun. For an extra-special treat, try packing them with sweets before distributing them as party favours.
Use these inexpensive Dollar Store party ideas as inspiration to create a memorable celebration for your child’s birthday!
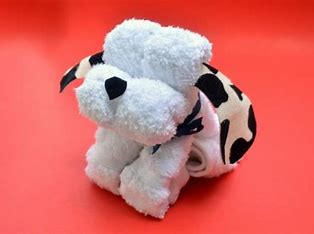
Certainly! Here’s a fun and adorable craft that’s great for kids and even party decorations:
🐶 Folded Towel Puppy
🧺 Supplies Needed:
- 1 small hand towel or washcloth (preferably brown, white, or tan)
- 2 rubber bands or small hair ties
- Ribbon (optional, for a collar or bow)
- Googly eyes or small buttons
- Small pom-pom or black button for the nose
- Glue (if attaching eyes and nose)
🐾 Instructions:
- Lay the Towel Flat:
- Lay the towel flat on a table, with one of the edges facing you.
- Roll the Towel:
- Start rolling the towel tightly from one long end to the center.
- Then roll the opposite long end toward the center, so both rolls meet in the middle.
- Fold the Rolled Towel in Half:
- Fold the towel in half with the rolled sides on the outside. It will look like a U-shape.
- Form the Head and Ears:
- Grab the folded end and wrap a rubber band a few inches from the fold to create the dog’s head. The towel ends sticking out will look like floppy ears.
- Shape the Body:
- Use another rubber band toward the middle or bottom to help hold the shape of the body, if needed.
- Add the Face:
- Glue or tape on googly eyes.
- Add a pom-pom or button for the nose.
- Tie a ribbon around the neck like a collar.
🎀 Fun Extras:
- Add a name tag to the ribbon collar.
- Use patterned towels for a playful look.
- Make a whole puppy family using different towel sizes!
This Folded Towel Puppy is a charming no-sew project that kids can make with just a few simple supplies. It’s perfect for gifts, room decorations, or just a cute craft to brighten someone’s day!
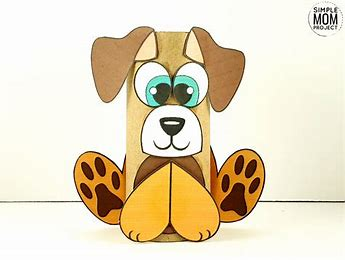
12. Upcycled Toilet Paper Roll Dog
Sure! Here’s a fun and eco-friendly craft idea for kids:
🐶 Upcycled Toilet Paper Roll Dog
♻️ Supplies Needed:
- Empty toilet paper roll
- Construction paper or paint
- Googly eyes
- Glue stick or white glue
- Scissors
- Black marker or crayon
- Small piece of felt, yarn, or paper (for ears and tail)
- Optional: pom-pom for nose
✂️ Instructions:
- Color the Roll:
- Paint the toilet paper roll your chosen dog color (brown, white, black, spotted, etc.) or wrap it in colored construction paper.
- Let it dry if using paint.
- Add the Face:
- Glue on googly eyes.
- Add a small pom-pom or a paper circle as a nose.
- Use a marker to draw a mouth, whiskers, or spots.
- Make the Ears:
- Cut out two ear shapes from felt or construction paper.
- Glue them to the inside top edges of the roll so they flop outward.
- Create the Legs (Optional):
- Cut four small strips of paper or cardboard and fold them into little “L” shapes.
- Glue them to the bottom of the roll to make standing legs.
- Add the Tail:
- Use yarn, a strip of paper, or felt to create a tail and glue it to the back.
- Decorate:
- Add a collar, tag, or tiny bow with ribbon or markers.
- Use stickers or draw bones and paw prints for extra flair.
🐾 Fun Tips:
- Let kids make a whole kennel of different dog breeds!
- Use the finished dog as a pencil holder or small toy puppet.
- Add a name tag and let kids write a story about their new pet!
The Upcycled Toilet Paper Roll Dog is a great way to reuse materials while sparking creativity—fun, simple, and perfect for home or classroom crafts!
13. Adorable Pipe Cleaner Puppies
If you are a parent of a tween, you should read this. One of the easiest ways to make an animal toy that I am aware of is using these pipe cleaner puppies. The best part is that all you need is glue, pipe cleaners, and googly eyes.
Coil a single pipe cleaner into a spring shape to form the body. After that, adhere the legs and tail separately, and then decorate the eyes with black beads (such as these). Adorable!
14. Valentine’s Day Toilet Roll Puppy
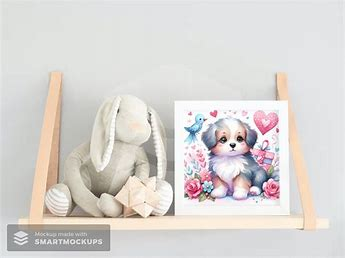
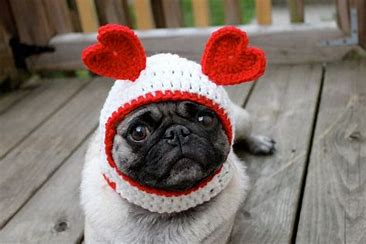
These toilet roll pups are perfect as a thank-you gift for Mom or as a Valentine’s Day present for their school crush. They’re so adorable with their heart-shaped patches and cute mopey looks!
A toilet roll, white paint, black construction paper, and a marker are all you’ll need. Take a seat with your child and provide guidance, but also allow them to express themselves and create their own designs!

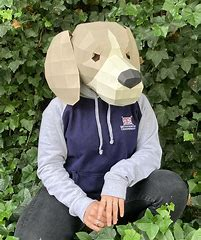
Of course! Here’s a creative and hands-on craft that kids will enjoy making and wearing:
🐶 3D Paper Plate Dog Masks
🎨 Supplies Needed:
- Paper plate (one per mask)
- Construction paper (for ears, tongue, nose, etc.)
- Googly eyes (or paper ones)
- Glue stick or white glue
- Scissors
- Markers or crayons
- Hole punch
- String or elastic band
- Optional: cotton balls, felt, or foam for extra 3D details
✂️ Instructions:
- Prepare the Mask Base:
- Cut eye holes in the paper plate so the child can see when wearing the mask.
- Trim the plate to fit the shape of a face if needed.
- Add 3D Ears:
- Cut out two floppy or pointy dog ears from construction paper or felt.
- Fold the base of each ear slightly and glue or tape them to the top sides of the plate, letting them hang or stick up for a 3D effect.
- Make the Snout:
- Roll a small piece of construction paper into a cone or cylinder for a snout and glue it to the lower center of the plate.
- Add a black nose at the tip using a pom-pom, paper, or marker.
- Attach the Eyes:
- Glue googly eyes above the snout, or draw/attach paper eyes if preferred.
- Add a Tongue:
- Cut a small red strip of paper and round one end to look like a tongue.
- Glue it sticking out under the snout for a playful look.
- Decorate the Face:
- Use crayons, markers, or more paper to add fur patterns, eyebrows, whiskers, or spots.
- Attach the Strap:
- Punch a hole on each side of the plate.
- Tie a piece of string or an elastic band to each hole so the child can wear the mask around their head.
🐾 Creative Tips:
- Use cotton balls or felt for added texture (great for fluffy dog breeds!).
- Make different breeds by changing ear shapes and colors.
- Let kids name their dog mask and act out silly dog skits!
These 3D Paper Plate Dog Masks are perfect for pretend play, costume days, parties, or just a fun afternoon craft!
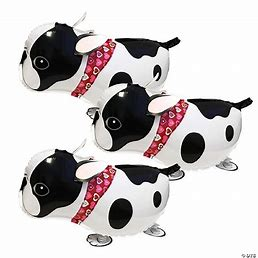
Sure! Here’s a playful and creative craft idea kids will love:
🎈🐶 Walkable Balloon Puppy
🎨 Supplies Needed:
- Long balloon (or round one, preferably brown, tan, or white)
- Construction paper or cardstock (for ears, legs, tail, face)
- Tape or glue dots
- String or ribbon (for a leash)
- Googly eyes or markers
- Scissors
- Small coins or paperclips (to weigh the feet)
✂️ Instructions:
- Inflate the Balloon:
- Inflate a long or oval balloon to form the puppy’s body. Tie the end securely.
- Make and Attach the Legs:
- Cut out four short paper strips or paw shapes from cardstock.
- Tape small coins or paperclips to the bottoms to weigh them down.
- Tape or glue the legs to the bottom of the balloon, evenly spaced so it “walks” when pulled.
- Add the Face:
- Cut out and glue or tape paper shapes for the eyes, nose, and mouth.
- Or stick on googly eyes and draw the mouth with a marker.
- Attach the Ears and Tail:
- Cut two floppy ears from construction paper and tape them near the top of the balloon.
- Cut a long curved strip for the tail and attach it to the back.
- Add the Leash:
- Tape a piece of string or ribbon to the front bottom area of the balloon (under the “chin”).
- Hold the string and gently pull — your puppy will wobble and follow you like a real pet!
🐾 Creative Tips:
- Use patterned paper or stickers to give your puppy spots or stripes.
- Try different dog breeds — make a floppy-eared basset hound or a tiny chihuahua!
- Name your balloon puppy and make a matching collar or tag.
The Walkable Balloon Puppy is a fun, lightweight craft that combines imagination and motion—perfect for playdates, parties, or just bringing a smile to a rainy day!
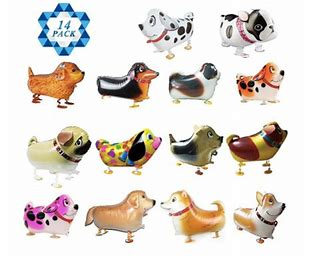
These downloadable dog toys are really simple to assemble and were first created to commemorate the Chinese Year of the Dog. Just cut out the pattern, attach it with tape, and then let your child play with their new companion.
Younger children who have just begun using scissors would benefit greatly from doing this. Their abilities will advance with simple shape cutting, and there isn’t any hazardous hot glue to be seen.
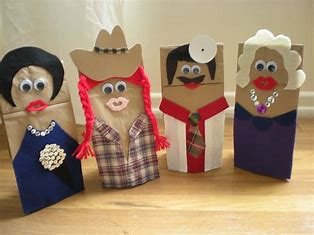
These paper bag puppets are perfect for group activities, such as birthday celebrations or kindergarten classrooms. The children can create them according to their own ideas, and it’s simple to get the materials in large quantities.
Encourage the children to perform with the puppets after they have been made! Assign each of them to research and present on a specific breed of dog.
Get some unwaxed brown paper bags like these if you want to complete this activity in an environmentally friendly manner. You can recycle these!
Certainly! Here’s a fun and easy craft for kids:
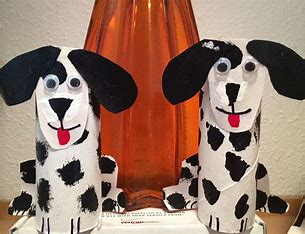
🐶 Toilet Paper Roll Dogs
🧻 Supplies Needed:
- Empty toilet paper rolls
- Construction paper or paint
- Glue stick or white glue
- Scissors
- Googly eyes
- Markers or crayons
- Small pom-pom or paper circle for the nose
- Felt, paper, or foam for ears, tail, and tongue
✂️ Instructions:
- Color the Roll:
- Paint the toilet paper roll or wrap it in construction paper to create the base of your dog’s body.
- Choose colors like brown, white, black, tan—or get creative with bright or patterned paper!
- Make the Face:
- Glue on googly eyes near the top of the roll.
- Add a small pom-pom or circle for the nose.
- Draw on a smile, whiskers, or a tongue sticking out.
- Add Ears:
- Cut out two floppy or pointy ears from felt, foam, or paper.
- Glue them to the top sides of the roll so they hang down or stick out.
- Create Legs (Optional):
- Cut four short paper strips or roll mini paper tubes to make legs.
- Glue them to the bottom of the roll to help the dog stand.
- Attach the Tail:
- Cut a strip of paper or yarn and glue it to the back of the roll as the tail.
- Decorate:
- Add spots, a collar, or a name tag using markers, stickers, or extra paper.
🐾 Fun Ideas:
- Make a family of dogs using different colors and sizes of rolls.
- Turn your dog into a puppet by attaching a stick inside the roll.
- Write a short story about your dog and give it a special name.
These Toilet Paper Roll Dogs are a great way to recycle while having fun. They’re perfect for pretend play, classroom projects, or a creative afternoon at home!
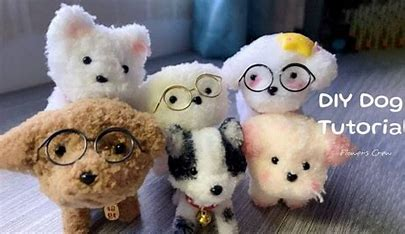
20. DIY Pom Pom Pup
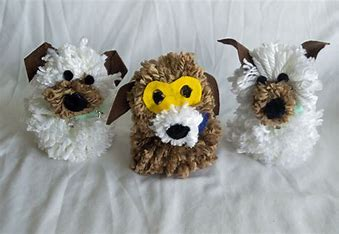

Absolutely! Here’s a cute and easy craft idea for kids:
🐾 DIY Pom Pom Pup
🎨 Supplies Needed:
- Yarn (any color you like)
- Scissors
- Small googly eyes
- Small pom-poms (for nose and tail, optional)
- Glue (hot glue for adults, craft glue for kids)
- Felt or construction paper (for ears and tongue)
- Needle and thread (optional, for extra security)
✂️ Instructions:
- Make the Pom Pom:
- Wrap yarn around your fingers or a pom pom maker about 50–100 times (depending on size).
- Carefully slide the yarn off your fingers and tie a piece of yarn tightly around the middle.
- Cut the loops on both sides to create a fluffy pom pom.
- Trim the pom pom to make it round and neat.
- Create the Puppy’s Head and Body:
- Make two pom poms: one bigger for the body and one smaller for the head.
- Glue or sew the smaller pom pom (head) on top of the bigger one (body).
- Add the Face:
- Glue on googly eyes.
- Use a small pom pom or felt circle for the nose.
- Cut out a tiny tongue from red felt or paper and glue it below the nose.
- Make and Attach the Ears:
- Cut out two floppy ears from felt or paper.
- Glue them to the sides of the head pom pom.
- Add the Tail:
- Glue a small pom pom or a short piece of yarn to the back of the bigger pom pom for the tail.
- Final Touches:
- Use markers to add any extra details like whiskers or eyebrows.
- Let everything dry completely before playing.
🐕 Fun Tips:
- Use different colored yarns to make unique pups.
- Make a whole family of pom pom pets.
- Attach a safety pin on the back to turn your pom pom pup into a cute brooch!
This DIY Pom Pom Pup is a soft, cuddly craft that’s perfect for kids to make and play with or give as adorable handmade gifts!