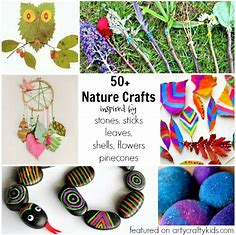

Sure! Here’s a list of fun and easy nature crafts and activities that kids and families can enjoy together using simple, natural materials:
🌿 Fun and Easy Nature Crafts and Activities
1. Leaf Rubbing Art
- Materials: Leaves, crayons, white paper
- Instructions: Place a leaf under a sheet of paper and gently rub over it with the side of a crayon. Watch the leaf’s texture and shape appear!
2. Nature Collage
- Materials: Leaves, flowers, twigs, glue, paper
- Instructions: Collect different natural items and glue them onto paper to create a beautiful nature-themed collage.
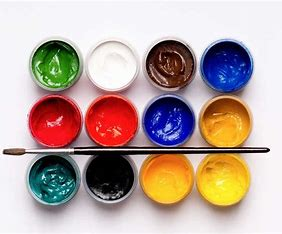
3. Painted Rocks
- Materials: Smooth rocks, paint, paintbrushes
- Instructions: Paint fun designs, animals, or faces on rocks. You can also write inspirational words and leave them in parks for others to find.
4. Twig Picture Frames
- Materials: Twigs, glue or string, cardboard backing
- Instructions: Arrange and glue twigs around a photo or piece of cardboard to create a rustic frame.
5. Pine Cone Bird Feeders
- Materials: Pine cones, peanut butter, birdseed, string
- Instructions: Spread peanut butter on the pine cone, roll it in birdseed, and hang it outside for birds to enjoy.
6. Nature Scavenger Hunt
- Materials: Checklist of items to find (leaf, feather, acorn, etc.)
- Instructions: Explore a park or backyard and try to find everything on the list. Great for observation and exploration!
7. Flower Pressing
- Materials: Fresh flowers, heavy books or flower press, paper
- Instructions: Place flowers between paper and press in a book for a few days. Use them for cards or bookmarks.
8. Stick Puppets
- Materials: Sticks, paper, markers, glue
- Instructions: Draw characters on paper, cut them out, and glue them to sticks to make puppets for a mini nature-themed show.
9. Nature Bracelets
- Materials: Tape (sticky side out), small natural items (petals, grass, leaves)
- Instructions: Wrap tape around your wrist with the sticky side facing out. Stick small nature treasures onto it for a wearable creation.
10. Mud Kitchen Play
- Materials: Old pots, spoons, dirt, water, natural materials
- Instructions: Create a pretend outdoor kitchen using mud and natural items. Great for imaginative and sensory play.
Would you like me to turn this into a printable activity sheet or expand any of these into full instructions with pictures?
- Turn leaves into masks
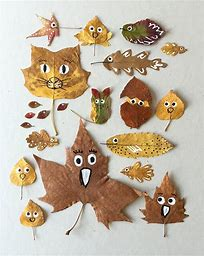

Big leaves can also be used to create the most stylish masks! Cut out the eye holes, press and dry them, and then paint the details. Fantastic!
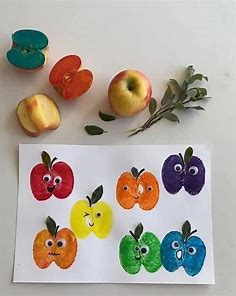
2. Find big leaves to make prints
Sure! Here’s a simple and fun activity idea titled:
🍃 Find Big Leaves to Make Prints
🎯 Objective:
Create beautiful leaf prints using large leaves found in nature.
📝 What You Need:
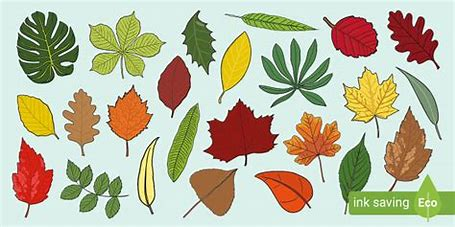
- Big leaves (like maple, oak, sycamore, or banana leaves)
- White paper or cardstock
- Paint (washable or acrylic)
- Paintbrush or sponge
- Old newspaper or table cover (to protect your work surface)
- Apron or old shirt (optional, to protect clothes)
📍 Instructions:
- Go on a Leaf Hunt:
Head outside to a park, garden, or your backyard. Look for big, interesting leaves with strong veins and textures. - Clean the Leaves:
Wipe off any dirt or bugs gently using a damp cloth or paper towel. - Prepare Your Workspace:
Lay down newspaper or a tablecloth. Put on an apron if needed. - Paint the Leaf:
Use a brush or sponge to lightly coat the underside of the leaf (the veiny side) with paint. - Make the Print:
Carefully press the painted side of the leaf onto your paper. Press down gently to transfer the texture. - Lift and Reveal:
Slowly lift the leaf off the paper to see your leaf print! - Let It Dry:
Let the print dry completely before displaying or framing it.
🌟 Optional Ideas:
- Try using different colors for a rainbow leaf print.
- Use the prints to make greeting cards, gift wrap, or wall art.
- Add labels to identify the type of leaf or tree it came from.
Would you like a version of this with pictures or as a printable activity sheet?
3. Craft pine cone hedgehog friends
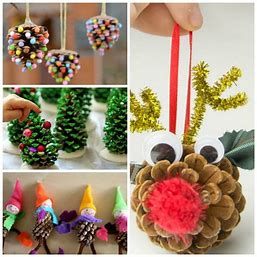
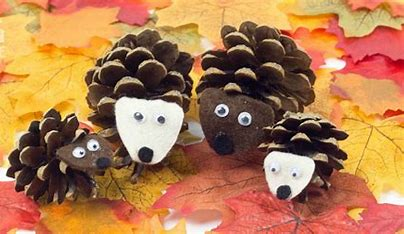
These vibrant hedgies are entertaining to play with or show off. Children will desire to create an array!
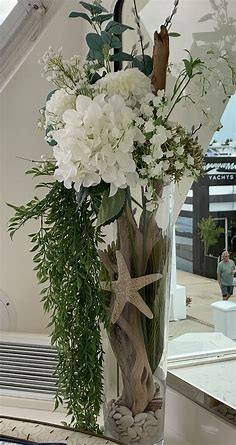
4. Display flowers in a twig vase

Absolutely! Here’s a simple guide for a nature-inspired craft:
🌸 Display Flowers in a Twig Vase
🎯 Objective:
Create a beautiful rustic vase using twigs and display fresh or dried flowers in it.
📝 What You Need:
- A clean, empty jar or tin can (mason jar, soup can, etc.)
- Twigs (collected from outdoors, similar in length)
- String, twine, or rubber bands
- Glue (hot glue works best, but craft glue works too)
- Scissors or pruners (for cutting twigs to size)
- Flowers (fresh or dried)
📍 Instructions:
- Collect Twigs:
Go outside and gather straight twigs. Try to find ones that are roughly the same thickness and a little longer than your jar or can. - Cut Twigs to Size:
Use scissors or pruners to trim the twigs to the height of your container. - Wrap the Container (Optional):
If you’re using a metal can, you can wrap it in paper first to help the glue stick better. - Glue the Twigs On:
Apply glue to the back of each twig and press it vertically against the container. Continue all the way around until the container is covered. - Secure with Twine (Optional):
Wrap twine or string around the vase a few times and tie a bow. This adds decoration and helps hold the twigs in place. - Add Flowers:
Fill the container with water (if using fresh flowers) and arrange your flowers inside. Dried flowers work beautifully too!
🌟 Optional Ideas:
- Paint the tips of the twigs for a colorful touch.
- Add a name tag or small sign for special occasions (e.g., “Happy Birthday”).
- Use seasonal flowers for a rotating nature display.
Would you like a printable or illustrated version of this craft guide?
5. Build fairy houses from rocks
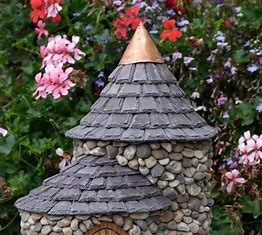
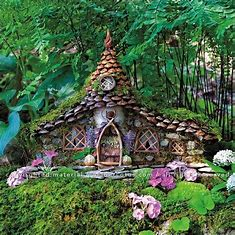
In relation to fairies, those tiny spirits will require a home! Scattering these cute small buildings throughout the landscape would look fantastic.
6. Play with stick fairies
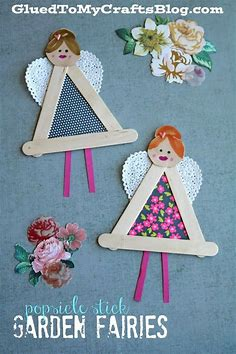
Of course! Here’s a charming and creative activity:
🧚♀️ Play with Stick Fairies
🎯 Objective:
Make adorable stick fairies from natural materials and enjoy imaginative outdoor or indoor play.
📝 What You Need:
- Small sticks or twigs (about finger length, straight and smooth)
- Leaves, flower petals, feathers (for wings and clothes)
- Yarn, thread, or twine (for hair or to tie pieces together)
- Markers or paint (to draw faces or decorate)
- Glue (craft glue or hot glue – with adult supervision)
- Scissors
📍 Instructions:
- Gather Your Materials:
Go outside and collect small sticks, leaves, and other nature treasures. Look for materials that are soft and flexible for easier crafting. - Create the Fairy Body:
Use a small stick as the fairy’s body. If you’d like, you can glue on a round bead or small ball as a head. - Add Hair:
Tie or glue yarn, string, or dried grass to the top of the stick for hair. - Make Wings:
Use leaves, flower petals, or feathers. Glue them to the back of the stick to become fairy wings. - Dress the Fairy:
Wrap bits of flower petals or small leaves around the stick as clothing. Use string or tiny bits of fabric to secure them. - Draw the Face:
Use a fine marker or paint to draw eyes, a smile, and other features. - Let It Dry:
If you used glue, allow everything to dry before playing.
🧚♂️ Play Ideas:
- Create a magical fairy village in your garden or sandbox.
- Build fairy houses from bark, moss, and pebbles.
- Act out stories and adventures with your stick fairies.
- Make fairy pets, like acorn owls or pinecone hedgehogs!
Would you like help writing a fairy story to go with the activity or a printable fairy template to decorate?
7. Crown yourself the queen or king of nature
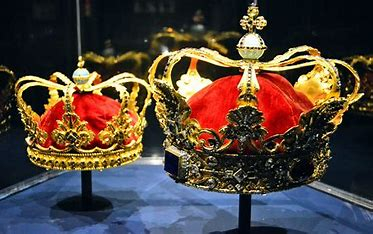
For imaginative play, these nature crowns are ideal. Children will adore donning them to govern the Creekside Empire or Tree Kingdom.
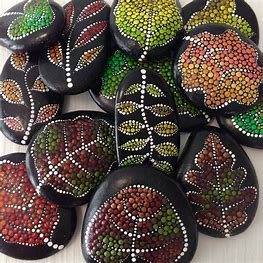
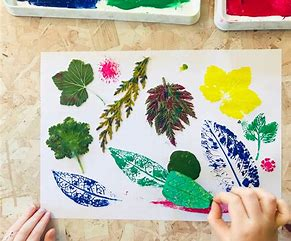
8. Print with leaves on rocks

Sure! Here’s a fun and easy nature craft idea:
🍂 Print with Leaves on Rocks
🎯 Objective:
Use real leaves to create beautiful natural prints on rocks — a fun way to combine nature and art!
📝 What You Need:
- Smooth, clean rocks (light-colored rocks work best)
- Leaves (with interesting shapes and veins)
- Acrylic paint or outdoor craft paint
- Paintbrush or sponge
- Paper towels or cloth
- Clear sealer (optional, to protect the design)
📍 Instructions:
- Collect Materials:
Go outside and gather some smooth rocks and leaves. Choose leaves with distinct vein patterns for the best prints. - Clean the Rocks:
Wash the rocks and let them dry completely so the paint sticks well. - Paint the Leaf:
Use a brush or sponge to coat the underside (vein side) of the leaf with a thin layer of paint. - Press the Leaf onto the Rock:
Gently press the painted side of the leaf onto the rock. Hold it in place and press down evenly. - Lift the Leaf:
Carefully lift the leaf to reveal the print. Let the paint dry. - Add Details (Optional):
Use a small brush to outline or decorate your leaf print with extra designs or patterns. - Seal the Rock (Optional):
Once dry, spray or brush on a clear sealant to make your artwork last longer, especially if placing it outside.
🌟 Fun Ideas:
- Use different types and colors of leaves for a nature-inspired rock collection.
- Give your printed rocks as gifts or leave them on trails or in parks to brighten someone’s day.
- Create a matching game by printing the same leaf on multiple rocks and trying to pair them up.
Would you like this turned into a printable step-by-step sheet or added to a complete nature craft booklet?
9. Dress up in a nature bracelet
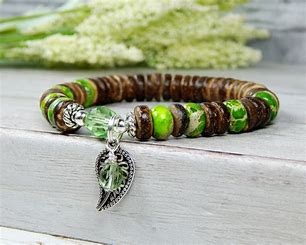
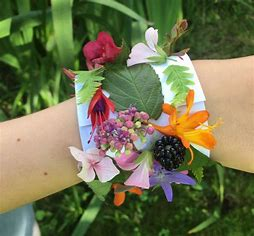
The easiest nature crafts are some of the best ones: Just use masking tape to create a bracelet, sticky side out. Then, attach berries, leaves, flowers, and other items to create a gorgeous nature bracelet.
10. Imprint clay with items from nature
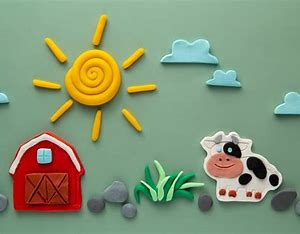
Absolutely! Here’s a creative and sensory-friendly activity idea:
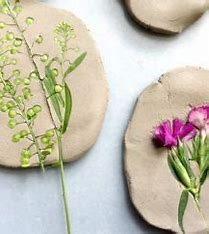
🍃 Imprint Clay with Items from Nature
🎯 Objective:
Press natural objects into clay to create beautiful textures and patterns—great for art, keepsakes, or ornaments.
📝 What You Need:
- Air-dry clay or homemade salt dough
- Rolling pin or smooth bottle
- Natural items (leaves, flowers, shells, pinecones, feathers, etc.)
- Cookie cutters (optional)
- Craft knife or plastic butter knife (for shaping)
- String or straw (for making hanging holes)
- Paint (optional, for decorating)
- Clear sealer or Mod Podge (optional, for finishing)
📍 Instructions:
- Prepare Your Clay:
Roll out a small amount of clay on a smooth surface until it’s about 1/4 inch thick. - Choose Natural Items:
Collect textured items from nature—leaves with veins, small flowers, or shells work best. - Press Into Clay:
Gently press the item into the clay to leave an imprint. Carefully lift it off to reveal the pattern. - Cut or Shape (Optional):
Use cookie cutters or a knife to cut around your imprint into shapes like circles, hearts, or leaves. - Make a Hole (Optional):
Use a straw or stick to make a small hole if you want to hang your creation later. - Let It Dry:
Set the clay pieces aside to dry fully (check the clay package for drying time). Air-dry clay usually hardens in 24–48 hours. - Decorate (Optional):
Once dry, you can paint the clay to highlight the textures. Let paint dry completely. - Seal It (Optional):
Apply a clear sealer to protect and preserve your artwork.
🌟 Fun Ideas:
- Make name tags or garden markers with leaf imprints.
- Use different leaf shapes for seasonal decorations.
- Give them as handmade gifts or ornaments.
Would you like a clay recipe or printable instructions to go along with this activity?
11. Spell your name with yarn-wrapped twigs
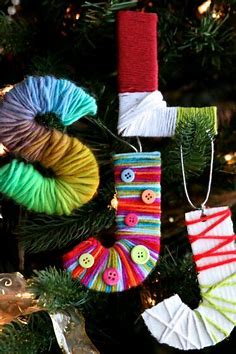
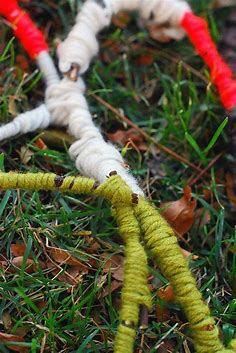
How enjoyable it is to practise your ABCs! To make an entire alphabet of letters, wrap yarn around twigs.
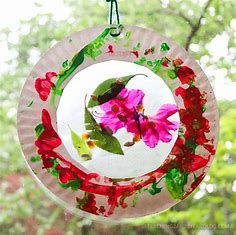
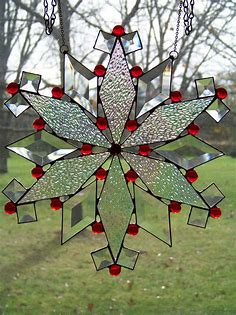
12. Hang pretty nature suncatchers
Of course! Here’s a delightful and colorful craft idea:
🌞 Hang Pretty Nature Suncatchers
🎯 Objective:
Create beautiful suncatchers using natural materials that catch the light and brighten up windows or outdoor spaces.
📝 What You Need:
- Clear contact paper or laminating sheets
- Scissors
- Natural items (flower petals, leaves, feathers, thin grasses)
- Embroidery hoop, paper plate (cut into a ring), or stick frame (optional)
- String or ribbon (for hanging)
📍 Instructions:
- Collect Nature Treasures:
Go for a walk and gather colorful, flat natural materials like flower petals, small leaves, fern tips, or feathers. - Cut the Contact Paper:
Cut two pieces of clear contact paper to the same size. Peel the backing off one and lay it sticky-side up. - Arrange the Design:
Place your nature items gently onto the sticky contact paper. Arrange them however you like—try to leave space around the edges for sealing. - Seal the Suncatcher:
Place the second piece of contact paper sticky-side down on top of the first to sandwich the items inside. Press down firmly. - Cut into a Shape (Optional):
Trim your suncatcher into a circle, heart, or any shape you like. You can also fit it inside a ring made from an embroidery hoop or paper plate. - Add a Hanger:
Punch a hole at the top and tie a loop of string or ribbon for hanging. - Hang It Up:
Hang your suncatcher in a sunny window, on a porch, or from a tree branch where sunlight will shine through.
🌟 Fun Ideas:
- Use autumn leaves for warm-colored fall suncatchers.
- Create a nature rainbow using petals of different colors.
- Make mini suncatchers to give as gifts or party favors.
Would you like a printable version of this craft or ideas for themed suncatchers (e.g. spring, summer, holiday)?
13. Make your own natural paintbrushes
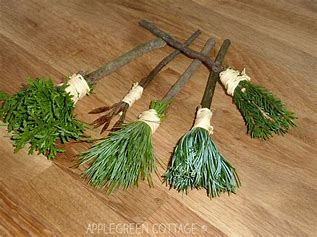
Convert objects like grasses and pine needles into paintbrushes so you may make more amazing nature crafts. Trying these out is a lot of fun.
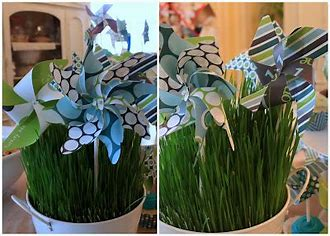
14. Spin some nature pinwheels

Absolutely! Here’s a breezy and fun activity:
🌬️ Spin Some Nature Pinwheels
🎯 Objective:
Create your own pinwheels using natural decorations and enjoy watching them spin in the wind!
📝 What You Need:
- Paper (sturdy paper or cardstock works best)
- Pencil with an eraser or a stick
- Push pin or thumbtack
- Scissors
- Glue
- Natural decorations (small leaves, flower petals, pressed flowers, grass)
- Ruler and pencil (for measuring and marking)
📍 Instructions:
- Decorate the Paper:
Glue small, flat nature items like leaves, petals, or grass to one side of the paper. Let it dry. - Cut the Square:
Cut your paper into a square (about 6×6 inches is a good size). - Draw the Cutting Lines:
Lightly draw diagonal lines from each corner to the center, stopping about 1 inch from the middle. - Cut Along the Lines:
Cut along each line, stopping where marked (do not cut all the way to the center). - Fold the Corners:
Take every other corner and gently fold it toward the center (do not crease). Hold them in place at the center. - Attach to the Pencil:
Push the pin or thumbtack through the center of the pinwheel (holding all the folded corners), then into the eraser of a pencil. Make sure it’s not too tight, so it can spin. - Test It in the Wind:
Blow on your pinwheel or take it outside on a breezy day and watch it spin!
🌟 Fun Ideas:
- Make seasonal pinwheels using different natural materials (spring flowers, summer grass, autumn leaves).
- Use paint or markers to add swirls and patterns to the paper before adding nature items.
- Try using a stick and a small bead between the pinwheel and stick so it spins more easily.
Would you like a printable template or step-by-step drawing to go with this craft?
15. Paint a portrait with leaves and flowers
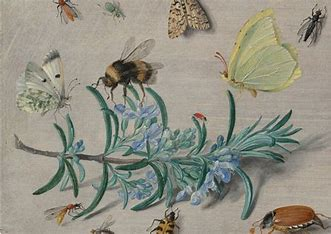
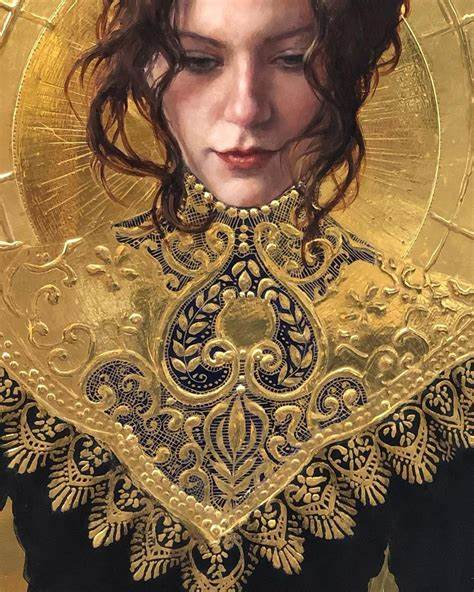
We adore how this environmental craft fosters creativity. Children can attempt to paint their own portraits or try to portray a loved one.
16. Play a game of tic-tac-toe with rocks

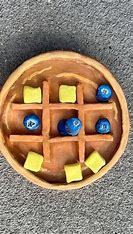
Sure! Here’s a simple and fun nature-inspired game idea:
🎮 Play a Game of Tic-Tac-Toe with Rocks
🎯 Objective:
Create your own outdoor tic-tac-toe game using painted rocks and natural materials. Fun for all ages!
📝 What You Need:
- 10 small rocks (similar size)
- Paint or markers
- Sticks, string, or chalk (for making the game board)
- Optional: a cloth bag to store your game pieces
📍 Instructions:
- Gather and Clean the Rocks:
Collect 10 smooth rocks. Wash and dry them so they’re ready for painting. - Paint Your Game Pieces:
Paint 5 rocks with X symbols and 5 with O symbols. You can also paint fun nature themes like flowers vs. leaves, ladybugs vs. bees, etc. Let them dry completely. - Make the Game Board:
- Outdoors: Use sticks, string, or draw lines in the dirt or with chalk on pavement.
- Indoors: Lay out string or tape in a tic-tac-toe grid on a flat surface.
- Play the Game:
- Players take turns placing their rock (X or O) in the grid.
- The first to get three in a row—across, down, or diagonally—wins!
- Store Your Game:
Keep the rocks and materials in a small bag or box so you can play again anytime.
🌟 Fun Ideas:
- Make a travel version with a small fabric board.
- Use painted wood slices instead of rocks.
- Play in the sand with shells and stones.
Would you like a printable instruction card or a themed version (like forest animals or garden bugs)?
17. Test your memory

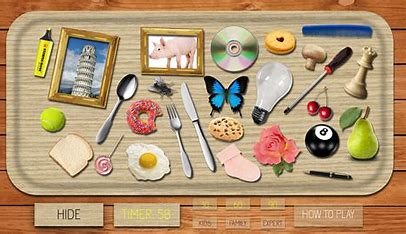
During a nature walk, collect two of each item. After that, put them in tiny, lidded boxes and engage in a memory game. So much fun!
18. Put together bark owls
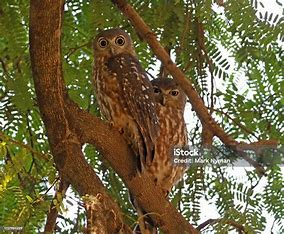
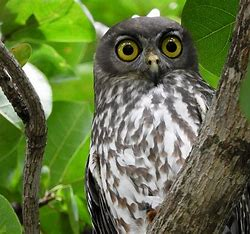
Absolutely! Here’s a fun and creative craft idea:
🦉 Put Together Bark Owls
🎯 Objective:
Create adorable owl decorations using bark and other natural materials. A great way to get creative with what you find outside!
📝 What You Need:
- Pieces of tree bark (for the owl’s body)
- Acorn caps, small stones, or buttons (for eyes)
- Small twigs or pine needles (for wings and feet)
- Leaves, seeds, or feathers (for decoration)
- Glue (craft glue or hot glue – with adult supervision)
- Scissors (for trimming pieces if needed)
- Optional: googly eyes, small feathers, or felt
📍 Instructions:
- Collect Natural Materials:
Go for a walk and gather bark, acorns, twigs, leaves, and anything else that could become part of your owl. - Choose a Piece of Bark:
Pick a flat piece of bark as the base—this will be your owl’s body. - Make the Eyes:
- Glue acorn caps, small round stones, or buttons onto the bark for the eyes.
- Add googly eyes or draw black dots inside for pupils.
- Add a Beak:
Use a small triangular piece of bark, a seed, or a pebble as the beak and glue it under the eyes. - Create Wings and Feet:
- Use small twigs or leaf pieces to make wings on each side of the body.
- Add tiny twigs or pine needles at the bottom for feet.
- Decorate the Owl:
Add feathers, leaves, or extra bark bits for texture and personality. You can also give your owl little “horns” by gluing small twigs to the top. - Let It Dry:
Allow the glue to fully dry before moving or displaying your owl.
🌟 Fun Ideas:
- Make a whole family of owls in different sizes.
- Attach a magnet to the back to decorate your fridge.
- Use them for storytelling, puppets, or nature table displays.
Would you like a printable craft sheet or a simple owl template to go with this activity?
19. Weave with natural objects
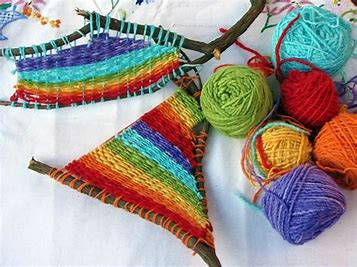

Kids will adore showing off the amazing outcomes of this nature project, which also provides great practice for fine motor abilities.
20. Press flowers and leaves to make bookmarks
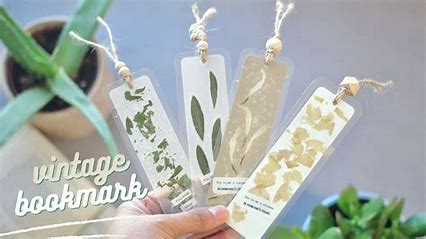
Of course! Here’s a beautiful and easy nature craft:
📚 Press Flowers and Leaves to Make Bookmarks
🎯 Objective:
Create one-of-a-kind bookmarks by pressing flowers and leaves, combining creativity with nature.
📝 What You Need:
- Fresh flowers and leaves (small and flat ones work best)
- Heavy books or a flower press
- Parchment paper or blotting paper
- Cardstock or thick paper (cut into bookmark size)
- Clear contact paper or laminating sheets
- Glue or tape
- Hole punch and ribbon (optional)
📍 Instructions:
- Collect and Prepare:
Go for a nature walk and collect small, flat flowers and leaves. Gently clean off any dirt. - Press the Flowers and Leaves:
- Place the flowers/leaves between sheets of parchment paper.
- Put them inside a heavy book or use a flower press.
- Leave them to press for 1–2 weeks until fully dried and flat.
- Design Your Bookmark:
- Cut a piece of cardstock into a bookmark shape (about 2″x6″).
- Arrange your pressed flowers and leaves on the cardstock.
- Glue or tape them down gently.
- Seal the Bookmark:
- Cover both sides with clear contact paper or use a laminating machine to protect the design.
- Trim any extra edges.
- Add Finishing Touches (Optional):
- Punch a hole at the top and tie a ribbon or string through it.
- Write your name, a quote, or a message on the back.
🌟 Fun Ideas:
- Make a matching set of bookmarks as gifts.
- Use different seasonal flowers for a year-round collection.
- Try arranging flowers in patterns (heart, butterfly, spiral).
Would you like a printable template or label designs for custom bookmarks?