Here are some delightful DIY Thanksgiving craft ideas from WeAreTeachers that are fun, festive, and perfect for the whole family or classroom:
🦃 1. Pop‑Up Thanksgiving Card
Make a handcrafted greeting card using card stock and folded construction paper. It’s interactive fun to build and heartfelt to give. bhg.com+14weareteachers.com+14circularsymphony.com+14
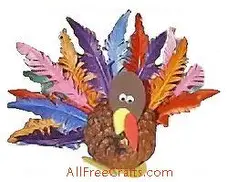
🍁 2. Painted Pine‑Cone Turkey
Simple yet charming: paint the tips of pine cones, then add pom‑pom heads, googly eyes, and felt beaks and wattles. Great for centerpieces or mantle decor. weareteachers.com
🦔 3. Paper‑Plate Hedgehog
Paint a paper plate, add googly eyes, nose, and a smile. Then glue on real or faux leaves to create spiky hedgehog “quills.” Cute and crafty! weareteachers.com
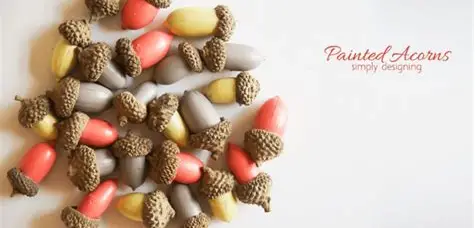
🌰 4. Painted Acorns
Turn wooden acorns into vibrant fall decor. Use craft paint and display them in bowls or scatter them along a table runner. ptaourchildren.org+14weareteachers.com+14realsimple.com+14
🎃 5. Button Pumpkin
Cut out a pumpkin shape from construction paper, then decorate it with colorful buttons for a tactile, kid-friendly craft. weareteachers.com
Bonus Themes from Other Great Sources
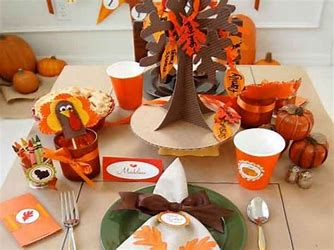
- Gratitude Tree or Jar: Decorate a jar or branch-filled vase with tags or paper leaves where family members write what they’re thankful for—read aloud at dinner! consumersadvisory.com+2kidscraftworkshop.com+2bhg.com+2
- Mini Cornucopias: Bend waffle cones into cornucopia shapes and fill them with treats—cute, edible place‑cards for Thanksgiving table settings! thespruce.com+14allrecipes.com+14bhg.com+14
- Leaf Garlands & Sunflower Crafts: Press real leaves or craft paper into garlands or sunflower shapes using collected fall foliage. thespruce.com+13bhg.com+13teachersconnect.co+13
🔧 Quick Material Checklist
| Craft Type | Key Supplies |
|---|---|
| Pop‑Up Card | Card stock, construction paper, washi tape |
| Pine‑Cone Turkey | Pine cones, paint, pom‑poms, googly eyes, felt |
| Paper‑Plate Hedgehog | Plate, paint, leaves, glue, googly eyes |
| Painted Acorns | Wooden acorns, paint, brushes |
| Button Pumpkin | Construction paper, buttons, glue |
| Gratitude Jar/Tree | Mason jar or branch, paper/tags, markers |
| Mini Cornucopias | Waffle cones, warm water, treats, name tags |
| Leaf Garland/Sunflowers | Real/paper leaves, paper plates, string |
💡 Tips for Success
- Involve kids: Many crafts are simple enough for little hands and encourage creativity.
- Use natural materials: Pine cones, leaves, and acorns add authentic autumn flair.
- Blend edible + decorative: Combine candies and craft for sweet, reusable table accents.
- Honor gratitude: Activities that involve writing or discussing what each person is thankful for add a meaningful touch to the festivities.
Have fun crafting these to celebrate Thanksgiving with warmth, creativity, and gratitude! If you’d like more ideas—like a video tutorial or kid-friendly games—just let me know. 😊
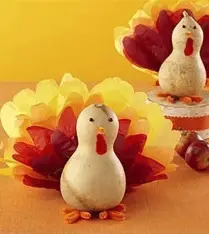
1. Mini Turkey Pinatas
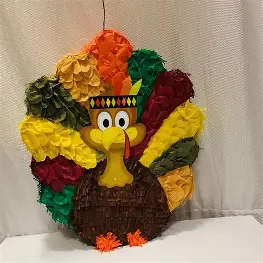
The outcomes speak for themselves, despite the fact that this is a very involved project (best suited for older children). Stuff your young turkeys with seasonal candy or confetti.
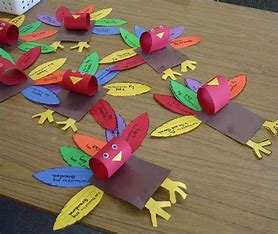
2. Glove Turkey

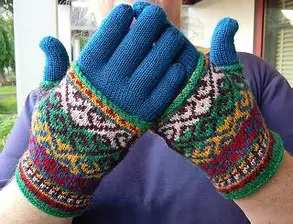
Sure! Here’s a fun and easy Glove Turkey craft idea for Thanksgiving:
🧤 Glove Turkey Craft (in English)
Perfect for kids and classrooms, the Glove Turkey uses a simple winter glove to create a colorful turkey decoration.
🎨 Materials Needed:
- One clean winter glove (preferably in brown, beige, or tan)
- Googly eyes
- Small pom-pom (for the nose or wattle)
- Felt or craft foam (in red, orange, and yellow)
- Fabric stuffing or cotton balls
- Glue (hot glue or strong craft glue)
- Scissors
- Optional: pipe cleaners, buttons, feathers
🧑🎨 Instructions:
- Stuff the Glove:
Fill the fingers and palm of the glove with stuffing or cotton balls. This creates the turkey’s body and feathers. - Seal the Opening:
Once stuffed, tie the wrist of the glove with a ribbon or rubber band to close it off. You can hide this with a strip of felt or decorative ribbon. - Create the Face:
- Glue on googly eyes near the thumb (this will be the turkey’s head).
- Add a red felt wattle and an orange beak below the eyes.
- You can use a small red pom-pom or a tiny bit of felt for the turkey’s snood (the red part over the beak).
- Decorate the “Feathers”:
The glove fingers will serve as the feathers. You can:- Glue small feathers to the glove fingers for extra color.
- Add buttons, glitter, or colored felt shapes to each “feather.”
- Display Your Turkey:
Your Glove Turkey can sit on a table as a centerpiece, or you can attach string to hang it like a decoration.
✅ Tips:
- Use mismatched or single gloves—great way to recycle!
- Make it into a hand puppet by leaving the glove unstuffed.
- Turn it into a gratitude activity by writing something you’re thankful for on each “feather.”
Would you like a printable version or a version for younger kids (like preschoolers)?
3. Gratitude Book

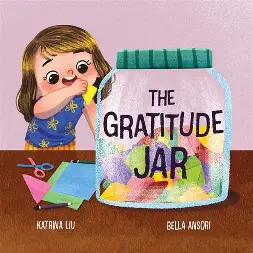
What a beautiful memento to document your appreciation! The ideal way to get ideas from everyone at your table is with this accordion-fold book.
4. Pie Garland


bsolutely! Here’s a fun and festive Pie Garland craft for Thanksgiving:
🥧 Pie Garland Craft (in English)
Celebrate Thanksgiving with this adorable pie-themed garland—perfect for decorating walls, mantels, or classrooms!
🎨 Materials Needed:
- Colored construction paper or cardstock (tan, orange, brown, white)
- Scissors
- Glue or glue stick
- String or twine
- Hole punch
- Cotton balls (for “whipped cream”)
- Markers or crayons (optional for decorating)
🧑🎨 Instructions:
- Make the Pie Slices:
- Cut out triangles from orange paper for the pie filling (like pumpkin pie).
- Cut slightly larger triangles from tan or brown paper for the pie crust—this will frame the orange triangles.
- Glue the orange triangles on top of the crust triangles.
- Add Details:
- Use tan or beige paper to cut thin strips for a crimped crust edge at the wide end of the pie slice.
- Glue a small cotton ball to the top of each pie slice as a dollop of whipped cream!
- Create Holes for Stringing:
- Punch two holes at the top corners of each slice.
- Thread string or twine through the holes to connect each pie slice and create the garland.
- Assemble and Hang:
- Once all pie slices are strung together, adjust spacing and tie loops at the ends of the string.
- Hang across a wall, doorframe, or fireplace mantle.
✨ Variations:
- Different Pie Flavors: Use red for cherry pie, purple for berry, or yellow for lemon.
- Personalized Pies: Have kids write what they’re thankful for on each slice.
- Mini Version: Use smaller triangles and make a shorter garland to hang over picture frames or windows.
This Pie Garland adds a sweet, handmade touch to your Thanksgiving décor and is easy enough for all ages to enjoy.
Would you like a printable template for the pie slices?
5. Autumn Leaf Folded Napkin
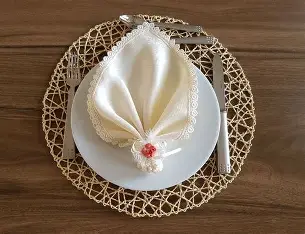
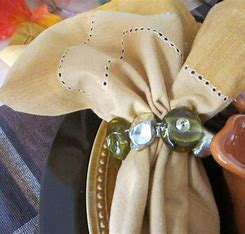
Children enjoy lending a hand, especially during the holidays. Why not add some fun to your work? Try folding a serviette like the leaves in this entertaining activity. Or make a boat, a hat, or a crown!
6. Corn Cob Colored Pencil Holder
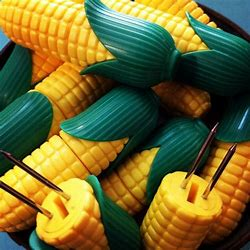
Absolutely! Here’s a cute and functional Thanksgiving craft idea:
🌽 Corn Cob Colored Pencil Holder (in English)
Turn an ordinary container into a fun corn-on-the-cob themed pencil holder—perfect for fall classrooms or Thanksgiving decorations!
🎨 Materials Needed:
- Empty tin can, mason jar, or clean yogurt container
- Yellow construction paper or craft foam (for corn kernels)
- Green construction paper (for corn husks)
- Scissors
- Glue or tape
- Optional: markers, googly eyes, raffia, or ribbon for decoration
- Colored pencils, markers, or pens (for filling)
🧑🎨 Instructions:
- Prepare the Base:
- Wash and dry your container thoroughly.
- If using a tin can, make sure there are no sharp edges.
- Make the Corn Kernels:
- Cut small oval or circle shapes from yellow paper or foam to represent corn kernels.
- You’ll need enough to cover the outside of the container.
- Attach the Kernels:
- Glue the yellow “kernels” all over the outside of the container until it resembles a corn cob.
- Overlap slightly or leave small spaces for a rustic look.
- Create the Husks:
- Cut long green leaf shapes from green construction paper.
- Glue or tape them around the bottom or back of the container, so they stick up and out like corn husks.
- Optional: curl the tips a bit with scissors for a more natural look.
- Decorate (Optional):
- Add googly eyes and a smile to turn it into a cute corn character.
- Wrap raffia or ribbon around the base for a farmhouse feel.
- Fill It Up:
- Add colored pencils, crayons, or markers. Now you’ve got a festive and functional fall pencil holder!
✅ Bonus Tips:
- Mini Version: Use toilet paper rolls or small cups for individual pencil holders or name cards.
- Gratitude Activity: Have kids write something they’re thankful for on each kernel before gluing it on.
- Eco-Friendly Option: Use recycled materials like bottle caps for kernels!
Would you like a printable pattern for the kernels and husks?
7. Turkey Crayon Holder
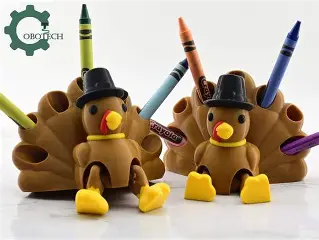
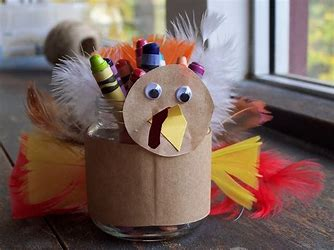
This adorable little turkey, which is made from construction paper and a paper cup, is ideal for handing young children crayons to occupy them at the Thanksgiving feast. Or stuff them with appetisers before the feast.
8. Patchwork Glass Vases
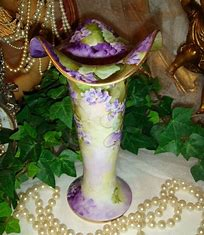

Certainly! Here’s a cozy and creative fall craft idea:
🍂 Patchwork Glass Vases (in English)
These Patchwork Glass Vases are a beautiful way to decorate for Thanksgiving using warm autumn colors and simple materials. Perfect as a centerpiece or gift!
🎨 Materials Needed:
- Clear glass jars or vases (Mason jars, recycled bottles, etc.)
- Tissue paper in fall colors (red, orange, yellow, brown)
- Scissors
- Mod Podge or a mixture of white glue + water
- Foam brush or paintbrush
- Optional: raffia, twine, ribbon, tea lights, faux flowers
🧑🎨 Instructions:
- Prep the Tissue Paper:
- Cut the tissue paper into small squares or rectangles—about 1 to 2 inches wide.
- Use a variety of colors to give it that “patchwork quilt” look.
- Apply the First Layer:
- Using a foam brush, spread a thin layer of Mod Podge (or glue mix) over a small section of the glass vase.
- Stick on the Patches:
- Press a piece of tissue paper onto the glue and gently brush more Mod Podge over it to smooth it down.
- Repeat, overlapping slightly, until the entire jar is covered.
- Seal and Finish:
- Once all patches are applied, brush a final layer of Mod Podge over the whole vase to seal it.
- Let dry completely (about 30–60 minutes depending on glue thickness).
- Decorate the Rim (Optional):
- Tie raffia, twine, or ribbon around the top for a rustic touch.
- You can also glue on a paper leaf with a thankful message or someone’s name for a personalized gift.
- Display It:
- Fill with dried or faux flowers, fall leaves, or even a battery-powered tea light for a cozy glow.
✅ Tips:
- Use fall-patterned napkins instead of tissue paper for extra texture.
- Layer colors for a stained-glass effect when lit from inside.
- Great for kids with adult supervision (especially when using glass and glue).
Would you like a version with step-by-step photos or printable labels to go with them?
9. Leaf Bowls
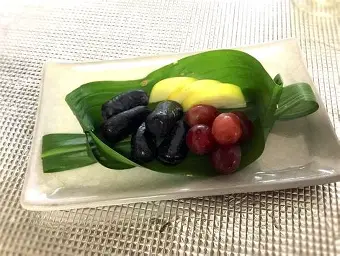
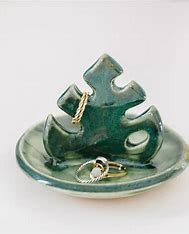
These stunning clay and painted DIY Thanksgiving decorations resemble autumn foliage.
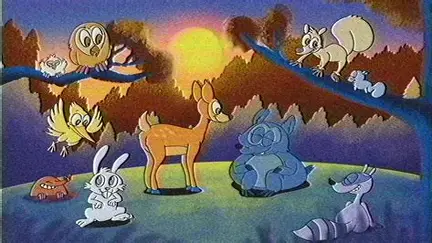
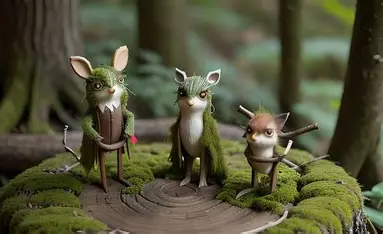
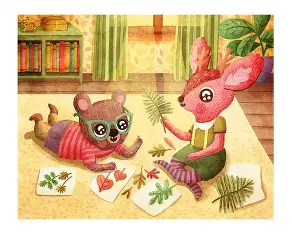
10. Woodland Critters
Of course! Here’s a charming and kid-friendly Thanksgiving or fall craft idea:
🐿️ Woodland Critters Craft (in English)
Create adorable woodland animals like foxes, owls, raccoons, and squirrels using paper, felt, pinecones, or toilet paper rolls. These critters make great decorations, table centerpieces, or playful storytelling props!
🎨 Materials Needed:
- Toilet paper rolls, pinecones, or small paper cups (as base)
- Construction paper or craft foam (brown, gray, white, orange, etc.)
- Googly eyes
- Glue or glue stick
- Scissors
- Markers or crayons
- Optional: felt, pipe cleaners, acorns, mini pom-poms
🧑🎨 Instructions (for 3 common critters):
🦊 1. Fox:
- Wrap a toilet paper roll with orange paper.
- Cut out a white triangle for the face, and two orange triangles with smaller white ones inside for ears.
- Glue on googly eyes and draw a nose with a black marker.
- Add a small orange paper tail with a white tip and glue it to the back.
🐿️ 2. Squirrel:
- Cover the base with brown or gray paper.
- Use felt or paper to make little paws and a fluffy tail (you can curl a strip of paper or use a pipe cleaner).
- Add googly eyes, small teeth (tiny white paper rectangle), and draw a nose.
- Optional: glue a small acorn or nut in its hands!
🦉 3. Owl:
- Wrap a pinecone or small cup in paper or felt.
- Cut out large eyes, a small beak, and feather shapes in various colors.
- Glue everything on to give the owl a wide-eyed, feathery look.
- You can also use real feathers or leaf shapes for wings.
🪵 Display Ideas:
- Arrange your woodland critters around mini pumpkins, pinecones, and leaves for a festive Thanksgiving centerpiece.
- Add name tags to make them fun place cards.
- Use in a “Thankful Forest” display where each critter holds a message of gratitude.
✅ Bonus Tips:
- Use recycled materials for an eco-friendly craft.
- Mix textures (felt, paper, natural elements like twigs) for a more lifelike look.
- Great for group projects—each person can create a different animal!
Would you like templates or printable cutouts for the critters?
11. Paper Bag Pumpkin

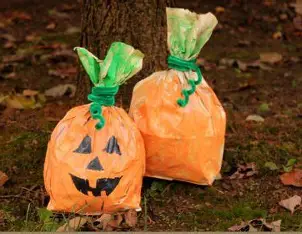
What a cute little man he is. The classic Thanksgiving craft for preschoolers.
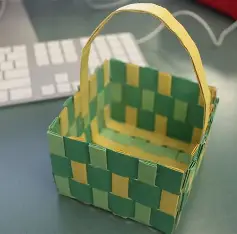
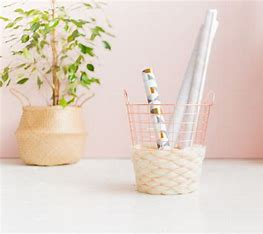
12. Woven Paper Basket
Certainly! Here’s a creative and hands-on Thanksgiving craft idea:
🧺 Woven Paper Basket (in English)
Make a colorful woven paper basket using strips of paper! It’s perfect for holding treats, notes of gratitude, or fall decorations—and it’s a great way to practice fine motor skills too.
🎨 Materials Needed:
- Construction paper or cardstock (in fall colors)
- Ruler and pencil
- Scissors
- Glue or tape
- Optional: stickers, markers, ribbon for decorating
🧑🎨 Instructions:
- Create the Base:
- Cut a square piece of paper (about 8×8 inches or larger for a bigger basket).
- Fold it in half both ways to find the center (creates 4 quadrants).
- Unfold and lay flat.
- Cut the Slits:
- Starting from one side, cut evenly spaced slits from the edge toward the center—stop about 1 inch from the middle.
- Do this along only one direction (horizontal or vertical), creating slots for weaving.
- Prepare Weaving Strips:
- Cut long, even strips from different colored paper (about 1 inch wide).
- These strips should be long enough to weave through the slits.
- Start Weaving:
- Weave the strips over and under the slits, alternating each row.
- Push the strips close together as you go, and glue or tape down the ends on the back to secure.
- Build the Basket Walls:
- Once your woven square is done, gently bend up the sides and tape or glue the corners to create a shallow basket shape.
- Optional: Add extra strips around the top edge for a clean, reinforced border.
- Add a Handle (Optional):
- Cut a strip of paper and attach it to each side to make a handle.
- Decorate with ribbon, fall stickers, or hand-drawn designs.
🍁 How to Use It:
- Fill with paper leaves that have thank-you messages written on them.
- Use to serve wrapped treats or mini pumpkins.
- Make several and place them as table favors for guests.
✅ Tips:
- Use a ruler for straight lines and even spacing.
- Laminated strips or cardstock make sturdier baskets.
- Kids can personalize their basket with names or drawings.
Would you like a printable pattern or photos to guide the folding and weaving process?
13. Button Pumpkin
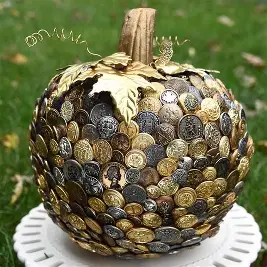

A sweet and easy project for young children. Assist children in cutting out a pumpkin and stem, then provide them with a variety of buttons and glue so they may decorate!
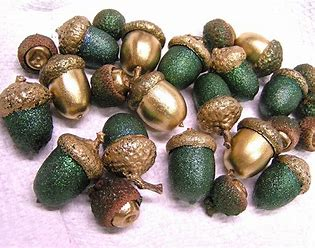
14. Painted Acorns
Of course! Here’s a fun and simple fall craft:
🎨 Painted Acorns (in English)
Painted acorns are a colorful and natural way to decorate for Thanksgiving or fall. They’re great for table centerpieces, garlands, or craft bowls—and kids love making them!
🍂 Materials Needed:
- Real acorns (cleaned and dried)
- Acrylic paint (in fall or bright colors)
- Paintbrushes or cotton swabs
- Paper towel or craft mat
- Optional: clear sealant spray or Mod Podge
- Small bowls, baskets, or jars for display
🧑🎨 Instructions:
- Collect and Prepare Acorns:
- Gather acorns from outdoors or purchase them at a craft store.
- Bake them at 175°F (80°C) for 1–2 hours to kill bugs and dry them out. Let cool completely.
- Paint the Acorns:
- Use a small paintbrush to carefully paint the nut portion of each acorn (you can leave the caps natural or paint those too).
- Try solid colors, ombre effects, metallics, or patterns like stripes and polka dots.
- Dry the Paint:
- Place painted acorns on wax paper or a tray to dry completely (about 1 hour depending on paint thickness).
- Seal the Acorns (Optional):
- Once dry, apply a coat of Mod Podge or spray sealant to protect the paint and give a nice finish.
- Display Them:
- Place them in bowls, scatter on tabletops, fill glass jars, or glue onto wreaths or garlands for decoration.
✅ Tips:
- Use metallic paints (gold, bronze, copper) for a classy autumn look.
- Make a “thankful acorn” bowl where each acorn represents something you’re grateful for.
- Great for kids and adults—just be sure younger children don’t put small acorns in their mouths.
Would you like ideas on how to turn painted acorns into other decorations (like garlands or napkin rings)?
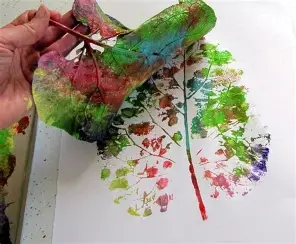
15. Paper Plate Hedgehog
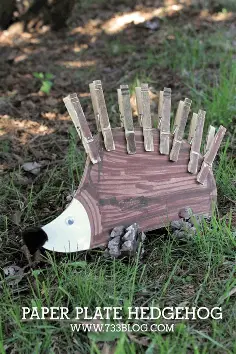
This cute little critter is so simple to make. Just paint a paper plate and add googly eyes (one on each side), a nose, and a smile. Then glue on found leaves or faux leaves.
16. Painted Pine Cone Turkey

Absolutely! Here’s a classic and festive Thanksgiving craft:
🦃 Painted Pine Cone Turkey (in English)
Turn a simple pine cone into an adorable turkey using paint, craft materials, and a little creativity! This easy craft is perfect for kids and makes a fun table decoration or place card.
🎨 Materials Needed:
- Pine cones (medium-sized, cleaned and dried)
- Acrylic paint (red, orange, yellow, brown, etc.)
- Paintbrushes
- Googly eyes
- Small pom-poms (for the turkey head)
- Felt or foam sheets (red, orange, yellow for beak, wattle, and feet)
- Glue (hot glue for fast results or craft glue for kid safety)
- Optional: construction paper or craft feathers
🧑🎨 Instructions:
- Paint the Pine Cone:
- Use a small brush to paint the tips of the pine cone “scales” in fall colors like red, orange, and yellow.
- Let it dry completely.
- Make the Turkey’s Face:
- Glue a small pom-pom to the narrow end of the pine cone to be the turkey’s head.
- Attach two googly eyes to the pom-pom.
- Cut a tiny triangle from orange felt (for the beak) and a small red wavy shape (for the wattle), and glue both under the eyes.
- Add Feet (Optional):
- Cut small feet from orange felt or foam and glue them to the bottom of the pine cone.
- Create Tail Feathers:
- You can glue real craft feathers to the back of the pine cone OR
- Cut out feather shapes from red, orange, and yellow paper or foam and glue them in a fan shape behind the turkey.
- Display:
- Let everything dry fully, then place your turkey on the table, on a windowsill, or use it as a cute place card holder!
✅ Tips:
- Want a name tag? Stick a small card in the feathers with the guest’s name.
- Use natural pine cones from your yard (make sure to bake them first at 200°F for 30 minutes to remove bugs).
- Great for classroom or family crafts—set up a “turkey station” with all supplies ready.
Would you like a printable template for the beak, wattle, or feathers?
17. Pop-Up Thanksgiving Card
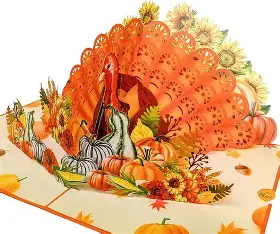
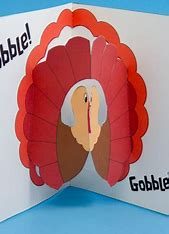
This craft is as much fun to make as it is to present. It is made from card stock and folded pieces of construction paper.
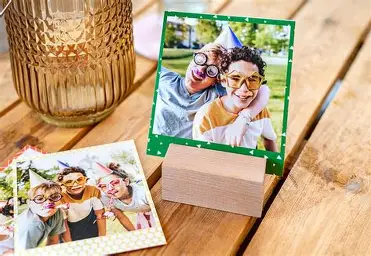
18. Wooden Photo Holder
Certainly! Here’s a warm, rustic craft idea perfect for Thanksgiving:
🪵 Wooden Photo Holder (in English)
A Wooden Photo Holder is a simple, charming craft that makes a beautiful keepsake or Thanksgiving table decoration. Use it to display family photos, thankful notes, or place cards.
🎨 Materials Needed:
- Small wood slices or wooden blocks (available at craft stores or use fallen branches)
- Craft wire (floral or jewelry wire works well)
- Pliers (for shaping the wire)
- Drill (optional, for making holes in wood)
- Hot glue gun (if not drilling)
- Optional: paint, markers, stickers, Mod Podge, mini clothespins
🧑🎨 Instructions:
- Prepare the Wood Base:
- Use a wood slice or block about 2–3 inches wide.
- Sand the surface if needed.
- Optional: Paint or decorate the wood with names, fall designs, or the word thankful.
- Make the Wire Holder:
- Cut a piece of wire about 10–12 inches long.
- Twist one end into a spiral or loop—this is where your photo or card will sit.
- Leave the rest of the wire straight to insert into the base.
- Attach the Wire to the Wood:
- If using a drill: Make a small hole in the center of the wood slice and insert the straight end of the wire.
- If not using a drill: Hot glue the wire to the top or back of the wood. Add a mini clothespin for extra support if desired.
- Insert a Photo or Note:
- Once dry and sturdy, insert a family photo, “I’m thankful for…” card, or name tag into the spiral loop.
🍁 Ways to Use It:
- As a place card holder at your Thanksgiving table.
- Display a family photo or favorite fall memory.
- Hold a gratitude note written by your child or student.
✅ Tips:
- Add natural touches like acorns, pinecones, or mini leaves to decorate the base.
- Let kids decorate the wooden base with paint, stamps, or stickers.
- Make one for each family member and display them together!
Would you like printable “Thankful For” cards to go with this craft?
19. Painted Leaf Friends
Go for a stroll and gather beautiful autumn foliage. Do your best to locate a wide variety of sizes and forms. Next, make faces with paint pens. Make a play out of the leaves by using them as characters.
20. Craft Stick Scarecrows

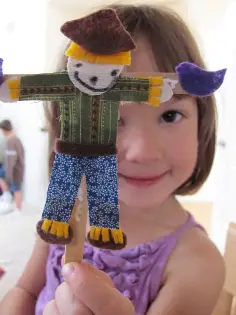
Of course! Here’s a fun and easy fall-themed craft:
🌾 Craft Stick Scarecrows (in English)
These cute scarecrows made from craft sticks (popsicle sticks) are a perfect fall or Thanksgiving craft for kids. Great for classroom projects, fridge magnets, or seasonal decorations!
🎨 Materials Needed:
- Craft sticks (7–9 per scarecrow)
- Cardstock or foam (for hat and nose)
- Paint or markers (tan, orange, black, yellow, brown)
- Googly eyes
- Glue (craft glue or hot glue)
- Scissors
- Straw, raffia, or yellow yarn (for hair)
- Optional: buttons, ribbon, or mini flowers for decoration
🧑🎨 Instructions:
- Make the Scarecrow Face Base:
- Lay 7 craft sticks side by side vertically.
- Glue 1 or 2 sticks horizontally across the back to hold them together—this forms the face.
- Paint the Face:
- Paint the front of the sticks light tan or beige for the scarecrow’s face.
- Let dry completely.
- Add the Hat:
- Cut a hat shape from construction paper, foam, or even extra craft sticks.
- Glue it to the top of the face, slightly tilted for a fun, rustic look.
- Add straw or raffia peeking out from under the hat to look like messy scarecrow hair.
- Create the Face:
- Glue on googly eyes.
- Cut a small orange triangle (for the nose) and glue it on.
- Use a black marker or paint to draw a stitched smile and some “stitches” on the face for a traditional scarecrow look.
- Decorate the Hat (Optional):
- Glue on a button, ribbon, sunflower, or mini leaf for extra charm.
- Display Your Scarecrow:
- Add a magnet to the back to hang on the fridge, or attach string to hang it as a door or wall decoration.
✅ Tips:
- Mini version: Use small popsicle sticks for mini scarecrows.
- Gratitude version: Write something you’re thankful for on each craft stick.
- Classroom idea: Make one scarecrow per student and create a display titled “Our Thankful Field.”
Would you like a printable scarecrow face template or hat pattern to go with this?
21. Froot Loop Fall Tree

Not only are Froot Loops delicious, they also (kind of) come in autumn hues. On a piece of paper, create a tree with branches using markers. Then, adhere Froot Loops for the leaves. To accommodate the fallen leaves, create a pile at the bottom.
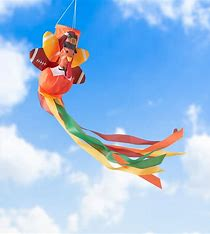
22. Turkey Windsock
Absolutely! Here’s a festive and fun Thanksgiving craft idea:
🦃 Turkey Windsock (in English)
A Turkey Windsock is a colorful, easy-to-make Thanksgiving craft that’s perfect for decorating porches, classrooms, or windows. It’s fun for kids and helps develop cutting and gluing skills!
🎨 Materials Needed:
- Construction paper (brown, red, orange, yellow, and other fall colors)
- Empty toilet paper roll or paper cup
- Glue or tape
- Scissors
- String or yarn (for hanging)
- Googly eyes
- Markers or crayons
- Optional: stapler or hole punch
🧑🎨 Instructions:
- Make the Turkey Body:
- Wrap brown construction paper around a toilet paper roll or cup.
- Glue or tape it in place to cover the outside fully.
- Create the Face:
- Glue on two googly eyes near the top.
- Cut and glue a small orange triangle for the beak.
- Add a red paper wattle (the dangling part under the beak).
- Make the Tail Feathers:
- Cut long strips of red, orange, yellow, and other fall-colored paper (about 1 inch wide and 8–10 inches long).
- Glue or tape them to the inside bottom edge of the roll or cup so they hang down—these are the feathers blowing in the wind!
- Attach a Hanging String:
- Punch two small holes near the top of the roll or cup.
- Tie a piece of string or yarn through the holes to hang your windsock.
- Decorate (Optional):
- Use markers to draw feather patterns or write things you’re thankful for on each tail strip.
- Add glitter or stickers for extra fun!
✅ Tips:
- Classroom-friendly: Let each child make one and hang them from the ceiling.
- Outdoor version: Laminate the feathers or use weatherproof materials for porch decoration.
- Gratitude twist: Turn it into a “thankful turkey” by writing one thing you’re grateful for on each tail strip.
Would you like a printable template for the beak, wattle, and feathers?
23. Leaf Cookies
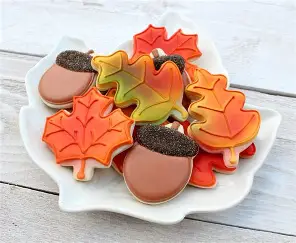

Hey, if you use this wonderful marbled dough and a leaf cookie cutter, cookies can be works of beauty!