Here’s a polished write-up in English for your idea:
Upcycling Ideas for the Garden – From Budget Planters to DIY Garden Furniture
Transforming your garden doesn’t have to cost a fortune. With a little creativity, everyday items can be repurposed into practical and stylish garden features. Upcycling not only saves money but also adds unique charm and sustainability to your outdoor space. Here are some inspiring ideas to get you started:
1. Budget-Friendly Planters
- Tin Cans & Buckets – Paint old tins or buckets and use them as quirky planters.
- Colanders & Teapots – Their built-in drainage makes them perfect for herbs or trailing plants.
- Tires – Stack and paint used tires to create bold, colorful flower beds.
2. Vertical Gardens
- Wooden Pallets – Turn pallets into vertical planters for small spaces.
- Old Ladders – Lean a ladder against a wall and use the steps as plant shelves.
- Guttering – Mount sections of old guttering on a fence for rows of salad greens or strawberries.
3. Garden Furniture from Reclaimed Items
- Pallet Seating – Stack pallets to create rustic sofas or benches, then add cushions for comfort.
- Cable Spools – Large wooden spools make excellent outdoor tables.
- Old Chairs & Bed Frames – Repurpose sturdy frames into benches or swing seats.
4. Decorative Touches
- Mason Jar Lanterns – Fill with candles or solar lights for cozy evening lighting.
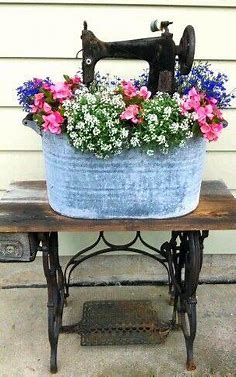
- Vintage Kitchenware – Upcycle old kettles, watering cans, or enamel jugs into statement planters.
- Broken Tools – Turn shovels, rakes, or hoes into quirky trellises or garden art.
5. Eco-Friendly Water Features
- Watering Can Fountain – Attach a small pump to a vintage watering can for a charming trickle fountain.
- Bathtubs & Sinks – Upcycle old bathroom fixtures into mini wildlife ponds.
With just a bit of imagination, you can give discarded items a second life and create a garden that’s not only beautiful but also sustainable. Upcycling projects bring personality to your outdoor space while keeping your budget low and your creativity high.
Would you like me to expand this into a step-by-step DIY guide for one or two of the ideas (like the pallet seating or tin can planters), so readers can follow along easily?
- Create a tyre planter
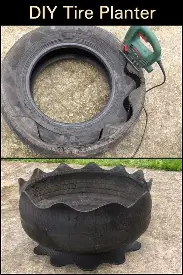

Think of repurposing your old spare tyre as a garden planter for vegetables, flowers or shrubs before you drive it to the closest tip.
For a genuinely unfinished look, you may leave it alone. Alternatively, as seen above, you could paint it to create adorable rustic sensations. You have an option.
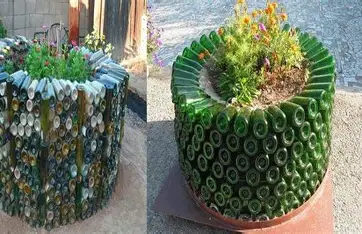
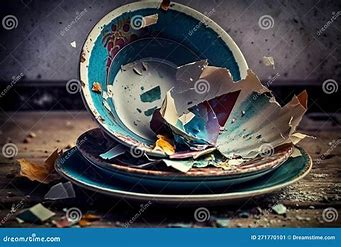
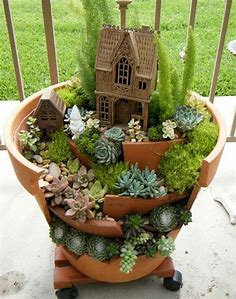
2. Transform broken crockery into a rockery
Here’s a clear version in English for your idea:
Transform Broken Crockery into a Rockery
Don’t throw away those chipped plates, cracked bowls, or broken mugs—give them a new life in your garden! Broken crockery can be repurposed into a unique and eye-catching rockery that adds texture and charm to your outdoor space.
How to Do It:
- Collect Pieces – Gather old crockery such as plates, teacups, saucers, or tiles. Break larger items into smaller pieces if needed (wear gloves for safety).
- Choose a Spot – Select a corner of your garden, near a border, or around a tree where you’d like to create your rockery.
- Layer the Base – Start with soil, pebbles, or small stones to provide structure and drainage.
- Arrange the Crockery – Place the broken pieces artistically, mixing colors, shapes, and textures to mimic natural rocks.
- Add Plants – Tuck in rockery plants such as succulents, alpines, or moss between the crockery shards for a natural look.
- Finish with Details – Add small stones, gravel, or shells to fill gaps and create a polished effect.
Why It Works
- It’s eco-friendly, giving new life to items that would otherwise be waste.
- It adds color and character, especially if the crockery has patterns or bright glazes.
- It creates a low-maintenance feature perfect for hardy, drought-tolerant plants.
Would you like me to make this into a step-by-step illustrated tutorial (with suggested images) or keep it as a short garden tip write-up?
3. Turn a slatted mattress base into a vertical planter
Why not use an outgrown cot bed foundation to display plants? Because they let you make the most of walls and create eye-catching plant displays, vertical planters are currently very popular.
With a coat of paint, any slatted base frame can be turned into a do-it-yourself vertical garden planter.
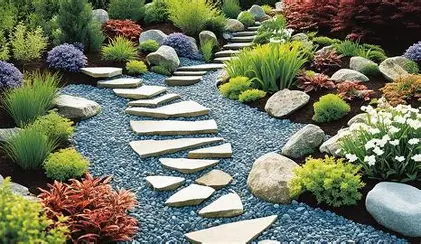
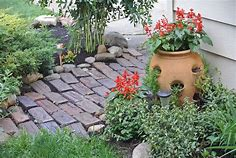
4. Lay a path of old bricks
Here’s a simple write-up in English for that idea:
Lay a Path of Old Bricks
Old, weathered bricks can be given a second life as a beautiful garden path. Reusing them not only saves money but also adds rustic charm and character to your outdoor space.
How to Do It:
- Plan Your Path – Mark out the route with string or a garden hose to visualize the shape (straight, curved, or winding).
- Prepare the Ground – Dig out the path area to a depth of around 10–15 cm (4–6 inches). Remove weeds and roots.
- Create a Base – Spread a layer of sand or gravel and level it to provide drainage and a stable foundation.
- Lay the Bricks – Place the old bricks in your chosen pattern (herringbone, stretcher bond, or basket weave). Tap each one down firmly with a rubber mallet.
- Fill the Gaps – Brush sand or fine gravel into the joints to lock the bricks in place.
- Finishing Touches – Add edging stones, plants, or ground cover along the sides to soften the look.
Why It Works
- Budget-Friendly – Uses materials you may already have.
- Eco-Friendly – Keeps old bricks out of landfill.
- Unique Style – No two reclaimed brick paths are ever the same, giving your garden a timeless, lived-in feel.
Would you like me to also suggest some creative design patterns (like spirals, checkerboard, or mixed brick-and-stone styles) to make the path even more eye-catching?
5. Create an unusual garden sculpture
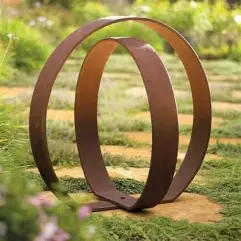

Now that garden sculptures are popular on TikTok, why not create your own with recycled materials? Using panels of patterned and coloured corrugated iron, this repurposed piece from the RHS Chlesea Flower Show adds height to an outdoor area and serves as an intriguing focal point.
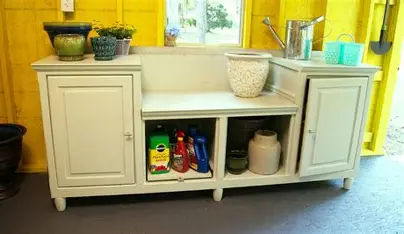
6. Turn a cupboard into a smart potting bench
Here’s a neat version in English for your idea:
Turn a Cupboard into a Smart Potting Bench
An old cupboard doesn’t need to go to waste—transform it into a practical and stylish potting bench for your garden. This upcycle project gives you a dedicated space for planting, storing tools, and keeping everything tidy.
How to Do It:
- Choose Your Cupboard – Pick a sturdy old cupboard or cabinet. Even a worn or slightly damaged one will work, as long as the frame is solid.
- Prepare the Surface – Remove any doors you don’t need and give it a good sanding. A coat of outdoor-friendly paint or wood sealant will protect it from the weather.
- Create a Worktop – Use the cupboard’s top surface as your potting area. If it’s not strong enough, replace it with a thicker wooden board.
- Add Storage – Use shelves and drawers to store pots, tools, and seeds. Hooks or rails on the sides can hold trowels, gloves, or watering cans.
- Customize – Line the worktop with metal or tile for easy cleaning, and add a small bucket or basin to catch soil.
- Decorate – Paint it in cheerful garden colors, or leave it rustic for a vintage look.
Why It Works
- Practical – Keeps your gardening tools and supplies in one place.
- Eco-Friendly – Gives a second life to unwanted furniture.
- Charming – Adds personality and a homely touch to your garden.
Would you like me to expand this into a step-by-step DIY guide with materials and tools list, so it reads like a full tutorial?
7. Transform old shelves
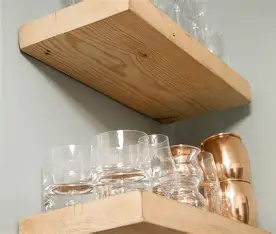
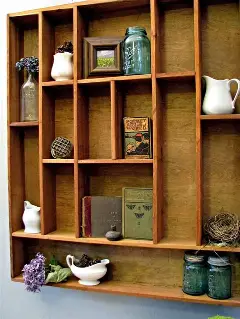
Have you got any old bookshelves or cabinets in your house that aren’t being used? Make a fantastic garden addition out of it, like this oddball planter.
According to a Mano Mano spokesman, “a bookshelf’s natural shape is ideal for lots of garden projects.”
Make your own garden bar or bar table, or turn the shelves into a plant container to keep your herbs separate. They are also great for keeping garden items that don’t seem to have a place. They can also add a really rustic and vintage atmosphere to your landscape.
8. Upcycle foraged finds for landscaping materials

Here’s a clear write-up in English for your idea:
Upcycle Foraged Finds for Landscaping Materials
Nature provides plenty of free and sustainable resources that can be repurposed into beautiful landscaping features. By upcycling foraged finds—like stones, branches, driftwood, or shells—you can create unique designs that blend seamlessly with your garden while keeping costs low.
Ideas to Try:
- Stone Edging – Collect rocks and pebbles to edge flowerbeds, paths, or ponds.
- Log Borders – Use fallen branches or cut logs to create rustic garden borders or raised bed edges.
- Driftwood Features – Arrange driftwood into natural sculptures, trellises, or garden accents.
- Shell Pathways – Scatter seashells or crushed shells along pathways for texture and sparkle.
- Twig Fences – Weave flexible twigs into low garden fences or screens.
- Natural Mulch – Fallen leaves, pinecones, or bark can be spread as mulch to enrich the soil and retain moisture.
Why It Works
- Eco-Friendly – Reduces waste and avoids buying new materials.
- Cost-Effective – Most resources can be gathered for free.
- Natural Beauty – Blends with the outdoor environment for a harmonious look.
Would you like me to expand this into a detailed landscaping guide (with sections on different natural materials and how to use them), or keep it as a quick idea list?
9. Get creative with an old kitchen sink
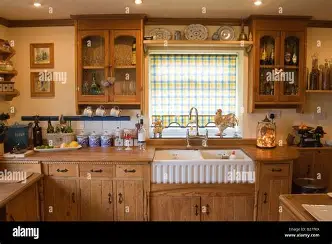
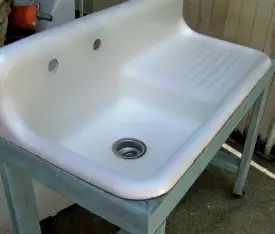
When it comes to upcycling projects, everything is included, even the kitchen sink, as ceramic sinks create stylish alternative planters. Better still? The drainage is already taken care of because of the design!
To help with even drainage, put a few large stones in the bottom. Then, fill it with compost and plant a variety of bedding plants to make sure the garden is vibrant.
10. Turn a colander into a hanging basket
Here’s a polished version in English for that idea:
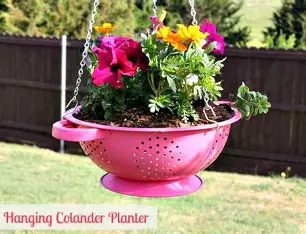
Turn a Colander into a Hanging Basket
An old colander makes the perfect base for a quirky and practical hanging basket. With its built-in drainage holes and sturdy shape, it’s ready-made for planting.
How to Do It:
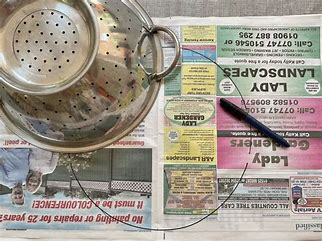
- Choose Your Colander – Pick a metal or plastic colander. Vintage or colorful ones add extra charm.
- Prepare It – If needed, give it a coat of outdoor-friendly paint to match your garden style.
- Add Liners – Place a coconut fiber liner or moss inside to hold soil while allowing water to drain.
- Fill with Soil – Add potting compost and choose plants that trail beautifully, such as petunias, ivy, or strawberries.
- Attach Chains – Use the colander’s handles to secure three or four chains (or strong rope) and connect them at the top with a hook.
- Hang & Enjoy – Suspend your new basket from a tree, pergola, or bracket and watch it bloom.
Why It Works
- Ready-Made Drainage – No need to drill extra holes.
- Budget-Friendly – Repurposes an item you already own.
- Unique Charm – Adds personality and a touch of vintage style to your garden.
Would you like me to also suggest some plant combinations (like edible herbs, trailing flowers, or succulents) that work especially well in a colander basket?
11. Upcycle decking offcuts as a garden path
If you recently had decking installed, take a cue from Celine Dion and reconsider throwing away any leftovers. Instead, make all of your best garden path ideas a reality by trimming them to size to create a tidy garden walkway.
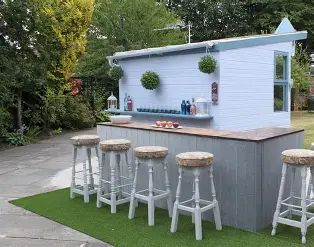
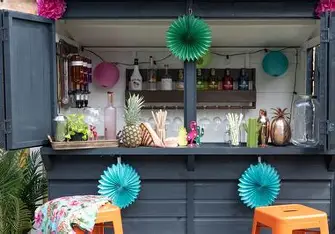
12. Serve up a homemade garden bar
Here’s a polished version in English for your idea:
Serve Up a Homemade Garden Bar
Bring a touch of fun and hospitality to your outdoor space by creating a homemade garden bar. Perfect for summer gatherings, weekend barbecues, or simply relaxing after a long day, a DIY bar can be as rustic or as stylish as you like—all while upcycling materials you already have.
How to Do It:
- Choose a Base – Repurpose sturdy items such as a wooden pallet, an old dresser, or even a repurposed cupboard as the foundation of your bar.
- Add a Countertop – Use reclaimed wood, an old door, or a piece of worktop to create a serving surface. Sand and seal it to withstand outdoor use.
- Include Storage – Add shelves, crates, or hooks behind the bar to hold glasses, bottles, and bar tools.
- Personalize the Style – Paint it in bold summer colors, go for rustic wood finishes, or add a chalkboard front for writing cocktail menus.
- Accessorize – String up fairy lights, hang bunting, or add a canopy to create atmosphere.
- Finishing Touches – Include bar stools, a bucket of ice, and maybe even a small herb planter for fresh cocktail garnishes.
Why It Works
- Budget-Friendly – Built from upcycled and reclaimed materials.
- Practical – A dedicated space for entertaining outdoors.
- Stylish – Adds personality and a “holiday at home” feel to your garden.
Would you like me to draft a step-by-step DIY tutorial for building a pallet garden bar, with a materials and tools list, so readers can recreate it easily?
13. Create your own fruit and veg beds
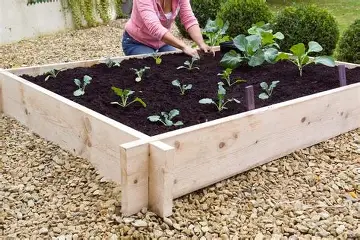
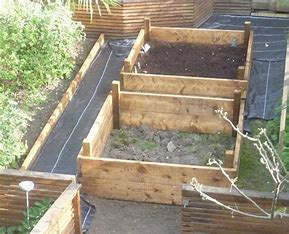
Repurpose corrugated iron sheets to make vegetable and fruit plots, just like Lynne and the people at Gardena did.
In addition to making your crops the centre of attention, it’s a great way to shield them from nearby wildlife. Additionally, the raised bed will guarantee that your soil is at a greater elevation, which will accelerate the warming process in the spring and enable the season to begin sooner.
Bonus added? Instead of being dispersed over your garden, fertilisers, organic materials, and manures will be focused on your hungry crops.
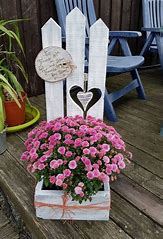
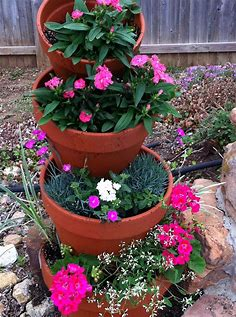
14. Add pattern and colour to plant pots
Here’s a simple version in English for your idea:
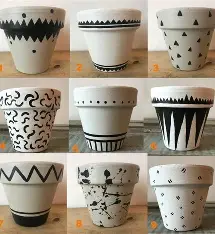
Add Pattern and Colour to Plant Pots
Plain plant pots can be transformed into eye-catching features with just a little creativity. By adding patterns and colour, you can brighten up your garden, patio, or windowsill while giving old pots a fresh new life.
How to Do It:
- Choose Your Pots – Terracotta, ceramic, or even plastic pots all work well. Clean them thoroughly before decorating.
- Paint the Base – Apply a coat of outdoor-friendly paint or spray paint in your chosen colour.
- Add Patterns – Use stencils, painter’s tape, or freehand designs to create stripes, dots, chevrons, or geometric shapes.
- Get Creative – Try mosaic effects with broken tiles, decoupage with patterned paper, or even natural dyeing techniques for fabric-wrapped pots.
- Seal the Surface – Apply a waterproof sealant or varnish to protect your design from the weather.
Why It Works
- Personalised – Matches your garden’s style and colours.
- Upcycled – Refreshes old or tired pots instead of buying new ones.
- Creative – Lets you experiment with bold designs, or keep it subtle and chic.
Would you like me to also suggest some specific design themes (like boho, Mediterranean, or minimalist) to help inspire different pot styles?
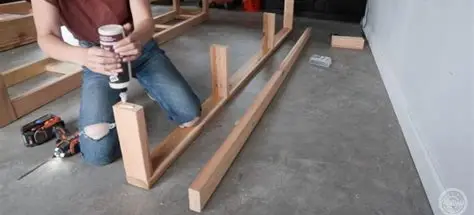
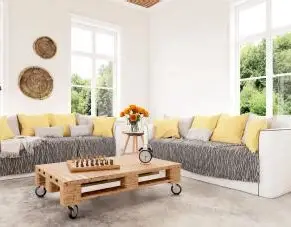
15. Make a DIY corner sofa


Given how much we cherish spending time outside, garden furniture can be an expensive investment, but surely it’s worth it? However, what happens if you lack the funds to invest? In that case, upcycling to create a stylish yet affordable furniture set is your best option.
Since corner couches are currently the most popular sitting option for gardens, why not construct your own out of leftover wood? To make the seats even cosier, add pillows.
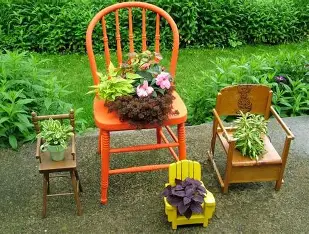
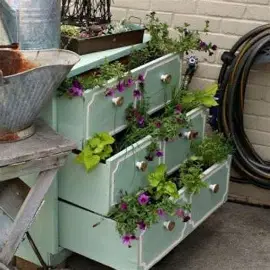
16. Dress up old furniture

Here’s a clear version in English for your idea:
Dress Up Old Furniture
Instead of throwing out tired or outdated pieces, give them a fresh new look with a little creativity. Dressing up old furniture is an easy way to upcycle what you already have, save money, and add unique character to your home or garden.
How to Do It:
- Paint & Stain – A fresh coat of paint or wood stain can instantly transform a dull piece. Try bold colours for a statement, or soft neutrals for a modern touch.
- New Hardware – Swap old handles, knobs, or hinges for stylish replacements to update the look.
- Add Pattern – Use stencils, wallpaper, or decoupage to bring fun patterns or textures to drawers, tabletops, or cabinet doors.
- Upholstery Update – Re-cover chairs, stools, or benches with fresh fabric for an instant refresh.
- Repurpose – Turn a dresser into a bathroom vanity, a side table into a nightstand, or a cupboard into a garden potting bench.
- Creative Accents – Add trim, decorative mouldings, or even mosaic tiles for a one-of-a-kind finish.
Why It Works
- Budget-Friendly – Gives new life to what you already own.
- Sustainable – Reduces waste by reusing instead of replacing.
- Stylish – Creates custom pieces that reflect your personality.
Would you like me to make this into a step-by-step DIY guide for one type of furniture makeover (for example, turning an old dresser into a modern statement piece)?
17. Turn the kitchen table into a herb garden
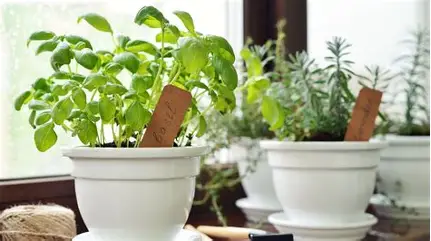
One of the greatest and simplest methods to follow the huge edimentals trend is to create an elevated herb garden, so why not turn your ideas into a reality using an old kitchen table?
“To create a soil bed, start by removing the table top and inverting the supporting wooden planks,” advises Matthew Brown of Sadolin.
Sanding, cleaning, and painting are the next processes. After drying, “Place herbs in rows in the bed, leaving 5 cm between plants.” The produce should not be destroyed by garden pests because of the elevation.
18. Repurpose old pots and pans
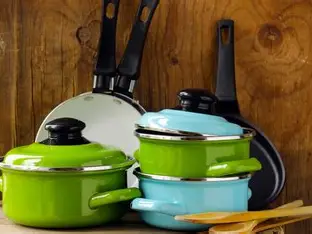
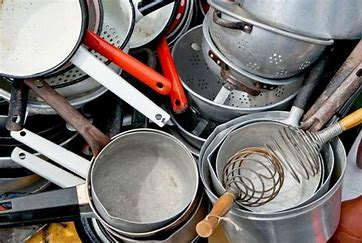
Here’s a polished version in English for that idea:
Repurpose Old Pots and Pans
Don’t throw away those worn-out pots and pans—give them a second life in your garden! Their sturdy shapes and quirky character make them perfect for creative upcycling projects.
Ideas to Try:
- Planters – Drill drainage holes in the base and plant herbs, succulents, or flowers. Cast iron pans and enamel pots look especially charming.
- Hanging Baskets – Add chains or rope to lightweight pans and hang them as unique planters.
- Bird Baths or Feeders – Use shallow pans to create bird baths or fill them with seeds for feeders.
- Garden Décor – Paint old pots and pans in bright colors and use them as whimsical yard decorations.
- Mini Water Features – Turn a deep pot into a small container pond with water plants and pebbles.
- Tool Holders – Mount pans on a shed wall to hold small gardening tools or packets of seeds.
Why It Works
- Eco-Friendly – Extends the life of kitchenware instead of discarding it.
- Budget-Friendly – Saves money on planters and décor.
- Unique Charm – Adds a playful, rustic touch to your outdoor space.
Would you like me to expand this into a step-by-step DIY tutorial for one project (like making a pot-and-pan planter), or keep it as a short collection of ideas?
19. Turn a wooden pallet into a coffee table
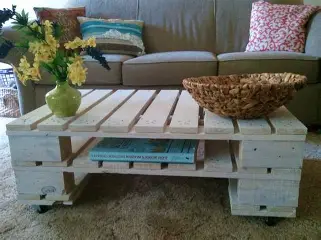
A coffee table is becoming a necessary piece of garden furniture as grassless garden designs gain popularity and we try to make our outdoor areas more like our home ones.
Purchasing new garden furniture can occasionally seem so far out of reach if you’re on a tight budget. Consider a pallet garden furniture suggestion if you’re searching for a clever way to pass the time while saving for your ideal furniture set.
This lovely example, created by the Cuprinol team, demonstrates how a wooden pallet can be transformed into an amazing outdoor table. With a splash of bright colour and basic castor feet, it takes on a completely new function.
20. Crafta a three-door potting shed


Here’s a full write-up in English for your request:
Craft a Three-Door Potting Shed
A potting shed is the perfect addition to any garden, giving you a dedicated space for planting, storage, and organization. By upcycling old doors, you can create a unique three-door potting shed that is both practical and full of character.
Materials You’ll Need
- Three old solid doors (preferably wooden and weather-resistant)
- Reclaimed timber or pallets for framing
- Screws, nails, and outdoor wood glue
- Hinges and latches (optional, for doors or windows)
- Corrugated plastic, tin, or reclaimed wood for the roof
- Paint, wood stain, or sealant for weather protection
How to Build It
- Plan the Design – Use the three doors as the front wall of the shed, with one door acting as the entrance and the others as decorative panels or storage access points.
- Create the Frame – Build a simple wooden frame using reclaimed timber. Make sure it’s level and sturdy to hold the doors securely.
- Attach the Doors – Fix the three doors side by side to form the shed’s front. Leave one on hinges to use as the main entry.
- Add Walls and Roof – Use pallet wood, reclaimed boards, or metal sheeting to complete the side and back walls. Top with a sloped roof to allow rainwater runoff.
- Install Shelving and Worktops – Inside, add shelves from leftover wood and a bench space for potting plants.
- Finishing Touches – Paint or stain the shed to match your garden style. You can also hang tools directly on the inside of the doors for handy storage.
Why This Upcycle Works
- Budget-Friendly – Repurposes doors and wood you may already have.
- Eco-Friendly – Cuts down on waste by reusing materials.
- Charming Design – Old doors add character and make the shed a garden feature as well as a workspace.
Would you like me to write this as a step-by-step DIY project guide with diagrams and measurements, so it’s easy to follow for someone who wants to build it?
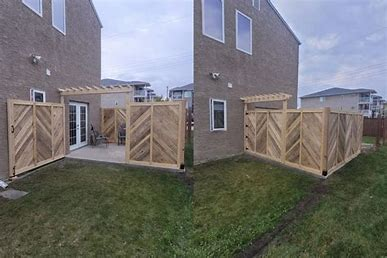
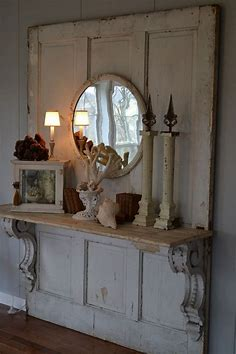
21. Create a pergola out of old window frames
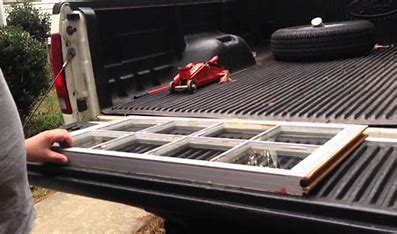
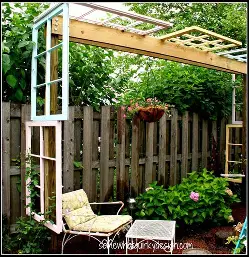
Instead of throwing away your old windows while you’re getting new ones installed, take Gardena and Lynne’s lead and turn them into a lovely pergola.
To be honest, it’s worth the effort because it’s the kind of design that looks really remarkable. If you don’t have any extra window frames or even doors, we’d even encourage you to check your local freecycling site to see if anyone else is throwing them out.
22. Get creative with your plant pots
Here’s a fresh version in English for your idea:
Get Creative with Your Plant Pots
Plant pots don’t have to be plain or expensive—by reusing and decorating everyday items, you can give your garden or home a unique and personal touch. From quirky upcycles to artistic makeovers, there are endless ways to get creative with your planters.
Fun Ideas to Try
- Painted Terracotta Pots – Add patterns, stripes, or bold colors with weatherproof paint.
- Tin Can Planters – Decorate old food cans with rope, fabric, or paint for a rustic or modern look.
- Teacups & Teapots – Use vintage crockery for charming indoor planters.
- Colanders & Baskets – Their natural drainage makes them perfect for hanging plants.
- Boots & Shoes – Old wellies, sneakers, or leather boots can be repurposed as quirky plant holders.
- Upcycled Furniture Drawers – Line an old drawer with plastic and turn it into a rustic herb planter.
- Hanging Mason Jars – Suspend jars with twine or wire for small succulents or herbs.
- Toy Planters – Hollow out old toy trucks, wagons, or dolls’ heads for playful statement pots.
Tips for Success
- Always add drainage holes to prevent waterlogging.
- Use outdoor-safe paint or sealant to make your creations last longer.
- Mix and match styles to create a whimsical, eclectic garden display.
Would you like me to expand this into a craft-style guide with decorating techniques (like stenciling, mosaics, or decoupage) so it appeals to DIY crafters?