

Here are some fun and easy upcycled paper crafts for kids—perfect for reusing old newspapers, magazines, packaging, and scrap paper while sparking creativity:
1. Magazine Bead Jewelry
- Roll strips of colorful magazine paper around a pencil, glue the ends, and thread them onto string.
- Kids can make necklaces, bracelets, or keychains.
2. Paper Mosaics
- Tear or cut old paper into small squares.
- Use them to create mosaic art on cardboard or cardstock.
3. Rolled Paper Snail Shells
- Roll thin strips of paper into spirals.
- Use them to make snails, flowers, or decorative patterns.
4. DIY Paper Bags
- Transform old newspapers or wrapping paper into small gift bags.
- Add hand-drawn designs for a personal touch.
5. Toilet Paper Roll Binoculars
- Tape or glue two rolls together.
- Decorate with leftover paper scraps to make pretend play binoculars.
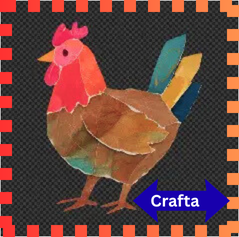
6. Paper Collage Animals
- Cut different colors and textures of scrap paper.
- Kids can arrange them into animals, flowers, or abstract art.
7. Homemade Paper Puppets
- Use cereal box cardboard as a base.
- Glue on magazine cutouts, draw faces, and attach popsicle sticks to make puppets.
8. Origami from Old Notebooks
- Repurpose the clean sides of used paper for origami shapes—frogs, cranes, or boats.
9. Recycled Paper Crowns
- Cut strips from cardboard packaging or poster paper.
- Decorate with magazine clippings, colored scraps, or tissue paper.
10. DIY Notebooks
- Stack scrap paper, fold in half, and staple or tie with yarn.
- Kids can decorate the covers with collage art.
✨ Bonus Tip: Encourage kids to save colorful wrappers, old greeting cards, and envelopes—they make great craft supplies!
Would you like me to make this into a step-by-step guide with photos/illustrations for kids, or more like a teacher’s project list with instructions?
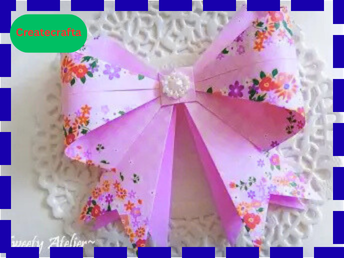
- Beaded Paper Butterfly
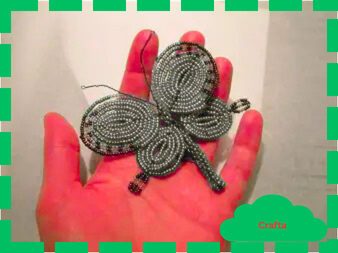
There are a lot of craft potential with accordion folding. Create this eye-catching yet basic butterfly. Allowing children to draw their own designs on the paper before cutting the butterfly shape will increase the amount of pleasure. Make sure the antenna has chenille stems! Add beads to the antenna to complete the creation.
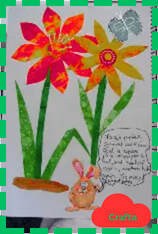
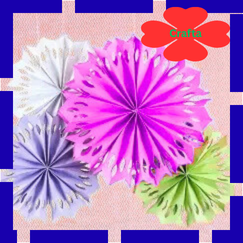
2. Paper Plate Flowers

Here’s a simple and fun guide for making Paper Plate Flowers with kids using upcycled materials: 🌸
DIY Paper Plate Flowers
Materials You’ll Need
- Old paper plates (reused from crafts or meals—just clean first)
- Leftover paint, markers, or crayons
- Scrap paper, tissue paper, or magazine cutouts for decoration
- Scissors
- Glue or tape
- Straws, sticks, or rolled-up paper for stems
Steps
- Cut the Petals
- Take a paper plate and cut slits around the edges toward the center.
- Round or point the tips to look like petals.
- Shape the Flower
- Bend the cut “petals” slightly forward to give the flower some dimension.
- Add Color
- Paint or color the petals with markers or crayons.
- For extra fun, use scrap magazine pieces or tissue paper to collage onto the petals.
- Make the Center
- Cut a circle from leftover paper, foil, or even a bottle cap, and glue it in the middle.
- You can also crumple a piece of tissue paper into a ball for a 3D center.
- Attach the Stem
- Use a straw, stick, or rolled-up scrap paper as the stem.
- Tape or glue it to the back of the flower.
- Optional Leaves
- Cut leaf shapes from green scrap paper or an old cereal box, then decorate and attach to the stem.
Fun Variations
- Layered Flowers: Stack two plates (one smaller) to make a double-petal effect.
- Sunflowers: Paint petals yellow, and glue sunflower seeds or brown paper in the center.
- Wall Art: Skip the stem and make a bouquet of paper plate flowers to hang as a mural.
Would you like me to also write this as a short classroom activity plan (objectives, materials, steps, time required) so teachers can use it directly?
3. Construction Paper Twirl Snake
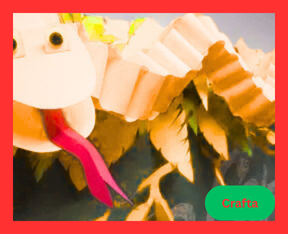

Your whirly snakes will come to life with a few easy cuts and an enjoyable rolling motion! Make a reptile pattern on the construction paper after cutting it lengthwise. To create a diamond shape for the head and tail, cut diagonally at both ends. For added personality, adhere a forked paper tongue and googly eyes!
4.. Rainbow Paper Craft
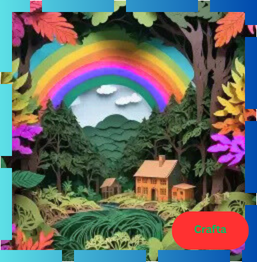
Here’s a simple and fun Rainbow Paper Craft idea for kids 🌈:
DIY Rainbow Paper Craft
Materials You’ll Need
- Scrap paper in rainbow colors (or white paper to color with crayons/markers/paint)
- Old cardboard or paper plate (for the base)
- Scissors
- Glue or tape
- Cotton balls, tissue paper, or scrap white paper (for clouds)
Steps
- Prepare the Base
- Cut a half-circle from cardboard or the rim of a paper plate.
- This will be the base to hold the rainbow.
- Cut the Rainbow Strips
- Use old colored paper, magazine pages, or hand-colored white paper.
- Cut into strips (about 1 inch wide).
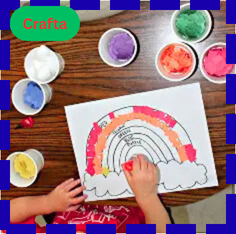
- Assemble the Rainbow
- Glue the strips onto the base in rainbow order: red, orange, yellow, green, blue, indigo, violet.
- Curve them to follow the shape of the half-circle.
- Add Clouds
- Glue cotton balls, crumpled white paper, or tissue paper at both ends of the rainbow.
- Decorate (Optional)
- Add glitter, stickers, or even draw sunshine and raindrops around the rainbow.
Fun Variations
- Hanging Rainbow: Punch a hole at the top and add string to hang your rainbow in a window.
- 3D Rainbow: Instead of gluing strips flat, curl them into arches and glue the ends down for a pop-up rainbow.
- Message Rainbow: Write a positive word or phrase (like Hope, Shine Bright, Be Kind) on each strip.
Would you like me to create a collection of rainbow-themed upcycled crafts (like rainbow wind catchers, rainbow collage from magazines, rainbow mobiles) so kids have more than one option?
5. Transfer Color with Tissue Paper
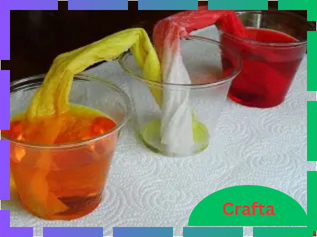
Give the children a white piece of paper and paintbrushes after cutting the tissue paper into little squares. Before letting it dry, place the tissue paper on the sheet of paper and paint it with water to make the pieces “stick” to it. The colour will then have been transferred to the backdrop sheet when you remove the tissue paper.
6. Textured Paper Collage
Here’s a fun and creative Textured Paper Collage activity kids can enjoy while reusing old and scrap materials: 🎨
DIY Textured Paper Collage
Materials You’ll Need
- Old newspapers, magazines, wrapping paper, and scrap paper
- Textured materials like tissue paper, sandpaper, cardboard, foil, bubble wrap, or fabric scraps
- Scissors (safety scissors for kids)
- Glue stick or liquid glue
- Cardboard base (old cereal box, shoebox lid, or thick paper)
Steps
- Prepare the Base
- Cut out a sturdy piece of cardboard or thick paper to use as your collage canvas.
- Choose a Theme
- Kids can make animals, flowers, landscapes, or abstract designs.
- Example: a fish made from shiny foil scales and tissue paper seaweed.
- Cut and Tear Materials
- Tear tissue paper for a crumpled effect.
- Cut foil or shiny wrappers into shapes for sparkle.
- Use corrugated cardboard for ridges.
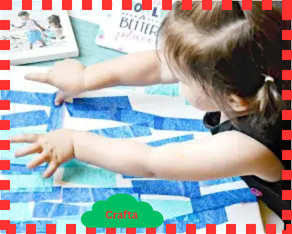
- Build Layers
- Start by gluing large background pieces (like blue paper for the sky or ocean).
- Add smaller textured pieces on top to create depth and patterns.
- Add 3D Effects
- Scrunch tissue paper into little balls.
- Fold or roll paper for raised textures.
- Use bubble wrap for bumpy surfaces.
- Finish with Details
- Use marker outlines or small cutouts to add eyes, outlines, or extra decoration.
Fun Variations
- Nature Collage: Trees with sandpaper trunks and tissue paper leaves.
- Ocean Scene: Foil fish, bubble wrap water, and tissue paper coral.
- Abstract Art: Random shapes and textures glued into colorful patterns.
👉 This activity helps kids explore textures, creativity, and recycling all at once.
Would you like me to create a ready-to-use printable template (with outlines like flowers, fish, or animals) so kids just glue textured paper onto them?
7. Adorable Paper Pinwheels
The wind is blowing! Start with a square piece of paper. Next, draw your diagonals using a ruler, then use scissors to cut them nearly to the centre. Use a flat-headed pushpin to secure to a straw or pencil eraser after folding each alternating point towards the centre.
8.. Tie Dye Coffee Filters
Here’s a bright and fun kids’ project using upcycled filters—Tie Dye Coffee Filters! 🌈
DIY Tie Dye Coffee Filters
Materials You’ll Need
- White coffee filters (unused or clean, flattened)
- Washable markers (bright colors work best)
- A spray bottle with water (or a small cup and paintbrush)
- Old newspaper or cardboard (to protect the table)
- Scissors (optional, for shaping)
Steps
- Flatten the Filter
- Lay the coffee filter flat on the table.
- Add Designs
- Use markers to draw shapes, stripes, or random scribbles all over the filter.
- Encourage mixing different colors—they’ll blend beautifully when wet.
- Spray with Water
- Lightly mist the filter with a spray bottle.
- Watch as the colors spread and blend into a tie-dye effect!
- (If no spray bottle, kids can dab water gently with a paintbrush.)
- Let Dry
- Place the wet filter on newspaper or cardboard.
- Allow to dry completely (about an hour).
- Optional Fun Extras
- Fold and cut the dried filters like snowflakes for cool patterns.
- Layer several dyed filters to make paper flowers (attach with pipe cleaners or twist ties).
- Use as sun catchers by taping them to a window.
Learning Twist for Kids
- Teaches color mixing (red + blue = purple, yellow + blue = green).
- Builds fine motor skills through drawing, spraying, and folding.
- Shows how capillary action spreads water and ink through paper.
Would you like me to also write a classroom version (with group setup, timing, and clean-up tips) so teachers can run this as a science + art activity?
9. Paper Flextangles
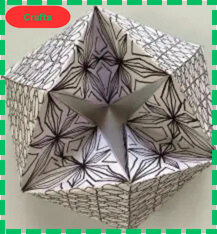
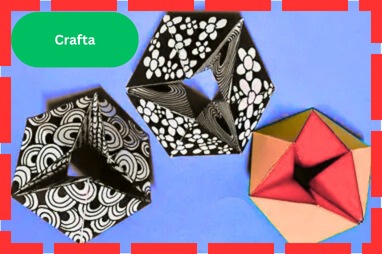
Since kids love fidget toys, flextangles are currently very popular. Use the template found at the following link to create a proportional one. After that, colour it using vibrant hues as directed by the tutorial, then tape and fold it till you have an endless flex angle!
10. Weaved Paper Hearts
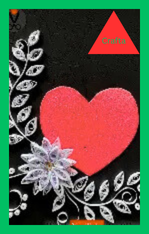
Here’s a sweet and simple guide for making Weaved Paper Hearts ❤️ —a fun craft for kids that also teaches patterning and fine motor skills.
DIY Weaved Paper Hearts
Materials You’ll Need
- Scrap construction paper, old gift bags, or magazine covers (2 different colors work best)
- Scissors
- Pencil
- Glue (optional, for securing edges)
Steps
- Cut the Heart Shapes
- Fold each piece of paper in half.
- Draw the outline of half a heart along the fold.
- Cut it out so when unfolded, you have a full heart shape.
- Prepare the Slits
- Keep the heart folded in half.
- Starting at the folded edge, cut 3–5 evenly spaced slits toward the curved side, but don’t cut all the way through.
- Do this for both heart shapes.
- Weave the Strips
- Place one heart vertically and the other horizontally.
- Gently weave the strips:
- Slide the first strip of Heart A over the first strip of Heart B, then under the next.
- Alternate the pattern until the strip is through.
- Repeat with the remaining strips, alternating the over/under pattern.
- Flatten & Secure
- Once woven, adjust so the strips lie flat.
- Add a dab of glue at the edges if you want the weaving to stay in place.
- Decorate (Optional)
- Add small paper cutouts, glitter scraps, or write a message on the heart.
- Punch a hole and add string if you’d like to hang it.
Fun Variations
- Mini Hearts: Use smaller hearts to make bookmarks or Valentine’s notes.
- Giant Heart Collage: Kids can each make one and join them together into a wall display.
- Recycled Version: Use old cereal boxes, magazine covers, or colorful junk mail.
Would you like me to also make a printable heart template with weaving lines so kids can just cut and weave directly without needing to draw shapes?
11. Green Paper Turtles
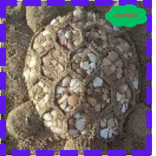
Cut a larger circle and strips of green paper for your turtle base and shell. Attach one side of the strip to the circle’s edge with glue. Glue it down after curling it around to the opposite side. Cut out a circle head and kidney-shaped legs from green paper. To add some personality, add googly eyes!
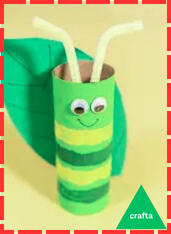
12. Paper Animal Bracelets
That’s a really fun idea! Kids love wearing their creations, and Paper Animal Bracelets are a perfect upcycled craft. 🐯🐰🐼
DIY Paper Animal Bracelets
Materials You’ll Need
- Strips of sturdy paper (recycled cereal boxes, card stock, or old folders work great)
- Scrap paper, magazine cutouts, or tissue paper for decorating
- Markers, crayons, or colored pencils
- Scissors (safety scissors for kids)
- Tape, glue, or stapler
- Optional: googly eyes, stickers
Steps
- Make the Bracelet Base
- Cut a strip of sturdy paper about 1–2 inches wide and long enough to wrap around the wrist.
- Decorate it with color, patterns, or textured scraps.
- Choose an Animal
- Popular choices: cat, dog, bunny, panda, tiger, owl, fish.
- Kids can either draw directly on the bracelet or make a separate paper cutout of the animal’s head.
- Create the Animal Face
- Cut a circle, oval, or shape for the animal’s head.
- Add ears, whiskers, or other features with scrap paper.
- Draw or glue on eyes, nose, and mouth.
- Attach the Face
- Glue or tape the animal face onto the middle of the bracelet strip.
- Add Extra Details
- Cut out paws, wings, tails, or fins to stick on the bracelet.
- Use scrap paper, tissue, or foil for fun textures.
- Fit the Bracelet
- Wrap the strip around the wrist and tape, staple, or glue the ends so it fits snugly (but not too tight).
Fun Variations
- Zoo Collection: Kids can make a set of bracelets (lion, elephant, monkey).
- Insect Bracelets: Use shiny foil or tissue paper for butterflies, ladybugs, or bees.
- Underwater Theme: Fish, octopus, and crab bracelets from colorful magazine pages.
- Friendship Animal Bracelets: Kids make one animal each and trade with friends.
👉 Would you like me to design a printable template set (with animal heads, ears, and bracelet strips) so kids can just cut, color, and assemble?
13. Awesome Paper Mache Pots

Modge-podge leftover tissue paper or construction paper onto a clear balloon or cup. Apply the adhesive thoroughly and use a lot of gooey modge-podge. For further texture and colour, let it dry between coats. Lastly, when it’s entirely dried, remove the container or open it!