Here’s a lively list of fun & stylish upcycled crafts you can dive into right now—each one practical, trendy, and eco-friendly:
♻️ Fun & Stylish Upcycled Craft Ideas
- Tin Can Lanterns – Punch patterns into old tin cans, add a tea light, and create glowing garden or balcony lights.
- Wine Bottle Vases – Paint, wrap with twine, or etch designs onto empty bottles for chic table décor.
- T-Shirt Tote Bags – Turn old tees into reusable shopping bags—no sewing required if you use clever knotting!
- CD Mosaic Frames – Break old CDs into shiny pieces and use them to decorate picture frames or mirrors.
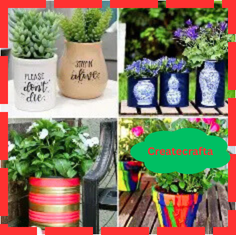
- Jar Herb Gardens – Repurpose glass jars into mini indoor gardens for basil, mint, or succulents.
- Sweater Pillow Covers – Upcycle cozy sweaters into stylish cushion covers for a rustic, hygge vibe.
- Bottle Cap Magnets – Add colorful paper or tiny photos to bottle caps, attach a magnet, and decorate your fridge.
- Drawer Knob Wall Hooks – Reuse old furniture knobs as unique, vintage-style wall hooks.
- Magazine Coasters – Roll strips of magazine pages tightly, glue, and seal for bold, artsy drink coasters.
- Painted Mason Jar Organizers – Perfect for holding pens, brushes, or kitchen utensils with a splash of color.
✨ These crafts aren’t just eco-friendly—they also look stylish enough to gift or sell at markets!
Do you want me to put together a step-by-step tutorial for a few of these, or would you like a Pinterest-style roundup with quick inspo descriptions?
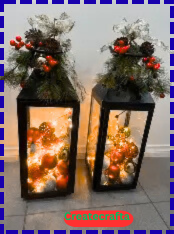

This simple upcycling project turns a plastic bottle into a pretty lantern with LED lights and a polished finish thanks to the ornamental paper wrapping. It’s an inventive method to provide a warm glow to any area and a cost-effective approach to give your home some flair and cosiness!
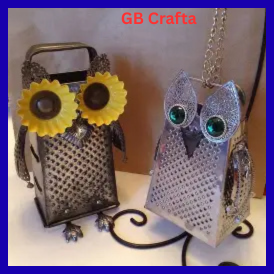
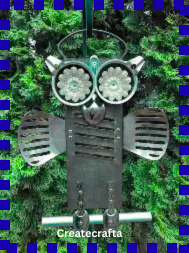
2. Kitchen Grater Owl metal garden art
Here’s a lively list of fun & stylish upcycled crafts you can dive into right now—each one practical, trendy, and eco-friendly:
♻️ Fun & Stylish Upcycled Craft Ideas
- Tin Can Lanterns – Punch patterns into old tin cans, add a tea light, and create glowing garden or balcony lights.
- Wine Bottle Vases – Paint, wrap with twine, or etch designs onto empty bottles for chic table décor.
- T-Shirt Tote Bags – Turn old tees into reusable shopping bags—no sewing required if you use clever knotting!
- CD Mosaic Frames – Break old CDs into shiny pieces and use them to decorate picture frames or mirrors.
- Jar Herb Gardens – Repurpose glass jars into mini indoor gardens for basil, mint, or succulents.
- Sweater Pillow Covers – Upcycle cozy sweaters into stylish cushion covers for a rustic, hygge vibe.
- Bottle Cap Magnets – Add colorful paper or tiny photos to bottle caps, attach a magnet, and decorate your fridge.
- Drawer Knob Wall Hooks – Reuse old furniture knobs as unique, vintage-style wall hooks.
- Magazine Coasters – Roll strips of magazine pages tightly, glue, and seal for bold, artsy drink coasters.
- Painted Mason Jar Organizers – Perfect for holding pens, brushes, or kitchen utensils with a splash of color.
✨ These crafts aren’t just eco-friendly—they also look stylish enough to gift or sell at markets!
Do you want me to put together a step-by-step tutorial for a few of these, or would you like a Pinterest-style roundup with quick inspo descriptions?
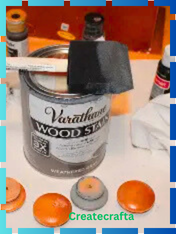
Give an old puzzle stool a trendy new function! A lost piece is creatively transformed into a massive wood board that is ideal for showcasing your favourite décor. With some sanding, staining, and adding beautiful little feet, you can create a rustic wood board suitable for showing candles, flowers, or decor pieces. It’s a great approach to give a cherished item a completely new look while keeping it around.
4. DIY Upcycled Utensil Holder
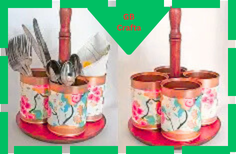
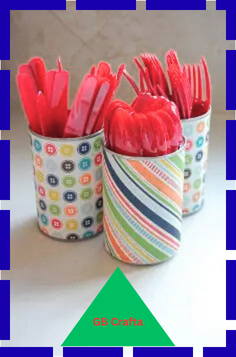
Here’s a fun DIY guide for making your own Upcycled Utensil Holder – stylish, eco-friendly, and super useful:
🛠 DIY Upcycled Utensil Holder
Materials You’ll Need:
- 1 large tin can (or multiple smaller ones)
- Sandpaper (to smooth edges)
- Acrylic paint or spray paint (your choice of color)
- Paintbrush (if using acrylic paint)
- Jute rope, twine, or fabric scraps (optional for decoration)
- Hot glue gun or strong craft glue
- Scissors
- Clear sealant spray (optional, for durability)
Steps:
- Prepare the Can
- Wash and dry your tin can thoroughly.
- Remove the label and any glue residue.
- Sand down the sharp edges at the top to make it safe.
- Paint It
- Apply a base coat of spray paint or acrylic paint.
- Let it dry, then add another coat for even coverage.
- For a rustic look, lightly sand some areas after painting for a distressed effect.
- Decorate
- Wrap jute rope or twine around the middle or bottom of the can, securing with hot glue.
- Add fabric scraps, lace, or washi tape for extra style.
- You can even stencil patterns or paint designs for a personalized touch.
- Seal & Finish
- Spray with a clear sealant if you want it to resist scratches and water.
- Fill It Up
- Place your cooking utensils, paintbrushes, craft tools, or even cutlery inside.
🌟 Style Variations
- Farmhouse Chic: White paint + burlap wrap.
- Boho Vibe: Bright colors + pom-poms or beads.
- Industrial: Leave it metallic with just a clear coat.
- Minimalist: Matte black or white with simple labeling.
Would you like me to make you a step-by-step photo-style layout (Pinterest board style) for this project, so it’s easier to follow visually?
5. Creative DIY Flower Pot Idea
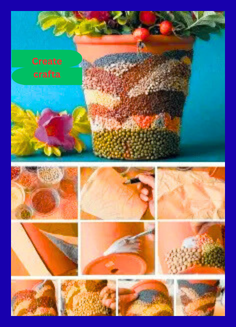
With just a few easy steps, this enjoyable do-it-yourself project transforms a plain flower bucket into a stunning display item. It may be transformed from boring to charming by adding ornamental components and painting it, which makes it ideal for showcasing flowers or as a stand-alone accent.
6. Sunburst In The Dining Room
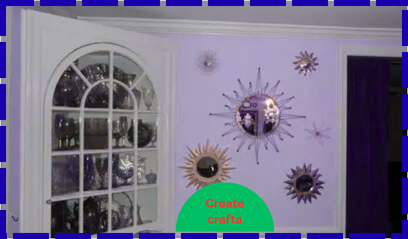

A sunburst in the dining room can be such a stylish, eye-catching feature! 🌞 It instantly adds warmth, energy, and a touch of glamour. Here are some ideas depending on how bold or subtle you want to go:
🌟 Sunburst Dining Room Ideas
- Sunburst Mirror Centerpiece
- Place a large sunburst mirror on the main dining wall—it doubles as a focal point and reflects light beautifully.
- Metallic finishes (gold, bronze, or silver) give a glam look, while wood tones feel rustic and earthy.
- Sunburst Chandelier
- A starburst/sputnik-style chandelier above the dining table creates instant drama.
- Choose brass or matte black for mid-century modern vibes, or crystal accents for elegance.
- Sunburst Wall Art
- Use reclaimed wood, painted dowels, or even upcycled cutlery to create a DIY sunburst art piece for the wall.
- Perfect if you love a handmade, eco-chic touch.
- Painted Sunburst Accent Wall
- Try a mural effect with paint or wallpaper behind your dining table—rays expanding outward for a bold statement.
- Neutral colors keep it subtle, while gold or warm yellow pops add energy.
- Table Setting Details
- Sunburst placemats (woven, metallic, or fabric) can carry the theme in a softer, functional way.
- Pair with round dinnerware for harmony.
✨ Style Tip: Sunburst décor works best as a single bold statement in the room—either the mirror, chandelier, or mural—so it feels striking but not overwhelming.
Would you like me to put together a DIY tutorial for a handmade sunburst mirror/wall art (using upcycled items like sticks, skewers, or old cutlery), or more of a mood-board style inspiration roundup for dining room design?
7. Recycled Glass Jars Turned Stylish Office Storage
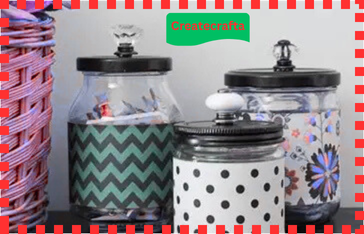
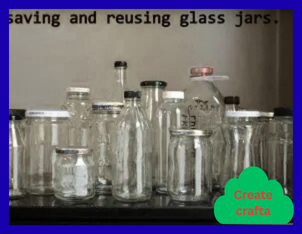
Transform your old glass jars into stylish workplace organisers with a fantastic makeover! This simple project turns repurposed jars into chic storage options for pens, craft items, or even workplace knickknacks using spray paint, scrapbook paper, and ornamental knobs. It’s an inexpensive approach to maintain a tidy and stylish workstation.

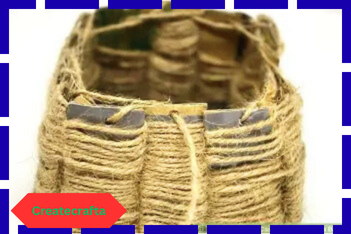
Here’s a simple idea for turning boxes into baskets:
Instead of throwing away cardboard boxes, you can transform them into beautiful storage baskets.
How to make it:
- Choose a box – Any sturdy cardboard box will work (like a shoebox or a cereal box).
- Cut to size – Trim the box to the height you’d like your basket to be.
- Wrap with rope, fabric, or paper – Use jute rope, old fabric strips, or even colored paper to cover the box, gluing as you go.
- Add handles (optional) – Cut small holes on each side or attach a strip of fabric or rope for handles.
- Line the inside – Add fabric or paper inside to give it a finished look.
Uses:
- Organize toys, books, or crafts.
- Store pantry or bathroom items.
- Decorate shelves while keeping clutter hidden.
Would you like me to give you step-by-step DIY instructions with pictures for making one?
9. Upcycled Coffee Canister Craft with Decoupage
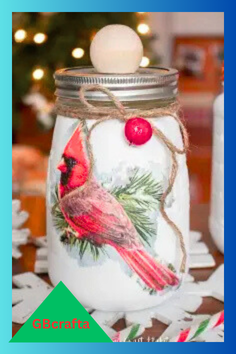
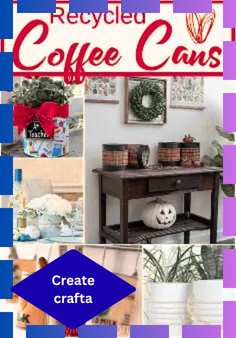
Ordinary coffee containers can be transformed into ornamental storage pieces with a little decoupage magic. The completed items are gorgeous and ideal for keeping everything organised, from craft supplies to household necessities.
10. How to Decorate Cookie Tins with Fabric

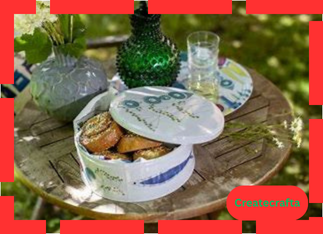
Here’s a simple guide for decorating cookie tins with fabric to turn them into beautiful storage or gift containers:
Materials Needed:
- Empty cookie tin (washed and dried)
- Fabric of your choice (cotton, linen, or patterned cloth)
- Fabric scissors
- Mod Podge or white craft glue
- Foam brush or paintbrush
- Ribbon, lace, or trim (optional)
- Hot glue gun (optional, for stronger hold)
Steps:
- Measure the Tin
- Use a measuring tape to find the height and circumference of the tin.
- Cut your fabric to fit, leaving about 1 inch extra on each side for folding.
- Prepare the Tin
- Wipe the outside of the tin to remove any grease or dust so the glue sticks well.
- Apply Glue
- Use Mod Podge or glue and spread a thin, even layer on the outer surface of the tin.
- Wrap the Fabric
- Carefully place the fabric around the tin, smoothing it out to remove wrinkles or bubbles.
- Overlap the ends slightly for a neat seam.
- Secure the Edges
- Fold the extra fabric over the top and bottom edges, gluing it down neatly inside the rim.
- If the tin has a lid, cut out a fabric circle slightly larger than the lid, then glue it down, folding edges under.
- Add Decorative Touches
- Attach ribbon, lace, or trim around the edge of the lid or bottom with hot glue for a polished look.
- You can even add buttons, bows, or labels.
Ideas for Use:
- Store sewing supplies, tea bags, or craft items.
- Use as a gift container for cookies or small treats.
- Make matching sets for home décor storage.
Would you like me to also give you design style ideas (like rustic, modern, vintage, or festive) for decorating your tins with fabric?
11. Upcycle Sweaters to Make Throw Pillow Covers

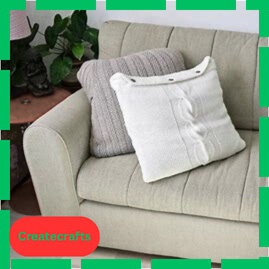
Crafting gold may be made from old sweaters! Utilise them to create soft accessories, seasonal decorations, or home décor that maintains their cosy texture while updating their appearance. They become soft, textured pillow coverings for your bed or sofa with this easy and enjoyable craft. You can make lovely pillows that give your room a cosy, lived-in vibe with a little cutting, stitching, and imagination.

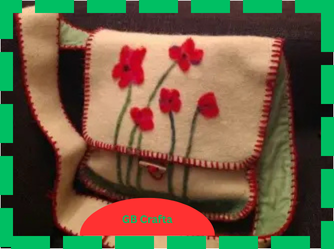
Here’s a creative idea for a Felt Upcycle Project – perfect for reusing leftover or old felt pieces:
Felt Upcycle Project: DIY Coasters
Instead of tossing scrap felt, you can transform it into colorful and useful coasters.
Materials Needed:
- Felt scraps (different colors work best)
- Scissors
- Fabric glue or needle and thread
- A circular template (cup or lid)
Steps:
- Cut Shapes – Trace circles (or squares/hearts for fun designs) onto the felt scraps and cut them out.
- Layer or Stitch – For thicker coasters, glue or stitch two or three felt shapes together.
- Decorate – Use smaller felt scraps to cut out patterns (like flowers, stars, or stripes) and glue them onto the top.
- Finish – Let the glue dry, or stitch around the edges for durability.
Other Upcycle Ideas with Felt:
- Keychains – Cut shapes like hearts or animals, stuff lightly with cotton, and sew.
- Bookmarks – Layer scraps into long rectangles or fun shapes.
- Garlands – String together colorful felt shapes for room or party décor.
- Pin Cushions – Sew small felt squares or circles, stuff, and decorate.
Would you like me to create a list of 10+ quick felt upcycle projects (from easy to advanced) so you can pick what inspires you most?
13. Upcycle A Placemat Into A Basket
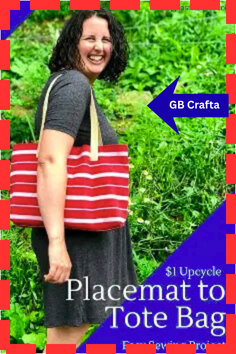
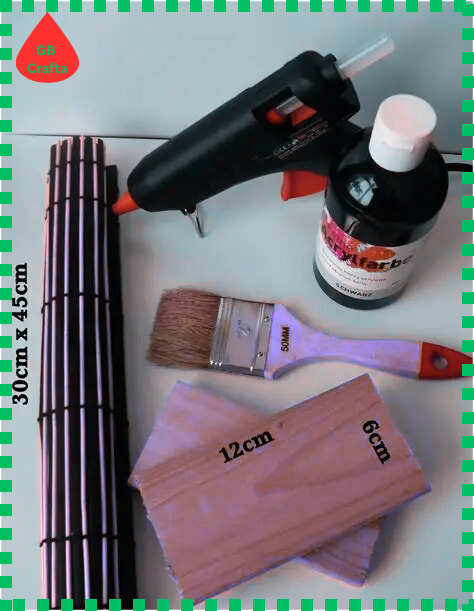
All you need to do is fold and sew flat placemats into chic storage baskets. These baskets are useful, stylish, and ideal for adding some individuality while maintaining organisation in your area.