

Here are fun, fresh, and easy Earth Day crafts for 2025 — great for kids, classrooms, and family activities!
🌍 FUN Earth Day Crafts for 2025
Bright, hands-on ideas using recycled materials, nature items, and simple supplies.
🪴 1. Mini Greenhouse Seed Pods (2025 Trend!)
Use empty egg cartons + clear plastic lids to create tiny “greenhouses.”
Kids can plant seeds and watch them sprout.
You need: egg carton, soil, seeds, spray bottle, plastic cover.
🎨 2. Tissue Paper Earth Suncatcher
A vibrant window craft that glows beautifully in sunlight.
Supplies: blue & green tissue squares, contact paper, scissors, black paper frame.
🧃 3. Recycled Juice Box Bird Feeder
Upcycle empty juice boxes into cute bird feeders painted like tiny houses.
Supplies: juice box, twine, paint, birdseed.
♻️ 4. Bottle Cap Earth Mosaic (Super Fun for Groups!)
Collect blue, green, and white bottle caps and arrange into a big circular Earth artwork.
Perfect for: schools, community centers, eco events.
💧 5. Water Cycle in a Bag Experiment Craft
A craft + science combo! Create a “weather in a bag” window display.
Draw clouds, sun, arrows to show evaporation and precipitation.
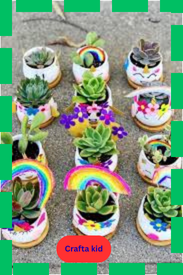
🍃 6. Nature Imprint Air-Dry Clay Medallions
Press leaves, flowers, or herbs into clay circles.
Paint with eco-friendly colors once dry.
🧵 7. T-Shirt Tote Bag No-Sew Craft
Turn an old T-shirt into a stylish, reusable tote bag.
Supplies: old T-shirt, scissors, optional marker decoration.
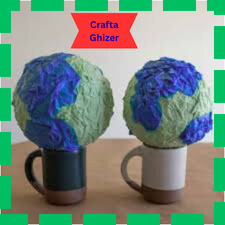
🗞️ 8. Newspaper Planet Earth Collage
Tear up newspaper pieces, dye them with watercolor, and assemble into a textured Earth collage.
🐝 9. Bee & Butterfly Hotel (Kid-Friendly Version)
Fill a tin can with paper tubes, twigs, and pinecones to help pollinators thrive.
🥚 10. Eggshell Garden Creatures
Draw faces on eggshells, fill with soil + grass seed, and watch “hair” grow.
🌱 11. Eco-Friendly Slime (New 2025 Recipe!)
Use plant-based starch and soap-free color for a greener, safe slime experience.
✨ Want More?
I can also create:
- Printables (Earth templates, worksheets, coloring pages)
- Step-by-step instructions
- Crafts for preschool, classroom, or teens
- A themed activity guide for Earth Day 2025
Would you like a full craft list, detailed instructions, or age-specific ideas?
- Plate Earth Craft
Cet artisanat pour la Journée de la Terre est amusant et simple à réaliser pour les enfants !
J’apprécie les bricolages simples avec des assiettes en papier. C’est incroyable comment vous pouvez transformer une assiette en quelque chose d’aussi amusant.
Comment réaliser cette activité ?
A. Matériaux requis assiette en papier
Peinture acrylique Pinceau Papier de construction Ciseaux Crayon Colle
B. Set-up
Faites le contour des mains de votre enfant sur du papier coloré. Alors, prenez votre peinture et votre plateau !
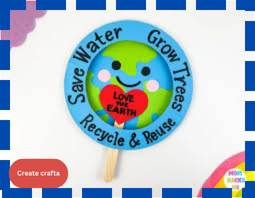
C. Activity
Peins une assiette en papier de bleu et vert. Indiquez que les zones bleues symbolisent l’eau, tandis que les zones vertes désignent la terre.
Lorsque l’assiette est sèche, vous pouvez dessiner un cœur au centre et demander aux enfants de le colorier en rouge.
Placez les mains de votre enfant de chaque côté de l’assiette en papier pour qu’ils puissent tenir le monde entre leurs mains !
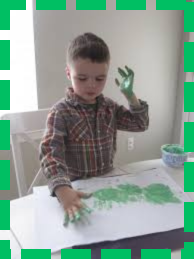
2. Fingerprint Earth -updated for 2025

Here is a fresh, modern 2025 version of the classic “Fingerprint Earth” craft — brighter, easier, and more meaningful for kids!
🌍 Fingerprint Earth (2025 Updated Version)
A quick, adorable craft using fingerprints to form continents, oceans, and even tiny icons representing caring for the planet.
🎨 What’s New for 2025?
✔ Uses washable gel ink pads for cleaner blending
✔ Adds mini fingerprint icons (trees, hearts, raindrops)
✔ Optional AR-style outline — a subtle glow ring around Earth
✔ Includes a “My Promise to Earth” pledge space
✔ Works great as a classroom bulletin board for Earth Day 2025
🧰 Materials
- White cardstock or watercolor paper
- Blue + green washable ink pads (gel pads blend best)
- Black fine-tip marker
- Optional: metallic gel pen for the 2025 glow ring
- Wet wipes or small water bowl for cleanup
🪄 How to Make the 2025 Fingerprint Earth
1. Draw the Earth Outline
Lightly sketch (or print) a circle.
Add a thin outer ring and color it with a silver/blue metallic pen for a soft 2025 “glow.”
2. Fingerprint Oceans (Blue)
Use your index finger to stamp blue fingerprints around the circle first.
Blend slightly by overlapping prints.
2025 Tip:
Use two shades of blue for a modern watercolor effect.
3. Fingerprint Continents (Green)
Stamp green fingerprints in clusters to suggest continent shapes.
No accuracy needed — the fingerprint texture creates a beautiful abstract Earth.
4. Add Mini Icon Fingerprints (Optional but fun!)
Use tiny fingertip prints to add:
- Green thumbprint = tree top
- Blue pinky print = raindrop
- Red thumbprint = heart
Then draw simple stems or outlines with a pen.
Great for classroom Earth Day displays!
5. Add Details
Use your black marker to:
- Outline the circle
- Add simple cloud swirls
- Add the words Earth Day 2025 or Love Your Planet
6. (Optional) Add a “My Promise to Earth” Strip
At the bottom, kids write one promise, such as:
- “I will reuse more.”
- “I will plant seeds.”
- “I will turn off lights.”
⭐ 2025 Classroom Display Idea
Arrange all student Fingerprint Earths on a big board with the title:
“Every Fingerprint Makes a Difference — Earth Day 2025”
Add green string connecting each fingerprint Earth to a shared globe in the center.
Would you like:
- a printable Earth circle template,
- a step-by-step kid-friendly instruction sheet, or
- a poster design for classroom use?
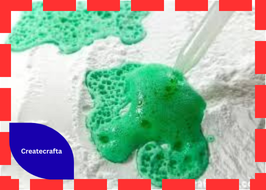
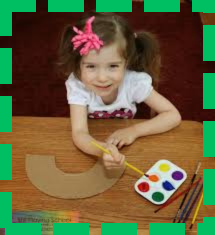
3. Puffy Paint Earth

Créez votre propre peinture en relief en quelques étapes simples.
Cette activité manuelle pour la Journée de la Terre est très amusante à réaliser pour les enfants. Ils vont adorer le processus de création de la peinture gonflante et la sensation qu’elle procure.
How to do this activity
A. Materials you need
crème à raser colorant alimentaire colle Elmer’s
bols pinceaux imprimible gratuit Earth
B. Set-up
Pour réaliser de la peinture gonflante, mélangez des quantités égales de mousse à raser et de colle dans un récipient.
Réalisez cela deux fois et ajoutez du colorant alimentaire pour obtenir des teintes bleues et vertes.
C. Activity
Imprimez la forme de la Terre. Ensuite, demandez aux enfants de prélever la peinture gonflante et de l’étaler sur la Terre à l’aide d’un pinceau.
Une fois que les enfants ont terminé de peindre, laissez-le sécher. Il faut environ trois heures pour qu’il sèche ! Ça a une texture malléable ! C’est un projet artistique tellement amusant.
4. Walking Dinosaur Paper Plates
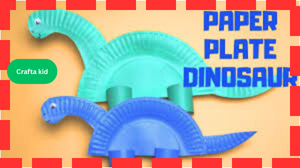

Here’s a fun, kid-friendly craft: Walking Dinosaur Paper Plates — a moving dinosaur made from simple supplies! Perfect for Earth Day, classroom crafts, or dino-themed activities.
🦕 Walking Dinosaur Paper Plate Craft (2025 Version!)
A bright, movable dinosaur made from paper plates that “walks” when you pull a string or push its legs.
🧰 Materials
- 2 paper plates (plain or colored)
- Construction paper (green, blue, or any dino color)
- Scissors
- Glue or tape
- Brass fasteners (paper fasteners)
- Googly eye
- Hole punch
- Yarn or string (for the walking pull)
- Markers/paint (optional for decorating)
🪄 How to Make It (Step-by-Step)
1. Make the Dinosaur Body
- Fold a paper plate in half.
- This folded plate will be the body and belly of the dinosaur.
- Paint or color it if you’d like.
2. Create the Head + Tail
From construction paper, cut out:
- A dinosaur head with long neck
- A tail
Glue or tape the head to the inside of one end of the folded plate.
Attach the tail to the opposite end.
3. Cut & Attach the Legs (This Makes It “Walk”)
- Cut four legs from construction paper (thick legs work best).
- Punch a small hole at the top of each leg.
- Punch two holes on each side of the paper plate body (front and back positions).
- Attach the legs with brass fasteners — this allows the legs to move freely.
4. Add the “Walking Pull” String (Optional but Fun!)
- Punch a small hole at the front bottom of the plate.
- Tie a piece of yarn.
- When kids pull the string, the paper legs shake and swing — making the dinosaur appear to walk.
5. Add Details
- Glue on a googly eye.
- Add plates, spikes, or spots out of construction paper.
- Draw a smile or teeth with marker.
- Add patterns or color designs for a 2025 look (rainbow spikes, ombré body, neon patterns).
🦖 2025 Upgrade Ideas
- Make a Triceratops frill or Stegosaurus back plates from folded paper.
- Add paper accordion legs for a bouncy walk.
- Create a dino family using different colored plates.
- Turn the dinosaur into an Earth Day “Recycle-O-Saurus” using only recycled paper.
🎉 Classroom Display Title Ideas
- “Our Walking Dinosaurs!”
- “Dino Parade 2025”
- “Stomp, Shuffle, Walk!”
If you want, I can make:
✅ a step-by-step printable guide,
✅ a template for the legs/head, or
✅ themed versions (T-Rex, Brachiosaurus, Stegosaurus, Triceratops).
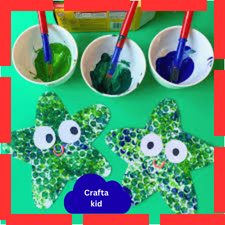
5. Earth Sponge Crafta
J’adore utiliser des éponges pour réaliser des activités manuelles avec les enfants. Ils sont l’outil idéal pour que les enfants puissent le tenir et l’utiliser facilement.
Ce bricolage pour la Journée de la Terre est simple et amusant pour les enfants, qui peuvent observer les impressions qu’ils créent avec des éponges.
How to do this activity
A. Materials you need
éponges ciseaux marqueur Sharpie
Peinture bleue et verte
papier cartonné
B. Set-up
Utilisez un marqueur Sharpie pour dessiner une forme circulaire sur une éponge. Ensuite, éliminez-le.
C. Activity
Peignez l’éponge en vert et bleu pour représenter la Terre.
Demandez aux enfants de retourner l’éponge et d’y faire des empreintes sur du papier blanc ou noir. Il se peut qu’ils doivent retoucher certaines parties de l’éponge pour que les impressions apparaissent clairement à chaque fois.
Ils vont adorer ce bricolage simple pour le jour de la Terre !
6: Recycled Robot Crafta
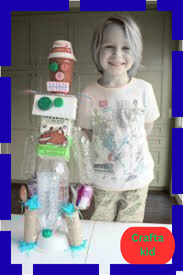
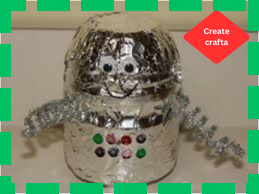
Here’s a fun, kid-friendly Recycled Robot Craft (updated 2025 version!) using everyday household materials. Perfect for Earth Day, STEM week, or creative play.
🤖 Recycled Robot Craft (2025 Edition)
A build-your-own robot made entirely from recyclables — boxes, tubes, lids, foil, and random bits kids LOVE to repurpose.
🧰 Materials (Use What You Have!)
- Small cardboard boxes (cereal, tea, soap, snack boxes)
- Toilet paper or paper towel tubes
- Bottle caps & lids (buttons, knobs, eyes)
- Aluminum foil or silver paper
- Scrap cardboard pieces
- Glue or tape
- Markers or paint
- Optional: straws, pipe cleaners, old buttons, bolts, string, googly eyes
🪄 How to Make Your Recycled Robot
1. Build the Robot Body
- Choose 1 box as the main body.
- Wrap it in foil for a classic robot look, or leave it natural for a recycled aesthetic.
2. Add the Head
- Use a smaller box (tea box or snack box).
- Attach it to the top of the body with glue or tape.
- Cover with foil or decorate with markers.
3. Create the Arms
- Use paper towel tubes, folded cardboard strips, or straw pieces.
- Attach on each side.
- Want a bendy robot? Add accordion-folded paper arms!
4. Add Legs
Choose from:
- Tubes
- Stacked bottle caps
- Small boxes
- Rolled cardboard
Glue or tape them to the bottom of the body.
5. Make Robot Features
Use recyclables to add details!
Ideas:
- Bottle cap eyes
- Button knobs as belly controls
- Foil squares as screens
- Cardboard gears
- Straws as antennas
- Pipe cleaners for springs and wires
- Lids as ears or shoulder pads
6. Decorate Your Robot
- Draw buttons, numbers, and lights with markers.
- Add a robot name tag (e.g., “EcoBot 3000,” “RecycleTron,” “Spark-O-Bot”).
- Color the foil with permanent markers for rainbow robots.
⭐ 2025 Upgrade Ideas
- Add a solar panel made from scrap black paper.
- Create a heart window showing “recycled items inside.”
- Use QR-style doodles to make it look futuristic.
- Attach wheels from old toy parts for a rolling robot.
- Make a full robot family using different-sized boxes.
🪧 Classroom Display Title Ideas
- “Meet Our RecycleBots!”
- “Robots Built From Rubbish!”
- “Earth Day Eco-Robots 2025”
Want me to make a step-by-step printable, templates, or robot name ideas?
7. Free Earth Day Color by Code


Prenez mes fiches de coloriage par code pour la Journée de la Terre GRATUITEMENT ! Les enfants adoreront colorier les images pour voir leur révélation !
C’est un bricolage facile à faire avec vos enfants pour la Journée de la Terre cette année.
How to do this activity
A. Materials you need
Codes de couleur pour la Journée de la Terre : crayons et marqueurs.
B. Set-up
Imprimez les fiches de travail sur lesquelles vous souhaitez que les enfants travaillent.
C. Activity
Les enfants examineront la clé de chaque feuille colorier par code et associeront les couleurs aux chiffres de l’image.
Vérifiez s’ils peuvent compléter toute la feuille de travail ! Ces éléments seraient un excellent complément à votre unité sur le Jour de la Terre.
8. Cardboard Rainbow Crafta
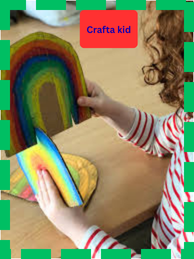
Here’s a bright, easy, kid-friendly Cardboard Rainbow Craft — perfect for Earth Day, recycling units, or colorful classroom displays!
🌈 Cardboard Rainbow Craft (2025 Edition!)
A vibrant rainbow made entirely from recycled cardboard + scrap paper. Simple, sturdy, and very cute for kids.
🧰 Materials
- Recycled cardboard (shipping box, cereal box, etc.)
- Scissors or craft knife (adult use)
- Glue stick or white glue
- Colored paper scraps
(or tissue paper, paint, or markers) - Cotton balls, pom-poms, or scrap white paper for clouds
- Optional: string for hanging
🪄 How to Make It (Step-by-Step)
1. Cut the Rainbow Shape
- Draw a large arch on the cardboard.
- Draw a smaller arch inside it.
- Cut out the rainbow “band” shape.
- Optionally make two, one for the front and one for support.
2. Add Rainbow Stripes
You can decorate each band using:
Option A — Scrap Collage (most eco-friendly!)
- Tear or cut colored paper into small pieces.
- Glue each color in rows (red → orange → yellow → green → blue → purple).
Option B — Paint
- Paint stripes directly onto the cardboard.
Option C — Tissue Paper Dabs
- Wad tissue paper squares into mini puffs and glue them on.
3. Make Cloud Ends
- Glue cotton balls, scrunched white paper, or cardboard cloud shapes to both ends.
- Add sparkle glue or silver marker for a 2025 shimmer effect.
4. Add a Stand or Hanging String (Optional)
- Attach a folded cardboard triangle to the back to help it stand,
OR - Punch a hole at the top and tie a string to hang it.
⭐ 2025 Upgrades & Variations
- Use rainbow gradients (ombre) instead of solid stripes.
- Add tiny positive message tags:
- “Shine Bright!”
- “Choose Kindness!”
- “Color the World Green!”
- Sprinkle the rainbow with eco-friendly glitter or metallic pen highlights.
- Make a giant classroom rainbow where each student contributes one cardboard piece.
🪧 Display Ideas
- “Brightening Our Earth – 2025”
- “Recycled Rainbows, Happy Planet!”
- “Coloring the World with Kindness”
If you’d like, I can create:
🌈 step-by-step printable,
📎 cloud & rainbow outline template, or
🎉 a full rainbow-themed craft pack.
9. Toilet Paper Roll Ladybugs
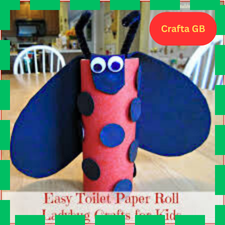
Ce bricolage pour la Journée de la Terre est adorable pour le printemps ! Il est parfait de réutiliser les rouleaux de papier toilette pour fabriquer des objets d’artisanat.
Cette activité manuelle de coccinelle est adorable ! C’est incroyable comment on peut transformer un simple rouleau de papier toilette en adorables objets fait main.
How to do this activity
A. Materials you need
rouleaux de papier toilette peinture noire pinceau
Yeux mobiles Colle Papier rouge Ciseaux
B. Set-up
Peignez les rouleaux de papier toilette en noir ! Nous privilégions l’utilisation de la peinture acrylique car elle donne un rendu plus audacieux.
C. Activity
Fabriquez deux demi-cercles en papier rouge pour représenter les ailes de la coccinelle. Demandez aux enfants de réaliser des points sur la coccinelle en utilisant l’empreinte digitale !
Collez-les avec de la colle en stick ou, pour garantir une fixation plus durable, optez pour de la colle chaude.
Collez les yeux mobiles et utilisez des chenilles pour faire les antennes. Découpez de petits morceaux de fil chenille et roulez légèrement les extrémités pour qu’elles ressemblent à une antenne.
10: Bubble Wrap Art

Here’s a fun, colorful, kid-friendly Bubble Wrap Art craft — perfect for Earth Day, texture painting, or just a messy art day!
🎨 Bubble Wrap Art (2025 Edition!)
Bubble wrap = instant texture stamps! Kids LOVE the popping feel and the dotted patterns.
🧰 Materials
- Bubble wrap (small or large bubbles)
- Washable paint (any colors)
- Paint rollers or brushes
- White cardstock or large sheets of paper
- Tape (to secure bubble wrap)
- Paper plate or paint tray
- Optional: markers, scissors, stencils, glue
🪄 How to Make Bubble Wrap Art
1. Prepare the Bubble Wrap
- Cut pieces of bubble wrap into squares or shapes.
- Tape the bubble-side OUT onto the table or wrap it around a block/roller.
2. Add Paint
- Pour paint onto a tray.
- Lightly dab or roll paint onto the bubble side.
- Don’t overload — thin layers make cleaner dots.
3. Stamp Your Pattern
Press the painted bubble wrap onto paper and peel it up.
Kids will see a perfect field of circles!
🌈 Fun 2025 Variations
🍉 1. Bubble Wrap Stamps
Cut bubble wrap into shapes:
- circles
- hearts
- clouds
- leaves
- Earth shapes
- dinosaur footprints
Stamp them in different colors!
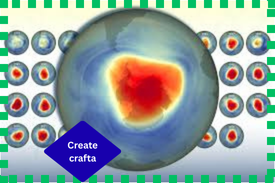
🌍 2. Bubble Wrap Earth Painting
- Paint bubble wrap with blue + green
- Press onto a circle of cardstock
A quick, textured Earth Day art piece.
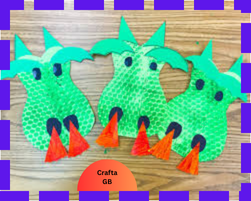
🦋 3. Bubble Wrap Butterfly Wings
- Cut a butterfly shape
- Paint bubble wrap in rainbow bands
- Stamp onto both wings
Add pipe cleaner body & googly eyes.
🎨 4. Bubble Wrap Backgrounds
Use bubble wrap to make:
- underwater bubbles
- snowy scenes
- starry skies
- dinosaur egg textures
- robot textures (great with silver paint!)
🎒 5. Bubble Wrap Roller Painting
Wrap bubble wrap around:
- a rolling pin
- a cardboard tube
Roll it through paint → across paper
Creates a dotted track effect.
⭐ Display Ideas
- “Pop into Art!”
- “Bubble Wrap Masterpieces – 2025”
- “Textures of the Earth” (for Earth Day displays)
If you’d like, I can create:
🎨 printable templates,
🖼️ theme-specific bubble wrap art ideas (dinosaurs, Earth Day, ocean, space), or
📘 a step-by-step instruction sheet.