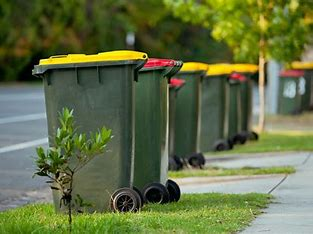
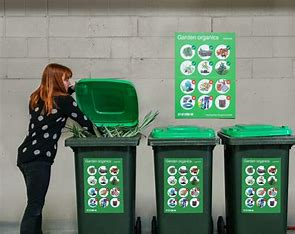
Your recycling container will become the focal point of all the fun with these recycling games!
1. Students use easy-to-find items to make their own basketball game
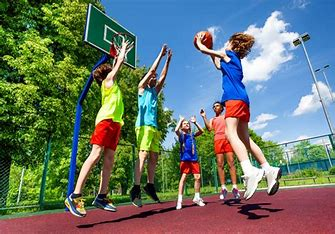

Creating a homemade basketball game can be a fun and creative project for students. Here’s a simple way to make your own basketball game using easy-to-find items:
Materials Needed:
- A small hoop or a makeshift hoop: You can use a plastic cup, a small basket, or a paper plate. If you have a mini hoop from a toy set, that works too.
- A small ball: A ping pong ball, a rubber ball, or even a crumpled piece of paper will work.
- A backboard: Use a piece of cardboard, a large book, or a clipboard.
- Tape or glue: to attach the hoop to the backboard.
- A marker or colored paper: for decorating the backboard and hoop.
Instructions:
- Prepare the backboard:
- Take your cardboard, book, or clipboard and decorate it with markers or colored paper if you like.
- This will be the structure that holds the hoop in place.
- Make the hoop:
- If you’re using a plastic cup, cut a small section out to create an open ring, or leave it as is for a small, enclosed hoop.
- For a paper plate, cut out the center to make a ring. You can also use a small basket or any round object that can serve as a hoop.
- Attach the hoop to the backboard.
- Secure the hoop to the backboard using tape or glue. Make sure it’s centered and at a comfortable height for shooting.
- Create a base:
- If you want your game to be more stable, you can create a base by taping or gluing the bottom of the backboard to a flat surface like a table or a larger piece of cardboard.
- Set Up the Playing Area:
- Find a suitable spot for your game. You can set it up on a desk, a table, or any flat surface.
- Start Playing:
- Use your small ball or crumpled paper as the basketball. Try to shoot it into the hoop from various distances.
Variations:
- Scoring: Assign point values for different shooting distances or challenges.
- Obstacles: Add obstacles to make the game more challenging, like stacking books or placing items around the playing area.
This homemade basketball game is a great way to have fun and be creative with what you have around the house. Enjoy!
2. Turn water bottles into field goal posts for some football-themed fun
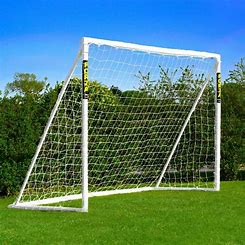
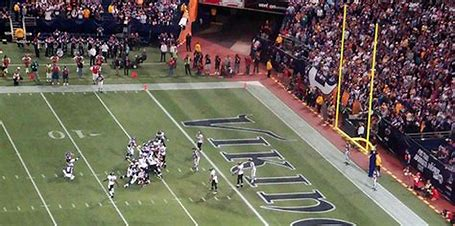
Turning water bottles into field goal posts is a fun and easy way to create a football-themed game. Here’s how you can do it:
Materials Needed:
- Empty water bottles: two for the goal posts and additional ones for stability.
- A small piece of cardboard or a flat surface: To serve as the base.
- Tape or glue: To attach the bottles and secure them.
- A small ball: Like a ping pong ball or a foam ball, to serve as the football.
- Markers or colored paper: For decorating, if desired.
Instructions:
- Prepare the base:
- Take your piece of cardboard or flat surface. This will act as the base to hold the field goal posts upright.
- Prepare the water bottles.
- If you have extra water bottles, you can use them to help stabilize the field goal posts. Fill two water bottles with some water or sand to add weight. These will be the basis of your goal posts.
- Create the Field Goal Posts:
- Take two empty water bottles for the goal posts. Place these bottles upright on the base (cardboard or flat surface).
- Use tape or glue to securely attach the bottles to the base, ensuring they are evenly spaced apart and stand upright.
- Attach the crossbar.
- Use another empty water bottle or a piece of cardboard to create the crossbar of the goal post.
- If you use a water bottle, cut it to form a flat strip, then tape or glue it across the top of the two goalpost bottles.
- If you use cardboard, cut it to fit across the top and tape or glue it to the top of the two goalpost bottles.
- Decorate:
- Use markers or colored paper to decorate your field goal posts if you like. You can add numbers, colors, or team logos to personalize your setup.
- Start Playing:
- Use your small ball (a ping pong ball or foam ball) as the football. Try to kick or throw the ball through the field goal posts. You can set up challenges like shooting from different distances or adding obstacles.
Variations:
- Scoring: Assign points based on where the ball goes through the goal posts or the distance from which the ball is shot.
- Team Play: Play with friends or family, taking turns to see who can score the most points.
This setup is a great way to add a football-themed activity to your playtime, and it’s simple enough to put together with items you already have at home. Enjoy your game!
3. Let students show off their most creative trick throws for getting recyclables into the bin
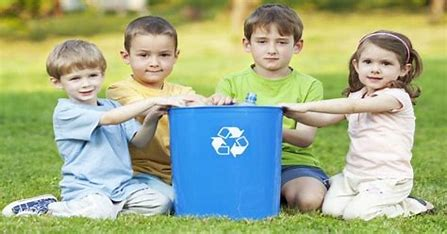
Turning recycling into a fun and creative activity can be both entertaining and educational. Here’s how students can show off their most creative trick throws for getting recyclables into the bin:
Materials Needed:
- Recyclables: items like paper, plastic bottles, cans, or cardboard.
- Recycling Bin: A container or box designated for recycling.
- Markers or tape: for marking the throwing area and creating targets.
- Additional Props: Optional items like hoops, cardboard cutouts, or cones to create obstacles or targets.
Instructions:
- Set up the recycling bin:
- Place the recycling bin in a designated spot in the room or yard. Ensure it’s easily visible and accessible.
- Create the throwing area.
- Mark a throwing line or area where students will stand to make their throws. Use markers, tape, or cones to define this space.
- Add targets or obstacles (optional):
- To make the activity more challenging, create targets or obstacles. For example:
- Hoops: Hang hoops or rings above the bin.
- Cardboard Cutouts: Place cutouts or signs near the bin.
- Obstacles: Use objects like books or boxes to create a course.
- To make the activity more challenging, create targets or obstacles. For example:
- Explain the challenge:
- Students need to creatively throw their recyclables into the bin. They can use different techniques and tricks to make it more interesting.
- Demonstrate Tricks:
- Encourage students to demonstrate various tricks, such as:
- Overhead Throws: Tossing items from above the head.
- Underhand Throws: throwing items from below the waist.
- Spin Throws: Adding a spin to the recyclable before throwing.
- Bounce Shots: Bouncing items off a surface before they land in the bin.
- Target throws: aiming for specific targets or through hoops.
- Encourage students to demonstrate various tricks, such as:
- Show off and compete:
- Have the students take turns showing off their trick throws. You can also set up a mini-competition where they earn points for creativity, accuracy, or difficulty of their tricks.
- Celebrate Creativity:
- Recognize and celebrate the most creative, accurate, or challenging throws. Offer small prizes or certificates to add an element of fun.
Additional Tips:
- Safety First: Ensure that the throwing area is clear of obstacles and that students are using soft, safe items to avoid accidents.
- Encourage Teamwork: If working in groups, have students collaborate to come up with their trick throws and cheer each other on.
This activity not only makes recycling fun but also helps students develop creativity, coordination, and an appreciation for the importance of recycling. Enjoy the creative throws!
4. Make your own recycling corn hole game
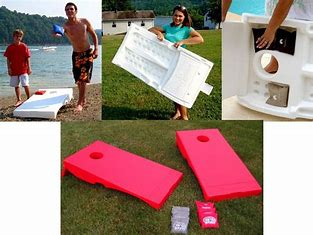
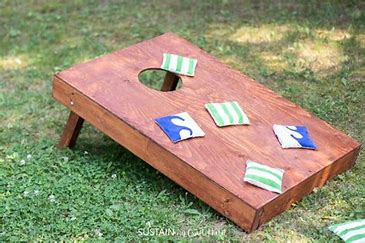
Creating a DIY recycling corn hole game is a fantastic way to combine fun and sustainability. Here’s a step-by-step guide to making your own recycling-themed corn hole game:
Materials Needed:
For the boards:
- Wooden Boards (or sturdy cardboard): Two boards, each about 2 feet by 4 feet.
- Wood screws or strong adhesive: to assemble the boards.
- Paint or markers: for decorating the boards with recycling themes.
- Saw: for cutting the boards (if necessary).
- Drill: for creating the hole (if using wood).
For the bags:
- Fabric Scraps: Use old clothes, fabric scraps, or recycled materials.
- Thread and needle or sewing machine: for sewing the bags.
- Rice, Beans, or Old Clothes: For filling the bags.
For the Hole:
- Circular Template: To trace the hole on the boards.
- Drill with a Hole Saw Bit: To cut out the hole (if using wood).
Instructions:
1. Prepare the Boards:
- Cut and Sand: If using wooden boards, cut them to 2 feet by 4 feet. Sand the edges to make them smooth.
- Mark and Cut the Hole: Measure and mark a hole (6 inches in diameter) about 9 inches from the top of each board. Use a drill with a hole-saw bit to cut out the holes. If using cardboard, you can cut the hole with a utility knife.
2. Assemble and Paint:
- Attach Legs (Optional): If you want your boards to be raised, attach two sets of legs (made from 2x4s or similar materials) to the back of each board, angling them outward.
- Paint or Decorate: Paint or decorate the boards with recycling symbols, messages about sustainability, or any creative designs. Let the paint dry completely.
3. Make the bags:
- Cut Fabric: Cut fabric into squares (approximately 6×6 inches).
- Sew Bags: Sew the fabric squares into bags, leaving one side open. Fill each bag with rice, beans, or small fabric scraps for weight, then sew the open side closed.
4. Set Up the Game:
- Position the Boards: Place the boards about 27 feet apart (the standard distance for a corn hole). Adjust the distance as needed for your space.
- Place the Bags: Put the bags near the boards.
5. Playing the game:
- Objective: Toss the bags through the hole. Each bag that goes through the hole scores points (e.g., 3 points per bag), and bags that land on the board score 1 point.
- Rules: Decide on the number of rounds or a target score. Players take turns tossing bags, aiming to score the most points.
Tips:
- Customization: Let students design and paint their own boards for a personal touch.
- Recycling Theme: Use recycled materials as much as possible to emphasize the recycling message.
- Safety: Ensure the area around the game is clear to avoid any accidents.
This DIY recycling corn hole game is a fun way to promote recycling while enjoying a classic backyard game. Have fun playing and recycling!
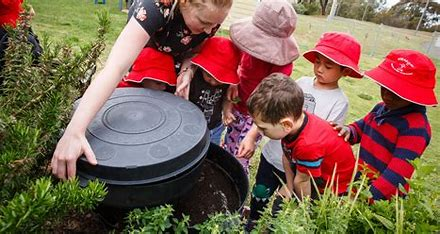
5. Students roll oversized dice to find out what animal they have to imitate as they recycle


Using oversized dice to decide what animal students should imitate while recycling adds a fun and interactive twist to a recycling activity. Here’s how you can set up and play this game:
Materials Needed:
- Oversized Dice: You can make these from cardboard boxes or use pre-made foam dice.
- Animal List: A list of animals with their corresponding movements and sounds.
- Recycling Bin: A container for recyclables.
- Recyclables: paper, plastic bottles, cans, or cardboard.
- Markers or paper: To create a score sheet or instructions.
Instructions:
1. Prepare the oversized dice:
- DIY Dice: If making your own, use large cardboard boxes or foam cubes. Cut them to size (about 6 inches on each side) and tape or glue the edges.
- Numbering: Use markers to number each side of the dice from 1 to 6. Each number will correspond to an animal.
2. Create the animal list:
- Choose Animals: Decide on six animals (one for each number on the dice). Some fun options might be:
- 1: Frog
- 2: Penguin
- 3: Elephant
- 4: Kangaroo
- 5: Monkey
- 6: Bird
- Describe Movements: Write down or print out a brief description of how each animal moves or sounds. For example, a frog might hop, a penguin might waddle, and a monkey might swing its arms.
3. Set Up the Recycling Area:
- Place the recycling bin in an open area where students can easily reach it.
- Arrange the recyclables nearby.
4. Explain the game:
- Roll the dice: Students take turns rolling the oversized dice.
- Imitate the Animal: Based on the number rolled, students must imitate the corresponding animal while recycling. For example, if they roll a 4 (kangaroo), they must hop like kangaroos as they put recyclables into the bin.
- Recycle: Students should still focus on properly sorting and placing recyclables into the bin while they are imitating the animal.
5. Play the game:
- Turns: Each student takes a turn rolling the dice and performing the animal imitation while recycling.
- Encourage Creativity: Students can add their own twists to the animal movements and sounds to make it more entertaining.
6. Reflect and celebrate:
- After everyone has had a turn, discuss the importance of recycling and how fun it can be when combined with physical activity.
- Celebrate everyone’s efforts and creativity with small rewards or praise.
Additional Tips:
- Safety: Ensure the area around the recycling bin is clear to prevent accidents while students are moving around.
- Incorporate learning: Use the game as a chance to teach more about recycling and the environmental benefits of proper waste sorting.
- Adapt for Space: If space is limited, consider adapting the movements to be more stationary or performing the actions in place.
This activity not only makes recycling more engaging but also gets students moving and thinking creatively. Enjoy the game and the fun animal imitations!
6. Give a classic game a modern twist to get students excited to recycle
Giving a classic game a modern twist is a great way to engage students in recycling while having fun. Here’s how you can add a modern spin to a classic game like “Simon Says” to get students excited about recycling:
**Game: “Eco-Simon Says”
Objective: Students follow recycling-related commands given by “Simon” (the leader) to perform different recycling tasks or actions. This modern twist incorporates eco-friendly actions and recycling knowledge into the classic game.
Materials Needed:
- Recycling Bin: For proper sorting and disposal of recyclables.
- Recyclables: items like paper, plastic bottles, cans, or cardboard.
- Eco-Friendly Props (Optional): Items like reusable bags or eco-themed costumes to add a fun visual element.
- A Space for Movement: an open area where students can move around safely.
Instructions:
1. Explain the game:
- Objective: The leader (Simon) will give commands related to recycling, and students must follow the commands only if the leader starts with “Eco-Simon Says.” If the command is given without “Eco-Simon Says,” students should not follow it.
- Commands: Commands will involve recycling actions or knowledge, such as sorting items, using eco-friendly products, or making eco-friendly choices.
2. Create recycling commands:
- Prepare a list of commands that are both fun and educational. Here are some examples:
- “Eco-Simon says, sort the paper into the recycling bin!”
- says“Eco-Simon Says, mimic a recycling truck as you walk to the bin!”
- “Eco-Simon Says: Create a recycling slogan with your hands!”
- “If Eco-Simon says, sort the plastic bottles into the bin, but you don’t have to follow this command.”
- “Eco-Simon says, perform a recycling dance for 10 seconds!”
- “Eco-Simon says, name three items that can be recycled.”
- Mix it up: Include both physical actions and knowledge-based commands to keep the game dynamic and engaging.
3. Start the game:
- Leadership: Select a student or teacher to be “Eco-Simon,” who will give the commands.
- Play: Eco-Simon gives commands, and students must perform the action if it starts with “Eco-Simon Says.” If Eco-Simon doesn’t start with “Eco-Simon Says,” students should remain still.
- Eliminate and Rotate: Students who follow a command when Eco-Simon doesn’t say “Eco-Simon Says” are out. Rotate Eco-Simon to give different students a chance to lead.
4. Wrap Up:
- Discuss: After the game, discuss the importance of each recycling action or fact that was part of the game.
- Celebrate: Recognize students for their participation and creativity. Offer small rewards or praise for their efforts in learning and recycling.
Additional Tips:
- Incorporate technology: Use a tablet or projector to display recycling facts or videos between rounds to reinforce learning.
- Eco-Friendly Prizes: Consider eco-friendly prizes like reusable water bottles or recycled paper notebooks.
- Adapt for Space: Modify actions or commands based on available space and ensure students have enough room to move safely.
This modern twist on “Simon Says” not only makes recycling fun but also educates students about the importance of eco-friendly practices in an interactive way. Enjoy playing and learning together!
7. Bigger is better with this giant version of a popular table game
Creating a giant version of a popular table game is a fantastic way to engage students and make recycling fun! Let’s take a classic game like Connect Four and make a giant outdoor version to encourage recycling and teamwork.
Giant Connect Four with a Recycling Twist
Objective:
Players aim to connect four of their pieces in a row (horizontally, vertically, or diagonally) while learning about recycling.
Materials Needed:
For the game board:
- Large Frame: Use PVC pipes or wooden planks to create a large frame for the game. The frame should be about 4 feet wide and 3 feet tall.
- Plastic Circles: Use large, durable plastic or cardboard circles (about 6–8 inches in diameter) for the game pieces. You’ll need two colors (one for each team).
- Paint or markers: to color and decorate the circles.
- Drill or Cutting Tool: To create slots for the circles in the frame.
- Recycling Bin: For collecting recyclables used in the game.
For the game pieces:
- Recycled Materials: Use recycled items like plastic bottle caps or cardboard cutouts to create the game pieces. Paint or color them to differentiate the two teams.
- Labels: Optionally, label each piece with recycling symbols or messages about recycling.
Instructions:
1. Construct the frame:
- Build the Frame: Assemble the large frame using PVC pipes or wooden planks. Ensure the frame is sturdy and has enough height and width for the game.
- Cut Slots: Cut evenly spaced slots into the frame where the circles will fit. Each slot should be large enough to hold a circle securely.
2. Prepare the game pieces:
- Create Circles: If using plastic or cardboard, cut circles to a uniform size. Paint or decorate them in two different colors (one color for each team).
- Recycle Pieces: Incorporate recycled materials where possible to add an eco-friendly twist.
3. Set Up the Game:
- Place the Frame: Position the giant Connect Four frame in an open area where students have enough space to play.
- Add the Bin: Place a recycling bin nearby to collect the recycled game pieces after each game.
4. Play the game:
- Teams: Divide students into two teams. Each team takes turns dropping their colored circles into the top of the frame.
- Objective: The goal is to connect four of your team’s circles in a row (horizontally, vertically, or diagonally) while using the correct recycling techniques. For example, players could be asked to sort their pieces by material (plastic or paper) before placing them.
- Rules: Players drop their circles into the frame, and the first team to connect four in a row wins.
5. Incorporate recycling education:
- Recycling Facts: Between rounds, discuss recycling facts or tips related to the materials used in the game.
- Eco-Friendly Messages: Use the game as an opportunity to promote eco-friendly practices and the importance of recycling.
6. Clean Up:
- Recycle Pieces: After the game, collect the game pieces and ensure they are properly recycled if they are not reusable.
- Dispose Responsibly: Dispose of any non-recyclable materials responsibly.
Additional Tips:
- Adapt Size: Adjust the size of the frame and pieces based on available space and materials.
- Decorate: Use recycled decorations or paint the frame with eco-friendly paint to emphasize the recycling theme.
- Team Play: Encourage teamwork and strategy in addition to recycling education.
This giant Connect Four game not only brings a classic table game to a larger scale but also integrates important lessons about recycling, making it an engaging and educational experience for students. Enjoy the game!
8. Put their love of online dance videos to use by creating a classroom recycling dance
Combining students’ enthusiasm for online dance videos with a classroom recycling initiative can create a fun and engaging activity. Here’s how to design a Classroom Recycling Dance that incorporates recycling education with dance:
Classroom Recycling Dance
Objective:
Students will create and perform a dance routine that incorporates recycling actions and messages, combining movement with environmental awareness.
Materials Needed:
- Music: A popular song or a custom playlist with upbeat, energetic tracks.
- Dance Props: Optional items like recycling-themed signs, reusable items, or colored paper for visual effects.
- Recycling Bin: For sorting and disposing of recyclables.
- Space: An open area in the classroom or outside for dancing.
Instructions:
**1. Plan the Dance Routine:
- Choose the Music: Select an energetic and popular song that students enjoy. Ensure it has a good rhythm for dancing.
- Integrate Recycling Actions: Create dance moves that incorporate recycling actions. For example:
- “Sort and Spin”: Simulate sorting recyclables while spinning or turning.
- “Bottle Toss”: Mimic tossing recyclables into a bin with dance moves.
- “Paper Shuffle”: Use hand movements to mimic the shuffling or organizing of paper recyclables.
**2. Teach the dance moves:
- Create a Routine: Develop a short dance routine that combines the chosen song with the recycling-themed moves. You can choreograph simple steps and transitions that are easy for students to follow.
- Practice the Dance: Break the routine into sections and teach each section to the students. Practice each move and ensure that students understand how it relates to recycling.
**3. Incorporate recycling messages:
- Dance Props: Use recycling-themed props, such as signs with recycling messages or cardboard cutouts of recyclable items, to enhance the dance.
- Recycling Facts: Include facts or tips about recycling in between dance sections or as part of the routine. For example, students can shout out recycling facts as they perform specific moves.
**4. Perform the dance:
- Rehearse: Once the routine is learned, rehearse the full dance with the music.
- Perform: Have students perform the recycling dance for their classmates, teachers, or even a larger audience. Encourage enthusiasm and energy during the performance.
**5. Discuss and reflect:
- Feedback: After the performance, discuss what students learned about recycling and how the dance helped convey the message.
- Celebrate: Celebrate the students’ efforts with praise or small rewards, such as eco-friendly items like reusable water bottles or stickers.
Additional Tips:
- Video Recording: Record the dance performance to share with parents or on social media to showcase the students’ creativity and recycling efforts.
- Choreography Help: If possible, invite a local dance instructor or use online dance tutorials to help with choreography.
- Incorporate technology: Use a projector or smart board to show recycling facts and messages during the dance practice.
This classroom recycling dance not only makes recycling education fun and interactive but also leverages students’ love for dance and online videos to promote environmental awareness. Enjoy dancing and recycling!