Here’s a fun list of DIY Upcycling Projects for Kids – Non-Toy Gifts that are creative, practical, and made from things you probably already have at home:
🎁 DIY Upcycled Non-Toy Gift Ideas for Kids
- T-Shirt Tote Bag
- Upcycle old t-shirts into reusable tote bags with no sewing required. Perfect for carrying books or snacks.
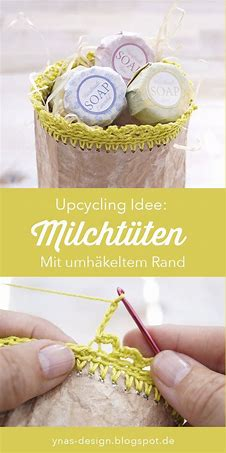
- Jar Lanterns
- Decorate old glass jars with tissue paper, paint, or washi tape. Add a battery-operated tea light for a cozy lantern.
- Cereal Box Notebook
- Cut cereal boxes into covers, add scrap paper, and bind with yarn or staples to make eco-friendly notebooks.
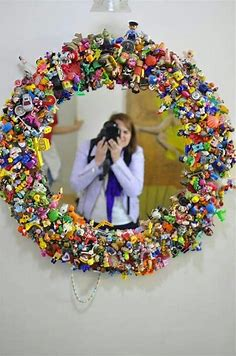
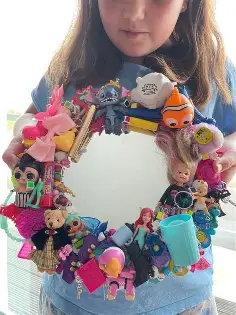
- CD/DVD Mosaic Art Frame
- Break old CDs into shiny pieces and glue them onto a recycled cardboard or wooden frame. Makes a sparkling photo or art frame.
- Fabric Scrap Bookmarks
- Use leftover fabric scraps, ribbon, or denim strips to create colorful bookmarks. Add buttons or beads for charm.
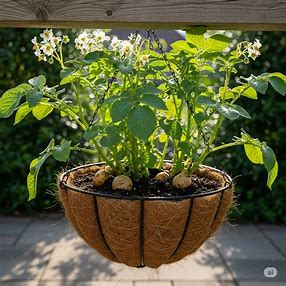
- Painted Tin Can Planters
- Clean tin cans, paint or decoupage them, and add small plants or succulents. A sweet gift for a windowsill garden.
- Puzzle Piece Picture Frame
- Repurpose old puzzle pieces by painting them and gluing them onto a recycled frame for a quirky look.
- Upcycled Crayon Shapes
- Melt broken crayons into silicone molds (stars, hearts, etc.). Kids get brand-new crayons in fun shapes.
- Bottle Cap Magnets
- Decorate bottle caps with drawings, stickers, or glitter and attach magnets to the back for fridge art.
- Denim Pencil Pouch
- Use the pocket from an old pair of jeans, sew/glue a zipper, and create a handy pencil pouch.
- Recycled Tin Can Drum Set
- Cover cans with colorful paper or fabric scraps. Stretch a balloon or fabric over the top to make a drum.
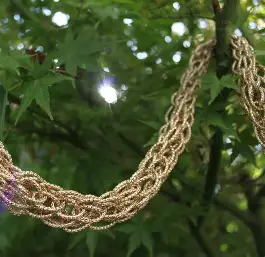
- Upcycled Jewelry
- Turn old buttons, beads, or broken jewelry into DIY necklaces, bracelets, or keychains.
- Cork Keychains
- Paint or decorate wine corks and add a keyring for a lightweight and eco-friendly keychain gift.
- Magazine Collage Wall Art
- Cut out colorful magazine pieces and glue them on cardboard for abstract wall art or name signs.
- Egg Carton Trinket Holder
- Paint and decorate egg cartons to create jewelry or treasure organizers.
✨ These gifts are non-toy, useful, and personalized while teaching kids creativity and sustainability.
Would you like me to make a step-by-step guide for a few of these (like tote bags, planters, or crayons) so kids can follow along easily?
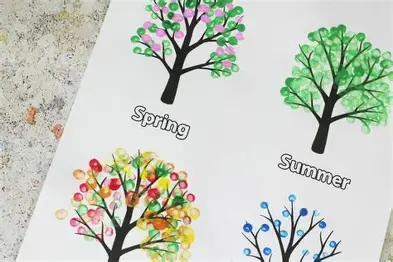
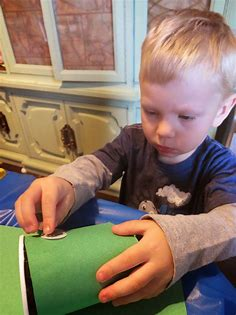
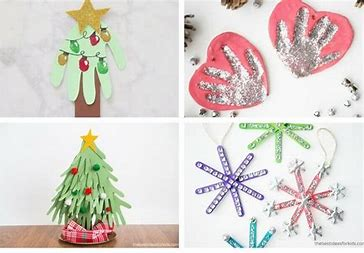
Paper rolls and cotton balls are combined in an entertaining tree project to teach children about the changing of the seasons. It’s a craft that encourages creativity with paint and fine motor skills.
2. Four season paper roll trees
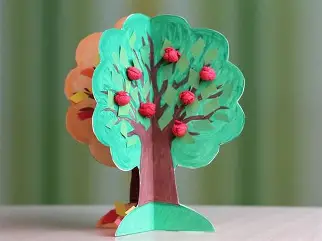
That’s a wonderful upcycling craft idea! 🌳 Using paper rolls to make Four Season Trees is fun, educational, and a great way to teach kids about seasonal changes. Here’s a simple guide:
🌱 DIY Four Season Paper Roll Trees
Materials Needed:
- 4 toilet paper rolls (or paper towel rolls cut in half)
- Construction paper (green, yellow, orange, red, pink, white, blue, brown)
- Scissors
- Glue stick or craft glue
- Cotton balls (for snow)
- Tissue paper scraps (for blossoms & leaves)
- Crayons/markers (optional for details)
Instructions:
1. Prepare the Tree Trunks
- Take 4 toilet paper rolls.
- Cover them with brown paper or color them with crayons/paint.
- Cut 4 slits at the top of each roll so paper “tree tops” can slot in.
2. Create Tree Tops for Each Season
Cut 4 circles (or fluffy cloud shapes) out of construction paper—one for each season. These will slot into the paper roll slits.
🍃 Spring Tree
- Use light green paper for leaves.
- Add pink or purple tissue paper crumpled into tiny blossoms.
- Glue them on randomly to look like blooming flowers.
🌞 Summer Tree
- Use dark green paper for the tree top.
- Add lots of green tissue paper scrunchies for a full, leafy tree.
- You can even glue on a few red dots for apples or fruit.
🍂 Autumn Tree
- Use orange, yellow, and red tissue paper.
- Glue them scattered across the tree top.
- Add some “fallen leaves” around the paper roll base.
❄ Winter Tree
- Use bare brown branches (drawn or cut from paper).
- Glue cotton balls or white tissue paper to look like snow.
- You can sprinkle glitter for a frosty effect.
3. Assemble the Trees
- Slot each seasonal tree top into a paper roll trunk.
- Line them up in order—Spring, Summer, Autumn, Winter.
🌟 Extra Ideas:
- Mount them on a piece of cardboard for a seasonal display board.
- Label each tree with the season name.
- Add small details (birds for spring, sun for summer, falling leaves for autumn, snowflakes for winter).
Would you like me to create a printable template (tree tops, leaves, blossoms, snowflakes, etc.) so kids can just cut and glue instead of drawing everything?
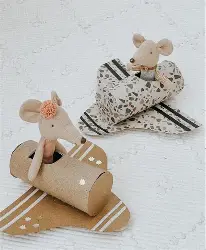
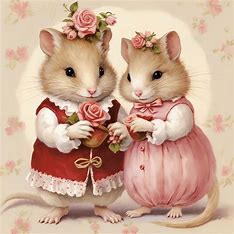
These Valentine mice are so cute with their noses and love ears. Preschoolers and elementary school students will love these Valentine’s Day classroom crafts since they are so simple to make.
That’s a lovely upcycling idea! 🌸 Here’s a simple guide for making Paper Roll Flower Art using toilet paper or paper towel rolls:
🌼 DIY Paper Roll Flower Art
Materials Needed:
- Empty toilet paper rolls (or paper towel rolls cut into smaller pieces)
- Scissors
- Glue (hot glue for quicker drying, or school glue for kids)
- Paints, markers, or colored paper
- Cardboard or canvas as a base
- Optional: glitter, buttons, beads for decoration
Instructions:
- Prepare the Rolls
- Flatten each paper roll and cut into strips about 1–2 cm wide.
- Each strip will form a “petal” shape when pinched slightly.
- Make the Petals
- Pinch the ends of each strip so they look like flower petals (oval or pointy shape).
- You’ll need about 5–7 petals for each flower.
- Assemble the Flowers
- Arrange the petals in a circle on your cardboard/canvas base.
- Glue them down so they form a flower.
- Repeat with more petals to create multiple flowers.
- Add the Center
- Use a button, bead, pom-pom, or small rolled paper circle for the center of each flower.
- Decorate & Paint
- Paint the petals in bright colors (or cover with colored paper).
- Add glitter or details with markers if you like.
- Create a Design
- Arrange flowers into a bouquet, a heart shape, or even cover the whole canvas with them for wall art.
- You can also add stems and leaves from green paper roll strips.
🌟 Extra Ideas:
- Make 3D wall decor by layering flowers on top of each other.
- Use metallic spray paint (gold/silver) for a chic home decor look.
- Kids can make gift cards by gluing mini flowers onto folded cardboard.
Would you like me to create a step-by-step illustrated template (like a kid-friendly visual guide) for this project?
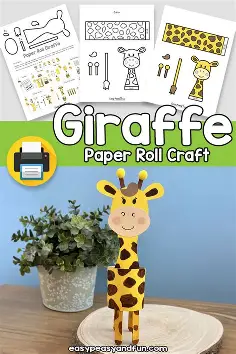
To create a family of giraffes, combine toilet paper rolls and towel paper rolls.
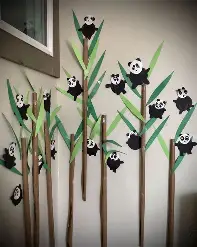
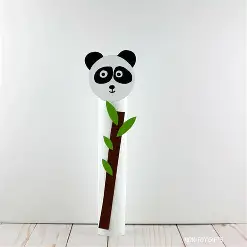
Great choice! 🐼 A Paper Roll Panda is a super cute and easy upcycling project for kids. Here’s how you can make one step by step:
🐼 DIY Paper Roll Panda Craft
Materials Needed:
- 1 toilet paper roll (or paper towel roll cut in half)
- White paint (or white paper to wrap around the roll)
- Black construction paper (or paint/marker)
- Googly eyes (optional – you can also draw them)
- Glue stick or liquid glue
- Scissors
- Black marker
Steps:
- Prepare the Roll
- Paint the toilet paper roll white.
- Let it dry completely (or wrap it with white paper if you prefer no paint).
- Make Panda’s Ears, Arms, and Legs
- Cut out 2 small black circles for ears.
- Cut out 2 oval shapes for arms and 2 wider ovals for legs from black paper.
- Add the Face
- Cut 2 black ovals (slightly bigger than the eyes) for panda’s eye patches.
- Glue them near the top of the roll.
- Add googly eyes (or draw them with a marker).
- Use a black marker to draw the nose and a cute smile.
- Attach the Ears, Arms & Legs
- Glue the ears inside the top rim of the roll.
- Attach the arms to the sides and the legs near the bottom front.
- Optional Accessories
- Roll a strip of green paper into “bamboo” and glue it to the panda’s arm.
- Add a little bow or flower crown to make it extra fun.
✅ Now you have an adorable Paper Roll Panda made from recycled materials! Perfect as a desk buddy, party decoration, or part of an animal craft collection.
Do you want me to also create a printable template (ears, arms, legs, eye patches) so kids can just cut and glue without drawing?

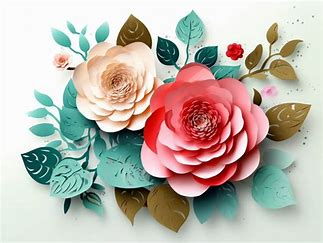
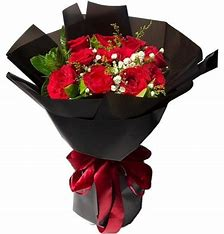
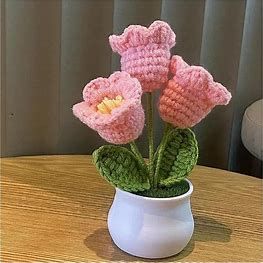
Make these 3D flower bouquets for Mother’s Day, Valentine’s Day or grandma’s birthday.
8. Paper roll Mother’s Day craft
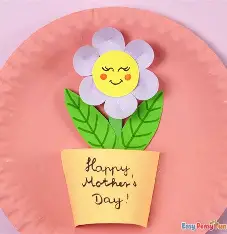
Here’s a super cute and easy Paper Roll Mother’s Day Craft idea that kids can make with upcycled toilet paper rolls or paper towel tubes:
🌸 Paper Roll Mother’s Day Vase Craft
Materials Needed:
- Empty toilet paper rolls (or cut paper towel rolls)
- Cardboard (for the base)
- Paints, markers, or colored paper
- Glue or tape
- Scissors
- Flowers (real, paper, or tissue paper flowers)
Instructions:
- Prepare the Roll
- Take a toilet paper roll and make sure it’s clean and smooth.
- If using paper towel rolls, cut them to the desired height.
- Decorate the Roll
- Paint the roll in bright colors (pink, yellow, blue, etc.).
- You can also cover it with colored paper, wrapping paper, or fabric scraps.
- Add Details
- Draw hearts, flowers, or write “Happy Mother’s Day” on the roll.
- Kids can also glue buttons, sequins, or ribbon for extra decoration.
- Make the Base
- Cut a cardboard circle slightly bigger than the roll’s diameter.
- Glue the roll to the base so it stands firmly.
- Fill the Vase
- Add handmade paper flowers, tissue paper blooms, or even real flowers in a small cup inside the roll.
- Kids can write little notes of love on each flower petal.
Variation Ideas:
- Paper Roll Flower Bouquet: Cut the roll into rings, paint them, and glue them together in the shape of a flower. Attach to a stick or straw as the stem.
- Paper Roll Mother’s Day Card Holder: Decorate the roll and use it as a stand to hold a handmade card or a photo.
- Paper Roll Crown for Mom: Cut zig-zag edges at the top, paint gold, and decorate with gems or stickers—Mom gets her royal crown! 👑
Would you like me to create a step-by-step printable template (with flower cutouts and labels like “Best Mom” or “Love You Mom”) so kids can easily assemble it?
9. Apple core paper roll craft
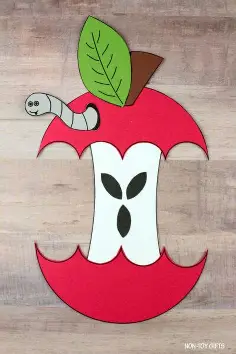
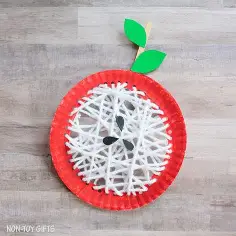
With this easy paint and glue project, you can show toddlers and preschoolers the inside of an apple and discuss its leaves, skin, stem, seeds, and core. It’s a paper roll apple core project.
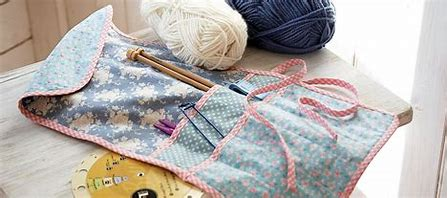
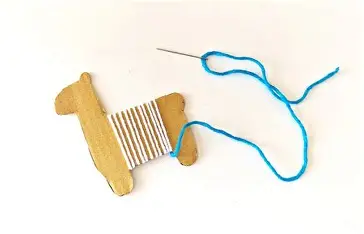
Ah, great choice! Paper roll knitting (also called spool knitting or French knitting) is a super fun upcycling craft for kids that turns a toilet paper roll into a little knitting loom. It’s easy, inexpensive, and makes a wonderful non-toy gift like bracelets, coasters, or keychains.
Here’s how you can do it:
🧶 DIY Paper Roll Knitting (Upcycled Craft)
Materials Needed
- Empty toilet paper roll (or paper towel roll cut smaller)
- 4–6 popsicle sticks (or sturdy paperclips/bobby pins if no sticks)
- Tape or glue
- Yarn (any color)
- Scissors
Instructions
- Make the Loom
- Take your paper roll.
- Tape or glue popsicle sticks evenly spaced around the top edge (4–6 sticks work well).
- Make sure they stick up about 1 inch above the roll — these will be your knitting pegs.
- Start the Yarn
- Drop the yarn tail through the middle of the roll and let it hang out the bottom.
- Wrap the yarn around each stick (peg) in a circle, looping it behind each one.
- Begin Knitting
- After wrapping all sticks once, bring the yarn back around again.
- Use your fingers (or a paperclip) to lift the bottom loop over the top yarn and off the stick.
- Repeat this all the way around.
- Keep wrapping new yarn and lifting loops over.
- Watch It Grow!
- The knitted cord will start to come out the bottom of the roll.
- Keep going until it’s the length you want.
- Finish Off
- When done, cut the yarn leaving a small tail.
- Thread the tail through each loop on the sticks and pull them off one by one.
- Tug gently to secure.
🎁 Gift Ideas from Paper Roll Knitting
- Bracelets or necklaces → braid or tie the knitted cord into wearable gifts.
- Keychains → add a keyring to the end.
- Coasters → coil the cord into a circle and stitch it flat.
- Mini scarves for dolls → just knit a long strand.
- Decorative ties → wrap around jars, gifts, or flower pots.
Would you like me to make a kid-friendly illustrated step-by-step guide (like a printable with pictures) for paper roll knitting so kids can follow along more easily?
11. Paper roll butterfly craft

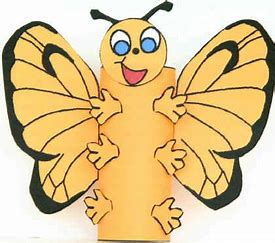
Let children design the butterfly’s wings however they wish using a range of materials.
12. Fire breathing dragon craft
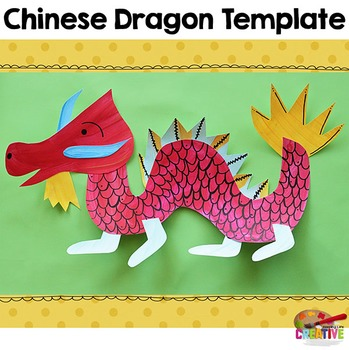
Here’s a fun idea for making a Fire Breathing Dragon Craft with kids using simple materials:
Materials You’ll Need:
- Empty toilet paper roll (or paper towel roll cut in half)
- Green paint or green construction paper
- Googly eyes (or draw eyes on paper)
- Glue or tape
- Red, orange, and yellow tissue paper (cut into strips/flames)
- Scissors
- Optional: markers, glitter, or stickers for decoration
Instructions:
- Prepare the Dragon Body
- Paint the toilet paper roll green (or wrap it in green paper). Let it dry.
- Make the Face
- Glue on googly eyes near one end of the roll.
- Draw nostrils and scales with markers, or cut small shapes from paper to decorate.
- Add the Fire Flames
- Cut strips of red, orange, and yellow tissue paper (about 1 inch wide and 6–8 inches long).
- Glue or tape the strips inside the opposite end of the roll (the “mouth”).
- Finishing Touches
- Decorate the body with scales, wings, or horns if you like, using extra paper.
- Blow into the open end — the tissue flames will flutter like fire!
✨ Now you’ve got a fire-breathing dragon that comes to life when you blow through it.
Would you like me to give you a step-by-step printable template for the dragon’s face (eyes, scales, wings, etc.) so kids can just cut and glue?
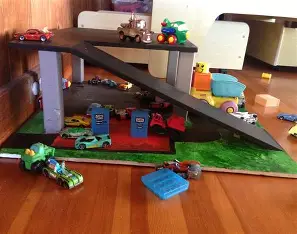
You most likely have a large collection of toy automobiles in your home if you have boys. In addition to being a clever car storage system, this paper roll car garage is a delightful place for youngsters to play.
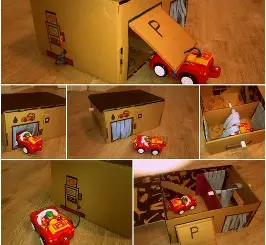
Here’s a fun DIY Cardboard Car Wash Craft that kids will love, perfect for toy cars like Hot Wheels or Matchbox! 🚗💦
Materials You’ll Need:
- Large shoebox or medium-sized cardboard box
- Scissors or craft knife (adult supervision)
- Glue or tape
- Paint, markers, or colored paper
- Straws or craft sticks
- Yarn, string, or strips of felt/tissue paper (for brushes)
- Sponge pieces (optional for scrubbers)
- Small spray bottle (optional for water play)
Instructions:
- Prepare the Box
- Cut off the top flaps of the shoebox so it’s open.
- Cut two large openings on the shorter sides to make the entrance and exit.
- Decorate the Outside
- Paint or cover the outside with colorful paper. Add signs like “Car Wash,” bubbles, or arrows.
- Make the Car Wash Brushes
- Take yarn, string, or tissue paper strips and glue/tape them around a straw or craft stick.
- Attach these across the inside of the box so cars pass through the “brushes.”
- Add More Features
- Glue sponge pieces inside for scrubbers.
- Add paper arches for a “rinse” section.
- Use straws or pipe cleaners to create a drying section (like air blowers).
- Play Time!
- Push toy cars through the wash.
- For extra fun, spray a little water with a spray bottle or use a damp sponge before sending cars inside.
✨ You now have a mini car wash play station for toy cars, made completely from cardboard and craft supplies!
Would you like me to design a printable “Car Wash Sign & Labels Set” (like entrance, exit, soap, rinse, dry) that kids can cut and paste onto their DIY car wash?
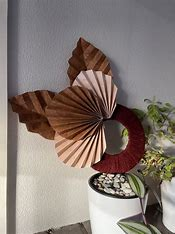
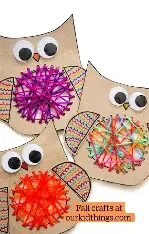
These flowers, which are made from cardboard and yarn, will make everyone’s day.
16. Penny spinners
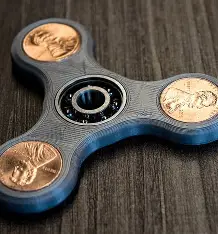
Here’s a simple and fun craft for making Penny Spinners (sometimes called button spinners or coin spinners) – a classic STEM activity that teaches kids about balance and motion! 🪙✨
Materials You’ll Need:
- Cardstock or thick cardboard (a cereal box works well)
- Scissors
- Markers, crayons, or paint (for decorating)
- A penny (or any small coin)
- Tape or glue
Instructions:
- Cut Out the Circle
- Cut a circle (about 2–3 inches wide) from cardstock or cardboard.
- You can trace around a cup to make it even.
- Decorate the Spinner
- Use markers or crayons to make fun patterns (spirals, stripes, dots).
- Bold, colorful designs look really cool when spinning!
- Make the Slot
- Cut a small slit in the center of the circle – just wide enough to fit a penny halfway through.
- Insert the Penny
- Slide the penny into the slit so that half sticks out below the circle.
- Secure with a small piece of tape if needed.
- Spin and Play!
- Place the penny spinner on a flat surface, give it a flick, and watch the designs blur into motion.
Extra Fun Ideas:
- Try different circle sizes and see which spins the longest.
- Make several with different patterns and compare how they look while spinning.
- Use glow-in-the-dark or neon markers for a dazzling effect under a light!
Would you like me to make a printable template with pre-drawn spiral patterns that kids can just color, cut, and turn into penny spinners?
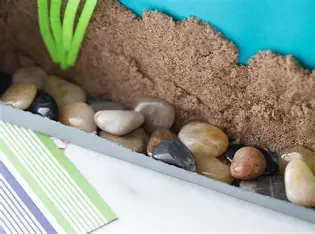
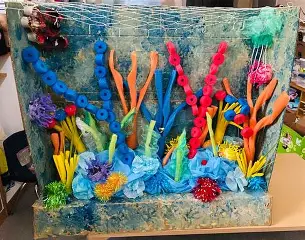
This aquarium, which was constructed out of a cereal box, is tastefully embellished with tiny rocks, shells, and kinetic sand.
That sounds adorable! 🦙 Here’s how you can make a Woven Cardboard Llama Craft with kids:
Materials You’ll Need:
- Sturdy cardboard (cereal box or shipping box)
- Pencil & scissors
- Yarn, string, or embroidery thread (various colors)
- Glue or tape
- Googly eyes (or draw eyes with a marker)
- Markers or paint for decoration
Instructions:
- Make the Llama Shape
- Draw a simple llama outline on cardboard (body with legs, head, and ears).
- Cut it out with scissors.
- Keep the body wide enough to weave yarn across.
- Cut Weaving Slots
- Along the llama’s belly, cut small notches (about ½ inch apart) on both sides.
- These will hold the yarn in place.
- Wrap the Base Strings (Warp)
- Tape one end of yarn to the back.
- Stretch the yarn across the body, slot to slot, until you’ve made several vertical strands.
- Secure the end on the back with tape.
- Start Weaving (Weft)
- Take a different colored yarn and weave it over-under-over-under through the vertical strands.
- Keep going back and forth, pushing the yarn down gently after each row.
- Switch colors for a rainbow blanket effect!
- Add Details
- Glue on a googly eye, or draw one with a marker.
- Draw or paint a cute face, ears, and hooves.
- You can even add tassels or pom-poms from yarn to make it festive.
- Finishing Touches
- Once weaving is complete, trim and secure yarn ends with tape or glue at the back.
- Your llama now has a colorful woven blanket on its back!
✨ This craft combines weaving practice with a playful llama design — a perfect mix of fine motor skills and creativity.
Do you want me to make a printable llama outline template that kids can trace and cut out to save time?
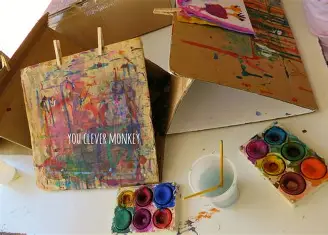
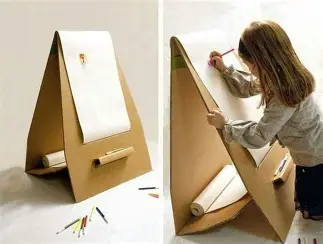
This is such a great idea for children who like to paint.
19. Cardboard marble maze game
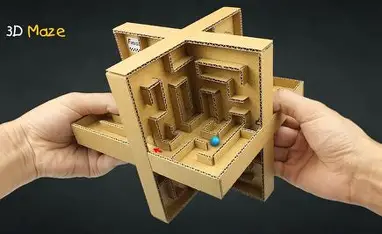
Here’s a simple and super fun idea for a DIY Cardboard Marble Maze Game that kids can build and play with! 🌀🎱
Materials You’ll Need:
- A shallow cardboard box lid (like a shoebox lid)
- Drinking straws, popsicle sticks, or cardboard strips
- Glue or tape
- Scissors
- A marble (or small bead/ball)
- Markers/paint for decorating
Instructions:
- Prepare the Base
- Use the shoebox lid as the base of your maze.
- If you don’t have one, cut a shallow rectangle out of cardboard and make a border with strips of cardboard.
- Design the Maze
- Draw a rough path on the base (from Start to Finish).
- Add turns, dead ends, and tricky passages.
- Build the Walls
- Cut straws, popsicle sticks, or cardboard strips to different lengths.
- Glue or tape them along your maze lines to create walls.
- Add Obstacles & Fun Features
- Create tunnels by gluing half tubes of cardboard.
- Cut holes for “traps” where the marble can fall in.
- Add little ramps or bridges for extra challenge.
- Decorate
- Mark “Start” and “Finish.”
- Add arrows, numbers, or colorful designs to make it exciting.
- Play the Game
- Place the marble at “Start.”
- Tilt the box gently side to side to guide the marble through the maze to the “Finish.”
✨ Now you’ve got your very own Cardboard Marble Maze Game—fun to build, decorate, and play over and over!
Would you like me to make a printable maze layout template that kids can stick inside their box and then glue the walls on top of?

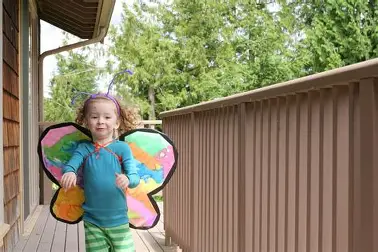
Young children will be thrilled to paint and play with their own butterfly wings.
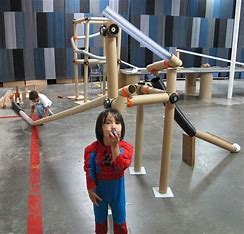
21. Woven house
Do you mean a Woven House Craft made from paper, cardboard, or natural materials? Here’s a fun idea for a DIY Woven House Craft for Kids:
Materials You’ll Need:
- Cardboard (for the house base)
- Colored paper strips (or yarn, ribbon, or fabric scraps)
- Scissors
- Glue or tape
- Ruler and pencil
Instructions:
- Make the House Base
- Cut a piece of cardboard into the shape of a simple house (square bottom with a triangle roof).
- On the square section, draw vertical lines spaced about 1 cm apart.
- Cut along those lines, stopping just before the roof section (don’t cut all the way through).
- Prepare the Weaving Strips
- Cut colored paper (or yarn/ribbon) into long strips.
- Start Weaving
- Take one strip and weave it over and under the cardboard slits.
- For the next strip, alternate (under then over).
- Continue until the square body of the house is filled.
- Finish the House
- Glue down the ends of the strips so they don’t move.
- Decorate the roof with paper, markers, or extra weaving.
- Add details like doors, windows, and a chimney if you like.
✨ The result is a bright, textured woven house that looks cozy and creative!
Would you like me to make this as a flat paper weaving craft (easy for younger kids) or a 3D woven house model (more advanced)?

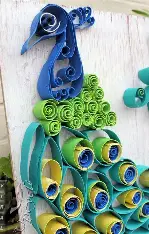
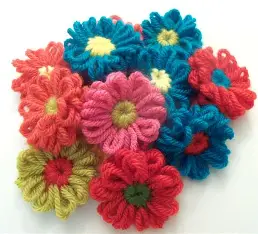
I adore this artwork’s vibrant colours!